WimTec PROOF P4 - 6 V Montage- Und Bedienungsanleitung
Vorschau ausblenden
Andere Handbücher für WimTec PROOF P4 - 6 V:
- Montage- und bedienungsanleitung (12 Seiten)
Verfügbare Sprachen
Verfügbare Sprachen
Inhaltsverzeichnis

Verwandte Anleitungen für WimTec WimTec PROOF P4 - 6 V


Inhaltszusammenfassung für WimTec WimTec PROOF P4 - 6 V
- Seite 1 PROOF P4 Montage- und Bedienungsanleitung Assembly and operating instructions...
-
Seite 2: Allgemeine Hinweise
Reinigungs- oder Desinfektionsmittel verwenden nur mit weichem Schwamm oder Tuch behandeln keine Reinigung mit Dampfstrahlgeräten Diese Anleitung ist gültig für folgende Produkte: WimTec PROOF P4 - 6 V Art.Nr. 120 998 WimTec PROOF P4 - 12 V Art.Nr. 121 018 Lieferumfang: Aufputz-Aluminiumgehäuse mit integrierter Elektronik, Thermostat... -
Seite 3: Technische Daten
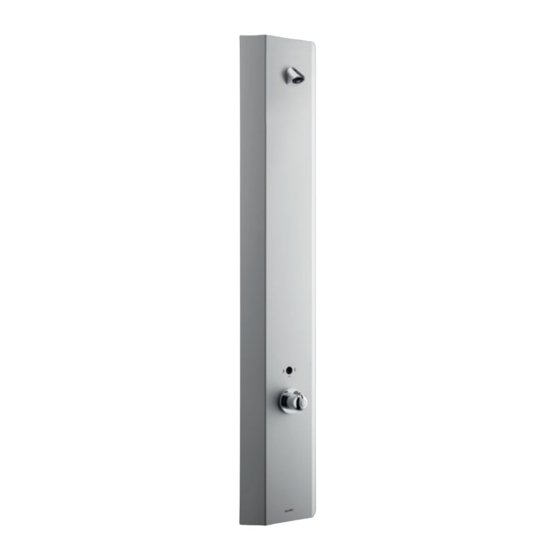
9 l/min bei 0,3 MPa (3 bar) Wassertemperatur: max. 70 °C (max. 80 °C für max. 10 min) Wasserzulauf: R 1/2“ IG Material: Paneel: Aluminium eloxiert, Brausekopf und Thermostatgriff: Messing verchromt Temperatureinstellung: Thermostat mit Heißwassersperre (nicht frostbeständig) WimTec PROOF P4 Dusche-Paneel... - Seite 4 Legende Duschepaneel: Elektronikmodul: On-Taster zum Einschalten der Dusche. Zeit-Regler Thermostatgriff zur Temperatur- regelung mit Taste zum Entriegeln der 38 °C Sicherheitssperre. Generell gilt für den Zeit-Regler: Gegen den Uhrzeiger- sinn zum Reduzieren. Im Uhrzeigersinn zum Erhöhen. WimTec PROOF P4 Dusche-Paneel...
-
Seite 5: Einstellung Der Laufzeit
30 s voreingestellt (10 s - 60 s einstellbar). Nach Ablauf der eingestellten Laufzeit schaltet die Dusche- armatur automatisch ab. Selbstschluss-Funktion Wasserfluss startet Wasserfluss stoppt Sobald der Benutzer auf den Nach Ablauf der eingestellten Taster tippt. Laufzeit. Laufzeit WimTec PROOF P4 Dusche-Paneel... - Seite 6 Netzteil 230 V / 12 V nicht in Duschepaneel oder Schutzbereichen anbringen. ½" * E-Anschluss 12 V= Eine Nachrüstung ist auf bestehenden Anschlüssen im Standardmaß 150 mm möglich. * Bei externer Versorgung E-Anschluss 12 V= vorsehen. WimTec PROOF P4 Dusche-Paneel...
-
Seite 7: Montage
4. Stockschraube für Befestigung eindrehen und Befesti- gungsbügel für Batteriemodul dabei einhängen. 5. Korbfilter in 90° Anschlusswinkel einsetzen und Ab- sperrung aufdichten. 6. Anschlusswinkel mit Absperrung aufdichten und in Zulei- tungen einschrauben – Vorabsperrung dabei schräg nach innen ausrichten. WimTec PROOF P4 Dusche-Paneel... - Seite 8 Gewünschte Laufzeit am Elektronikmodul einstellen (siehe S. 5). ACHTUNG! Folgende Schritte unbe- Dusche-Paneel in die vordere Bügellasche einhängen. dingt in beschriebener Reihenfolge ausführen! Flexschläuche mit beigelegter Dichtung an Wasserzuleitung anschließen. Batteriemodul anstecken. (Sicherheitsschließimpuls beim Magnetventil erfolgt). WimTec PROOF P4 Dusche-Paneel...
- Seite 9 ACHTUNG! Folgende Schritte unbe- Dusche-Paneel in die hintere Bügellasche einhängen. dingt in beschriebener ACHTUNG! Keine Kabel oder Schläuche quetschen Reihenfolge ausführen! oder knicken. Batteriemodul mit Beilagscheibe und Flügelmutter an der Stockschraube befestigen. Hauptwasserleitung öffnen. Funktionstest durchführen. WimTec PROOF P4 Dusche-Paneel...
- Seite 10 HINWEIS: zum Deaktivieren der Dusche bei Reinigungsar- beiten, wird empfohlen einen Schalter (Schlüsselschalter) vor dem Netzteil zu installieren. Gewünschte Laufzeit am Elektronikmodul einstellen (siehe S. 5). Dusche-Paneel in die vordere Bügellasche einhängen. Flexschläuche mit beigelegter Dichtung an Wasserzuleitung anschließen. WimTec PROOF P4 Dusche-Paneel...
- Seite 11 Reihenfolge ausführen! (Riegel stehen parallel zur Flussrichtung). Dusche-Paneel in die hintere Bügellasche einhängen. ACHTUNG! Keine Kabel oder Schläuche quetschen oder knicken. Duschepaneel von unten mit Beilagscheibe und Flügelmutter an der Stockschraube sichern. Hauptwasserleitung öffnen. Funktionstest durchführen. WimTec PROOF P4 Dusche-Paneel...
- Seite 12 PROOF P4 Ersatzteile Art.Nr.: Bezeichnung 120 165 Duschkopf WimTec PROOF 120 356 Elektronikmodul 231 205 Magnetventil 221 312 Magnetventil-Adapter 230 741 6 V Lithium Batterie 230 987 Batteriemodul 6 V 117 899 Netzteil (1-fach) 113 792 Netzteil (5-fach) 107 159...
- Seite 24 WIMTEC Sanitärprodukte GmbH p: A - 3325 Ferschnitz, Freidegg 50, AUSTRIA t: +43 (0) 7473 5000 f: +43 (0) 7473 5000 - 500 m: verkauf@wimtec.com i: www.wimtec.com...