
Verwandte Anleitungen für Pari LC SPRINT Familie


Inhaltszusammenfassung für Pari LC SPRINT Familie
- Seite 1 LC SPRINT Familie ©2015 PARI GmbH Spezialisten für effektive Inhalation, 023D1001M 02/15...
- Seite 2 Gebrauchsanweisung....Instructions for use ......
-
Seite 3: Inhaltsverzeichnis
– 3 – Gebrauchsanweisung Stand der Information: 201412. Alle Rechte vorbehalten. Technische und optische Änderungen sowie Druckfehler vorbehalten. Abbildungen ähnlich. WICHTIGE HINWEISE............. Allgemein................Informationen zur Gebrauchsanweisung......Gestaltung von Sicherheitshinweisen ......Therapie von Babys, Kindern und hilfsbedürftigen Personen ................Therapie von Patienten mit einer operativ angelegten Öffnung der Luftröhre (Tracheostoma)......Hygiene ................PRODUKTBESCHREIBUNG........... Lieferumfang ..............Zweckbestimmung ............Bestimmungsgemäßer Gebrauch ........Gegenanzeigen ..............Produktvarianten und kombinationen......Materialinformation ............Lebensdauer ..............INHALATION ..............Montage des Verneblers ..........Einfüllen des Medikamentes ..........Inhalation durchführen............REINIGUNG UND DESINFEKTION ZU HAUSE ..... Vorbereitung ..............Pflege des Anschlussschlauches ........ - Seite 4 – 4 – SONSTIGES ..............Entsorgung ............... Technische Daten ............Zeichenerklärung.............. Kontakt ................
-
Seite 5: Wichtige Hinweise
– 5 – WICHTIGE HINWEISE 1.1 Allgemein Lesen Sie diese Gebrauchsanweisung vollständig durch. Be wahren Sie sie zum späteren Nachschlagen auf. Bei Nichtbe achtung der Gebrauchsanweisung können Verletzungen oder Schäden am Produkt nicht ausgeschlossen werden. Bei anhaltenden Beschwerden oder gesundheitlicher Ver schlechterung unterbrechen Sie die Anwendung und kon taktieren Sie umgehend Ihren Arzt. 1.2 Informationen zur Gebrauchsanweisung Diese Gebrauchsanweisung ist für den Anwender zu Hau se bestimmt. Für Fachpersonal ist eine separate Gebrauchs anweisung erhältlich. Gebrauchsanweisungen können Sie bei Bedarf bei der PARI GmbH bestellen [siehe: Kontakt, Seite 28]. Für einzelne Produkte sind die Gebrauchsanweisungen sowohl in deutscher als auch in englischer Sprache im Internet abrufbar: www.pari.de/produkte (auf der jeweiligen Produktseite). 1.3 Gestaltung von Sicherheitshinweisen Sicherheitsrelevante Warnungen sind in dieser Gebrauchs anweisung in Gefahrenstufen eingeteilt: – Mit dem Signalwort VORSICHT sind Gefahren gekennzeich net, die ohne Vorsichtsmaßnahmen zu leichten bis mittel schweren Verletzungen oder zu Beeinträchtigungen der Therapie führen können. – Mit dem Signalwort HINWEIS sind allgemeine Vorsichts maßnahmen gekennzeichnet, die im Umgang mit dem Pro dukt beachtet werden sollten, um Schäden am Produkt zu vermeiden. -
Seite 6: Therapie Von Babys, Kindern Und Hilfsbedürftigen Personen
1.4 Therapie von Babys, Kindern und hilfsbedürftigen Personen Babys, Kinder und hilfsbedürftige Personen dürfen nur unter ständiger Aufsicht eines Erwachsenen inhalieren. Nur so ist ei ne sichere und wirksame Therapie gewährleistet. Diese Perso nengruppe schätzt oftmals Gefährdungen (z.B. Strangulation mit dem Netzkabel oder dem Anschlussschlauch) falsch ein, wodurch eine Verletzungsgefahr bestehen kann. Das Produkt enthält Kleinteile. Kleinteile können die Atemwege blockieren und zu einer Erstickungsgefahr führen. Achten Sie daher darauf, dass Sie den Kompressor, den Vernebler und das Zubehör stets außer Reichweite von Babys und Kleinkin dern aufbewahren. Für die Behandlung von Babys und Kleinkindern, die noch nicht mit dem Mundstück inhalieren können, gibt es spezielle Masken. Die Vernebler sind nur für Patienten geeignet, die selbständig atmen und bei Bewusstsein sind. Nur so wird eine wirksame Therapie ermöglicht und eine Erstickungsgefahr vermieden. 1.5 Therapie von Patienten mit einer operativ angelegten Öffnung der Luftröhre ﴾Tracheostoma﴿ Tracheostomierte Patienten können nicht mit dem Mundstück inhalieren und benötigen deshalb zum Inhalieren das PARI TRACHEO SET mit einer speziellen Tracheomaske. Bei Verwendung der Tracheomaske achten Sie darauf, dass wäh rend der Inhalation der Verneblerdeckel geöffnet ist. Dies ge währleistet eine ungehinderte Ausatmung und vermeidet die Gefahr einer Atemnot. -
Seite 7: Hygiene
– 7 – 1.6 Hygiene Beachten Sie folgende Hygienehinweise: – Verwenden Sie zur Inhalationstherapie nur gereinigte und getrocknete Produktbestandteile. Verunreinigungen und Restfeuchte führen zu Keimwachstum, wodurch eine erhöh te Infektionsgefahr besteht. – Waschen Sie sich vor jeder Benutzung und Reinigung gründlich die Hände. – Führen Sie die Reinigung und Trocknung unbedingt auch vor der ersten Anwendung durch. – Verwenden Sie zum Reinigen und Desinfizieren stets fri sches, kalkarmes Wasser. – Achten Sie auf ausreichende Trocknung aller Einzelteile nach jeder Reinigung und Desinfektion. – Bewahren Sie das Produkt und das Zubehör nicht in feuch ter Umgebung oder zusammen mit feuchten Gegenständen auf. -
Seite 8: Produktbeschreibung
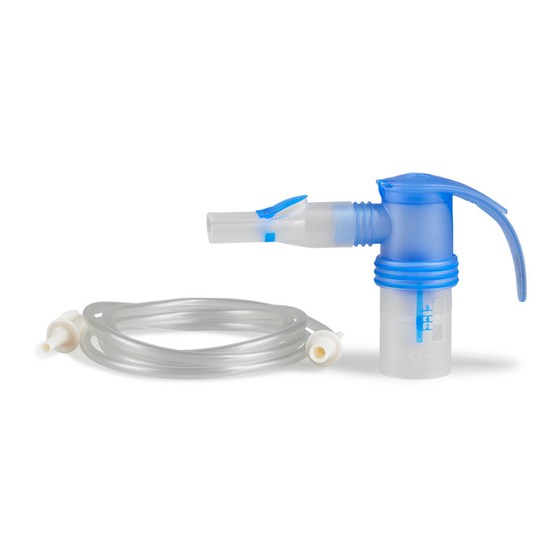
– 8 – PRODUKTBESCHREIBUNG 2.1 Lieferumfang Der Lieferumfang variiert je nach Garnitur. Den Lieferumfang Ihrer Garnitur können Sie der nachfolgenden Tabelle entneh men. Prüfen Sie, ob alle Teile Ihres PARI Produkts im Lieferumfang enthalten sind. Sollte etwas fehlen, verständigen Sie umge hend den Händler, von dem Sie das PARI Produkt erhalten ha ben. Komponenten In Ihrer Garnitur können folgende Komponenten enthalten sein: Vernebleroberteil Düsenaufsatz Verneblerunterteil Mundstück LC Unterbrecher Babymaske mit Babywinkel... - Seite 9 – 9 – a) Kindermaske soft b) Erwachsenenmaske soft a) Anschlussschlauch (f/m) b) Anschlussschlauch (f/f) Schlauchadapter (10) LC Tracheoadapter (11) Filtereinsatz für Kompressor Garnituren In allen VerneblerGarnituren sind die folgenden Komponenten enthalten: (1) Vernebleroberteil (2) Düsenaufsatz (3) Verneblerunterteil Je nach Garnitur sind zusätzlich folgende Komponenten im Lieferumfang enthalten: Garnitur (4) (5) (6) (7a) (7b) (8a) (8b) (9) (10) (11) Nr. (REF) 023B8001 × × × × × 023B8006 ×...
-
Seite 10: Zweckbestimmung
023G1400 × × 023G1401 × × 023G1402 × × 023G1403 × × 023G6001 × 023G6002 × × 023G6003 × 023G8511 × × × 1) PIFControlSystem: Peak Inspiratory Flow (Einatemspitzenflusskontrolle) 2) inkl. zweitem Düsenaufsatz 2.2 Zweckbestimmung Die Vernebler der PARI LC SPRINT Familie sind Medikamen tenvernebler, die zusammen mit einem PARI Kompressor für eine Inhalationstherapie der unteren bzw. oberen Atemwege vorgesehen sind. Die Dauer einer Anwendung beträgt in der Regel 5 bis 10 Mi nuten, maximal jedoch 20 Minuten (je nach Medikamenten menge). Es dürfen nur original PARI Kompressoren und PARI Zubehör verwendet werden. Die PARI GmbH haftet nicht für Schäden, die beim Betreiben von PARI Verneblern mit Kompressoren oder Zubehör anderer Hersteller auftreten. Die Gebrauchsanweisung des verwendeten Kompressors sowie des Zubehörs sind zu beachten. -
Seite 11: Bestimmungsgemäßer Gebrauch
– 11 – 2.3 Bestimmungsgemäßer Gebrauch Der Vernebler ist ausschließlich für den Einsatz zu Hause vor gesehen. Der Vernebler, das Mundstück und die Masken dürfen aus hy gienischen Gründen nur von einem einzigen Patienten verwen det werden. Das Produkt ist nur für Patienten geeignet, die selbständig atmen und bei Bewusstsein sind. Nur für die Inhalationstherapie zugelassene Medikamente dür fen verwendet werden. Beachten Sie eventuelle Einschränkun gen in der Gebrauchsinformation des jeweiligen Medikaments. 2.4 Gegenanzeigen Keine. 2.5 Produktvarianten und ‐kombinationen Der PARI LC SPRINT Vernebler kann mit allen auf dem Markt befindlichen PARI Kompressoren betrieben werden. Den PARI LC SPRINT Vernebler gibt es in verschiedenen Ver sionen für unterschiedliche Altersgruppen und Anforderungen: – PARI LC SPRINT (Düsenaufsatz: blau) Mit Mundstück zur universellen Behandlung der Atemwege von Erwachsenen und Kindern ab ca. 4 Jahren. – PARI LC SPRINT Junior (Düsenaufsatz: gelb) Zur Behandlung der Atemwege von Kleinkindern und Kin dern. In Kombination mit einer Babymaske zur Behandlung von Babys und Kleinkindern bis ca. 4 Jahren, die noch nicht mit dem Mundstück inhalieren können. -
Seite 12: Materialinformation
– 12 – – PARI LC SPRINT STAR (Düsenaufsatz: rot) Mit Mundstück zur Behandlung der tiefen Atemwege von Er wachsenen und Kindern ab ca. 4 Jahren. – PARI LC SPRINT BABY (Düsenaufsatz: rot) Mit Babymaske und Babywinkel zur Behandlung der Atem wege von Babys (auch Frühgeborenen) und Kleinkindern bis ca. 4 Jahren. 2.6 Materialinformation Polypropylen Vernebler, Mundstück, Kindermaske soft, Erwachsenenmaske soft, Babywinkel, LC Unterbrecher, LC Tracheoadapter Silikon Babymaske thermoplastisches Mundstück, Kindermaske soft, Elastomer Erwachsenenmaske soft, Vernebler Polyester Gummiband Synthetischer Kautschuk Gummiband 2.7 Lebensdauer Tauschen Sie den Vernebler spätestens nach einem Jahr aus, da sich das Material des Verneblers mit der Zeit verändern kann. Die Wirksamkeit der Therapie kann dadurch beeinträch tigt werden. -
Seite 13: Inhalation
– 13 – INHALATION 3.1 Montage des Verneblers VORSICHT Überprüfen Sie alle Verneblerbestandteile und das Zubehör vor jeder Anwendung. Ersetzen Sie gebrochene, verformte oder stark verfärbte Teile. Beachten Sie außerdem die nach folgenden Montagehinweise. Beschädigte Einzelteile sowie ein falsch montierter Vernebler können die Funktion des Verneblers und damit die Therapie beeinträchtigen. • Stecken Sie den Düsenaufsatz mit leichtem Druck auf die Dü se im Verneblerunterteil. Der Pfeil auf dem Düsenauf satz muss dabei nach oben zeigen. • Setzen Sie das Verneblerober teil auf das Verneblerunterteil und verschließen Sie den Ver nebler durch Drehen im Uhr zeigersinn. • Stecken Sie den Anschluss schlauch an den Vernebler. -
Seite 14: Verwendung Mit Mundstück
– 14 – Verwendung mit Mundstück • Stecken Sie das Mundstück an den Vernebler. Verwendung mit einer Babymaske mit Babywinkel • Stecken Sie die Babymaske auf den Babywinkel. Drücken Sie dabei die Baby maske mit dem Daumen von innen über den ersten Wulst des Babywinkels. • Stecken Sie den Babywinkel an den Vernebler. -
Seite 15: Verwendung Mit Kinder- Oder Erwachsenenmaske
– 15 – Verwendung mit Kinder‐ oder Erwachsenenmaske • Stecken Sie die Kinder oder Erwachsenenmaske an den Vernebler. Bei Verwendung der Maske achten Sie darauf, dass das Ausatemventilplättchen nach außen gedrückt ist, damit Sie während der Inhalation ungehindert ausatmen können. -
Seite 16: Einfüllen Des Medikamentes
– 16 – 3.2 Einfüllen des Medikamentes HINWEIS Achten Sie darauf, dass der Deckel nur in der vom Scharnier vorgegebenen Richtung bewegt wird. Ansonsten könnte der Verneblerdeckel abbrechen. • Stecken Sie den Vernebler in die dafür vorgesehene Halte rung am Kompressor. • Öffnen Sie den Verneblerde ckel, indem Sie mit dem Dau men von unten gegen den Deckel drücken. • Füllen Sie die vom Arzt ange wiesene Menge des Medika ments von oben in den Düsen aufsatz des Verneblers ein. Beachten Sie das minimale und maximale Füllvolumen [siehe: Technische Daten, Sei te 27]. Enthält der Vernebler zu wenig oder zu viel Medika ment, wird die Vernebelung und damit die Therapie stark beeinträchtigt. • Schließen Sie den Verneblerdeckel. Achten Sie darauf, dass der Deckel einrastet. Falls Sie pro Anwendung mehrere Medikamente nacheinander inhalieren sollen, spülen Sie den Vernebler zwischen den Inha lationen mit Leitungswasser aus. Entfernen Sie überschüssi ges Wasser aus dem Vernebler durch Ausschütteln und befül len Sie das Medikament wie beschrieben. -
Seite 17: Inhalation Durchführen
– 17 – 3.3 Inhalation durchführen Vergewissern Sie sich vor der Inhalation, dass alle Teile fest miteinander verbunden sind. Führen Sie die Inhalation so lange durch, bis das Medikament aufgebraucht ist (erkennbar an einem veränderten Geräusch im Vernebler). Einige Tropfen Medikament verbleiben auch nach der Inhalation im Vernebler. Information zur Verwendung eines Verneblers mit PIF ControlSystem: Das PARI PIFControlSystem im oberen Teil des Verneblers verrin gert die Luftzufuhr und erzeugt damit einen erhöhten Einatem Widerstand. Es dient dazu, eine langsame und kontrollierte Inhala tion zu erlernen. Wenn Sie wäh rend der Therapie beim Einatmen einen erhöhten Widerstand wahr nehmen, versuchen Sie so lang sam einzuatmen, dass Sie keinen erhöhten Widerstand mehr spü ren. Dadurch verbessern Sie die Medikamentenaufnahme in den unteren Atemwegen. • Schließen Sie den Anschlussschlauch am Kompressor an und schalten Sie den Kompressor ein. -
Seite 18: Inhalation Mit Einer Babymaske Mit Babywinkel
– 18 – Inhalation mit Mundstück bzw. Kinder‐ oder Erwachsenenmaske • Setzen Sie sich entspannt und aufrecht hin. • Nehmen Sie den Vernebler aus der Halterung heraus und halten Sie ihn senkrecht. • Nehmen Sie das Mundstück zwischen die Zähne und um schließen Sie es mit den Lippen bzw. setzen Sie die Maske mit leichtem Druck über Mund und Nase auf. • Atmen Sie möglichst langsam und tief durch das Mundstück bzw. die Maske ein und entspannt wieder aus. • Sobald Sie mit der Inhalation fertig sind, stecken Sie den Vernebler wieder in die Halterung. • Schalten Sie den Kompressor aus. Inhalation mit einer Babymaske mit Babywinkel Verwenden Sie die Babymaske nur in Verbindung mit dem Babywinkel. Das Baby bzw. Kleinkind kann durch die Schlitze im Babywinkel ungehindert ausatmen, die Gefahr einer Atemnot wird dadurch vermieden. • Richten Sie die Winkelstellung und Maskenposition entspre chend der Lage des Babys bzw. Kleinkindes aus. •... - Seite 19 – 19 – Kranke Säuglinge wehren sich häufig gegen das Andrücken der Gesichtsmaske und drehen den Kopf hin und her. Für eine effektive Inhalation nehmen Sie die Maske direkt in die Hand und stützen Sie den kleinen Finger an der Wange des Kindes ab. So können Sie den Bewegungen des Kopfes leichter mit der Maske folgen. • Führen Sie die Behandlung durch. • Sobald Sie mit der Inhalation fertig sind, stecken Sie den Vernebler wieder in die Halterung. • Schalten Sie den Kompressor aus.
-
Seite 20: Reinigung Und Desinfektion Zu Hause
– 20 – REINIGUNG UND DESINFEKTION ZU HAUSE Der Vernebler und das verwendete Zubehör müssen nach je der Anwendung gründlich gereinigt und mindestens einmal täg lich desinfiziert werden. Der Anschlussschlauch kann weder gereinigt noch desinfiziert werden. 4.1 Vorbereitung • Ziehen Sie den Schlauch vom Vernebler ab. • Entfernen Sie alle Medikamentenreste aus dem Vernebler. • Zerlegen Sie den Vernebler in alle Einzelteile. • Ziehen Sie das blaue Aus atemventil am Mundstück vor sichtig aus dem Schlitz heraus. Das Ventil muss danach immer noch am Mundstück hängen. • Spülen Sie alle Einzelteile des Verneblers unter fließendem Leitungswasser kurz vor. Tun Sie dies besonders gründlich, wenn die Reinigung und Desinfektion nicht sofort durchge führt wird. 4.2 Pflege des Anschlussschlauches • Schließen Sie den Anschlussschlauch an den Kompressor • Schalten Sie Ihren Kompressor ein. • Lassen Sie den Kompressor so lange arbeiten, bis die durch den Schlauch strömende Luft einen eventuellen Feuchtig... -
Seite 21: Reinigung
– 21 – 4.3 Reinigung • Legen Sie alle Einzelteile ca. 5 Minuten lang in warmes Lei tungswasser mit etwas Spül mittel. Verwenden Sie bei gro ber Verschmutzung ggf. eine saubere Bürste (diese Bürste darf ausschließlich für diesen Zweck benutzt werden). • Spülen Sie alle Teile gründlich unter fließendem Wasser ab. • Beschleunigen Sie das Abtropfen des Wassers durch Aus schütteln aller Teile. 4.4 Desinfektion Desinfizieren Sie den zerlegten Vernebler und das verwendete Zubehör (außer den Anschlussschlauch) im Anschluss an die Reinigung (nur ein gereinigter Vernebler kann wirksam desinfi ziert werden). Information bei Verwendung von Masken mit Gummiband: Das Gummiband kann nur gereinigt werden, da es durch die hohen Temperaturen beim Desinfizieren beschädigt werden kann. VORSICHT Eine feuchte Umgebung begünstigt Keimwachstum. Entneh men Sie daher alle Teile unmittelbar nach Beendigung der Desinfektion aus dem Kochtopf bzw. aus dem Desinfektions gerät. Trocknen Sie die Teile. Eine vollständige Trocknung reduziert die Infektionsgefahr. -
Seite 22: In Kochendem Wasser
– 22 – In kochendem Wasser • Legen Sie alle Einzelteile mind. 5 Minuten in kochendes Wasser. Verwenden Sie einen sauberen Kochtopf und frisches, kalkarmes Wasser. Kunststoff schmilzt bei Berührung mit dem heißen Topfboden. Achten Sie deshalb auf ausreichenden Wasserstand im Topf. Damit vermeiden Sie eine Beschädigung der Einzelteile. • Beschleunigen Sie das Abtropfen des Wassers durch Aus schütteln aller Teile. Mit einem handelsüblichen, thermischen Desinfektionsgerät für Babyflaschen ﴾keine Mikrowelle﴿ Verwenden Sie für eine wirksame Desinfektion ein thermisches Desinfektionsgerät mit einer Laufzeit von mindestens 6 Minu ten. Für die Durchführung der Desinfektion, die Dauer des Desinfektionsvorgangs sowie die erforderliche Wassermenge beachten Sie die Gebrauchsanweisung des verwendeten Des infektionsgerätes. VORSICHT Eine unzureichende Desinfektion begünstigt Keimwachstum und erhöht damit die Infektionsgefahr. Die Desinfektion ist erst wirksam durchgeführt, wenn sich das Desinfektionsgerät automatisch abgeschaltet hat bzw. die in der Gebrauchs anweisung des Desinfektionsgeräts angegebene Mindest Desinfektionszeit erreicht ist. Schalten Sie das Gerät daher nicht vorzeitig ab. Achten Sie außerdem auf dessen Sauber keit und überprüfen Sie regelmäßig die Funktionsfähigkeit. -
Seite 23: Mit Einem Mikrowellen-Desinfektionsgerät
– 23 – Mit einem Mikrowellen‐Desinfektionsgerät MikrowellenDesinfektionsgeräte ermöglichen eine wirksame Desinfektion der Produktbestandteile in einer haushaltsübli chen Mikrowelle. HINWEIS Der LC Unterbrecher ist nicht mikrowellengeeignet und darf deshalb nicht in der Mikrowelle desinfiziert werden. Positionieren Sie die Produktbe standteile im Desinfektionsgerät mit ausreichend Abstand zuein ander, damit der Wasserdampf alle Flächen erreichen kann. Halten Sie bei der Desinfektion die folgenden Zeiten ein: Wattleistung Desinfektionszeit Abkühlzeit 850 – 950 4 Min. 2 Min. 600 – 850 6 Min. 2 Min. Informationen zur erforderlichen Wassermenge sowie zur Durchführung der Desinfektion entnehmen Sie den Gebrauchs anweisungen der verwendeten Geräte (Desinfektionsgerät und Mikrowelle). - Seite 24 – 24 – VORSICHT Die Produktbestandteile dürfen nur in einem Mikrowellen Desinfektionsgerät den Mikrowellenstrahlen ausgesetzt wer den. Eine Erhitzung in der Mikrowelle ohne entsprechendes Desinfektionsgerät führt zur Beschädigung der Einzelteile. Verwenden Sie keine Grillfunktion, diese führt zur Beschädi gung der Einzelteile. Nach Beendigung des Desinfektionsvorgangs können die Einzelteile noch sehr heiß sein. Halten Sie deshalb unbe dingt die Abkühlzeit ein, bevor Sie die Teile entnehmen, es besteht sonst Verbrennungsgefahr. Eine unzureichende bzw. nicht wirksame Desinfektion be günstigt Keimwachstum und erhöht damit die Infektionsge fahr. Die Desinfektion ist erst wirksam durchgeführt, wenn die angegebene MindestDesinfektionszeit sowie die erfor derliche Leistung der Mikrowelle eingehalten wird. Achten Sie außerdem auf die Sauberkeit des Desinfektionsgeräts. Überprüfen Sie regelmäßig die Funktionsfähigkeit von Mikro welle und Desinfektionsgerät. Verwenden Sie nur Wasser für die Desinfektion, auf keinen Fall Chemikalien.
-
Seite 25: Chemische Reinigung Mit Desinfektion
– 25 – Chemische Reinigung mit Desinfektion Mithilfe einer chemischen Aufbereitung kann die Reinigung und Desinfektion in einem Arbeitsgang durchgeführt werden. Verwenden Sie dafür das reinigende Desinfektionsmittel ® Bomix plus. Für den sicheren Umgang mit der Chemikalie beachten Sie die Gebrauchsinformation des Desinfektionsmittels, insbesondere die darin enthaltenen Sicherheitshinweise. VORSICHT Eine unzureichende Desinfektion begünstigt Keimwachstum und erhöht damit die Infektionsgefahr. Eine ausreichende Reinigung mit Desinfektion kann nur erreicht werden, wenn das angegebene Mischungsverhältnis sowie die angegebene Einwirkzeit eingehalten wurde und wenn alle Einzelteile wäh rend der gesamten Einwirkzeit vollständig von der Lösung bedeckt sind. Es dürfen keine Hohlräume oder Luftblasen vorhanden sein. ® • Bereiten Sie eine 2%Bomix plusLösung vor, indem Sie 10 ml des Konzentrats mit 500 ml Leitungswasser mi schen. • Legen Sie alle Einzelteile in die vorbereitete Lösung und las sen Sie sie 5 Minuten einwir ken. Wird die Einwirkdauer deutlich überschritten, können die Kunststoffteile den Geruch des Desinfektionsmittels annehmen. • Spülen Sie alle Teile gründlich unter fließendem Wasser ab (Rückstände des Desinfektionsmittels können allergische Reaktionen oder Schleimhautirritationen verursachen). -
Seite 26: Visuelle Kontrolle
– 26 – • Beschleunigen Sie das Abtropfen des Wassers durch Aus schütteln aller Teile. • Entsorgen Sie die verwendete Lösung (die verdünnte Lö sung kann über den Ausguss entsorgt werden). 4.5 Visuelle Kontrolle Überprüfen Sie alle Produktbestandteile nach jeder Reinigung und Desinfektion. Ersetzen Sie gebrochene, verformte oder stark verfärbte Teile. 4.6 Trocknung und Aufbewahrung • Legen Sie alle Teile auf eine trockene, saubere und saugfä hige Unterlage und lassen Sie sie vollständig trocknen. • Schlagen Sie den Vernebler in ein sauberes, fusselfreies Tuch ein (z.B. Geschirrtuch) und bewahren Sie ihn an ei nem trockenen, staubfreien Ort auf. -
Seite 27: Sonstiges
– 27 – SONSTIGES 5.1 Entsorgung Alle Produktbestandteile können über den Hausmüll entsorgt werden, sofern es keine anderen landesspezifischen Entsor gungsregeln gibt. 5.2 Technische Daten Betriebsgase Luft, Sauerstoff Minimale Durchflussmenge 3,0 l/min Entsprechender minimaler Betriebsdruck 0,5 bar / 50 kPa Maximale Durchflussmenge 6,0 l/min Entsprechender maximaler Betriebsdruck 2,0 bar / 200 kPa Minimales Füllvolumen 2 ml Maximales Füllvolumen 8 ml Aerosoldaten gemäß DIN EN 135441 sind auf Anfrage bei der PARI GmbH erhältlich. -
Seite 28: Zeichenerklärung
– 28 – 5.3 Zeichenerklärung Auf dem Vernebler bzw. auf der Verpackung befinden sich fol gende Zeichen: Hersteller Das Produkt erfüllt die grundlegenden Anforderungen nach Anhang I der Richtlinie 93/42/EWG über Medizinprodukte. Gebrauchsanweisung beachten. Bestellnummer Chargenbezeichnung 5.4 Kontakt Für Produktinformationen jeder Art, im Fehlerfall oder bei Fra gen zur Handhabung wenden Sie sich bitte an unser Service Center: Tel.: +49 (0)8151279 279 (deutschsprachig) +49 (0)8151279 220 (international) - Seite 29 – 29 – Instructions for use Information as of: 201412. All rights reserved. Technical and design changes and printing errors reserved. Principle shown in figures. IMPORTANT INFORMATION.......... General................Information about the instructions for use ......Structure of safety instructions ......... Treatment of babies, children and anyone who requires assistance ................ Treatment of patients with a surgically created opening in the windpipe (tracheostoma) ........Hygiene ................PRODUCT DESCRIPTION ..........Components ..............Intended use..............Proper use ................ Contraindications.............. Product variants and combinations ........Material information ............Operating life ..............INHALATION ..............Assembling the nebuliser ..........Filling with medication ............Performing the inhalation ..........CLEANING AND DISINFECTION AT HOME ....
- Seite 30 – 30 – MISCELLANEOUS ............Disposal................Technical data ..............Explanation of symbols ............ Contact ................
-
Seite 31: Important Information
IMPORTANT INFORMATION 1.1 General Please read these instructions for use carefully and completely. Do not discard, so you can consult them at a later date. If you fail to comply with the instructions for use, injury or damage to the device cannot be ruled out. If symptoms persist or if your condition worsens, discon tinue the application and contact your doctor immediately. 1.2 Information about the instructions for use These instructions for use are intended for the user at home. A separate copy of instructions for use is available for medical specialists. If these instructions for use are lost, you can request another copy from PARI GmbH [see also: Contact, page 54]. The in structions for use for some products can be retrieved on the in ternet in both German and English. Simply visit: www.pari.de/ deen/products (on the respective product page). 1.3 Structure of safety instructions Safetycritical warnings are categorised according to hazard levels in these instructions for use: – The signal word CAUTION is used to indicate hazards which, without precautionary measures, can result in minor to moderate injury or impair treatment. – The signal word NOTICE is used to indicate general precau tionary measures which are to be observed to avoid dam aging the product during use. -
Seite 32: Treatment Of Babies, Children And Anyone Who Requires Assistance
1.4 Treatment of babies, children and anyone who requires assistance Babies, children and anyone who requires assistance must be supervised constantly by an adult during inhalation therapy. This is the only way to ensure safe and effective treatment. In dividuals in this group often underestimate the hazards in volved (e.g. strangulation with the power cord or the connec tion tubing), thus resulting in a risk of injury. The product contains small parts. Small parts can block the respiratory tract and lead to a choking hazard. Therefore, make sure that you always keep the compressor, the nebuliser and the accessories out of the reach of babies and infants. Special masks may be obtained for treating babies and infants who are not yet able to inhale using the mouthpiece. The nebulisers are only designed for patients who are able to breathe by themselves and are conscious. This is the only way to ensure effective treatment and avoid a choking hazard. 1.5 Treatment of patients with a surgically created opening in the windpipe ﴾tracheostoma﴿ Tracheostomised patients cannot use the mouthpiece to inhale and therefore need the PARI TRACHEO SET with a special tracheostoma mask for an inhalation session. If a tracheo stoma mask is used, make sure that the nebuliser cap is open during inhalation. This ensures unobstructed expiration and avoids the risk of shortness of breath. -
Seite 33: Hygiene
– 33 – 1.6 Hygiene Observe the following hygiene instructions: – Do not use product components for inhalation therapy un less they have been thoroughly cleaned and dried. Contam ination and residual moisture encourage the growth of bac teria, so increasing the risk of infection. – Before every use and cleaning, wash your hands thoroughly. – Make absolutely sure you also carry out cleaning and drying before using the device for the first time. – For cleaning and disinfection, always use fresh water with reduced calcium content. – Make sure all components are dried properly whenever you have performed cleaning or disinfection. – Do not keep the product and accessories in a damp environ ment or together with damp objects. -
Seite 34: Product Description
– 34 – PRODUCT DESCRIPTION 2.1 Components The components included vary depending on the pack. To find out which components are included in your pack, refer to the following table. Check that all components of your PARI product are contained in your pack. If anything is missing, please notify the dealer from whom you purchased the PARI product immediately. Components Your pack may contain the following components: Nebuliser upper section Nozzle attachment Nebuliser lower section Mouthpiece LC interrupter Baby mask with baby bend... - Seite 35 – 35 – a) Child mask soft b) Adult mask soft a) Connection tubing (f/m) b) Connection tubing (f/f) Tubing adapter (10) LC Tracheal adapter (11) Filter insert for compressor Packs The following components are included in all nebuliser packs: (1) Nebuliser upper section (2) Nozzle attachment (3) Nebuliser lower section The following components may also be included with the product depending on the pack: Pack no. (4) (5) (6) (7a) (7b) (8a) (8b) (9) (10) (11) (REF) 023B8001 × × × × × 023B8006 ×...
-
Seite 36: Intended Use
× × 023G1401 × × 023G1402 × × 023G1403 × × 023G6001 × 023G6002 × × 023G6003 × 023G8511 × × × 1) PIFControlSystem: (PIF = Peak Inspiratory Flow) 2) incl. second nozzle attachment 2.2 Intended use The nebulisers of the PARI LC SPRINT family are medication nebulisers that are designed to be used in conjunction with a PARI compressor for inhalation therapy of the lower and/or up per respiratory tract. Each application generally takes between 5 and 10 minutes (depending on the quantity of medication), but in no case more than 20 minutes. Only original PARI compressors and PARI accessories must be used. PARI GmbH cannot be held liable for damage caused by using PARI nebulisers with compressors or accessories from other manufacturers. Please read and follow the instructions for use of the com pressor and of the accessories you are using. -
Seite 37: Proper Use
– 37 – 2.3 Proper use The nebuliser is intended exclusively for home use. For reasons of hygiene, the nebuliser, the mouthpiece and the masks must only be used by a single patient. This product is only designed for patients who are able to breathe by themselves and are conscious. Only medication that has been approved for inhalation treat ment must be used. Take note of any restrictions in the instruc tions for use of the medication in question. 2.4 Contraindications None. 2.5 Product variants and combinations The PARI LC SPRINT nebuliser can be operated with all PARI compressors that are available on the market. The PARI LC SPRINT nebuliser is available in various versions for different age groups and requirements: – PARI LC SPRINT (nozzle attachment: blue) With mouthpiece for general treatment of the respiratory tract in adults and children aged approx. 4 years and older. – PARI LC SPRINT Junior (nozzle attachment: yellow) For treating the respiratory tract in infants and children. In conjunction with a baby mask for treating babies and infants up to about 4 years old who are not yet able to inhale using the mouthpiece. – PARI LC SPRINT STAR (nozzle attachment: red) With mouthpiece for treatment of the deep respiratory tract in adults and children aged approx. 4 years and older. -
Seite 38: Material Information
– 38 – – PARI LC SPRINT BABY (nozzle attachment: red) With baby mask and baby bend for treatment of the respirat ory tract in babies (including premature babies) and infants aged up to about 4 years old. 2.6 Material information Polypropylene Nebuliser, mouthpiece, child mask soft, adult mask soft, baby bend, LC interrupter, LC tracheal adapter Silicone Baby mask Thermoplastic elastomer Mouthpiece, child mask soft, adult mask soft, nebuliser Polyester Rubber band Synthetic rubber Rubber band 2.7 Operating life Replace the nebuliser after a year at the latest as changes can occur in the material of the nebuliser over time. This might im pair the effectiveness of the treatment. -
Seite 39: Inhalation
– 39 – INHALATION 3.1 Assembling the nebuliser CAUTION Check all nebuliser components and the accessories before each use. Replace any broken, misshapen or seriously discoloured parts. Please also follow the instructions for as sembly given below. Damaged components and/or an incorrectly assembled nebuliser may impair functioning of the nebuliser and thus treatment as well. • Press the nozzle attachment lightly onto the nozzle in the nebuliser lower section. The arrow on the nozzle at tachment must point upwards. • Place the nebuliser upper sec tion on the nebuliser lower sec tion and turn it clockwise to lock the two parts together. • Attach the connection tubing to the nebuliser. - Seite 40 – 40 – Using with a mouthpiece • Fit the mouthpiece onto the nebuliser. Use with a baby mask and baby bend • Attach the baby mask to the baby bend. Use your thumb to press the baby mask from the inside over the first ridge on the baby bend. • Attach the baby bend to the nebuliser.
- Seite 41 – 41 – Using with a child or adult mask • Attach the child or adult mask to the nebuliser. When using a mask, make sure that the expiratory valve plate is pressed out so you can exhale freely during an inhalation session.
-
Seite 42: Filling With Medication
– 42 – 3.2 Filling with medication NOTICE Take care to ensure that the cap only moves in the direction allowed by the hinge. Otherwise the nebuliser cap might snap off. • Insert the nebuliser in the holder on the compressor intended for this purpose. • Open the nebuliser cap by pressing your thumb against the underside of the cap. • Pour the quantity of medication prescribed by your doctor into the nebuliser nozzle attach ment. Be sure to follow the instruc tions regarding the minimum and maximum fill volumes [see also: Technical data, page 53]. If the nebuliser con tains too little or too much medication, nebulisation, and thus also the treatment, will be greatly impaired. • Close the nebuliser cap. Make sure that the cap snaps into place. If you are to inhale several medications one after the other in one application, rinse out the nebuliser with tap water between inhalations. Remove excess water by shaking the nebuliser and then fill with medication as described. -
Seite 43: Performing The Inhalation
– 43 – 3.3 Performing the inhalation Before the patient starts inhaling, ensure that all parts are firmly connected to each other. Perform inhalation until the medication is used up (indicated by a change in the sound of the nebuliser). Several drops of medication will remain in the nebuliser after inhalation. Information on using a nebuliser with PIFControl System: The PARI PIFControlSystem in the nebuliser upper section re stricts the inflow of air and so cre ates increased inspiratory resist ance. It is used to help patients to learn slow, controlled inhalation. If you notice increased resistance when breathing in during a treat ment session, try to inhale more slowly, until you no longer feel the increased resistance. In this way, you will improve the amount of medication that is delivered to the lower respiratory tract. • Connect the connection tubing to the compressor and switch the compressor on. - Seite 44 – 44 – Inhalation with mouthpiece or with child or adult mask • Sit in an upright position and relax. • Take the nebuliser out of its holder and hold it upright. • Take the mouthpiece between your teeth and close your lips around it or press the mask lightly over the mouth and nose. • Breathe in through the mouthpiece or mask as slowly and deeply as possible, and then breathe out in a relaxed man ner. • Replace the nebuliser in the holder as soon as you have fin ished inhaling. • Switch the compressor off. Inhalation with a baby mask and baby bend The baby mask must only be used in conjunction with the baby bend. The baby or infant can breathe out without obstruction and the risk of shortness of breath is avoided. • Adjust the alignment of the bend and the mask according to the position the baby or in...
- Seite 45 – 45 – Sick infants often struggle when the mask is pressed against their face, and twist their head back and forth. To ensure effective inhalation, hold the mask firmly in your hand and rest your little finger against the child's cheek. This will enable you to follow the movements of the child's head with the mask more easily. • Complete the treatment session. • Replace the nebuliser in the holder as soon as you have fin ished inhaling. • Switch the compressor off.
-
Seite 46: Cleaning And Disinfection At Home
– 46 – CLEANING AND DISINFECTION AT HOME The nebuliser and the accessories used must be cleaned thoroughly after each application and disinfected at least once a day. The connection tubing cannot be cleaned or disinfected. 4.1 Preparation • Detach the tubing from the nebuliser. • Make sure that all medication residues are removed from the nebuliser. • Dismantle the nebuliser into its individual parts. • Carefully pull the blue expirat ory valve out of the slot in the mouthpiece. The valve must still be attached to the mouth piece. • Rinse all components of the nebuliser under running tap wa ter. This must be done especially thoroughly if cleaning and disinfection are not carried out straight away. 4.2 Care of the connection tubing • Connect the connection tubing to the compressor. • Switch the compressor on. • Leave the compressor running until any condensation in the tubing has been removed by the air flowing into the tube. -
Seite 47: Cleaning
– 47 – 4.3 Cleaning • Place all disassembled com ponents in warm tap water with a little dishwashing liquid for at least 5 min. If necessary, use a clean brush to remove loose dirt (the brush must be re served exclusively for this pur pose). • Rinse all parts thoroughly in running water. • You can remove excess water more quickly by shaking all parts. 4.4 Disinfection After cleaning, disinfect the dismantled nebuliser and accessor ies used (except for the connection tubing) (effective disinfec tion is only possible if the nebuliser has been cleaned). Information when using masks with rubber bands: The rubber band can only be cleaned as it might be damaged by the high temperatures used during disinfection. CAUTION A damp environment may encourage the growth of bacteria. Therefore, remove all parts from the pot or disinfector as soon as disinfection has finished. Dry the parts. The risk of infection is reduced when the parts are dried completely. -
Seite 48: In Boiling Water
– 48 – In boiling water • Place all the individual parts in boiling water for at least 5 minutes. Use a clean pot and fresh water with reduced calcium content. Plastic will melt if it comes into contact with the hot base of the pot. Therefore, make sure there is plenty of water in the pot. This way you will avoid damaging the components. • You can remove excess water more quickly by shaking all parts. Using a standard thermal disinfector for baby bottles ﴾not a microwave oven﴿ For effective disinfection, use a disinfector with a runtime of at least 6 minutes. Regarding disinfection, the duration of the dis infection procedure and the quantity of water required for this, follow the instructions for use of the disinfector you are using. CAUTION Inadequate disinfection encourages the growth of bacteria and thus increases the risk of infection. Thorough disinfec tion has not been completed until the disinfector automatic ally switches itself off or the minimum disinfection time spe cified in the instructions for use of the disinfector has elapsed. Therefore, do not switch the device off prematurely. Also make sure that the disinfector is kept clean and check that it is working perfectly regularly. - Seite 49 – 49 – With a microwave disinfector Microwave disinfectors ensure effective disinfection of the product components in a standard commercial microwave oven. NOTICE The LC interrupter is not designed to withstand exposure to microwaves, and must therefore not be disinfected in a mi crowave oven. Place the product components in the disinfector with enough space between them to allow the steam to reach all surfaces reliably. Maintain the following times when disinfecting: Wattage Disinfection time Cooling time 850 – 950 4 min. 2 min. 600 – 850 6 min. 2 min. Information about the amount of water required and about the disinfection process is included in the instructions for use of the devices in question (disinfector and microwave).
- Seite 50 – 50 – CAUTION The product components must not be exposed to microwave radiation unless they are in a microwave disinfector. If they are heated in a microwave oven without the protection of the disinfector, the individual parts will be damaged. Do not use the grill function because this too will damage the individual parts. At the end of the disinfection process, the parts may still be very hot. Therefore, it is essential to wait for the cooling time to pass before taking the parts out, otherwise there is a risk of burns. Inadequate or ineffective disinfection encourages the growth of bacteria and thus increases the risk of infection. Disin fection is not completed properly unless both the specified minimum disinfection time and the required power output of the microwave are observed. The disinfector must also be perfectly clean. Check regularly that the microwave and the disinfector are functioning perfectly. Use only water for disinfection, never use chemicals.
- Seite 51 – 51 – Chemical cleaning with disinfection Cleaning and disinfection can be carried out in a single cycle using a chemical preparation process. For this, use the clean ® ing disinfecting agent Bomix plus. To ensure safety when handling chemicals, follow the instruc tions for use of the disinfecting agent, particularly the accompa nying safety instructions. CAUTION Inadequate disinfection encourages the growth of bacteria and thus increases the risk of infection. Adequate cleaning with disinfection can only be assured if the specified mixing ratio and application time are adhered to, and if all individual parts are completely immersed in the solution for the entire application time. There must not be any cavities or air bubbles. • Prepare a 2% solution of ® Bomix plus by mixing 10 ml of the concentrate with 500 ml tap water. • Place all the individual parts in the prepared solution and leave them to soak for 5 min. If the application period is exceeded significantly, the plastic parts may take on the smell of the disinfectant. • Rinse off all parts thoroughly in running water (residues of the disinfectant can cause allergic reactions or irritations of the mucous membrane). • You can remove excess water more quickly by shaking all parts.
-
Seite 52: Visual Inspection
– 52 – 4.5 Visual inspection Inspect all product components after each cleaning and disin fection. Replace any broken, misshapen or seriously discoloured parts. 4.6 Drying and storage • Place all parts on a dry, clean and absorbent surface and let them dry completely. • Wrap the nebuliser in a clean, lintfree cloth (e.g., a tea towel) and keep it in a dry, dustfree environment. -
Seite 53: Miscellaneous
– 53 – MISCELLANEOUS 5.1 Disposal All product components can be disposed of with domestic waste unless this is prohibited by the disposal regulations pre vailing in the respective member countries. 5.2 Technical data Operating gases Air, oxygen Minimum flow 3.0 l/min. Corresponding minimum operating pressure 0.5 bar / 50 kPa Maximum flow 6.0 l/min. Corresponding maximum operating pressure 2.0 bar / 200 kPa Minimum fill volume 2 ml Maximum fill volume 8 ml Aerosol data according to DIN EN 135441 is available on re quest from PARI GmbH. -
Seite 54: Explanation Of Symbols
– 54 – 5.3 Explanation of symbols The following symbols can be found on the nebuliser and/or the packaging: Manufacturer The product satisfies the basic requirements as set forth in Appendix I of Directive 93/42/EEC concerning medical devices. Please follow the instructions for use. Order no. Lot no. 5.4 Contact For all product information and in the event of defects or ques tions about usage, please contact our Service Center: Tel.: +49 (0)8151279 279 (Germanspeaking) +49 (0)8151279 220 (international) - Seite 56 PARI GmbH Moosstrasse 3 • 82319 Starnberg • Germany Tel.: +49 (0) 81 512 79 0 • Fax: +49 (0) 81 512 79 101 EMail: info@pari.de • www.pari.de...