ADIATEK ruby 45 Bedienungs- Und Wartungsanleitung
Inhaltsverzeichnis
Verfügbare Sprachen
Verfügbare Sprachen
Quicklinks
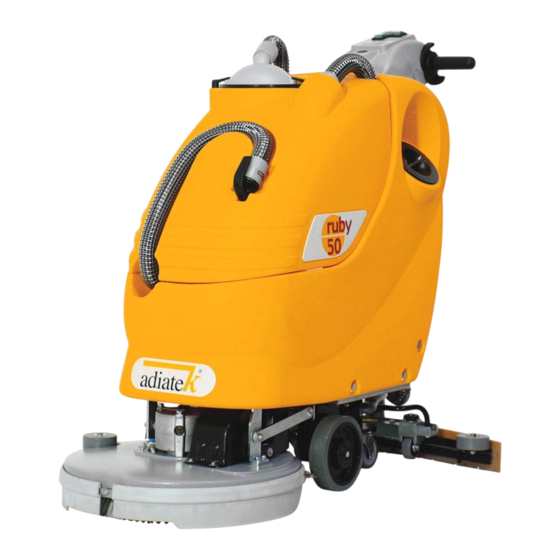
ruby 45
ruby 50
ruby 55
02 2013
Uso e manutenzione
(istruzioni originali)
Use and maintenance
Emploi et entretien
Bedienung und
Wartungsanleitung
Uso y mantenimiento
Attenzione! Leggere le istruzioni prima dell'uso.
Attention! Please read the instructions before use.
Attention! Lire les instructions avant de l'emploi.
Achtung! Vor dem Gebrauch die Anleitungen lesen.
Atención! Leer las instrucciones antes del empleo.
COD. 65301002
Kapitel
Inhaltsverzeichnis

Verwandte Anleitungen für ADIATEK ruby 45

Inhaltszusammenfassung für ADIATEK ruby 45
- Seite 1 45 ruby 50 ruby 55 02 2013 Uso e manutenzione (istruzioni originali) Use and maintenance Emploi et entretien Bedienung und Wartungsanleitung Uso y mantenimiento Attenzione! Leggere le istruzioni prima dell'uso. Attention! Please read the instructions before use. Attention! Lire les instructions avant de l'emploi.
-
Seite 28: Legende Tableau De Bord Et Controles
LEGENDE TABLEAU DE BORD ET CONTROLES INTERRUPTEUR MOTEUR DE LA/DES BROSSE/S INTERRUPTEUR A CLEF (OPTIONNEL) INDICATEUR NIVEAU DE CHARGE BATTERIES/COMPTEUR HORAIRE LEVIERS PRESENCE HOMME BOUTON POUSSOIR VISUALISATION COMPTEUR HORAIRE (INDICATEUR) LEVIER ROBINET INTERRUPTEUR MOTEUR D'ASPIRATION LEVIER DE RELEVAGE SUCEUR TEMOIN DE SIGNALISATION ROBINET OUVERT/DEVIATEUR SYSTEME 3S (OPT.) 10. - Seite 39 INHALTSANGABE ZEICHENERKLÄRUNG ARMATURENBRETT UND BETÄTIGUNGEN ZEICHENERKLÄRUNG MASCHINE OPTIONELLE AUSRÜSTUNGEN TECHNISCHE DATEN EINLEITUNG GENERELLE SICHERHEITSNORMEN SYMBOLIK VOR DEM GEBRAUCH Beförderung der verpackten Maschine Auspacken der Maschine Installation der Batterien und Regulierung Batterientyp Ladegerät Eingebautes Ladegerät (optional) Wiederaufladen der Batterien Wiederaufladen der Batterien mit eingebautem Ladegerät (optional) Entsorgung der Batterien Batteriewächter Betriebsstundenzähler...
-
Seite 40: Zeichenerklärung Armaturenbrett Und Betätigungen
ZEICHENERKLÄRUNG ARMATURENBRETT UND BETÄTIGUNGEN SCHALTER BÜRSTENMOTOR SCHLÜSSELSCHALTER (OPTIONAL) DISPLAY BATTERIEWÄCHTER/BETRIEBSSTUNDENZÄHLER HEBEL BÜRSTENANTRIEB DRUCKKNOPF ANZEIGE BETRIEBSSTUNDENZÄHLER (DISPLAY) HEBEL FÜR REGULIERBARE WASSERZUFUHR SCHALTER SAUGMOTOR HEBEL SAUGFUSSHEBUNG KONTROLLEUCHTE WASSERZUFUHR/SCHALTUNG 3S SYSTEM (OPTIONAL) 10. PEDAL FÜR BÜRSTENKOPFAUSHEBUNG 11. DRUCKKNOPF SELBSTAUSLÖSUNG BÜRSTE (ruby 50) ZEICHENERKLÄRUNG MASCHINE 11. -
Seite 41: Optionelle Ausrüstungen
OPTIONELLE AUSRÜSTUNGEN Überlastschutzvorrichtung für Bürstenmotor Magnetventil Schlüsselschalter Ablassvorrichtung für den Frischwassertank Eingebautes Ladegerät Gruppe 3S (Solution Saving System) TECHNISCHE DATEN M.E. ruby 45 ruby 50 ruby 55 Arbeitsbreite Saugfussbreite Flächenleistung, bis zu 1575 1750 1925 Durchmesser Bürste/n 2x235 1x508 2x285 Drehgeschwindigkeit Bürste/n... -
Seite 42: Einleitung
EINLEITUNG - Alle 200 Arbeitsstunden die Maschine beim zustän- Anzeige maximale Temperatur Wir danken Ihnen, dass Sie unsere Maschine gewählt digen autorisierten Kundendienst überprüfen lassen. des Frischwassers. haben. Diese Scheuersaugmaschine wird in der in- - Um Verkrustungen am Filter des Frischwassertanks Ist in der Nähe der Öffnung des dustriellen und zivilen Reinigung verwendet und ist zu vermeiden, das Reinigungsmittel nicht stunden-... -
Seite 43: Vor Dem Gebrauch
VOR DEM GEBRAUCH Instruktionen vom Ladegeräthersteller gefolgt wer- den. BEFÖRDERUNG DER VERPACKTEN MASCHINE Die Maschine wird auf einer Holzpalette geliefert ACHTUNG: und ist für die Beförderung von Gabelstapler vorge- sehen. Das Gesamtgewicht beträgt 95 kg. Dieser Arbeitsgang muss durch qualifiziertes Perso- Die Verpackungsmasse sind: nal durchgeführt werden. -
Seite 44: Entsorgung Der Batterien
verhindern. Die Aufladung muss innert wenigen Mi- nuten nach Eintritt des blinkenden Signals entlade- ner Batterien erfolgen. HINWEIS: Die Batterien nie vollständig entladen las- sen, auch wenn die Maschine nicht gebraucht wird. Bei traditionellen Batterien, alle 20 Aufladungen den Elektrolyt-Stand kontrollieren und eventuell mit des- tilliertem Wasser nachfüllen. -
Seite 45: Montage Der Bürste/N
derselben Position wieder zu montieren, um zu ver- meiden, dass die diverse Neigung der Borsten eine Überlastung des Motors oder unangenehme Vibra- tionen verursacht. ACHTUNG: MONTAGE DER BÜRSTE/N 1. Die elektrische Verbindung zum Bürstenmotor Stets schaumhemmende Reinigungsmittel benötigen. entfernen, bei dem der Batteriestecker (1) getrennt Damit mit Sicherheit Schaumbildung vermieden wird, wird. -
Seite 46: Bodenreinigung
BODENREINIGUNG ACHTUNG: VERBINDUNG BATTERIESTECKER ZUR MASCHINE Diesen Arbeitsgang nur mit Handschuhe durchführen, Den Batteriestecker (1) an den Maschinenstecker (2) um sich vor gefährliche Wirkstoffe zu schützen. anschliessen, der sich auf der Rückseite der Maschine befindet. REGULIERUNG BÜRSTENDRUCK Durch die Flügelschraube (1), die sich innerhalb der vorderen, rechten Radseite befindet, ist es möglich, den Bürstendruck auf den zu reinigenden Boden zu regulieren. -
Seite 47: Vorschub
VORSCHUB 4. Den Schalter der Bürstenmotors (5) ausschalten. Der Antrieb dieser Maschinen wird durch die Bürsten 5. Den Schalter des Saugmotors (3) ausschalten. erzielt, die leicht geneigt arbeiten und dadurch die 6. Für Maschinen, die mit Schlüsselschalter (siehe Vorschubbewegung erlauben. unter "OPTIONELLE AUSRÜSTUNGEN") ausgerüstet sind, den Schlüssel (6) gegen den Uhrzeigersinn dre- STILLSTAND... -
Seite 48: Reinigung Saugfuss
ZWEIMONATIGE WARTUNG ERSATZ VORDERER SAUGFUSSGUMMI Die Abnützung der Sauggummi kontrollieren und eventuell auswechseln. Für den Ersatz ist notwendig: ACHTUNG: 1. Den Saugfußschlauch (3) von der Schlauchver- bindung herausnehmen. Die Arbeitsgänge der Bürstenbehandlung müssen nur 2. Den Saugfuss von der Halterung durch Linksdre- mit Handschuhe durchgeführt werden, um sich sei hung des Hebels (2) herausnehmen und die Gewin- vom mechanischen Borstenkontakt als vom chemi-... -
Seite 49: Halbjährliche Wartung
Falls die Störung andauert, sich mit dem zuständigen technischen Kundendienst in Verbindung setzen. DAS WASSER AUF DEN BÜRSTEN GENÜGT NICHT 1. Überprüfen, ob der Wasserhahnhebel (8) offen ist. 2. Den Flüssigkeitsstand im Frischwassertank über- prüfen. 3. Überprüfen, ob der Frischwasserfilter (1) sauber ist. -
Seite 50: Eingeplante Wartung
Festhalten und das Mitnehmen des Pads während der Arbeit erlauben. MASCHINE ARTIKEL ANZAHL BESCHREIBUNG GEBRAUCH ruby 45 48901010 Bürste PPL 0,3 Ø 235 Unebene Bodenflächen mit breiten Fugen. 48901040 Bürste NYLON 0,5 Ø 235 Glatte Bodenflächen mit kleinen Fugen und beständigem 48901050 Bürste PPL 0,6 Ø...