Herunterladen Inhalt Inhalt Diese Seite drucken
GGP ITALY SPA MP1 504 Series Gebrauchsanweisung

GGP ITALY SPA MP1 504 Series Gebrauchsanweisung

Handgeführter rasenmäher
Vorschau ausblenden Andere Handbücher für MP1 504 Series:

Werbung

Verfügbare Sprachen
  • DE

Verfügbare Sprachen

171505993/1A
03/2015
MP1 504 Series
MP1 554 Series
IT
Tosaerba con conducente a piedi - MANUALE DI ISTRUZIONI
ATTENZIONE: prima di usare la macchina, leggere attentamente il presente libretto.
FR
Tondeuse à gazon à conducteur à pied - MANUEL D'UTILISATION
ATTENTION: lire attentivement le manuel avant d'utiliser cette machine.
EN
Pedestrian controlled lawnmower - OPERATOR'S MANUAL
WARNING: read thoroughly the instruction booklet before using the machine.
DE
Handgeführter Rasenmäher - GEBRAUCHSANWEISUNG
ACHTUNG: vor inbetriebnahme des geräts die gebrauchsanleitung aufmerksam lesen.
NL
Lopend bediende grasmaaier - GEBRUIKERSHANDLEIDING
LET OP: vooraleer de machine te gebruiken, dient men deze handleiding aandachtig te lezen.

Werbung

Inhaltsverzeichnis
loading

Inhaltszusammenfassung für GGP ITALY SPA MP1 504 Series

  • Seite 1 171505993/1A 03/2015 MP1 504 Series MP1 554 Series Tosaerba con conducente a piedi - MANUALE DI ISTRUZIONI ATTENZIONE: prima di usare la macchina, leggere attentamente il presente libretto. Tondeuse à gazon à conducteur à pied - MANUEL D’UTILISATION ATTENTION: lire attentivement le manuel avant d’utiliser cette machine.
  • Seite 2 IMPORTANTE: Leggere attentamente le prescrizioni contenute nel libretto del motore, prima di mettere in funzione il motore per la prima volta. ATTENZIONE! Controllare il livello dell’olio prima dell’avviamento.   ВАЖНО:  Прочетете  внимателно  предписанията,  съдържащи  се  в  инструкциите  на  двигателя,  преди  да  го  включите за първи път. ВНИМАНИЕ! Проверете нивото на маслото преди включване.
  • Seite 3 ITALIANO - Istruzioni Originali ....................БЪЛГАРСКИ - Инструкция за експлоатация  ................BOSANSKI - Prijevod originalnih uputa ..................ČESKY - Překlad původního návodu k používání  ................. DANSK - Oversættelse af den originale brugsanvisning .............. DEUTSCH - Übersetzung der Originalbetriebsanleitung .............. ΕΛΛΗΝΙΚΑ - Μεταφραση των πρωτοτυπων οδηγιων  ..............ENGLISH - Translation of the original instruction ................ESPAÑOL - Traducción del Manual Original ................EESTI - Algupärase kasutusjuhendi tõlge ...
  • Seite 4 17/20...
  • Seite 5 1.1a...
  • Seite 6 1.1b...
  • Seite 7 1.1c 1.2a...
  • Seite 8 1.2b...
  • Seite 9 3.1a 3.1b 3.1c 3.1d...
  • Seite 10 viii...
  • Seite 11: Dati Tecnici

    MP1 504 MP1 554 �1� DATI TECNICI Series Series �2� Potenza nominale * 1,94 ÷ 2,80 2,27 ÷ 3,30 2800 ± 100 ÷ 2800 ± 100 ÷ �3� Velocità mass. di funzionamento motore * 2900 ± 100 2900 ± 100 �4� Peso macchina * 34 ÷ 41 35 ÷ 43 �5�...
  • Seite 12 [1] BG - ТЕХНИЧЕСКИ ДАННИ [1] BS - TEHNIČKI PODACI [1] CS - TECHNICKÉ PARAMETRY [2]        Н оминална мощност * [2]    N azivna snaga * [2]    J menovitý výkon * [3]      М аксимална скорост [3]    M aks. brzina rada motora * [3]    M aximální rychlost činnosti motoru * на функциониране на двигателя * [4]    T ežina mašine * [4]    H motnost stroje * [4] ...
  • Seite 13 [1] FI - TEKNISET TIEDOT [1] FR - CARACTÉRISTIQUES TECHNIQUES [1] HR - TEHNIČKI PODACI [2]    N imellisteho * [2]    P uissance nominale* [2]    N azivna snaga* [3]    M oottorin maksimaalinen [3]    V itesse max. de fonctionnement du moteur* [3]    M aks. brzina rada motora* toimintanopeus * [4]    P oids machine* [4]    T ežina stroja* [4]    L aitteen paino * [5] Largeur de coupe [5] ...
  • Seite 14 [1] PL - DANE TECHNICZNE [1] PT - DADOS TÉCNICOS [1] RO - DATE TEHNICE [2]    M oc znamionowa * [2]    P otência nominal * [2]    P utere nominală * [3]    M aks. prędkość obrotowa silnika * [3]    V elocidade máx. de funcionamento  [3]    V iteza max. de funcţionare a motorului * [4]    M asa maszyny * motor * [4] ...
  • Seite 15: Norme Di Sicurezza

    ATTENZIONE: PRIMA DI USARE LA MACCHINA, LEGGERE ATTENTAMENTE IL PRESENTE LIBRETTO. Conservare per ogni futura necessità. 5) Prima dell’uso, procedere ad una verifica generale della  NORME DI SICUREZZA macchina ed in particolare: da osservare scrupolosamente – dell’aspetto del dispositivo di taglio, e controllare che le viti e il gruppo di taglio non siano usurati o danneggiati. A) ADDESTRAMENTO Sostituire in blocco il dispositivo di taglio e le viti danneg- 1) ...
  • Seite 16: Manutenzione E Magazzinaggio

    l’avviamento  su  una  superficie  piana  e  priva  di  ostacoli  o  re le relative istruzioni prima di iniziare qualsiasi intervento  erba alta. di pulizia o manutenzione. Indossare indumenti adeguati e  16) Non avvicinare mani e piedi accanto o sotto le parti ro- guanti di lavoro in tutte le situazioni di rischio per le mani. tanti. Stare sempre lontani dell’apertura di scarico. 2)  ATTENZIONE!  –  Non  usare  mai  la  macchina  con  parti  17) Non sollevare o trasportare il rasaerba quando il moto- usurate o danneggiate. I pezzi guasti o deteriorati devono re è in funzione. essere sostituiti e mai riparati. Usare solo ricambi originali:  18) Non manomettere o disattivare i sistemi di sicurezza. l’uso di ricambi non originali e/o non correttamente monta- 19) ...
  • Seite 17: Conoscere La Macchina

    operazione all’aperto e a motore freddo. terreno(effetto “mulching); •    t agliare l’erba e scaricarla lateralmente (per macchine predisposte). E) TRASPORTO E MOVIMENTAZIONE 1) Ogni volta che è necessario movimentare, sollevare, tra- Uso improprio sportare o inclinare la macchina occorre: – Indossare robusti guanti da lavoro; Qualsiasi altro impiego, difforme da quelli sopra citati, può  –    A fferrare la macchina in punti che offrano una presa sicu- rivelarsi pericoloso e causare danni a persone e/o cose. ra, tenendo conto del peso e della sua ripartizione Rientrano nell’uso improprio (come esempio, ma non solo): – ...
  • Seite 18: Completare Il Montaggio

    26. Riposo 1.1b Montaggio del manico (Tipo “II”) 27. Avviamento motore Riportare  la  parte  inferiore  del  manico  (1)  nella  posizione  36.   S egnalatore contenuto sacco di raccolta: di  lavoro  e  fissarla  ai  supporti  laterali  dello  chassis  come  alzato (a) = vuoto / abbassato (b) = pieno indicato ...
  • Seite 19 Dispositivo di taglio –    R imuovere  il  sacco  di  raccolta  e  assicurarsi  che  la  pro- L’acceleratore è comandato dalla leva (1). tezione  di  scarico  posteriore  (1)  rimanga  stabilmente  Le posizioni della leva sono indicate dalla relativa tar- abbassata. ghetta. –    N ei  modelli  con  possibilità  di  scarico  laterale:  accertar- Su alcuni modelli è previsto un motore senza acceleratore.
  • Seite 20: Manutenzione Ordinaria

    di taglio; staccato. –    s ollevare la protezione di scarico posteriore, afferrare la  maniglia  e  rimuovere  il  sacco  di  raccolta  mantenendolo  1)    I ndossare  robusti  guanti  da  lavoro  prima  di  ogni  in- in posizione eretta. tervento  di  pulizia,  manutenzione  o  regolazione  sulla  macchina. • Nel caso di “mulching” o scarico posteriore dell’er- 2) ...
  • Seite 21       N on collegare il carica batteria direttamente al morsetto  4. La macchina comincia a vibrare in modo anomalo del  motore.  Non  è  possibile  avviare  il  motore  utilizzan- do il carica batteria come fonte di alimentazione, poiché  Danneggiamento o parti  Fermare la macchina  quest’ultimo potrebbe danneggiarsi.  allentate e staccare il cavo della Se si prevede di non utilizzare il rasaerba per un lungo candela Verificare eventuali periodo, scollegare la batteria dal cablaggio del motore, ...
  • Seite 23: Normes De Sécurité

    ATTENTION: LIRE ATTENTIVEMENT LE MANUEL AVANT D’UTILISER CETTE MACHINE. Conserver pour toute consultation future. sence ne se sont pas dissipées.   NORMES DE SÉCURITÉ –      T oujours bien remettre et serrer les bouchons du réser- à observer scrupuleusement voir et du bidon d’essence. 4) Remplacer les silencieux défectueux. 5) Procéder à un contrôle général de la machine avant son  A) FORMATION utilisation, en particulier: –    D e  l’aspect  de  l’organe  de  coupe,  contrôler  que  les  vis  1) ...
  • Seite 24: Entretien Et Entreposage

    d’éjection latérale ou la protection d’éjection arrière.  l’absence  d’entretien  ont  une  influence  significative  sur  13) Faire très attention à proximité d’escarpements, de fos- les émissions sonores et les vibrations. Il faut donc adop- sés ou de talus.  ter des mesures préventives afin d’éliminer tout dommage  14) Démarrer le moteur avec précaution en suivant les ins- possible dû à un bruit élevé et aux contraintes issues des  tructions  et  en  tenant  les  pieds  éloignés  de  l’organe  de  vibrations;  veiller  à  l’entretien  de  la  machine,  porter  un  coupe. casque anti-bruit, faire des pauses pendant le travail. 15)  Ne  pas  incliner  la  tondeuse  pour  le  démarrage.  Effectuer le démarrage sur une surface plate et sans obs- D) ENTRETIEN ET ENTREPOSAGE tacles ni herbe haute.
  • Seite 25: Connaître La Machine

    le  réservoir  dans  un  endroit  où  les  vapeurs  d’essence  jours derrière le guidon et donc à distance de sécurité de  pourraient atteindre une flamme, une étincelle ou une forte  l’organe de coupe rotatif. Si l’opérateur s’éloigne de la ma- source de chaleur. chine,  le  moteur  et  l’organe  de  coupe  s’arrêtent  dans  les  15) Laisser refroidir le moteur avant de ranger la machine à  secondes qui suivent. un endroit quelconque. 16)  Pour  réduire  le  risque  d’incendie,  débarrasser  le  mo- Usage prévu teur,  le  silencieux  d’échappement,  le  compartiment  de  la  batterie et la zone d’entreposage de l’essence des résidus ...
  • Seite 26: Terminer Le Montage

    13. Organe de coupe ATTENTION! Le déballage de la machine et l’achè- 14.  Protection d’éjection arrière vement du montage doivent être effectués sur une sur- 14a.  Déflecteur d’éjection latérale (si prévu) face plane et solide, avec un espace suffisant pour la 14b.  Protection d’éjection latérale (si prévue) manutention de la machine et des emballages, en utili- 15. ...
  • Seite 27: Description Des Commandes

    1.2a Assemblage du bac de ramassage (Type “I”) 2.5   Réglage de la hauteur de coupe Introduire le cadre (11) dans le bac (12) et accrocher tous • Type “I” les  profils  en  plastique  (13)  à  l’aide  d’un  tournevis  (voir  fi-       L e  réglage  de  la  hauteur  de  coupe  se  fait  au  moyen  du  gure).
  • Seite 28: Entretien Périodique

          A près le démarrage, placer le levier de l’accélérateur sur  s’y attache et provoquer des amas d’herbe coupée dans  “Rapide” (22). le gazon. •    M odèles avec démarrage manuel –    s i l’herbe est particulièrement haute, il convient de faire  Tirer le levier du frein de l’organe de coupe (1) contre le une  première  tonte  à  la  hauteur  maximum  permise  par  guidon et tirer fermement la poignée du câble de démar- la ...
  • Seite 29 possible  de  devoir  répéter  l’opération  plusieurs  fois  6. DIAGNOSTIC pour s’assurer que le réservoir est complètement vide. S’assurer d’avoir fait l’appoint du niveau d’huile Que faire si ... avant d’utiliser à nouveau la machine. 4.1 Entretien de l’organe de coupe Origine du problème Action corrective Toute intervention sur l’organe de coupe doit être effectuée  dans un centre spécialisé, qui dispose des équipements  1. La tondeuse à essence ne fonctionne pas. les mieux adaptés.
  • Seite 31: Safety Regulations

    WARNING: READ THOROUGHLY THE INSTRUCTION BOOKLET BEFORE  USING THE MACHINE. Keep for future reference worn  screws  to  preserve  balance.  Any  repairs  must  be    SAFETY REGULATIONS done at a specialised centre please follow meticulously –    d on’t  force  the  safety  lever  as  it  must  move  freely;  it  should  return  automatically  and  rapidly  back  to  the  neutral position, resulting in the stopping of the cutting A) TRAINING means...
  • Seite 32: Maintenance And Storage

    21)  On  power-driven  models,  disengage  the  wheel  drive  obligations and responsibilities of the Manufacturer. before igniting the engine. 4)    After  each  use,  disconnect  the  spark  plug  cable  and  22) Use manufacturer-recommended attachments only. check for damage. 23) Don’t use the machine if the attachments/tools are not  5) Keep all nuts, bolts and screws tight to be sure the ma- installed in their seats. chine  is  in  safe  working  condition.  Routine  maintenance  24) Disengage the cutting means, switch off the engine and ...
  • Seite 33: Getting To Know The Machine

    we live. Try not to cause any disturbance to the surround- User types ing area. 2)  Scrupulously  comply  with  local  regulations  and  provi- This  machine  is  intended  for  use  by  consumers,  i.e.  non- sions for the disposal of packaging, oils, petrol, filters, dam- professional operators. The machine is intended for “DIY”  aged parts or any elements which have a strong impact on  use only the  environment;  this  waste  must  not  be  disposed  of  as  normal waste, it must be separated and taken to specified  IDENTIFICATION LABEL AND MACHINE waste disposal centres where the material will be recycled.
  • Seite 34: Controls Description

    the cutting means housing. Disconnect the spark plug  1.1c Assembling the handle (Type“III”) cap and read the instructions before carrying  out any  Return the handle (1) to the work position and fasten it to the  maintenance or repairs. side chassis supports as shown in the diagram, using  the  44.    D anger of cutting yourself. Cutting means. Do not put  handles (2) and relative nuts and bolts. hands or feet near or under the opening of the cutting Make sure the pins (2a) are inserted in one of the two holes  means housing.  (2b) on the side supports of the chassis so as to achieve the correct height of the handle.
  • Seite 35: Grass Cutting

    2.4  Converter control lever (if fitted) –    I nsert the side discharge chute (8) as shown in the figure. In the models with drive systems, the converter control – Close the side discharge guard (4) so that the side dis- lever (if fitted) allows the operator to regulate forward gear  charge chute (8) is locked in place. speed. To do so, move the lever (1) following the indications  To  remove  the  deflector  cap  (5),  lift  the  rear  discharge  provided near the control lever.
  • Seite 36: Routine Maintenance

    ground from drying; Given  product  evolution,  the  above  mentioned  cutting  –    d o not cut wet grass; this could reduce cutting means ef- means may be replaced in time with others having similar  ficiency due to sticky grass and tear the lawn. interchangeable and operating safety features.  –    f or particularly high grass, initially mow at the maximum  height allowed by the machine then mow again after two  4.2   Adjusting the converter cable (if fitted) or three days. This adjustment is necessary when the lever (1) tends not  to remain in the « » position. When work is finished With the lever (1) in the « » position, turn the cable ad- When work has been completed, release the brake lever (1) ...
  • Seite 37 6. DIAGNOSTICS What to do if ..Problem description Corrective Action 1. The petrol-driven lawnmower doesn’t work No oil or fuel in the engine Check the oil and petrol  levels The spark plug and filter  Clean the spark plug and  are not in good condition filter which may be dirty or  replace them The lawnmower’s fuel tank  The float may be blocked;  was not emptied at the end  tilt the lawnmower on the  of the previous season carburettor side 2.
  • Seite 39: Sicherheitsvorschriften

    ACHTUNG: VOR INBETRIEBNAHME DES GERÄTS DIE GEBRAUCHSANLEITUNG AUFMERKSAM LESEN. Für zukünftiges Nachschlagen aufbewahren. –    F alls  Benzin  übergelaufen  ist,  darf  kein  Versuch  unter- SICHERHEITSVORSCHRIFTEN nommen  werden,  den  Motor  zu  starten.  Stattdessen  ist  zur strengsten Beachtung die  Maschine  von  der  benzinverschmutzten  Fläche  zu  entfernen. Bis das Benzin nicht vollständig verdampft ist  A) ALLGEMEINE HINWEISE und die Benzindämpfe nicht verflüchtigt sind, vermeiden ...
  • Seite 40: Wartung Und Lagerung

    zurücksetzen, um sicherzustellen, dass keine Hindernisse  Benzinzufuhr,  indem  Sie  die  Anweisungen  im  Handbuch  vorhanden sind. befolgen. 10)  Halten Sie das Schneidwerkzeug an, wenn der Mäher  28)  ACHTUNG  –  Im  Fall  von  Brüchen  oder  Unfällen  beim Transport über andere Flächen als Gras zu kippen ist  während  der  Arbeit,  sofort  den  Motor  abstellen  und  die  und wenn Sie den Rasenmäher zur Mähfläche hin- und wie- Maschine  entfernen,  damit  sie  keine  weiteren  Schäden  der abtransportieren.
  • Seite 41: Transport Und Handhabung

    mer in einem Fachbetrieb ausgeführt werden. die Wiederverwendung der Stoffe sorgt. 9) Während der Arbeiten zur Einstellung der Maschine 3)  Halten Sie sich strikt an die örtlichen Vorschriften für die  darauf  achten,  dass  die  Finger  nicht  zwischen  dem  sich  Entsorgung der Schneidreste. drehenden  Schneidwerkzeug  und  den  festen  Teilen  der  4)  Bei  Außerbetriebnahme  darf  die  Maschine  nicht  ein- Maschine eingeklemmt werden. fach ...
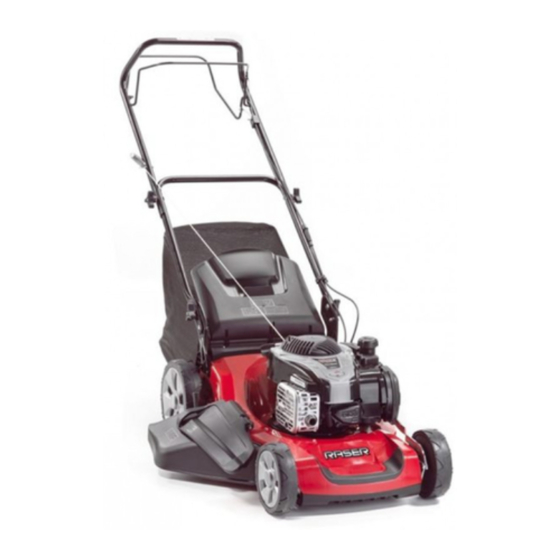
  • Seite 42: Typenschild Und Maschinenbauteile

    –    B etätigen  des  Schneidwerkzeugs  in  graslosen  41.   A chtung:  Vor  dem  Gebrauch  der  Maschine  die  Bereichen. Bedienungsanleitung lesen. 42.   A uswurfrisiko.  Während  des  Gebrauchs,  halten  Sie  Benutzer Dritte von der Arbeitszone entfernt. 43.   S chnittgefahr.  Schneidwerkzeug  in  Bewegung.  Diese Maschine ist für die Benutzung durch Verbraucher, ...
  • Seite 43: Der Arbeitsgang Ist Bei Stillstehendem Schneidwerkzeug Durchzuführen

    Die Überwurfmuttern (9) der Handräder (2) und (4) müssen  (1)  bedient,  der  zum  Anlassen  und  während  des  Betriebs  so  angezogen  werden,  dass  ein  Abstand  vom  Führungs- des  Rasenmähers  gegen  den  Handgriff  gedrückt  werden  holm  von  ca.  9  mm  entsteht  (bei  losgelassenen  Handrä- muss.  dern),  um  einen  festen  Halt  zu  gewährleisten,  ohne  dass  Beim Loslassen des Hebels bleibt der Motor stehen. ...
  • Seite 44: Ordentliche Wartung

    –    D ie  Grasfangeinrichtung  abnehmen  und  sicherstellen,  –    D en  Motor  ausschalten  und  abwarten,  bis  das  dass  der  hintere  Auswurfschutz  (1)  stabil  abgesenkt  Schneidwerkzeug anhält. bleibt. –    D en  hinteren  Auswurfschutz  anheben,  den  Handgriff   –    B ei Modellen mit der Möglichkeit des seitli- greifen und die Grasfangeinrichtung abnehmen, sie da- chen Auswurfs: Sicherstellen, dass der seitliche ...
  • Seite 45 Einsatzsicherheit und die ursprünglichen Leistungen der WICHTIG Die Einstellung muss bei ausgeschaltetem Maschine aufrechtzuerhalten. Motor erfolgen. Jegliche  Einstellung  oder  Wartungsarbeit  muss  bei  aus- 4.3 Aufladen der Batterie (falls vorgesehen) geschaltetem  Motor  ausgeführt  werden,  nachdem  das  • Modelle mit Elektrostart mit Schlüssel Zündkerzenkabel abgezogen wurde.
  • Seite 46 6. DIAGNOSE Was tun wenn ... Ursache des Problems Abhilfemaßnahme 1. Der Benzinrasenmäher funktioniert nicht Es fehlt Öl oder Benzin Kontrollieren Sie den im Motor Ölstand und den Benzinstand Die Zündkerze und der  Die Zündkerze und  Filter sind nicht in gutem  den Filter reinigen, die Zustand verschmutzt sein können,  oder sie auswechseln Das Benzin wurde  Der Schwimmer kann  zum Ende der letzten  blockiert sein; neigen Sie  Saison nicht aus dem ...
  • Seite 47: Veiligheidsvoorschriften

    LET OP: VOORALEER DE MACHINE TE GEBRUIKEN, DIENT MEN DEZE  HANDLEIDING AANDACHTIG TE LEZEN. Bewaren voor toekomstige behoeften. 4) Vervang de geluiddempers als deze defect zijn VEILIGHEIDSVOORSCHRIFTEN 5) Ga vóór het gebruik over op een algemene controle van  die strikt opgevolgd moeten worden de machine, en in het bijzonder: – het uitzicht van de snij-inrichting, en controleer of de A) VOORBEREIDING schroeven en de snijgroep niet versleten of beschadigd 1)  LET  OP!  Lees  deze  aanwijzingen  aandachtig  alvorens  zijn.
  • Seite 48: Onderhoud En Opslag

    machine  op  een  vlakke  ondergrond  zonder  hindernissen  ming, maak pauzes tijdens het werk. of hoog gras. 16)  Breng  uw  handen  en  voeten  nooit  nabij  of  onder  de  D) ONDERHOUD EN OPSLAG draaiende  delen.  Blijf  steeds  op  afstand  van  de  aflaat- opening. 1) LET OP! – Verwijder de kabel van de bougie en lees de  17) Hef de grasmaaier niet op en vervoer hem niet wanneer  desbetreffende  aanwijzingen  alvorens  eender  welke  in- de motor in werking is.
  • Seite 49: Transport En Verplaatsing

    de benzinetank vrij gehouden te worden van gras, bladeren  Voorzien gebruik of teveel vet. Leeg de opvangzak en laat geen containers  met gemaaid gras in gesloten ruimtes achter.  Deze machine is ontworpen en gebouwd om gras te maai- 17) Om het risico op brand te verminderen, dient men regel- en (en op te vangen) in tuinen en zones met gras, met een  matig na te gaan of er geen olie- en/of brandstoflekken zijn.  grootte in verhouding met de maaicapaciteit, in aanwezig- 18) Als u de tank moet ledigen, dient u dit in de open lucht  heid van een lopende bediener. te doen en wanneer de motor koud is. De aanwezigheid van toebehoren of specifieke inrichtingen  kan vermijden dat het gemaaide gras verzameld moet wor- E) TRANSPORT EN VERPLAATSING den  ofwel  voor  een  “mulching”  effect  zorgen,  waarbij  het  1)  Telkens  wanneer  de  machine  verplaatst,  geheven,  ver- gemaaide gras op het terrein wordt achtergelaten.
  • Seite 50 16. Steel De verpakking moet volgens de plaatselijk geldende be- 17. Versnelling (indien voorzien) palingen worden afgevoerd. 18.    H endel rem motor / snij-inrichting 19.  Hendel inschakeling aandrijving (indien voorzien) 1.1a Montage van de steel (Type “I”) 20. Snelheidsregelaar (indien voorzien) Herplaats het onderste deel van de steel (1) op de werkpo- sitie  en  bevestig  hem  aan  de  zijdelingse  steunen  van  het  Onmiddellijk ...
  • Seite 51: Het Gras Maaien

    1.2a Montage van de opvangzak (Type “I”)   OPMERKING  Indien de machine niet vooruitgaat met Steek het frame (11) in de zak (12) en haak alle plastieken  de bediening in de stand « » volstaat het de hendel in profielen vast (13), met behulp van een schroevendraaier,  de stand « » en vlak daarna weer in de stand « »...
  • Seite 52: Gewoon Onderhoud

    Til de achterste aflaatbeveiliging (1) op en druk in het mid- steel en een of meerdere bladeren bestaan. Als de blade- den om de vertanding (7) los te haken en de deflectordop  ren  volledig  afgemaaid  worden,  wordt  het  gazon  bescha- (5) te verwijderen. digd en zal het moeilijker teruggroeien. Over het algemeen, gelden de volgende aanwijzingen: 3.2 Starten van de motor • Modellen met versnellingshendel –    e en te laag maainiveau veroorzaakt scheuren en leegtes        O m de motor op te starten, brengt men de hendel van de  in het grasveld, en een “gevlekt” aspect”; versnelling naar de stand “Starter” (23). –    i n de zomer, moet het gras hoger gemaaid worden om te   ...
  • Seite 53 6)    O m  de  goede  werking  en  levensduur  van  de  machi- Versnippert  het  pas  gemaaide  gras  en  laat  het  achter  op  ne  te  verzekeren,  is  het  raadzaam  de  olie  an  de  mo- het terrein, als alternatief voor het opvangen in de op- tor ...
  • Seite 55 DICHIARAZIONE CE DI CONFORMITÁ (Direttiva Macchine 2006/42/CE, Allegato II, parte A) La Società: GGP Italy S.p.A. – Via del Lavoro, 6 – 31033 Castelfranco Veneto (TV) – Italy Dichiara sotto la propria responsabilità, che la macchina: Tosaerba con conducente a piedi / taglio erba a) Tipo / Modello Base MP1 504 b) Modello commerciale...
  • Seite 56 DICHIARAZIONE CE DI CONFORMITÁ (Direttiva Macchine 2006/42/CE, Allegato II, parte A) La Società: GGP Italy S.p.A. – Via del Lavoro, 6 – 31033 Castelfranco Veneto (TV) – Italy Dichiara sotto la propria responsabilità, che la macchina: Tosaerba con conducente a piedi / taglio erba a) Tipo / Modello Base MP1 554 b) Modello commerciale...
  • Seite 57 Déclaration CE de Conformité EC Declaration of Conformity EG-Konformitätserklärung EF- Samsvarserklæring EG-försäkran om överensstämmelse EF-overensstemmelseserklæring ES izjava o skla (Directive Machines 2006/42/CE, Annexe II, partie (Machine Directive 2006/42/EC, Annex II, part A) (Maschinenrichtlinie 2006/42/EG, Anhang II, Teil (Maskindirektiv 2006/42/EF, Vedlegg II, del A) (Maskindirektiv 2006/42//EG, bilaga II, de la) (Maskindirektiv 2006/42/EF, bilag II, del A) (Direktiva 2006/...
  • Seite 58 © by GGP ITALY spa • Soggetto  a  modifiche  senza  preavviso • Подлежи  на  промени  без  предупреждение • Moguće  su  promjene  bez  najave • Možnost  změn bez předešlého upozornění • Ret til ændringer forbeholdes • Kann ohne Vorankündigung geändert werden • Υπόκειται σε αλλαγές  χωρίς  προειδοποίηση • Subject  to  modifications  without  notice • Sujeto  a  modificaciones  sin  previo  aviso • Võimalikud  muudatused  ilma  ette teatamata • Voidaan tehdä muutoksia ilman ennakkoilmoitusta • Sujet à des modifications sans aucun préavis • Podložno promjenama  bez  prethodne  obavijesti • Előzetes  értesítés  nélkül  módosítható • Objekto  pakeitimai  be  perspėjimo • Var  tikt  mainīts  bez  iepriekšēja  brīdinājuma • Подлежи ...

Diese Anleitung auch für:

Mp1 554 series

Inhaltsverzeichnis