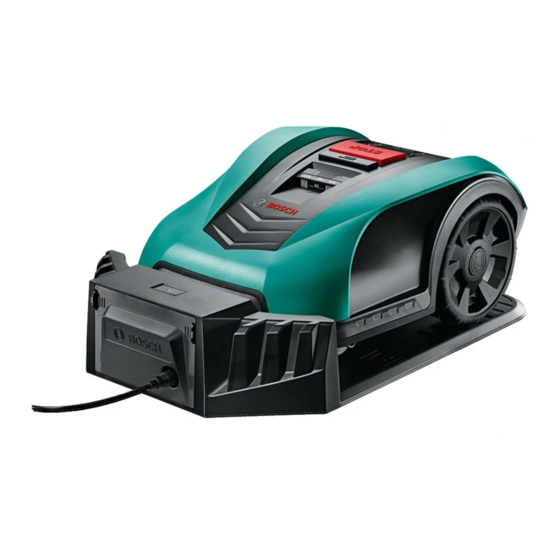
Herunterladen Inhalt Inhalt Diese Seite drucken

Werbung

Verfügbare Sprachen
  • DE

Verfügbare Sprachen

  • DEUTSCH, seite 12
Indego 350/400
Indego 350/400 Connect
Installation guide GB / DE / FR / NL / IT / ES / PT
Home made by you.

Werbung

Inhaltsverzeichnis
loading

Inhaltszusammenfassung für Bosch Indego 350

  • Seite 1 Indego 350/400 Indego 350/400 Connect Installation guide GB / DE / FR / NL / IT / ES / PT Home made by you.
  • Seite 2 GB | English DE | Deutsch FR | Français NL | Nederlands IT | Italiano ES | Español PT | Português...
  • Seite 3: Inhaltsverzeichnis

    Indego 350/400 Indego 350/400 Connect Installation guide English Home made by you. Table of contents Know your Indego If you prefer you can watch our installation video by Lawn preparation scanning the QR code here: Docking station placement Power connection...
  • Seite 4: Know Your Indego

    Dock indicator Rating label Garden symbol Anti theft sticker Mower ‘On’ indicator Height of cut button QR-Code B (Indego 350 Connect/400 Connect) Drive wheels Bumper Charging contacts (pins) Height of cut – release button QR-Code wird aktualisiert You have a 5 step process for installing your Indego. If you do not follow these steps the Indego will not work.
  • Seite 5: Lawn Preparation

    Lawn preparation First you will need to prepare the lawn. This is a key step Cut the main area for a successful installation. Please have a close look at of the lawn your lawn and any objects on it. to 40 mm. Remove foreign objects from the cutting area.
  • Seite 6: Docking Station Placement

    Determine the best place to position your docking station, point left where your Indego will return on its own to get charged. (so you can read the Bosch logo whilst standing outside the lawn area). Separate the mower from the docking station.
  • Seite 7: Power Connection

    Power connection Switch the Indego on. The isolator switch is located at the back left of the mower. Please note, if the mower is not We advise powering the docking station now so when you turned on, it will not charge. At this point, nothing will be shown on the display.
  • Seite 8: Perimeter Wire Layout

    Feed the perimeter wire Strip carefully Perimeter wire layout through the tubing on the docking station as 10–15 mm of insulation off the wire. indicated by the arrow on the docking station, until it appears on the other side. This part of the installation will most likely take you the longest amount of time. We will take you through it step by step.
  • Seite 9 Perimeter wire layout Marking permanent objects (1.2) <75 cm Mark out permanent objects you do not want the mower to run over, e.g. roots, ponds, rocks. Lay the perimeter wire around the lawn area This will prevent your Indego colliding with objects, or going straight into them.
  • Seite 10: Screen Settings And Mapping Your Lawn

    If you have purchased an Indego Connect you can finish your installation by setting up your account and completing the final steps through the Bosch Smart Gardening app – download now by scanning the QR code here: Set time and date.
  • Seite 11: Your Indego Is Intelligent

    Your Indego is intelligent How your Indego cuts efficiently Logicut Intelligent Cutting – During the first 3 full cuts your Indego ▶ learns the shape of the cutting area it is working in ▶ learns the location of the objects within it: trees, flower beds, ponds, etc. (only those objects that are marked out during installation are learnt) How your Indego learns the lawn shape Mapping the cutting area...
  • Seite 12 Home made by you. Inhaltsverzeichnis Wissenswertes zu Ihrem Indego Gerne können Sie den QR-Code einscannen und sich unser Vorbereitende Maßnahmen Installationsvideo anschauen: Platzieren der Ladestation Anschluss an das Stromnetz Verlegung des Begrenzungsdrahts Displayeinstellungen und Kartierung Intelligentes Mähen mit Bosch Logicut...
  • Seite 13 Ladekontakte Typschild Kontrollleuchte Anti-Diebstahlaufkleber Indikator „Gartenseite“ Einschalt-Kontrollleuchte Schnitthöhen-Einstelltaste QR-Code B (Indego 350 Connect/400 Connect) Antriebsräder Bumper Ladekontakte Schnitthöhen-Entsperrtaste QR-Code wird aktualisiert Die Installation Ihres Indego erfolgt in fünf Schritten. Bitte folgen Sie der Anleitung Schritt für Schritt. Andernfalls ist ein einwandfreies Arbeiten Ihres Indego nicht gewährleistet.
  • Seite 14: Vorbereitende Maßnahmen

    Vorbereitende Maßnahmen Zu Beginn ist die Rasenfläche vorzubereiten. Das ist Mähen Sie die Rasenfläche Grund voraussetzung für eine erfolgreiche Installation. auf maximal 40 mm. Bitte werfen Sie hierzu einen Blick auf die Rasenfläche und möglicher Hindernisse auf dieser. Entfernen Sie alle Fremdkörper von der Rasenfläche. Befreien Sie die Fläche von Steinen, Ästen, Kabeln und Metallgegenständen sowie allen weiteren Gegenständen, die beim Mähen auf der Rasenfläche stören würden.
  • Seite 15: Platzieren Der Ladestation

    Dabei ist es wichtig, dass die beiden Ladekontakte nach links zeigen Bestimmen Sie den optimalen Platz für die Ladestation, zu welcher der (sodass Sie das Bosch Logo lesen Indego zum Laden selbständig zurückkehrt. können, wenn Sie außerhalb der Rasenfläche stehen).
  • Seite 16: Anschluss An Das Stromnetz

    Anschluss an das Stromnetz Einschalten des Indego. Der Ein-/Ausschalter befindet sich hinten links unter dem Mäher. Bitte beachten Sie, dass der Mäher nicht lädt, Wir empfehlen an dieser Stelle, die Ladestation an das Stromnetz anzuschließen, solange er nicht eingeschaltet ist. Das Display bleibt in diesem Fall dunkel.
  • Seite 17: Verlegung Des Begrenzungsdrahts

    Führen Sie den Zirka 10–15 mm Verlegung des Begrenzungsdrahts Begrenzungsdraht am Drahtende abisolieren. durch den Kabelkanal unterhalb der Ladestation. Dieser Teil der Installation wird wahrscheinlich die meiste Zeit beanspruchen. Der Begrenzungsdraht muss rund um die Rasenfläche verlegt werden, um vorzugeben, wo der Indego mähen soll und wo nicht.
  • Seite 18: Verlegen Sie Den Begrenzungsdraht Rund Um Die Zu Mähende Rasenfläche

    Verlegung des Begrenzungsdrahts Ausgrenzen von Hindernissen (1.2). <75 cm Grenzen Sie Hindernisse aus, über die der Indego nicht fahren soll, wie z. B. Blumenbeete, Garten teiche, Verlegen Sie den Begrenzungsdraht rund um die zu mähende Rasenfläche Wurzeln etc. Dadurch wird vermieden, dass Ihr Indego permanent dagegen oder eventuell sogar hineinfährt.
  • Seite 19: Displayeinstellungen Und Kartierung Ihrer Rasenfläche

    Falls Sie einen Indego Connect gekauft haben, können Sie die Installation Einstellung von Zeit und Datum. abschließen, indem Sie Ihren Account in der Bosch Smart Gardening App anlegen und dort die letzten Schritte der Installation durchführen – laden Sie die App jetzt herunter, indem Sie den QR-Code hier scannen: Bitte drücken Sie vor dem Kartieren...
  • Seite 20: Intelligentes Mähen Mit Bosch Logicut

    Intelligentes Mähen mit Bosch Logicut Wie Ihr Indego effizient mäht und arbeitet Während der ersten 3 kompletten Mähzyklen lernt Ihr Indego ▶ die Form der Rasenfläche kennen sowie ▶ die Lage der ausgegrenzten Hindernisse auf dieser: Bäume, Blumenbeete, Teiche etc. (nur ausgegrenzte Hindernisse werden gespeichert) Wie Ihr Indego die Form der Rasenfläche erfasst...
  • Seite 21 Indego 350/400 Indego 350/400 Connect Guide d’installation Français Home made by you. Table des matières Connaissez votre Indego Si vous préférez, vous pouvez regarder la vidéo d’installation Préparation de la pelouse en scannant le QR code suivant : Placement de la station d’accueil Branchements Disposition du câble périphérique...
  • Seite 22 Voyant base Indicateur « tondeuse en allumée » Logo « jardin » Bouton « réglage hauteur de coupe » QR Code « B » (Indego 350 Connect/400 Connect) Roues motrices Par-chocs Points de charge Bouton « mettre hauteur de coupe QR-Code wird au maximum »...
  • Seite 23 Préparation de la pelouse Vous devez préalablement préparer votre pelouse. Tondre la zone C’est l’une des étapes clés pour une installation réussite. principale Veuillez à inspecter votre pelouse et tous objets présents à 40 mm. dessus. Enlevez tous les objets présents dans la zone de coupe.
  • Seite 24 Placement de la station d’accueil La station d’accueil de votre Indego doit être placée sur un côté de la pelouse, au niveau de l’herbe préalablement tondu à son minimum. Il est important que les pointes d’épingle de la station d’accueil Déterminer la meilleur place pour positionner la station montrent la gauche d’accueil, où...
  • Seite 25: Connection De L'alimentation

    Connection de l’alimentation Allumez l’Indego. Le bouton est situé à l’arrière, à gauche, sous de la tondeuse. Notez, que si la tondeuse n’est pas Nous conseillons de faire fonctionner la station d’accueil dès maintenant allumé, elle ne chargera pas. Du coup, rien ne s’affichera sur l’écran HMI.
  • Seite 26 Faites passer le câble Dénudez soigneusement Disposition du câble périphérique périphérique par le tuyau 10-15 mm aux extrémités du fil. situé sous la station d’accueil comme indiqué par la flèche, jusqu’à ce qu’il apparaisse de l’autre côté. C’est la partie d’installation qui vous prendra très probablement le plus de temps. Mais nous vous expliquerons la démarche étape par étape.
  • Seite 27 Disposition du câble périphérique La délimitation des obstacles doit être à au moins 75 cm <75 cm du câble périphérique (1.2). Délimitez les obstacles permanents que vous Disposer le câble périphérique autour de la zone à tondre ne voulez pas que la tondeuse écrase par exemple des racines, des étangs, des roches.
  • Seite 28 Indego tondre la pelouse pour Nous recommandons d’enregistrer votre tondeuse dans vous ! Et appréciez ! « My Bosch » via le site Internet MyBosch-Tools.com pour récupérer votre PIN plus rapidement. ▶ Si vous possédez une Indego Connect vous pouvez...
  • Seite 29 Votre Indego est intelligente La coupe intelligente Logicut - Comment votre Indego coupe efficacement ? Comment tond votre Indego ▶ Elle apprend la forme de la zone de coupe dans laquelle elle évolue ▶ Elle apprend l’emplacement des obstacles : les arbres, des parterres, des étangs etc (seul les obstacles définis pendant l’installation sont enregistrés).
  • Seite 30 Indego 350/400 Indego 350/400 Connect Installatiegids Nederlands Home made by you. Inhoudsopgave Ken uw Indego Bij voorkeur kunt u onze installatievideo bekijken door de Tuin voorbereiding volgende QR-code te scannen: Basisstation plaatsen Stroomaansluiting Begrenzingsdraad uitleggen Scherminstellingen Uw Indego is intelligent...
  • Seite 31 Huisindicator Beoordelingslabel Tuinsymbool Anti-diefstalsticker Maaier ‚aan‘ indicator Hoogte van de maaiknop QR Code „B“ (Indego 350 Connect/400 Connect) Wielaandrijving Bumper Oplaadcontact (pinnen) Maaihoogte – ontgrendelingsknop QR-Code wird aktualisiert De installatie van uw Indego bestaat uit 5 stappen. Als u deze stappen niet volgt zal uw Indego niet werken.
  • Seite 32 Gazon voorbereiding Allereerst is het belangrijk om uw gazon goed voor Maai het belangrijkste te bereiden. Dit is erg belangrijk voor een succesvolle gebied van uw gazon installatie. Werp een korte blik op uw gazon en tot een hoogte van 40 mm. eventuele voorwerpen die erin staan.
  • Seite 33: Indien Mogelijk Zorg Ervoor Dat U Het Basisstation Niet Plaatst In 45 °C

    Indego zelf kan terugkeren om op te laden. basisstation naar links wijzen (zodat u het Bosch logo kunt lezen terwijl u buiten het tuingebied staat). Haal de maaier uit het basisstation. Plaats het basisstation op een vlakke ondergrond.
  • Seite 34: Stroomaansluiting

    Stroomaansluiting Zet de Indego aan. De isolatorschakelaar bevindt zich aan de linker achterzijde van de maaier. Let op: als de maaier niet Wij adviseren om het basisstation direct op te laden. Wanneer de is ingeschakeld, zal deze niet opladen. Op dit punt, wordt er nog niets weergegeven op de HMI display.
  • Seite 35: Begrenzingsdraad Leggen

    Sluit de begrenzingsdraad aan Strip zorgvuldig Begrenzingsdraad leggen via de buis van het basisstation zoals aangegeven, 10 – 15 mm isolatie van de draad. tot deze aan de andere zijde verschijnt. Dit installatiedeel neemt waarschijnlijk het meeste tijd in beslag. Maar we zullen u er stap voor stap doorheen begeleiden.
  • Seite 36 Begrenzingsdraad leggen Het markeren van permanen- te objecten die ten minste <75 cm 75 cm van de begrenzings- draad (1,2) liggen. Leg de begrenzingsdraad rond het gazon Markeer de permanente objecten die u niet wilt dat de maaier maait, zoals bijvoorbeeld en objecten (4.8).
  • Seite 37 Indien u een Indego Connect heeft aangekocht kunt u uw installatie Selecteer een datum en tijd. beëindigen door uw account aan te maken en de laatste stappen in de Bosch Smart Gardening App te voltooien – download nu hier en scan de QR code. Druk op de  toets om het gazon in...
  • Seite 38 Uw Indego is intelligent Logicut Intelligent Cutting – Hoe uw Indego efficiënt maait. Om te maaien, ▶ registreert uw Indego de vorm van het maai-gebied waar het in werkt ▶ registreert uw Indego de locatie van de objecten daarbinnen: bomen, bloembedden, vijvers enz.
  • Seite 39 Indego 350/400 Indego 350/400 Connect Guida di installazione Italiano Home made by you. Indice Impari a conoscere il suo Indego Se preferisce guardare il nostro video su come fare lʼinstallazione, Preparazione del prato faccia la scansione del codice QR: Posizionamento della stazione di ricarica...
  • Seite 40: Stazione Di Ricarica

    Etichetta antifurto Simbolo raffigurante il giardino Indicatore di tensione di rete «On» Altezza pulsante taglio Codice QR «B» / QR Code «B» (Indego 350 Connect/400 Connect) Ruote motrici Paracolpi QR-Code wird Contatti (pin) di ricarica aktualisiert Altezza pulsante di rilascio Sono 5 gli step nel processo di installazione del suo Indego.
  • Seite 41 Preparazione del prato Prima di tutto va preparato il prato, passo fondamentale Tagli il prato ad per unʼinstallazione corretta. Osservi attentamente il suo unʼaltezza giardino e gli oggetti che si trovano al suo interno. di 40 mm. Rimuova gli oggetti estranei dallʼarea di taglio.
  • Seite 42 Determini il punto migliore dove posizionare la stazione la stazione siano rivolti verso sinistra di ricarica, a cui il suo Indego tornerà per ricaricarsi. (in questo modo potrà leggere il logo Bosch stando al di fuori dell’area di prato). Separi lʼapparecchio dalla stazione di ricarica.
  • Seite 43: Connessione Alla Rete

    Connessione alla rete Accenda Indego. Lʼinterruttore è posizionato nella parte posteriore sinistra. Eʼ importante notare che, Consigliamo di accendere ora la stazione di servizio così che quando se il rasaerba non è acceso, non si ricaricherà. A questo punto non apparirà nulla sulla inter- lei avrà...
  • Seite 44: Disposizione Del Filo Perimetrale

    Faccia passare il cavo perimetrale Spelli con cura Disposizione del filo perimetrale attraverso il tubo nella parte inferiore della stazione 10 –15 mm di rivestimento dal cavo. di ricarica, come indicato dalla freccia sulla stazione stessa, fino a farlo uscire dalla parte opposta. Questa parte dellʼinstallazione sarà...
  • Seite 45 Disposizione del filo perimetrale Come delimitare oggetti per- manenti che sono distanti <75 cm almeno 75 cm dal filo peri- metrale (1.2). Disponga il filo perimetrale attorno all’area da tagliare Delimiti oggetti permanenti dove non vuole che passi il rasaerba come per es. radici, e agli oggetti (4.8).
  • Seite 46 Se ha acquistato un Indego Connect può completarne l’installazione Selezione di ora e data. configurando il suo account e il prodotto tramite l’applicazione Bosch Smart Gardening – la scarichi ora scannerizzando il QR code che trova qui. Prema il pulsante  per mappare il...
  • Seite 47 Il suo Indego è intelligente Il Taglio Intelligente Logicut – come il suo Indego taglia il prato in modo efficiente. Per tagliare Indego ▶ apprende la forma dellʼarea di taglio nella quale lavora; ▶ apprende la dislocazione degli oggetti al suo interno: alberi, aiuole di fiori, ecc.
  • Seite 48 Indego 350/400 Indego 350/400 Connect Guía de instalación Español Home made by you. Indice de contenidos Conoce tu Indego Si lo prefieres puedes ver cómo instalarlo escaneando Prepara tu jardín el código QR aquí: Colocación de la base de carga Conectar a la red Disposición del cable perimetral...
  • Seite 49: Base De Carga

    Pegatina antirrobo Indicador de la base Indicador de encendido Símbolo de jardín Botón de altura de corte Código QR «B» (Indego 350 Connect/400 Connect) Ruedas Parachoques Contactos para carga (pins) Altura de corte - botón de desbloqueo QR-Code wird aktualisiert Debes seguir 5 pasos para instalar tu Indego.
  • Seite 50 Prepara tu jardín Primero necesitarás preparar el jardín. Esto es funda- Corta la hierba hasta mental para una instalación correcta. Echa un vistazo al una altura jardín y a los objetos situados en su interior. de 40 mm. Quita objetos extraños del área de corte.
  • Seite 51 Elige el mejor lugar para colocar tu base de carga, base señalen a la izquierda a la cuál Indego volverá para poder recargarse. (por lo que podrás leer el logo Bosch mientras estás fuera del área de corte). Separa el cortacésped de la base de carga.
  • Seite 52: Conector De Red

    Conector de red Enciende el Indego. El interruptor de aislamiento está situado en la parte inferior izquierda del cortacésped. Ten en Te aconsejamos conectar la base de carga ahora, así tu cortacésped estará cuenta que si el cortacésped no está encendido no cargará.
  • Seite 53 Coloca el cable perimetral Pela cuidadosamente Disposición del cable perimetral a través del riel de la base de carga según 10–15 mm de cable. indica la flecha situada en la base, hasta que aparezca por el otro lado. Esta es la parte de la instalación que más tiempo te llevará. Pero te indicaremos cómo hacerlo paso a paso.
  • Seite 54 Disposición del cable perimetral Cablea objetos que estén al menos a 75 cm del <75 cm perímetro del jardín (1.2). Rodea objetos permanentes con los que no Coloca el cable en el perímetro del área de corte quieres que choque el cortacésped: raíces, fuentes, piedras.
  • Seite 55 Download Si has comprado un Indego Connect puedes terminar tu instalación creando tu cuenta y completando los últimos pasos a través de la app Bosch Smart Gardening – descárgatela ahora escaneando el Selecciona día y hora. código QR aquí: Presiona la tecla  para mapear el...
  • Seite 56 Tu Indego es inteligente. Corte inteligente Logicut – Cómo corta tu Indego de forma eficiente. Para segar, tu Indego ▶ aprende la forma del área de césped que va a cortar ▶ aprende la ubicación de los objetos en el jardín: árboles, parterres, estanque, etc.
  • Seite 57 Indego 350/400 Indego 350/400 Connect Guia de instalação Português Home made by you. Índice Conheça o seu Indego Se você prefere, pode ver o nosso video de instalação Prepare o seu jardim escaneando o código QR aquí: Colocação da estação de carregamento Conexão à...
  • Seite 58 Indicador da doca Indicador de acendimento Símbolo de jardim do cortador de relva Botão da altura do corte Código QR B (Indego 350 connect/400 Connect) Rodas QR-Code wird Pára-choques Contatos para carga (pins) aktualisiert Altura de corte - botão de desbloqueio Debe seguir 5 passos para instalar o seu Indego.
  • Seite 59 Prepare o seu jardim Primeiro tem que preparar a sua relva. Isto é um passo Corte a zona principal fundamental para uma instalação correta. Por favor olhe da relva atentamente à relva e quaisquer objetos nela. à 40 mm. Retire objetos estranhos da área de cortar.
  • Seite 60 Escolha o melhor lugar para colocar a estação de carga da estação de carregamento carregamento à qual Indego voltará para recarregar. apontem à esquerda (para poder leer o logo Bosch encontrando-se fora da relva). Separe o corta-relvas da estação de carregamento. Coloque a estação a nível do chão.
  • Seite 61 Conexão à rede Ligue o Indego. O interruptor de isolamento está situado na parte inferior esquerda do corta-relvas. Não se esqueça que Aconselhamos conectar a estação de carregamento agora para se o Indego não está ligado, não pode carregar. Neste momento, ainda não aparecerá...
  • Seite 62 Pase o cabo de perímetro Tire com cuidado Disposição do cabo de perímetro através dos tubos da estação de carregamento, 10-15 mm de isolamento do cabo. conforme indicado pela seta na estação, até que ele saia do outro lado. Esta é a parte da instalação que provavelmente demorará mais tempo. Mas mostra- remos-lhe como fazer-lo passo a passo.
  • Seite 63 Disposição do cabo de perímetro A marcação de objetos permanentes que estejam <75 cm pelo menos à 75 cm do cabo de perímetro (1.2). Coloque o cabo de perímetro ao redor da área da relva Marque objetos permanentes com os que não quiser que o seu corta-relvas choque e dos objetos(4.8).
  • Seite 64 O corta relva não funcionará sem o seu PIN. Se você possui um modelo não-Connect e você perdeu o seu código PIN pessoal, você terá que entrar em contato com a Bosch (ver dados de contacto do „Serviço Pós- Desfrute ver o Indego cortar Venda“ no manual).
  • Seite 65 O seu Indego é inteligente. Como o seu Indego corta de maneira eficiente: Corte inteligente Logicut – Para cortar a relva, Indego ▶ aprende a forma da área de cortar ▶ aprende a localização dos objetos dentro dela: árvores, canteiros de flores, lagos etc.

Diese Anleitung auch für:

Indego 400Indego 350 connectIndego 400 connect

Inhaltsverzeichnis