WimTec Santec PROOF Montage- Und Bedienungsanleitung
Spülkasten slk

Verwandte Anleitungen für WimTec Santec PROOF


Inhaltszusammenfassung für WimTec Santec PROOF
- Seite 1 PROOF - Spülkasten SLK Montage- und Bedienungsanleitung Installation and operating instructions Instrucciones para el montaje y el funcionamiento Guia de Instalação e instruções operação...
-
Seite 2: Notes On Installation
Bei der Planung und Errichtung When planning and installing von Sanitäranlagen sind die sanitary systems, the relevant entsprechenden örtlichen, local, national, and internatio- nationalen und internationalen nal standards and regulations Normen und Vorschriften zu must be complied with! beachten! Allgemeine Installations- bedingungen unter www.wimtec.com. - Seite 3 Instrucciones para el montaje Instruções para a Instalação Sistema electrónico por Control retréte infrarrojo sin infra vermelhos para contro- contacto para control automa- lo automático as cisternas tico y control las cisternas de SanTec SLK. Conveniente para SanTec SLK. Adequado para montar en SanTec FIX WC instalação em elemento de elementos de montaje (art.
- Seite 4 Technische Daten, Technical Specifications, Datos técnicos, Especificações técnicas Einbaumaße in cm - 20 min. 135 51,5 Mounting dimensions in cm Dimensiones de montaje en cm dimensões de montagem em cm 0 - 25 Externe Versorgung: 12V AC / 50Hz Leistung: durchschnittlich 1 VA, Spitze 15 VA Versorgungsleitung: 2 x 1,5mm...
- Seite 5 Technische Daten, Technical Specifications, Datos técnicos, Especificações técnicas External supply: 12V AC / 50Hz Power consumption: 1 VA (average), 15 VA (peak) Feed line: 2 x 1,5mm at cable lenghts between 50-100m (H05VV-F 2X1,5) 2 x 1 mm at cable lenghts up to 50m (H03VV-F 2X1,0) Battery supply: 2 x 6V lithium (type CRP2P) Battery life:...
- Seite 6 Technische Daten, Technical Specifications, Datos técnicos, Especificações técnicas Alimentação exterior: 12V AC / 50Hz Consumo: 1 VA (médio, 15 VA (max.) Cabo: 2 x 1,5 mm2 para comprimento de cabo entre 50 – 100m ( HO5VV-F 2 x 1,5) 2 x 1 mm2 para comprimento de cabo até 50 m (HO3VV –...
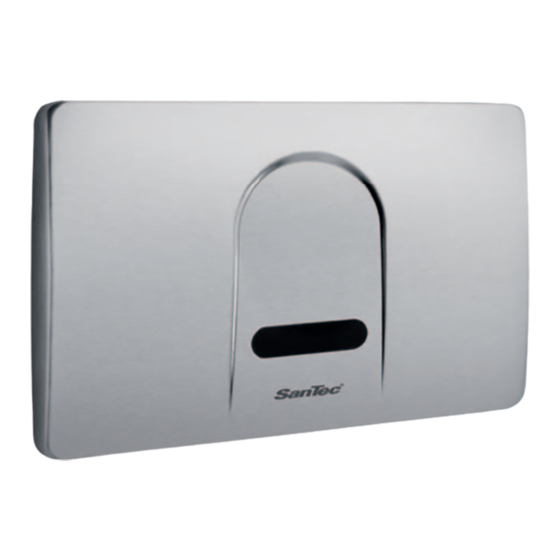
- Seite 7 Art.Nr.: 231 137 Montagerahmen Mounting frame Art.Nr.: 408 973 Elektronikplatte SanTec PROOF Electronic panel SanTec PROOF Art.Nr.: 104 646 - Edelstahl / stainless steel Einstellmöglichkeiten für Spülkasten SLK oder UP 320 direkt auf der Elektronikplatte, für Betrieb mit Batterie oder Netzmodul.
- Seite 8 Montagebeispiel, Example of installation, Ejemplo de montaje, Exemplo de montagem 230V/50Hz...
- Seite 9 Montagebeispiel, Example of installation, Ejemplo de montaje, Exemplo de montagem 1 12V Versorgungsleitung (2x1,5mm ) - max. Leitungslänge 100m 2 Wasserzulauf 3 Verkabelung für Haltegriff mit Drucktaste 4 Unterputzdose für Netzteil (Einbauort beliebig) 5 Trafo 12V (Zubehör) 6 Verkabelung für Taster (min 2 x 0,5 mm 7 Taster (optional) 1 12V feed line (2x1,5mm ) - maximum cable lenght 100m...
- Seite 10 Anschlusselemente SanTec PROOF 12V Elektronikplatte von hinten und 12V Netzeil (Zubehör) Backside of electro- nic panel and 12V power supply unit (accessory) Visto reverso de la placa electronica y 12 V. modulo de red (accessorio) Parte traseira do painel electrónico e unidade de alimen- tação a 12V...
- Seite 11 12 Access 12V for SanTec PROOF 11 Netzanschluss 230V / 50 Hz (supply at mains operation) (für Versorgung bei Netzbetrieb) 13 Battery case at SanTec PROOF 6V 12 Ausgang 12V für SanTec PROOF (für Versorgung bei Netzbetrieb) 13 Batteriefach bei SanTec PROOF 6V...
- Seite 12 Montage, Installation, Montaje, Instalação SanTec PROOF 12V + 6V...
- Seite 13 Montage, Installation, Montaje, Instalação Standard-Lagerbock aus Spülkasten entfernen Lagerbock mit integriertem Motorheber einsetzen Distanzbolzen und Spritzschutzplatte montieren, das Kabel vom Motorheber bzw. das Stromversorgungskabel (bei 12V Version) herausführen Remove standard bearing block out of the flushing cistern. Insert bearing block with integrated motor lifter. Install distance bolt and splash guard board;...
- Seite 14 Montage, Installation, Montaje, Instalação SanTec PROOF 12V...
- Seite 15 Montage, Installation, Montaje, Instalação Während Anschlussarbeiten Anlage stromlos schalten! 1 Externes Netzteil 230V/12V/50Hz (als Zubehör Art.Nr. 231120 erhältlich). Maximal zulässige Ausgangsspannung 18V/50Hz (Leerlauf). Die Verwendung “elektronischer Trafos” (z.B. aus der Lichttechnik) ist unzulässig. 1aBei Nutzung von CWS Cleanset externes Netzteil 230V/24V=stabilisiert (als Zubehör Art.Nr. 105 261 erhältlich) verwenden 2 Stromversorgung 230V herstellen 3 Die Verbindungsleitung Steuerung - Trafo muss mit Kabeln (bis 50m H03VV-F2X1.0, darüber H03VV-F2X1.5)
- Seite 16 Montage, Installation, Montaje, Instalação SanTec PROOF 6V...
- Seite 17 Montage, Installation, Montaje, Instalação 1 Stecker des Batteriemoduls anschließen 2 Kabel von Motorheber anschließen 3 Frontplatte einhängen und mit den beiden seitlichen Schrauben sichern 1 Connect cable form the battery case 2 Connect cable from the motor lifter 3 Install front panel and fix it with the safety screws on both sides. 1 Connect cable form the battery case 2 Connect cable from the motor lifter 3 Install front panel and fix it with the safety screws on both sides.
-
Seite 18: Funktionsbeschreibung
Funktionsbeschreibung Signal-Symbol (nur bei Variante mit Netzbetrieb) erscheint nach Benützung zur besseren Erkennbarkeit der manuellen Auslösefunktion für den Benutzer. (max. Reichweite des Nahreflexes: 3 cm) Funktion Verweilt ein Benutzer länger als 10 s, so wird beim Verlassen des Aktivbereichs automatisch (DIP-Schalter 1) eine Spülung ausgelöst. (Spülung kann wahlweise mit Magnetheber, Motorheber, Magnetventil,... - Seite 19 Funktionsbeschreibung Anschluss für Versorgung bei Netzbetrieb Anschluss für externen Lüfter (max. 24V, 15 mA) Nachlaufzeit 10 Min. Anschluss für CWS CleanSeat Anschluss für externen Taster zB Stützklappgriff mit eingebautem Taster Mittels Dip-Schalter können die verschiedenen Funktionen individuell eingestellt werden. Schalter 1 - Spülung Stellung “ON”: Automatische Spülung nach Benützung Stellung “OFF”: Keine automatische Spülung - nur “manuelle”...
- Seite 20 Description of functions Symbol (only at mains ope- rated variant) appears after use for better recognisability of the manual release for the use (max. active range at close range reflex: 3 cm) Function Abides a user more than 10 secs., an automatic flushing will be released (DIP-Switch 1) when the user leaves the active range.
- Seite 21 Description of functions Connection at mains supply Connection for external ventilator (max. 24V, 15 mA) Follow-up time 10 Min. Connection for CWS CleanSeat Connection for external button i.e. prop handle with integrated push button Via Dip-Switch different functions can be individual adjusted. Switch 1 - Flushing position “ON”: Automatic flushing after utilisation position “OFF”: No automatic flushing - only “manual”...
- Seite 22 Descripción de los functionamientos Symbol (only at mains ope- rated variant) appears after use for better recognisability of the manual release for the use (max. active range at close range reflex: 3 cm) Function Abides a user more than 10 secs., an automatic flushing will be released (DIP-Switch 1) when the user leaves the active range.
- Seite 23 Descripción de los functionamientos Connection at mains supply Connection for external ventilator (max. 24V, 15 mA) Follow-up time 10 Min. Connection for CWS CleanSeat Connection for external button i.e. prop handle with integrated push button Via Dip-Switch different functions can be individual adjusted. Switch 1 - Flushing position “ON”: Automatic flushing after utilisation position “OFF”: No automatic flushing - only “manual”...
- Seite 24 Descrição de Funçãos Symbol (only at mains ope- rated variant) appears after use for better recognisability of the manual release for the use (max. active range at close range reflex: 3 cm) Function Abides a user more than 10 secs., an automatic flushing will be released (DIP-Switch 1) when the user leaves the active range.
- Seite 25 Descrição de Funçãos Connection at mains supply Connection for external ventilator (max. 24V, 15 mA) Follow-up time 10 Min. Connection for CWS CleanSeat Connection for external button i.e. prop handle with integrated push button Via Dip-Switch different functions can be individual adjusted. Switch 1 - Flushing position “ON”: Automatic flushing after utilisation position “OFF”: No automatic flushing - only “manual”...
- Seite 26 Funktion, Function, Funcionamiento, Função Automatische Spülung Berührungslose Spülung Optionale Spülung durch Optionale beim Wegtreten durch Annäherung der Tastendruck Zwischenspülung durch (abschaltbar) Hand an den Anschluss von einem Mindestverweilzeit Sensor Stützgriff mit inte- 10 s griertem Taster Automatic flushing after Contactless manual Optional flush by Optional intermediate leaving the WC...
- Seite 27 Notizen...
- Seite 28 WIMTEC Elektronische Steuerungs- u. Meßgeräte GmbH p: A - 3325 Ferschnitz, Freidegg 50, AUSTRIA t: +43 (0) 7473 5000 f: +43 (0) 7473 5000 - 500 m: verkauf@wimtec.com i: www.wimtec.com...