Inhaltsverzeichnis
Werbung
Verfügbare Sprachen
Verfügbare Sprachen
Werbung
Inhaltsverzeichnis

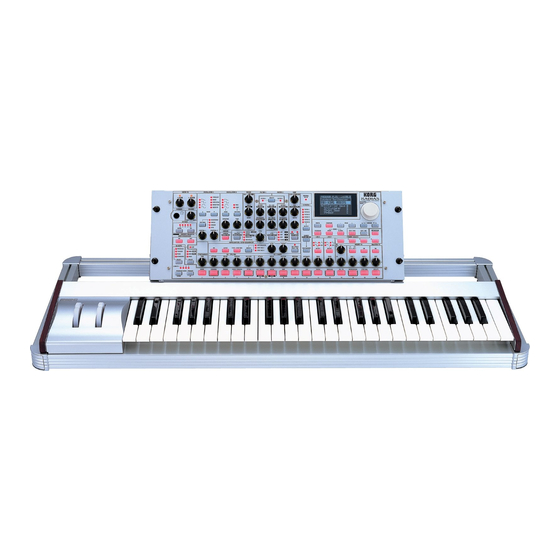
Inhaltszusammenfassung für Korg RD-KB
- Seite 1 RD-KB Owner’s manual Manuel d’utilisation Bedienungsanleitung...
-
Seite 2: Inhaltsverzeichnis
RD-KB – Manuel d’utilisation.............. 8 Eléments du RD-KB......................9 A propos des accessoires fournis ..................9 Affixer le crochet au RADIAS-R ..................9 Assembler le RADIAS-R et le RD-KB ................10 Autres précautions ......................12 Fiche technique ......................12 RD-KB – Bedienungsanleitung ............13 Bauteile des RD-KB ....................... -
Seite 3: Rd-Kb Owner's Manual
RD-KB owner’s manual Thank you for purchasing the RD-KB. The RD-KB is a dedicated keyboard for the RADIAS-R. To ensure trouble- free enjoyment, please read this manual carefully and use the product as directed. Please read this before you begin assembly... -
Seite 4: Parts Of The Rd-Kb
First apply the double-sided tape to the The cable that plugs into this connector is the link be- handle, and then apply the handle to the tween the RADIAS keyboard ( RD-KB ) and the RADIAS RADIAS-R. synthesizer module ( RADIAS-R ). With this cable con- Before you attach the handle, carefully wipe the nected, you’ll be able to use the keyboard, PitchBend... -
Seite 5: Assembling The Radias-R And Rd-Kb
Assembling the RADIAS-R and RD-KB Assembling the RADIAS-R and Raising the RADIAS-R RD-KB Grasp the handle with your left hand and raise the RADIAS-R to the upright position. Caution notes: In order to assemble the system correctly and safely, please observe the following points. -
Seite 6: Connecting The Cable
Korg KAOSS Pad, Korg padKONTROL, or one of the Korg ElecTribes. If you chose to install the accessory shelf, you will need to position the RADIAS- R toward one end of the keyboard, rather than in the center. -
Seite 7: Other Cautions
If you need to transport the system after assembling it, you must fold down the RADIAS-R and lock it to the RD-KB. You must also remove the accessory shelf. • Disassembly If you need to disassemble the RADIAS-R, reverse the steps in the Assembly section. -
Seite 8: Rd-Kb - Manuel D'utilisation
RD-KB – Manuel d’utilisation Nous vous remercions d’avoir choisi le RD-KB. Le RD-KB est un clavier dédié pour le RADIAS-R. Afin de pouvoir exploiter l’instrument sans le moindre problème, veuillez lire attentivement ce manuel d’utilisa- tion et suivre chacune de ses consignes. -
Seite 9: Eléments Du Rd-Kb
4. Prise TO RADIAS-R Le câble branché à cette prise constitue le lien entre le clavier RADIAS (RD-KB) et le module synthétiseur RA- DIAS (RADIAS-R). Quand ce câble est branché, vous pouvez utiliser le clavier, la molette PitchBend et la mo- lette de modulation du clavier RADIAS (RD-KB) pour piloter le RADIAS-R. -
Seite 10: Assembler Le Radias-R Et Le Rd-Kb
RD-KB – Manuel d’utilisation Assembler le RADIAS-R et le Soulever le RADIAS-R RD-KB Saisissez le crochet de la main gauche et relevez le RADIAS-R en position droite. Précautions pour l’assemblage Observez les points suivants pour assurer l’assemblage correct du système. - Seite 11 Le Branchez le câble fourni à la prise TO RADIAS-R RADIAS-R est maintenant bloqué par le RD-KB. du RD-KB et à la prise TO KYBD en face arrière du RADIAS-R. Le câble fourni est uniquement destiné à brancher le TO RADIAS-R à...
-
Seite 12: Autres Précautions
Evitez de placer l’appareil sur un support instable ou de l’adosser à un mur. • Transport Pour transporter le système après l’assemblage, abaissez le RADIAS-R et verrouillez-le avec le RD-KB. Enlevez en outre l’étagère accessoire. • Démontage Pour démonter le RADIAS-R, inversez les opérations d’assemblage. -
Seite 13: Rd-Kb - Bedienungsanleitung
RD-KB – Bedienungsanleitung Vielen Dank, dass Sie sich für den Kauf eines RD-KB entschieden haben. Das RD-KB ist eine speziell für den RA- DIAS-R entwickelte Tastatur. Bitte lesen Sie sich diese Anleitung vollständig durch und benutzen Sie das Produkt nur in der angegebenen Weise. -
Seite 14: Bauteile Des Rd-Kb
4. TO RADIAS-R-Buchse ken wieder anbringen zu können. Das Kabel, das man hier anschließt, stellt die Verbin- dung zwischen der RADIAS-Tastatur (RD-KB) und dem RADIAS-Synthesizermodul (RADIAS-R) dar. Nach Anschließen dieses Kabels, können Sie den RADI- AS-R über die Tastatur sowie das PitchBend- und Mo-... -
Seite 15: Zusammenbau Des Radias-R Und Der Rd-Kb
Zusammenbau des RADIAS-R und der RD-KB Zusammenbau des RADIAS-R Anheben des RADIAS-R und der RD-KB Halten Sie mit der linken Hand den Haken fest und stellen Sie den RADIAS-R aufrecht. Vorsicht beim Zusammenbau Im Sinne eines ordnungsgemäßen und sicheren Zusam- menbaus müssen Sie folgende Punkte beachten. -
Seite 16: Anschließen Des Kabels
Zubehörablage, die Sie vielleicht ebenfalls in- stallieren möchten. Auf dieser ebenen Plattform kann z.B. ein Effektgerät, ein Controller oder ein Instrument vom Schlage eines Korg KAOSS Pad, Korg padKON- TROL bzw. Korg ElecTribe abgestellt werden. Vor An- bringen der Zubehörablage müssen Sie den RADIAS-R zu einer Außenseite der Tastatur schieben. -
Seite 17: Weitere Vorsichtsmaßnahmen
• Transport Vor dem Transport des Systems nach dem Zusammen- bau müssen Sie den RADIAS-R absenken und an der RD-KB verriegeln. Außerdem muss die Zubehörablage entfernt werden. • Abbau Zum Entfernen des RADIAS-R gehen Sie bitte in umge- kehrter Zusammenbaureihenfolge vor. - Seite 18 Garantie des Herstellers oder Importeurs hinfällig lassen werden. Bitte bewahren Sie diese Quittung als Kaufbeleg auf, da andernfalls das Produkt von der Garantie des Herstellers oder Importeurs ausgeschlossen werden kann. 4015-2 Yanokuchi, Inagi-city, Tokyo 206-0812 Japan 2005 KORG INC.


