Varytec ARC One Bedienungsanleitung
Inhaltsverzeichnis
Verfügbare Sprachen
Verfügbare Sprachen
Inhaltsverzeichnis

Verwandte Anleitungen für Varytec ARC One


Inhaltszusammenfassung für Varytec ARC One
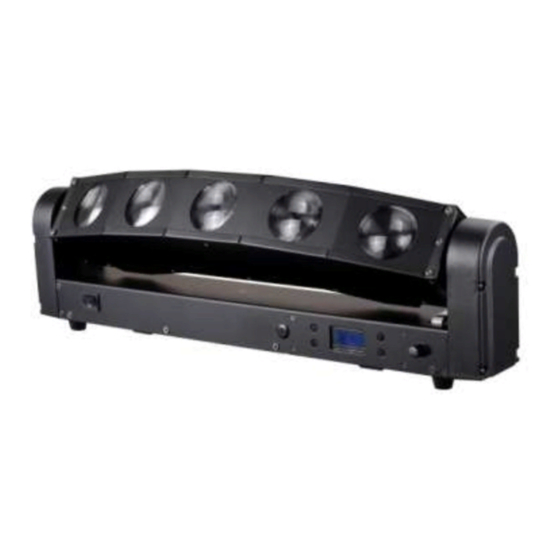
- Seite 1 Bedienungsanleitung / Manual ARC One...
-
Seite 2: Inhaltsverzeichnis
Inhaltsverzeichnis Sicherheitshinweise.......................... 3 1.1. Hinweise für den sicheren und einwandfreien Gebrauch ............3 Einführung ............................4 2.1. Packungsinhalt: ........................4 Einrichten ............................4 3.1. Installation ..........................4 3.2. Einstellungen ........................... 5 3.3. Verkabelung..........................5 3.3.1. DMX Kabel ........................6 Bedienung des Menüs........................6 4.1. -
Seite 3: Sicherheitshinweise
1. Sicherheitshinweise • Dieses Gerät ist nur für die Verwendung in geschlossenen Räumen (nicht im Freien) erlaubt. • Es erlischt der Garantieanspruch, bei manuellen Veränderungen des Gerätes. • Nur von ausgebildeten Fachkräften reparieren lassen. • Benutzen Sie nur Sicherungen desselben Typs und nur Originalteile als Ersatzteile. -
Seite 4: Einführung
Sicherheitsnormen montiert sein. 2. Einführung Vielen Dank, dass sie sich für den ARC One entschieden haben. Entpacken sie das Gerät vorsichtig und kontrollieren sie, dass alle Komponenten vorhanden sind. Bitte vergewissern sie sich dass ihr Paket in gutem Zustand ist und keine Beschädigungen vorweist. Falls doch informieren sie das Transportunternehmen umgehend und bewahren sie die Verpackung auf. -
Seite 5: Einstellungen
3.2. Einstellungen Funktionen der Bedienelemente: MENU Wechselt das Funktionsmenü Wechselt eine Funktionsseite nach oben Bei Zahlenwerten: erhöht diese Down Wechselt eine Funktionsseite nach unten Bei Zahlenwerten: verringert diese ENTER Bestätigt eine getätigte Änderung im Menü 3.3. Verkabelung DMX IN Hier können sie ein DMX Kabel einstecken. IM Master Slave Modus kommt das Kabel von ihrem Mastergerät, im DMX Control Modus kommt das Kabel von ihrer Konsole. -
Seite 6: Dmx Kabel
3.3.1. DMX Kabel Die DMX Kabel müssen einen XLR Stecker männlich und einen XLR Stecker weiblich an den Enden besitzen. Achten sie darauf, dass am Ende ihrer DMX Kette ein sogenannter Terminator gesetzt wird. Das DMX Signal könnte sich am Ende ihrer Kette aufschwingen und Störungen verursachen. Durch einen Terminator wird das verhindert. - Seite 7 gewünschten Wert aus und bestätigen sie erneut mit ENTER. Machen sie das so lange bis alle gewünschten kanäle so eingestellt sind wie sie es wünschen. Mit Menü wechseln sie erneut das Menü. Mit den UP/DOWN Tasten können sie nun zum nächsten Menü schalten: Menü...
-
Seite 8: Passwort Zurück Setzen
eingeben. Das Default Passwort ist 988. Bestätigen sie mit ENTER. Um die Unlock Funktion zu ermöglichen schalten sie das Gerät aus und wieder ein! PassWord Lock Gehen sie wie bei Unlock vor nur wählen sie dieses Mal ihre eigenen drei Zahlen oder das Standard Passwort und schützen sie das Gerät mit einem Passwort vor ungewolltem Zugriff. - Seite 9 8 – 14 Tilt Stand Alone Program 2 15 – 21 Tilt Stand Alone Program 3 22 – 28 Tilt Stand Alone Program 4 29 – 35 Tilt Stand Alone Program 5 36 – 42 Tilt Stand Alone Program 6 43 –...
-
Seite 10: Dmx Tabelle 17 Kanäle
5.2. DMX Tabelle 17 Kanäle Wert Funktion 0 – 255 Tilt 0 – 255 Tilt Fine 0 – 255 Dimmer 0 – 100% 0 – 255 Rot Dimmer 0 – 100% 0 – 255 Grün Dimer 0 – 100% 0 – 255 Blau Dimmer 0 –... - Seite 11 218 – 224 Kein Tilt nur LED Stand Alone Sound Program 5 225 – 231 Kein Tilt nur LED Stand Alone Sound Program 6 232 – 238 Kein Tilt nur LED Stand Alone Sound Program 7 239 – 245 Kein Tilt nur LED Stand Alone Sound Program 8 246 –...
-
Seite 12: Technische Daten
Keine Funktion 1 – 31 0 – 100% Rot 32 – 60 0 – 100% Grün 61 – 90 0 – 100% Blau 91 – 120 0 – 100% Weiss 121 – 150 0 – 100% Rot + Grün 151 – 180 0 –... - Seite 23 Importeur: B & K Braun GmbH Industriestraße 2 D-76307 Karlsbad www.bkbraun.com info@bkbraun.com 23 / 23...