Varytec LED ROAD PAR 14 x 3W RGB Bedienungsanleitung
3in1
Inhaltsverzeichnis
Verfügbare Sprachen
Verfügbare Sprachen
Kapitel
Inhaltsverzeichnis

Verwandte Anleitungen für Varytec LED ROAD PAR 14 x 3W RGB


Inhaltszusammenfassung für Varytec LED ROAD PAR 14 x 3W RGB
- Seite 1 Bedienungsanleitung LED ROAD PAR 14 x 3W RGB 3in1...
-
Seite 2: Inhaltsverzeichnis
Inhaltsverzeichnis Sicherheitshinweise.......................... 3 1.1. Hinweise für den sicheren und einwandfreien Gebrauch ............3 Allgemeine Informationen ........................ 4 Produktübersicht ..........................5 Menüstruktur ............................ 6 4.1 Übersicht ............................6 4.2 Einstellungen ..........................7 4.2.1 Festfarben ..........................7 4.2.2 Auto-Mode ..........................7 4.2.3 RUN ............................7 4.2.4 DMX ............................ -
Seite 3: Sicherheitshinweise
1. Sicherheitshinweise • Es erlischt der Garantieanspruch, bei manuellen Veränderungen des Gerätes. • Nur von ausgebildeten Fachkräften reparieren lassen. • Benutzen Sie nur Sicherungen desselben Typs und nur Originalteile als Ersatzteile. • Ziehen Sie den Netzstecker, bevor Sie das Gehäuse öffnen. 1.1. -
Seite 4: Allgemeine Informationen
2. Allgemeine Informationen Zubehör : 1 x Led Road PAR 1 x Einspeisekabel 1 x DMX Kabel 1 x Bedienungsanleitung Entpacken : Vielen Dank für den Kauf eines unserer Produkte. Alle unsere Produkte sind Vollständig getestet und in einwandfreiem Zustand geliefert. Prüfen Sie sorgfältig den Versandkarton auf Schäden. -
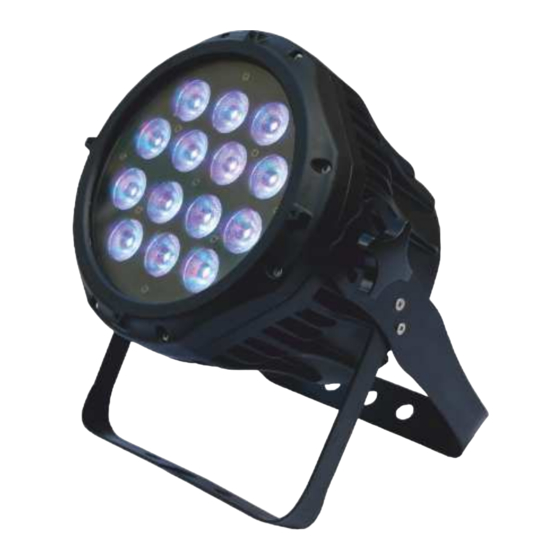
Seite 5: Produktübersicht
3. Produktübersicht Bedienfeld : Alle Gerätefunktionen und Einstellungen können über das eingebaute Bedienfeld angewählt werden. 5 / 13... -
Seite 6: Menüstruktur
4. Menüstruktur 4.1 Übersicht 6 / 13... -
Seite 7: Einstellungen
4.2 Einstellungen 4.2.1 Festfarben Mit der Mischung aus rot, grün und blau (0-255) können Sie eine Vielzahl von Festfarben erstellen. Unter dem Menüpunkt S (0-20) können Sie die Geschwindigkeit des Stroboskops einstellen. 4.2.2 Auto-Mode Wählen Sie [AUTO] und drücken Sie [ENTER]. Die Programme [AT.01] bis [AT.10] sind gespeichert und können nicht mit [EDIT] verändert werden. -
Seite 8: Id-Adresse
4.2.6 ID-Adresse Gehen Sie in das [Id]-Menü um die ID-Adresse des Geräts zu wählen. 4.2.7 Edit Custom In diesem Menü können Sie die Programme [PR.01] bis [PR.10] verändern. Jedes dieser Programme hat 30 Schritte, welche verändert werden können. Jeder dieser Schritte ermöglicht die Erstellung einer Scene mit folgenden Parametern: Rot, Grün, Blau, Weiß, Strobe, Zeit, Fade. -
Seite 9: Cal1
4.2.9 CAL1 Im [CAL1]-Modus können Sie verschiedene Weißtöne mit unterschiedlichen Farbtemperaturen auswählen. Es gibt 11voreingestellte Weißtöne, welche mit [Red], [Green], [Blue], [White] bearbeitet werden können. 4.2.10 CAL2 Gehen Sie in das [CAL2]-Menü um mit den RGB-Parametern verschiedene Weißtöne zu erstellen. Wenn Sie die neuen RGB-Parameter eingestellt haben werden diese im [CAL2]-Modus gespeichert. -
Seite 10: Dmx-Tabelle
5. DMX-Tabelle Dieses Gerät verfügt über 5 verschiedene DMX-Modi. 10 / 13... - Seite 11 11 / 13...
-
Seite 12: Technische Daten
ID-Adressen auf Kanal 10 im STAG Modus. Im STAG (10 Kanal)- Modus hat das Gerät eine zweite Adressierung, welche ID genannt wird. Die ID wird verwendet um bis zu 66 Geräte auf einer einzigen DMX-Adresse zu betreiben. Die Wahl der ID wird direkt am Gerät in den Einstellungen vorgenommen. Das Gerät mit der eigestellten ID wird dann am Steuerpult über den Wert des Kanal 10 (z.B. - Seite 13 Importeur: B & K Braun GmbH Industriestraße 2 D-76307 Karlsbad www.bkbraun.com info@bkbraun.com 13 / 13...
- Seite 14 User’s manual LED ROAD PAR 14 x 3W RGB 3in1...
- Seite 26 Importeur: B & K Braun GmbH Industriestraße 2 D-76307 Karlsbad www.bkbraun.com info@bkbraun.com 13 / 13...