Inhaltsverzeichnis
Werbung
Verfügbare Sprachen
Verfügbare Sprachen
Quicklinks
User's Manual
Welcome
Thank you very much for purchasing this product. It is a pico projector with DLP
technology inside. The DLP Technology, known for great cinema projectors,
provides rich colors and high contrast to this Pico Projector. Integrated with media
player, Office and PDF reader, and versatile connection options including HDMI,
AV-in, USB and Micro SD-card slot make this product the best solution for mobile
use.
Before you start, you are recommended to read this manual step by step to obtain
the best results with your new Pico Projector. We wish you a lot of fun.
Safety Notice
1. Keep the device and packaging materials out of the reach of infants and children.
2. Avoid subjecting the power adapter and other contacts to dripping or splashing
water and dry your hands before you use it. Do not place objects filled with liquids
such as vases, etc. on or near the device.
3. Make sure that the used power outlet is always readily available and never hidden.
In case of emergency, use the power adapter to separate the device from the power
network.
4. Keep your device away from all flames such as candles and do not set them up in
the vicinity of the device.
5. Keep the unit at least 10 cm away from other objects. Make sure the ventilation is
not covered by newspapers, tablecloths, curtains, etc.
6. For your own safety, do not use the projector during thunderstorms or lightning.
7. Relative Humidity is 25% ~ 80%, non-condensing.
8. The battery is integrated with the device. Do not dissemble and modify. The battery
should be replaced by an authorised service center only.
9. Ensure that the ambient room temperature is within 5 ~ 35°C
10. Wait before using if the device has been moved from a cold location into a warm one.
Any condensation that has formed may in certain circumstances destroy the device.
As soon as the device has reached room temperature it can be used without risk.
11. Handle the product with care. Avoid contact with sharp objects. Keep device away
from metallic objects.
12. Place the projector on a flat surface. Any collision or falling to the ground is likely to
damage the product.
13. Do not drop or disassemble the product otherwise the warranty voids. Opening or
removing covers may expose you to dangerous voltage or other hazards. Refer all
servicing to an authorized service center.
14. Use only the accessories supplied by the manufacturer.
15. Both product and user's manual are subject to further improvement or supplement
without further notice.
Page 1
Werbung
Kapitel
Inhaltsverzeichnis
Fehlerbehebung

Verwandte Anleitungen für AIPTEK PocketCinema V60


Inhaltszusammenfassung für AIPTEK PocketCinema V60
- Seite 1 User’s Manual Welcome Thank you very much for purchasing this product. It is a pico projector with DLP technology inside. The DLP Technology, known for great cinema projectors, provides rich colors and high contrast to this Pico Projector. Integrated with media player, Office and PDF reader, and versatile connection options including HDMI, AV-in, USB and Micro SD-card slot make this product the best solution for mobile use.
-
Seite 2: Fcc Compliance Statement
User’s Manual Care and Saftey Information for Pico Projectors 1. Avoid facing directly into the projector’s lens. 2. During the operation, this product may heat lightly, which is normal. 3. The device should not be used in a very dusty environment. -
Seite 3: Inhaltsverzeichnis
User’s Manual Table of Content Knowing your Device ____________________________ 4 Package Content ________________________________ 5 Getting Started__________________________________ 6 Preparing the content ____________________________ 7 Projecting from External AV Source ________________ 8 Function and Operations ________________________ 10 Notice for Long-time Projection ___________________ 18 Troubleshooting _______________________________ 18 Specifications _________________________________ 19 ... -
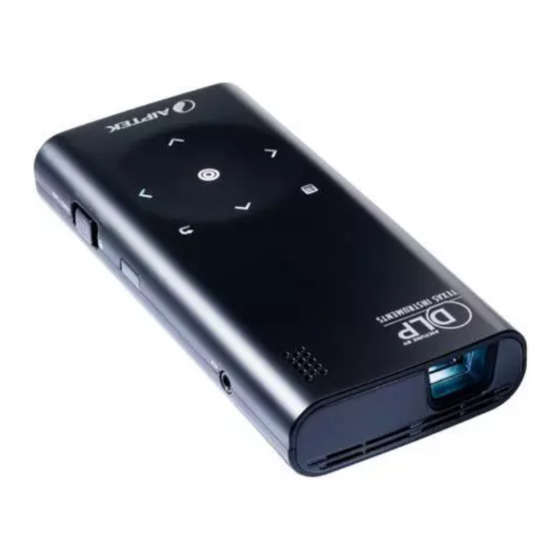
Seite 4: Knowing Your Device
User’s Manual Knowing your Device Projector Ventilation Projection Lens Speaker Focus Wheel Headphone/Speaker Connector Tripod Socket Stand IR Receiver Keypad Keypad Lock LED Indicator Power ON/OFF Micro SD Card Slot USB Connector HDMI Connector DC IN Keypad Menu Exist Up ... -
Seite 5: Remote Control
User’s Manual Remote Control Image rotate Button Power Button Source selection Button Mute Button Brightness Up Button Menu Button Return Button OK Button Right Button Left Button Zoom In Button Volume Up Button ... -
Seite 6: Getting Started
User’s Manual Getting Started Charging the product The projector is builted in a 3000 mAh Li-Polymer battery for mobile use. Please charge the projector for 8 hours prior to its first use. Connect one end of the supplied AC adapter to DC IN jack and the other end to a power outlet to start charging. -
Seite 7: Preparing The Content
User’s Manual Preparing the content Projecting from Internal Memory The projector has 2GB internal memory for file storage. Please download media files from your PC to the internal memory for projection: 1. Turn on the PC and the projector. 2. Connect the micro-USB port of the projector to the PC via USB cable. -
Seite 8: Projecting From External Av Source
User’s Manual Projecting from External AV Source HDMI Use the HDMI cable to connect the HDMI port on the rear panel of the projector to the external HDMI signal source. After connection, the screen switchs to HDMI source automatically. Note: Most video content are at 16:9 ratio. - Seite 9 User’s Manual Projecting from Smart Phone 1. Connect Samsung Galaxy S3 for Mirror projection Connect A to A HDMI cable with Samsung S3 sole sale accessory, HDTV (MHL) Adaptor, to make mirror projection from Samsung Galaxy S3. Note: The MHL Adaptor requires an external power source.
-
Seite 10: Function And Operations
User’s Manual Function and Operations Main Menu Press the navigation key to highlight the desired item and press (OK) to enter the submenu; press (Exist) to return to Main Menu. Main Menu Description This function allows users to select video Video file for projection. - Seite 11 User’s Manual Projecting Videos Select and project video files. 1. Select and enter ‘Video’ on the main menu. 2. In the videos list, use to select the folder and press to open the selected folder. Use to navigate the playlist. Press to start playing and projecting ...
- Seite 12 User’s Manual Note: The projector supports the following video formats: File Extension Video Decoder Audio Decoder *.avi MJPEG AAC (AAC-LC and HE-AAC) Xvid H.264/AVC ADPCM MPEG4 *.mov MPEG4 *.mp4 H.264 ADPCM *.mpg MPEG1 LPCM Projecting Photos Select and propject still images. 1.
- Seite 13 User’s Manual 6. Rotate the picture: Press (Menu) to enter Rotation function. Use Left/Right ( ) key to select the direction to rotate and press to confirm. To return, press (Exist) to photo folders or thumbnails. 7. To start a slideshow, press (Menu) to enter ‘Slideshow’...
-
Seite 14: Playing Music
User’s Manual 4. Zoom or Pan the document: Press the Up key to enter Zoom mode. Use Up/Down () keys to Zoom in/ Zoom out. In Zoom mode, press to switch to pan function. Please see the detail operation in Table B (page 12). Note: 1. -
Seite 15: Using Headphones
User’s Manual Note: The projector supports the following music formats: File Format File Extension *.mp3 *.wav *.ogg Using Headphones The projector equips speaker for providing the best audio performance. Addionally, you can connect the earphone or external speaker to the AV jack of the unit. When earphone is connected, the speaker will automatically turn off. - Seite 16 User’s Manual 1. Brightness This setting allows users to change the brightness by selecting as Eco Mode or Enhanced Mode. In Eco mode the brightness is reduced but the power consumption is less (suggest for battery mode) than Normal and Enhanced mode.
- Seite 17 User’s Manual 3. Language This item allows users to select the displayed system language. 4. Auto Power Off This item allows users to enable or disable the auto power off function of the projector. If auto power off is turned ON, the projector will be automatically turned off after the chosen period is due.
-
Seite 18: Notice For Long-Time Projection
User’s Manual Notice for Long-time Projection The built-in battery supports approximately 100 mins of projection. For long time projection, you are recommened to use AC adapter. When the battery is too weak to stay in operation, the low battery capacity icon ( will flash. -
Seite 19: Specifications
User’s Manual Specifications Item Description Optical Technology Light Source RGB LED Aspect ratio Resolution 640 x 480 Pixels (VGA) Contrast Ratio 1000:1 Projection Image Size 15 cm ~ 152 cm (6” ~ 60”) Projection Distance 20 cm ~ 200 cm (8” ~ 79”) Throw Ratio 1.59 (Projection Distance/Width of Image) (Diagonal : Distance) -
Seite 20: Willkommen
Benutzerhandbuch Willkommen Vielen Dank für den Kauf dieses Produktes. Es handelt sich um einen Pico Projektor mit DLP Technologie. Die DLP Technologie, die bei großen Kinoprojektoren eingesetzt wird, bietet kräftige Farben und einen hohen Kontrast bei diesem Pico Projektor. Der interne Media Player, Office und PDF Reader, sowie vielfältige Anschlussoptionen wie HDMI, AV-Eingang, USB und Micro-SD-Kartensteckplatz machen dieses Produkt zur idealen Lösung für die mobile Nutzung. -
Seite 21: Pflege- Und Sicherheitshinweise Für Pico Projektoren
Benutzerhandbuch Pflege- und Sicherheitshinweise für Pico Projektoren 1. Nicht direkt in das Objektiv des Projektors sehen. 2. Dieses Produkt kann während des Betriebes etwas warm werden, was normal ist. Projektor 3. Das Gerät nicht in einer sehr staubigen Umgebung verwenden. Staubpartikel und andere Fremdgegenstände können das Gerät beschädigen. - Seite 22 Benutzerhandbuch Inhalt Produktübersicht ________________________________ 4 Paketinhalt _____________________________________ 5 Erste Schritte ___________________________________ 6 Inhalt vorbereiten________________________________ 7 Projektion von einer externen AV-Quelle ____________ 8 Funktionen und Bedienung ______________________ 10 Hinweis für längere Projektion ____________________ 18 Fehlerbehebung________________________________ 18 Technische Daten ______________________________ 19 Seite 3...
-
Seite 23: Produktübersicht
Benutzerhandbuch Produktübersicht Projektor Lüftungsschlitze Projektionsobjektiv Fokusrad Lautsprecher Kopfhörer / Lautsprecheranschluss Stativgewinde Ständer IR Empfänger Tastenfeld Tastenfeldsperre LED Anzeige Strom EIN/AUS Micro-SD-Kartensteckplatz USB-Anschluss HDMI-Anschluss DC IN Tastenfeld Menü Beenden Hoch Rechts Links Down Seite 4... -
Seite 24: Fernbedienung
Benutzerhandbuch Fernbedienung Bild drehen Taste Ein/Aus-Taste Quellenauswahl Taste Menü Tasteзвук Helligkeit Aufwärtstaste Menütaste Zurück-Taste OK-Taste Rechtstaste Linkstaste Zoom In Taste Lautstärke erhöhen Taste Zoom Out Taste Lautstärke verringern Taste Abwärtstaste Warnung: Eine unsachgemäße Nutzung der Batterie kann zu einer Überhitzung, Explosion oder Entzündung führen, was Verletzungen oder ein Feuer zur Folge haben könnte. -
Seite 25: Erste Schritte
Benutzerhandbuch Erste Schritte Aufladen des Produktes Der Projektor verfügt über einen 3000 mAh Li-Polymer Akku für die mobile Nutzung. Bitte laden Sie den Projektor vor der ersten Nutzung 8 Stunden lang auf. Verbinden Sie ein Ende des beiliegenden Netzteils mit der DC IN Buchse und das andere Ende mit einer Steckdose, um mit dem Aufladen zu beginnen. -
Seite 26: Inhalt Vorbereiten
Benutzerhandbuch Inhalt vorbereiten Projektion aus dem internen Speicher Der Projektor verfügt über 2GB internen Speicher für Dateien. Bitte laden Sie Mediendateien für die Projektion von Ihrem PC in den internen Speicher: 1. Schalten Sie den PC und den Projektor ein. 2. -
Seite 27: Projektion Von Einer Externen Av-Quelle
Benutzerhandbuch Projektion von einer externen AV-Quelle HDMI Verwenden Sie das HDMI Kabel, um den HDMI Anschluss an der Rückseite des Projektors mit der externen HDMI Signalquelle zu verbinden. Nach dem Anschluss wird das Display automatisch zur HDMI-Quelle wechseln. Anmerkung: Die meisten Videoinhalte werden im Seitenverhältnis 16:9 angezeigt. Verwenden Sie die „Menü... -
Seite 28: Projektion Von Einem Smartphone
Benutzerhandbuch Projektion von einem Smartphone 1. Schließen Sie das Samsung Galaxy S3 für die Spiegelprojektion an Schließen Sie das A zu A HDMI Kabel an den separat für das Samsung S3 erhältlichen HDTV (MHL) Adapter an, um eine Spiegelprojektion vom Samsung Galaxy S3 durchzuführen. -
Seite 29: Funktionen Und Bedienung
Benutzerhandbuch Funktionen und Bedienung Hauptmenü Drücken Sie auf die Navigationstaste zur Markierung des gewünschten Elements und drücken Sie auf (OK) zum Aufruf des Untermenüs; drücken Sie (Beenden), um zum Hauptmenü zurückzukehren. Hauptmenü Beschreibung Mit dieser Funktion können Benutzer eine Video Videodatei zur Projektion auswählen. -
Seite 30: Videos Projizieren
Benutzerhandbuch Videos projizieren Wählen und projizieren Sie Videodateien. Wählen und rufen Sie „Video“ im Hauptmenü aus. Verwenden Sie in der Videoliste, um den Ordner zu wählen und drücken Sie auf , um den ausgewählten Ordner zu öffnen. Verwenden Sie , um durch die Wiedergabeliste zu steuern. - Seite 31 Benutzerhandbuch Anmerkung: Der Projektor unterstützt die folgenden Videoformate: Dateierweiterung Videodecoder Audiodecoder *.avi MJPEG AAC (AAC-LC und HE-AAC) Xvid H.264/AVC ADPCM MPEG4 *.mov MPEG4 *.mp4 H.264 ADPCM *.mpg MPEG1 LPCM Fotos projizieren Wählen und projizieren Sie Fotos. Wählen Sie „Foto“ und drücken Sie auf , um den Fotomodus im Hauptmenü...
-
Seite 32: Dokumente Projizieren
Benutzerhandbuch Das Bild drehen: Drücken Sie auf (Menü), um die Drehfunktion aufzurufen. Verwenden Sie die Links/Rechts ( ) Taste, um die Drehrichtung zu wählen und drücken Sie zur Bestätigung auf . Drücken Sie auf (Beenden), um zu Fotoordnern oder Miniaturbildern zurückzukehren. -
Seite 33: Musik Wiedergeben
Benutzerhandbuch 4. Das Dokument zoomen oder schwenken: Drücken Sie auf die Hoch Taste, um den Zoommodus aufzurufen. Verwenden Sie die Hoch/Runter ( ) Tasten, um hinein-/herauszuzoomen. Drücken Sie im Zoommodus auf , um zur Schwenkfunktion zu wechseln. Bitte entnehmen Sie die genaue Bedienung der Tabelle B (Seite 12). -
Seite 34: Kopfhörer Verwenden
Benutzerhandbuch Anmerkung: Der Projektor unterstützt die folgenden Musikformate: Dateiformat Dateierweiterung *.mp3 *.wav *.ogg Kopfhörer verwenden Der Projektor ist mit einem Lautsprecher für eine gute Audioleistung ausgestattet. Zusätzlich können Sie einen Kopfhörer oder externen Lautsprecher an die AV-Buchse des Gerätes anschließen. Wenn ein Kopfhörer angeschlossen ist, wird der Lautsprecher automatisch ausgeschaltet. - Seite 35 Benutzerhandbuch 1. Helligkeit In dieser Einstellung können Benutzer die Helligkeit durch Auswahl des Ökomodus oder Erweiterten Modus ändern. Im Ökomodus wird die Helligkeit reduziert und der Stromverbrauch verringert (empfohlen für Akkumodus) als im Normal und Erweiterten Modus. Modus Lumen Akku Empfehlung Betriebszeit Erweitert...
- Seite 36 Benutzerhandbuch 3. Sprache Mit dieser Option können Benutzer die angezeigte Systemsprache ändern. 4. Autom. Ausschalten Mit dieser Option können Benutzer die automatische Ausschaltfunktion des Projektors aktivieren oder deaktivieren. Wenn die automatisch Ausschaltung EIN geschaltet ist, wird der Projektor automatisch nach Ablauf der ausgewählten Zeit ausgeschaltet. 5.
-
Seite 37: Hinweis Für Längere Projektion
Benutzerhandbuch Hinweis für längere Projektion Der interne Akku unterstützt ungefähr 100 Min. Projektion. Wenn Sie länger projizieren möchten, wird die Nutzung des Netzteils empfohlen. Wenn der Akku zu schwach ist, um weiter betrieben werden zu können, wird die Anzeige für schwachen Akku ( ) anfangen zu blinken. -
Seite 38: Technische Daten
Benutzerhandbuch Technische Daten Element Beschreibung Optische Technologie Lichtquelle RGB LED Anzeigeformat Auflösung 640 x 480 Pixel (VGA) Kontrastverhältnis 1000:1 Projizierte Bildgröße 15 cm ~ 152 cm (6” ~ 60”) Projektionsabstand 20 cm ~ 200 cm (8” ~ 79”) Projektionsverhältnis 1,59 (Projektionsabstand/Bildbreite) (Diagonale: Entfernung) Helligkeit 50 ANSI Lumen... - Seite 39 Guide de l’utilisateur Bienvenue Merci beaucoup pour l’achat de ce produit. Il s'agit d'un pico projecteur avec à l'intérieur la technologie DLP. La technologie DLP, connu par les grands projecteurs de cinéma, offre des couleurs riches et un contraste élevé pour ce projecteur Pico. Intégré avec lecteur de Media, Office et PDF, et les options de connexion versatiles, y compris HDMI, AV-in, USB et l’entrée pour la carte Micro SD font de ce produit la solution idéale pour une utilisation mobile.
- Seite 40 Guide de l’utilisateur Entretien et Informations de sécurité pour Projecteurs Pico 1. Évitez de faire face directement à l'objectif du projecteur. 2. Pendant l'opération, ce produit peut chauffer légèrement, ce qui est normal. projecteur 3. L'appareil ne doit pas être utilisé dans un environnement très poussiéreux.
- Seite 41 Guide de l’utilisateur Table des matières Connaître votre appareil __________________________ 4 Contenu de l’emballage __________________________ 5 Pour commencer ________________________________ 6 Preparer le contenu ______________________________ 7 Projection depuis la source AV externe _____________ 8 Fonction et Opérations __________________________ 10 Notification pour projection de longue durée________ 17 Dépannage ____________________________________ 18 Spécifications _________________________________ 19 Page 3...
-
Seite 42: Connaître Votre Appareil
Guide de l’utilisateur Connaître votre appareil Projecteur Ventilation Objectif de projection Roues de la Haut-parleur Connecteur Haut-parleur/Écouteur mise au point Interface Trépied Support Récepteur IR Clavier Verrouillage Clavier Indicateur LED Mise en marche/Arrêt Emplacement pour Carte Micro SD Connecteur USB ENTRÉE DC Connecteur HDMI Clavier... -
Seite 43: Contenu De L'emballage
Guide de l’utilisateur Télécommande Bouton Rotation de l'image Bouton d’Alimentation Bouton de sélection de source Bouton Sourdine Luminosité Bouton Haut Bouton Menu Bouton de retour Bouton OK Bouton Gauche Bouton Droit Bouton Zoom avant Bouton Volume haut Bouton Zoom arrière Bouton Volume bas Bouton Bas Attention :... -
Seite 44: Pour Commencer
Guide de l’utilisateur Pour commencer Charger l’appareil Le projecteur est construit avec une batterie Li-Polymère de 3000 mAh pour une utilisation mobile. Veuillez charger le projecteur pendant 8 heures avant sa première utilisation. Branchez une extrémité de l'adaptateur secteur CA fourni à la prise ENTREE DC et l'autre extrémité... -
Seite 45: Preparer Le Contenu
Guide de l’utilisateur Preparer le contenu Projection à partir de la Mémoire Interne Le projecteur dispose de 2 Go de mémoire interne pour le stockage des fichiers. Veuillez télécharger des fichiers multimédia de votre PC vers la mémoire interne pour la projection : 1. -
Seite 46: Projection Depuis La Source Av Externe
Guide de l’utilisateur Projection depuis la source AV externe HDMI Utilisez le câble HDMI pour connecter le port HDMI sur le panneau arrière du projecteur sur la source HDMI signal externe. Après la connexion, l'écran passe automatiquement à la source HDMI. Note : La plupart des contenus vidéo sont au format 16 :9. - Seite 47 Guide de l’utilisateur Projection à partir d’un Smart Phone 1. Connecter Samsung Galaxy S3 pour projection miroir Branchez Câble HDMI A à A avec Samsung S3 seule accessoire en vente, Adaptateur HDTV (MHL), pour faire la projection miroir depuis Samsung Galaxy S3. Note : L'adaptateur MHL nécessite une source d'alimentation externe.
-
Seite 48: Fonction Et Opérations
Guide de l’utilisateur Fonction et Opérations Menu principal Pressez la touche de navigation pour sélectionner l'option désirée et pressez sur (OK) pour entrer dans le sous-menu, pressez sur (Quitter) pour revenir au menu principal. Menu principal Description Cette fonction permet aux utilisateurs de VIDÉO sélectionner un fichier vidéo pour projection. - Seite 49 Guide de l’utilisateur Projection Vidéos Sélectionnez et projeter des fichiers vidéo. Sélectionnez et entrez 'Vidéo' dans le menu principal. Dans la liste des vidéos, utilisez pour sélectionner le dossier et pressez pour ouvrir le dossier sélectionné. Utiliser pour naviguer dans la liste de lecture. Pressez sur pour commencer la lecture et la projection de la vidéo sélectionnée.
- Seite 50 Guide de l’utilisateur Note : Le projecteur prend en charge les formats vidéo suivants : Extension de fichier Décodeur vidéo Décodeur audio *.avi MJPEG AAC (AAC-LC et HE-AAC) Xvid H.264/AVC ADPCM MPEG4 *.mov MPEG4 *.mp4 H.264 ADPCM *.mpg MPEG1 LPCM Photos Projection Sélectionnez et projeter des images fixes.
- Seite 51 Guide de l’utilisateur Rotation de l'image : Presser (Menu) pour accéder à la fonction de rotation. Utiliser la touche Gauche/Droite ( ) pour sélectionner le sens de rotation et presser sur pour confirmer. Pour revenir, presser (Quitter) à dossiers photos ou vignettes. Pour lancer un diaporama, presser sur (Menu) pour entrer 'Diaporama' et sélectionner Marche.
-
Seite 52: Lecture De La Musique
Guide de l’utilisateur 4. Zoomer ou Pan le document : Presser sur la touche Haut pour passer en mode Zoom. Utilisez les boutons Haut/Bas ( ) Touches de zoom avant/Zoom arrière. En mode Zoom, presser sur pour passer en fonction panoramique/Pan. - Seite 53 Guide de l’utilisateur Utilisation d'un casque/écouteurs Le projecteur est équipé de haut-parleurs pour fournir une meilleure qualité audio. De plus, vous pouvez connecter des écouteurs ou un haut-parleur externe à la fiche AV de l'appareil. Lorsque l'écouteur est branché, le haut-parleur s'éteint automatiquement.
- Seite 54 Guide de l’utilisateur Mode Lumens Durée de vie Recommandation de la batterie Amélioré Mode batterie : 60 min Ce mode est recommandé 50 lms lorsque l'alimentation externe est disponible pour optimiser les performances. Normal Mode batterie : 80 min Ce mode est recommandé 40 lms lorsque la luminosité...
-
Seite 55: Notification Pour Projection De Longue Durée
Guide de l’utilisateur 4. Mise hors tension automatique Cette option permet aux utilisateurs d'activer ou de désactiver la fonction d'arrêt automatique du projecteur. Si la hors tension automatique est ACTIVÉE, le projecteur sera automatiquement éteint après que la période choisie est due. 5. -
Seite 56: Dépannage
Guide de l’utilisateur Dépannage Si votre projecteur ne semble pas fonctionner correctement, vérifiez les éléments ci-dessous avant de contacter un centre de service après vente agréé. Symptôme Point de contrôle 1. Vérifiez si le câble HDMI est correctement branché. Le projecteur ne 2. -
Seite 57: Spécifications
Guide de l’utilisateur Spécifications Elément Description Technologie optique Source lumineuse DEL RGB Format D’écran Résolution 640 x 480 Pixels (VGA) Taux de contraste 1000:1 Dimension de l’image 15cm ~ 152 cm (6" ~ 60") projetée Distance de projection 20 cm ~ 200 cm (8" ~ 79") Taux de Jet 1,59 (Distance de projection / Largeur de l'image) (Diagonale : Distance) -
Seite 58: Руководство Пользователя
Руководство пользователя Уважаемый пользователь Благодарим вас за покупку этого устройства. Данный пикопроектор изготовлен по технологии DLP. DLP-технология, применяемая в высококлассных кинопроекторах, обеспечивает богатство цветовой гаммы и высокую контрастность изображения этого пикопроектора. Наличие встроенных программ, таких как Office/PDF Reader и мультимедийный проигрыватель, а также разнообразных разъемов, включая разъемы HDMI, AV-IN, USB и... - Seite 59 Руководство пользователя Правила безопасной эксплуатации пикопроектора 1. Не смотрите в объектив работающего проектора. 2. Во время работы это устройство может немного нагреваться, что является нормальным явлением. проектор 3. Запрещается применять устройство в слишком пыльных условиях. Частицы пыли и другие инородные предметы могут повредить устройство.
- Seite 60 Руководство пользователя Содержание Знакомство с устройством ______________________ 4 Содержимое упаковки __________________________ 5 Начало работы _________________________________ 6 Подготовка контента ____________________________ 7 Проецирование от внешнего источника АВ-сигнала 8 Функции и элементы управления _______________ 10 Сведения о длительном проецировании _________ 18 Устранение неполадок _________________________ 18 Характеристики...
-
Seite 61: Знакомство С Устройством
Руководство пользователя Знакомство с устройством Проектор Вентиляция Проекционный объектив Колесо Динамик фокусировки Hаушники/Разъем внешнего динамика Гнездо штатива Подставка Приемник ИК Клавиатура Блокировка кнопок СД-индикатор Выключатель питания Гнездо карты Micro SD Разъем USB Разъем HDMI Вход DC IN Клавиатура Меню Выход Вверх... -
Seite 62: Содержимое Упаковки
Руководство пользователя Пульт Кнопка Поворот Кнопка питания Кнопка выбора источника Кнопка Выкл. звук Яркость Кнопка Вверх Кнопка Меню Кнопка Назад Кнопка OK Кнопка Вправо Кнопка Влево Кнопка увеличения Кнопка Громче Кнопка уменьшения Кнопка Тише Кнопка Вниз Предупреждение: Некорректное использование батарей может привести к их перегреву, взрыву или воспламенению... -
Seite 63: Начало Работы
Руководство пользователя Начало работы Зарядка устройства Для мобильного использования проектора в него встроена литий-полимерная батарея 3000 мАч. Перед первым использованием проектора следует выполнить зарядку батареи в течение 8 часов. Чтобы начать зарядку, подсоедините адаптер сетевого питания к гнезду DC-IN устройства, и вставьте... -
Seite 64: Подготовка Контента
Руководство пользователя Подготовка контента Проецирование из внутренней памяти Проектор имеет 2-Гб внутреннюю память для хранения файлов. Для проецирования следует загрузить мультимедийные файлы с вашего ПК во внутреннюю память: 1. Включите ПК и проектор. 2. Подключите порт Micro-USB проектора к ПК через кабель USB. Экран и вентилятор... -
Seite 65: Проецирование От Внешнего Источника Ав-Сигнала
Руководство пользователя Проецирование от внешнего источника АВ-сигнала HDMI Подсоедините порт HDMI на задней панели проектора к внешнему источнику сигнала HDMI через кабель HDMI. После подсоединения экран автоматически переключится на источник сигнала HDMI. Примечание: Большинство видеоисточников имеют формат кадра 16:9. Для оптимизации... - Seite 66 Руководство пользователя Проецирование от смартфона 1. Подключение Samsung Galaxy S3 для зеркального проецирования Для зеркального проецирования со смартфона Samsung Galaxy S3 подсоедините проектор кабелем HDMI типа A—A к адаптеру HDTV (MHL) (принадлежность Samsung S3), подсоединенному к смартфону. Примечание: Для работы MHL-адаптера требуется...
-
Seite 67: Функции И Элементы Управления
Руководство пользователя Функции и элементы управления Главное меню Кнопками джойстика выберите нужный пункт, и нажатием кнопки (OK) войдите в подменю; нажмите кнопку (Выход) для возврата в главное меню. Главное меню Описание Позволяет выбрать видеофайл для ВИДЕО проецирования. Позволяет выбрать для проецирования файлы ФОТО... - Seite 68 Руководство пользователя Проецирование видео Выбор и проецирование видеофайлов. Выберите и откройте пункт «Видео» в главном меню. В окне выбора видеофайлов кнопками выберите нужную папку и откройте ее кнопкой . Для выбора пунктов в списке воспроизведения используйте кнопки . Нажмите , чтобы...
- Seite 69 Руководство пользователя Примечание: Проектор поддерживает следующие форматы. Расширение файла Декодер видео Декодер аудио *.avi MJPEG AAC (AAC-LC и HE-AAC) Xvid H.264/AVC ADPCM MPEG4 *.mov MPEG4 *.mp4 H.264 ADPCM *.mpg MPEG1 LPCM Проецирование снимков Выбор и проецирование снимков. Выберите пункт «Фото» в главном меню, и нажмите для...
- Seite 70 Руководство пользователя Поворот изображения: Кнопкой (Меню) включите функцию поворота изображения. Кнопками влево/вправо ( ) выберите направление поворота, и кнопкой подтвердите выбор. Нажмите (Выход) для возврата в режим выбора папок или эскизов снимков. Для запуска слайдшоу, нажмите (Меню), чтобы войти в режим «Слайдшоу», и выберите...
-
Seite 71: Воспроизведение Музыки
Руководство пользователя 4. Увеличение и сдвиг документа: Кнопкой вверх включите режим увеличения. Нажмите вверх/вниз ( ) для увеличения/уменьшения размера. В режиме увеличения нажатие кнопки включает функцию сдвига изображения. Подробные сведения о командах управления приведены в таблице B (стр. 12). Примечание: 1. -
Seite 72: Использование Наушников
Руководство пользователя Примечание: Проектор поддерживает следующие форматы аудиофайлов: Формат файла Расширение файла *.mp3 *.wav *.ogg Использование наушников Проектор имеет встроенный динамик, обеспечивающий качественное воспроизведение звука. Кроме того, к гнезду AV этого устройства можно подключать наушники или внешние динамики. При подключении наушников... - Seite 73 Руководство пользователя 1. Яркость Этот параметр позволяет изменить режим яркости, выбрав режим Эко или Яркий. Режим Эко (рекомендуется при батарейном питании) уменьшает яркость, но также снижает энергопотребление по сравнению с режимами Обычный и Яркий. Режим Яркость Время работы Рекомендация батареи Яркий...
- Seite 74 Руководство пользователя 3. Язык Позволяет выбрать язык интерфейса системы. 4. Автовыключение Позволяет включить или выключить функцию автоотключения проектора. Если функция Автовыключ. включена, проектор автоматически отключается по истечении заданного периода времени. 5. Источник памяти Эта функция позволяет выбрать устройство памяти: внутреннюю память, карту Micro SD или...
-
Seite 75: Сведения О Длительном Проецировании
Руководство пользователя Сведения о длительном проецировании Встроенная батарея обеспечивает около 100 мин проецирования. Для длительного проецирования рекомендуется использовать адаптер питания. Когда заряд батареи слишком мал для обеспечения работы проектора, на экране начинает мигать значок низкого заряда батареи ( ). При появлении этого значка устройство... -
Seite 76: Характеристики
Руководство пользователя Характеристики Характеристика Описание Оптическая технология Источник света RGB-светодиод Формат кадра Разрешение 640 x 480 пикселов (VGA) Контрастность 1000:1 Размер проецируемого 15 ~ 152 см (6 ~ 60 дюйма) изображения Проекционное расстояние 20 ~ 200 см (8 ~ 79 дюйма) Проекционное... - Seite 77 使用手冊 從外接 AV 來源投影 HDMI 請用 HDMI 纜線將外接 HDMI 信號源插入投影機後側面板的 HDMI 連接埠。連結 完成後,螢幕自動轉為 HDMI 來源投影。 注意: 大多數的視訊內容長寬比均為 16:9 。請用「選單鈕」選擇三種投影模式之 一,以獲得最佳的視覺品質。 三種投影模式的效果顯示如下: 16:9 長寬比 智慧型手機 ( 來源 ) 畫面 Letterbox (16:9) Pan & Scan (4:3) Theme mode (4:3) ( 字幕盒 ) ( 橫移且填滿...
- Seite 78 사용 설명서 외부 AV 소스로부터 투사하기 HDMI HDMI 케이블을 사용하여 프로젝터의 후면 패널에 있는 HDMI 포트와 외부 HDMI 신호 소스를 연결합니다. 연결 후, 화면은 HDMI 소스로 자동으로 전환됩니다. 참고: 대부분의 비디오 컨텐츠는 16:9 비율입니다. “메뉴 버튼”으로 3 가지 투사 모드 중 하나를 선택하여 화면 품질을 최적화 합니다. 3 가지...
- Seite 79 دليل المستخدم خارجي العرض من مصدر HDMI HDMI على اللوحة الخلفية بالبروجيكتور بمصدر اإلشارة HDMI لتوصيل منفذ HDMI استخدم كابل تلقائ ي ًا HDMI التوصيل، تتغير الشاشة إلى مصدر بعد الخارجي لالختيار بين ثالثة أوضاع عرض استخدم زر القائمة 16:9 أغلب...