Exsys EX-42374 Bedienungsanleitung
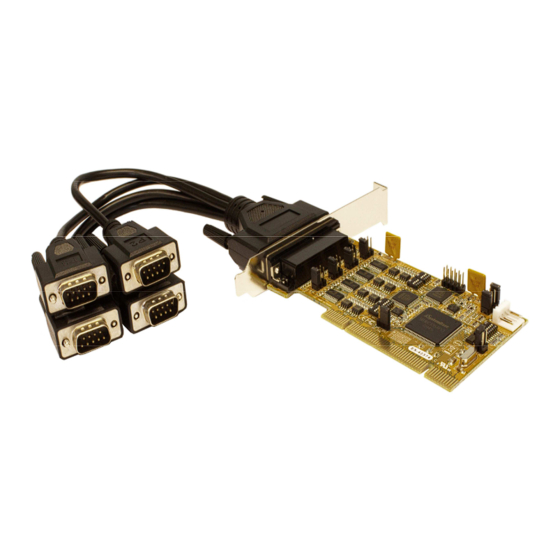
Rs-232/422/485 pci karte
mit 4 x 9 pin anschluss
Inhaltsverzeichnis
English
EX-42374
Bedienungsanleitung
Vers. 1.0 / 18.11.14
6. Driver Installation
Windows 98/ ME/ 2000/ XP/ Vista/ 7/ 8/ Server 200x
After starting Windows it recognizes a new "PCI Controller" and opens the hardware
assistant. Please choose manual installation and put the driver CD into your CD-Rom
EX-42374
drive. Now enter the Path "D:\IO\SYSTEMBASE\" and then the directory of your sys-
tem "32bit_Win2000,XP,2003,Vista,2008,7,8" or "64bit_WinXP,2003,Vista,2008,7,8"
into the box for the Path/Source and click at >next/continue<. Now Windows will
search for the drivers in the specified directory. Follow the hardware assistant and finish
the installation. If Windows recognizes other new devices repeat the above described
steps. Attention! Restart Windows in any case after installing the drivers.
CHECK THE INSTALLED DRIVER
Click at Start<>Run< then enter "compmgmt.msc" and click at >OK<. In the windows
that open select >Device Manager<. Under "Ports (COM and LPT)" you should find
RS-232/422/485 PCI Karte
one or more new "PCI Ports" as sample (Com3). If you see this or similar entries the
card is installed correctly.
mit 4 x 9 Pin Anschluss
CHANGE PORT NUMBER
If you like to change the port number for example COM3 to COM5, open the >Device
Manager< click at >COM3<, >Settings< and then >Advance<. There you can change
between COM3 till COM256.
Windows NT 4.0
Start Windows NT and insert the driver CD into your CD-ROM drive (for example D:).
Click at >Start< >Run< and enter „D:\IO\SYSTEMBASE\WinNT\Install.exe" then click
>OK<. Windows NT will now start the setup program and install the driver. Please Re-
start Windows NT after installing the drivers.
CHECK THE INSTALLED DRIVER
Click at >Start< >Programs< >Administrative Tools[Common]< >Windows NT-
Diagnostics< then click at >Resource< >IRQ<. Here you should find the entry „09
o
0
PCI". Then click at >I/O-Port< here you should see the entries „D400-D407 sysba-
se 0 PCI" „D800-D802 sysbase 0 PCI" and „DC00-DC1F sysbase 0 PCI" for
the ports. The I/O addresses can change depends which system and card is installed.
If you see these or similar entry's the card is installed correctly.
SCO UNIX / LINUX
The drivers are located in the following folder on our driver CD:
"D:\IO\SYSTEMBASE\SCO"
Because each individual distribution and kernel version of Linux is different, sadly we
cant provide a installation instruction. Please refer to the installation manual for stan-
dard IO ports from your Unix/Linux version! In some newer versions of Linux the card
will even be installed automatically after starting Linux.
Manual
16
Inhaltsverzeichnis

Verwandte Anleitungen für Exsys EX-42374


Inhaltszusammenfassung für Exsys EX-42374
- Seite 1 English EX-42374 Bedienungsanleitung Vers. 1.0 / 18.11.14 6. Driver Installation Windows 98/ ME/ 2000/ XP/ Vista/ 7/ 8/ Server 200x After starting Windows it recognizes a new “PCI Controller“ and opens the hardware assistant. Please choose manual installation and put the driver CD into your CD-Rom EX-42374 drive.
-
Seite 2: Inhaltsverzeichnis
If you are ready with the jumper settings, please proceed with the following installation instructions. Because there are large differences between PC’s, we can give you only a general installation guide for the EX-42374. Please refer to your computer’s reference manual whenever in doubt. -
Seite 3: Switch Settings
/ FCC / RoHS / WEEE DE97424562 DE97424562 DE97424562 DE97424562 2. Lieferumfang Bevor Sie die EX-42374 in Ihren PC installieren, überprüfen Sie bitte zuerst den Inhalt 4.2 Jumper Settings der Lieferung: • JP1: EX-42374 = The pin 9 is connected with RI (Ring Indicator) signal. -
Seite 4: Aufbau Und Anschlüsse
4 x 9 Pin Serielle Terminator for RS-422 and RS-485 4-wire mode: Testzwecke Anschlüsse (Bitte nicht ändern) JP1: PME Ein- / Ausschalten 3.2 Anschlüsse DB9 (EX-42374) DB9 (Endgerät) DB9 (EX-42374) DB9 (Endgerät) 1 DCD 1 DCD 2 RXD 2 RXD 1 TXD-... -
Seite 5: Switch Und Jumper Einstellungen
4.1 Switch Settings 4.1 Switch Einstellungen There are 5 DIP-switches on the board of the EX-42374. Of thes are, 1 8-pin DIP-switch Es gibt 5 DIP-Schalter auf der Platine der EX-42374. Davon ist 1 8-Pin DIP-Schalter für for the modes (SW1) and 4 4-pin DIP-switches for termination (SW3) (see picture on den Modi (SW1) und 4 4-Pin DIP-Schalter für die Terminierung (SW3) (siehe Bild auf... -
Seite 6: Jumper Einstellungen
4 x 9 Pin Terminator für RS-422 und RS-485 4-Draht Mode: production serial connector (Please do not change) JP1: PME On / Off 3.2 Connections DB9 (EX-42374) DB9 (Device) DB9 (EX-42374) DB9 (Device) 1 DCD 1 DCD 2 RXD 2 RXD 1 TXD-... -
Seite 7: Extent Of Delivery
/ FCC / RoHS / WEEE / FCC / RoHS / WEEE DE97424562 DE97424562 2. Extent of Delivery Before you install the EX-42374 in your PC, you should first check the contents of the 4.2 Jumper Einstellungen delivery: • EX-42374 JP1: = Am Pin 9 liegt das Standard Signal RI (Ring Indicator) an. - Seite 8 Unterschiede zwischen PC‘s gibt, können wir Ihnen nur eine generelle Anleitung zum (COM und LPT)" einen oder mehrere neue “PCI Ports“ z.B. (Com3) sehen. Wenn Sie Einbau der EX-42374 geben. Bei Unklarheiten halten Sie sich bitte an die Bedienungsan- diese oder ähnliche Einträge sehen, ist die Karte korrekt installiert.