Nidec Commander C300 PM/HS30 PM Schritt-Für-Schritt-Anleitung
Inhaltsverzeichnis
Quicklinks
Commander C300 PM/HS30 PM
Step By Step Guide
Guide pas à pas
Schritt-für-Schritt-Anleitung
Guida dettagliata
Guía detallada
Frame sizes 1 to 4
Tailles 1 à 4
Baugrößen 1 bis 4
Taglie da 1 a 4
Tamaños 1 a 4
This guide provides a fast and simple start-up procedure for a basic drive and motor installation.
For help with more advanced installations: Comprehensive user guides, online videos and help tools can be accessed using
the web address or QR code above
EN
For C300, it is essential to read
using the Safe Torque Off in safety systems
Ce guide fournit des instructions de mise en service simples et rapides pour une installation variateur/moteur de base.
Pour des informations complémentaires sur des installations plus avancées, des guides de mise en service complets, des
vidéos en ligne et des outils d'aide sont accessibles via l'adresse Web ou le code QR ci-dessus.
FR
Pour le modèle C300, il est essentiel de consulter la
via l'adresse Web ou le code QR ci-dessus avant d'utiliser la fonction Absence sûre du coupledans les systèmes de
sécurité.
Diese Anleitung bietet informationen für eine schnelle Inbetriebnahme eines einfachen Umrichter-Motor-Systems.
Bei aufwendigeren Systemem: Umfassende Betriebsanleitungen, Online-Videos und Hilfsmittel finden Sie unter unserer
Webadresse oder über den vorstehenden QR-Code.
DE
Beim C300 lesen Sie unbedingt
worstehenden QR-Code), um die Safe Torque Off-Funktion in Sicherheitssystemen zu verwenden.
Questa guida fornisce una procedura di avviamento semplice e veloce per l'installazione di un azionamento base e del
motore.
Chiavesse bisogno di un per l'installazione di soluzioni più avanzate può consultare le guide complete per l'utente, I video
IT
online e gli strumenti di supporto, a cui può accedere utilizzando l'indirizzo Internet o il codice QR qui sopra.
Per il C300, è essenziale leggere la
del codice QR qui sopra, prima di impiegare la funzione Safe Torque Off in sistemi di sicurezza.
Esta quia contiene un procedimiento inicial rápido y sencillo do la instalación básica de accionamiento y motor.
Para obtener ayuder sobre instalciones más avanzadas: Es posible acceder a guias de usuarion, herramientas de ayuda y
videos online exhaustivos a través de la dirección de Internet o el código QR anterior.
ES
Para el C300, es esencial leer la
Internet o el Código QR anterior antes de utilizar la función Safe Torque Off en los sistemas de seguridad.
www.controltechniques.com/support
Section 4.4
in the Control User Guide using the web address or QR code above prior to
Abschnitt 4.4
in der Betriebsanleitung: Steuereinheit (über die Webadresse bzw. den
Sezione 4.4
nella Guida dell'utente al controllo, servendosi dell'indirizzo Internet o
Sección 4.4
de la Guía del usuario del control disponible a través de la dirección de
Section 4.4
du Guide de mise en service - Contrôle accessible
Inhaltsverzeichnis

Verwandte Anleitungen für Nidec Commander C300 PM/HS30 PM


Inhaltszusammenfassung für Nidec Commander C300 PM/HS30 PM
- Seite 1 Commander C300 PM/HS30 PM Step By Step Guide Guide pas à pas Schritt-für-Schritt-Anleitung Guida dettagliata Guía detallada Frame sizes 1 to 4 Tailles 1 à 4 Baugrößen 1 bis 4 Taglie da 1 a 4 Tamaños 1 a 4 www.controltechniques.com/support This guide provides a fast and simple start-up procedure for a basic drive and motor installation.
- Seite 2 Only the Safe Torque Off function may be used as a safety function of a machine. Name and address of the manufacturer and authorised representative Manufacturer: Authorised representative: Nidec Control Techniques Ltd Nidec Netherlands B.V. The Gro Kubus 155 Newtown...
- Seite 3 Safety of Machinery, Safety-related parts of control systems, General principles EN ISO 13849-1:2015 for design EN 62061:2005 + AC:2010 Safety of machinery, Functional safety of safety related electrical, electronic + A1:2013 + A2:2015 and programmable electronic control systems Functional safety of electrical/ electronic/programmable electronic safety- IEC 61508 Parts 1 - 7:2010 related systems Signed for and on behalf of:...
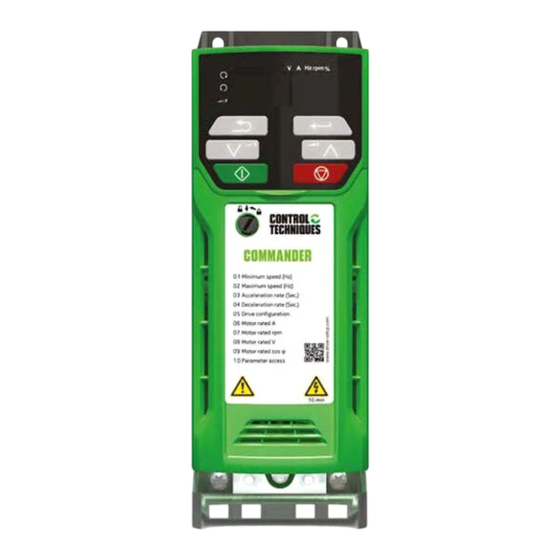
- Seite 4 Figure 1-1 Features of the drive Figure 1-1 Caractéristiques générales du variateur Abblidung 1-1 Umrichter-Leistungsmerkmale Figura 1-1 Parti costitutive dell'azionamento Figura 1-1 Características del accionamiento * Before removing the screw, refer to section 4.7.2 in the Power Installation Guide. * Avant de retirer la vis, consulter la section 4.7.2 du Guide d’installation - Puissance.
-
Seite 5: Schritt 1: Verpackungsinhalt Prüfen
English Francais Deutsch Italiano Espanol Connessioni Conexiones de Netzanschlüsse AC supply Connexions alimentación de CA dell'alimentazione connections (Refer to d’alimentation CA (Siehe Abblidung 1- (consulte Figura 1- c.a.(Vedere la Figure 1-2) (Voir la Figure 1-2) Figura 1-2) Erdungsanschlüsse Connessioni di Conexiones a tierra Connexions de mise Ground connections... - Seite 6 STEP 2: Check model and voltage ÉTAPE 2: Vérification du modèle et de la tension SCHRITT 2: Gerätetyp und Spannung prüfen FASE 2: Controllare il modello e la tensione PASO 2: Comprobación del modelo y la tensión C300-034 00073 A EN - Product EN - Electrical Specifications...
- Seite 7 STEP 3: Mount the drive ÉTAPE 3: Montage du variateur SCHRITT 3: Umrichter montieren FASE 3: Installare l'azionamento PASO 3: Montaje del accionamiento The drive should be mounted in an ambient temperature range of - 20 °C to 60 °C (- 4 °F to 140 °F). Output current derating may be required at ambient temperatures >...
- Seite 8 A Drill template for wall mounting is included on the drive packaging Un gabarit de perçage pour le montage mural est fourni avec le variateur Eine Bohrschablone für die Wandmontage ist in der Umrichterverpackung enthalten Una dima di foratura per il fissaggio a parete è inclusa nell'imballo dell'azionamento Se incluye una plantilla de perforación para el montaje en pared en el embalaje del accionamiento...
- Seite 9 STEP 4: Select supply / motor cables and fuses or MCB ÉTAPE 4: Sélection des câbles et des fusibles d’alimentation/ moteur ou des disjoncteurs magnéto-thermiques SCHRITT 4: Versorgungs-/Motorkabel und Sicherungen oder Sicherungsautomaten auswählen FASE 4: Selezionare i cavi di alimentazione / del motore e i fusibili o gli MCB PASO 4: Selección de cables de suministro / motor y fusibles o microdisyuntor...
- Seite 10 Los cables de suministro / motor y fusibles o microdisyuntor utilizados deben respetar los valores nominales indicados en la tabla a continuación: La tensión nominal de los fusibles y de los microdisyuntores debe ser superior o igual a la tensión de alimentación máxima del sistema. Fusibles: En la alimentación de CA del accionamiento debe instalarse una protección adecuada contra sobrecargas.
- Seite 11 * These fuses are fast acting. ** For UL installations, the circuit breaker must be listed under category control number DIVQ / DIVQ7, rated 600 Vac with a short circuit rating > 10 kA. In other countries, circuit breakers compliant with EN IEC 60947- 2 are recommended, with >...
-
Seite 12: Schritt 5: Klemmenabdeckung Abnehmen
STEP 5: Remove the terminal cover ÉTAPE 5: Démontage du capot SCHRITT 5: Klemmenabdeckung abnehmen FASE 5: Rimuovere la copertura dei terminali PASO 5: Extracción de la tapa de terminales STEP 6: Wire the drive up After completing step 6 re-fit the terminal cover (refer to step 5). ÉTAPE 6: Câblage du variateur Après avoir effectué... - Seite 13 Figure 1-2 Power terminal connections Figure 1-2 Connexions des bornes de puissance Abblidung 1-2 Netzanschlussklemmen Figura 1-2 Connessioni dei terminali di potenza Figura 1-2 Conexiones de los terminales de potencia L1/Live/Sous tension/ Sotto tensione/con corriente L3/Neutral/Neutre/ Neutro/neutra Ground connections The supply and motor ground connections are made using the ground busbar located at the bottom of the drive as shown in Figure 1-3.
- Seite 14 Electrochemical corrosion of grounding terminals Ensure that grounding terminals are protected against corrosion i.e. as could be caused by condensation. WARNING The ground loop impedance must conform to the requirements of local safety regulations. The drive must be grounded by a connection capable of carrying the prospective fault current until the protective device (fuse, etc.) disconnects the AC supply.
- Seite 15 Figure 1-3 Size 1 to 4 ground connections (size 2 shown) Figure 1-3 Connexions de mise à la terre pour tailles 1 à 4 (taille 2 illustrée) Abblidung 1-3 Erdverbindungen der Baugrößen 1 und 4 (Abbildung zeigt Baugröße 2) Figura 1-3 Connessioni di terra delle taglie da 1 a 4 (nella figura la taglia 2) Figura 1-3 Conexiones a tierra en los tamaños 1 a 4 (se ilustra el tamaño 2) 4 x M4 Figure 1-4 Control connections...
- Seite 16 Figure 1-4 Connexions de contrôle Les bornes de contrôle sont configurées par défaut pour l’installation illustrée ci-dessous : E/S logiques E/S analogiques 24 V utilisateur E/S logique 1 Entrée analogique 1 Référence de Fréquence nulle 10 kΩ fréquence 1 10 V utilisateur Non affecté...
- Seite 17 Figura 1-4 Connessioni di controllo I terminali di controllo sono configurati per default per la configurazione illustrata di seguito: I/O digitali I/O analogici Utenza 24 V I/O digitali 1 Ingresso analogico 1 Riferimento di Frequenza zero 10 kΩ frequenza 1 Utenza 10 V Nessuno Ingresso digitale 3...
- Seite 18 Figure 1-5 Commander C300 Safe Torque Off wiring instructions Figure 1-5 Instructions de câblage Absence sûre de couple (Safe Torque Off) pour le Commander C300 Abbildung 1-5 STO-Verdrahtungsanweisungen Commander C300 Figura 1-5 Istruzioni di connessione della funzione Safe Torque Off nel Commander C300 Figura 1-5 Instrucciones de cableado de Safe Torque Off de Commander C300 S 01...
- Seite 19 STEP 7: Use the keypad ÉTAPE 7: Utilisation du clavier SCHRITT 7: Verwendung der Bedieneinheit FASE 7: Utilizzare il tastierino PASO 7: Uso del teclado ESCAPE 1 1 1 3 1 1 1 1 mode . 1 1 1 4 1 1 1 5 1 1 1 2 ESCAPE...
- Seite 20 ESCI START INVIO per I tasti freccia SU/ ARRESTA / accedere alla GIÙ servono per RESETTA Serve per uscire Serve per avviare modalità di selezionare dalla modalità l'azionamento l'azionamento nella visualizzazione o di parametri singoli o modifica / nella modalità modalità...
- Seite 21 STEP 8: Run the motor ÉTAPE 8: Mise en marche du moteur SCHRITT 8: Motorbetrieb FASE 8: Avviamento del motore PASO 8: Puesta en marcha del motor Permanent magnet motor commissioning Action Detail Power-up the Ensure: drive • Drive displays ‘inh’ (enable terminals are open). Set maximum Enter: speed...
- Seite 22 Mise en service du moteur à aimants permanents Action Description Mise sous Vérifier que : tension du • Le variateur affiche « inh » (bornes Déverrouillage ouvertes). variateur Réglage de la Entrer : vitesse • La vitesse maximum P00.002 (Hz) maximale Réglage des Entrer :...
- Seite 23 Inbetriebnahme des Synchronmotors Maßnahme Detail Einschalten Folgende Punkte sicherstellen: • Der Umrichter zeigt ‚inh‘ an (Freigabeklemmen offen). Umrichters Einstellen der Eingabe: Sollwertbegre • Sollwertbegrenzung (Maximum) P00.002 (Hz) nzung (Maximum) Eingabe der Eingabe: Beschleunigu • Beschleunigungszeit in P00.003 (s/Maximalfrequenz) ngs- und •...
- Seite 24 Messa in servizio di un motore a magneti permanenti Azione Dettaglio Accensione Assicurarsi che: dell'azioname • Sul display sia visualizzato ‘inh’ (i terminali di abilitazione sono aperti). Impostazione Immettere: della velocità • Velocità massima P00.002 (Hz) massima Impostazione Immettere: dei tempi di •...
- Seite 25 Puesta en servicio del motor de imanes permanentes Acción Explicación Encendido del Asegúrese de lo siguiente: accionamient • El accionamiento muestra ‘inh’ (terminales de activación abiertos). Ajustar la Introduzca: velocidad • Velocidad máxima P00.002 (Hz) máxima Ajustar Introduzca: velocidades • Velocidad de aceleración en P00.003 (s/frecuencia máxima) •...
-
Seite 26: Ulteriori Informazioni
Additional Information Troubleshooting When the drive detects a fault it will display an error code. To locate and solve all error codes, a ‘Diagnostic Tool (App)’ is available on Microsoft, Android and iOS platform via the ‘Apps’ store on Smartphone / Tablet, search for ‘Control Techniques diagnostics tool in the Apps store’. - Seite 27 Información adicional Detección de problemas El accionamiento muestra un código de error cuando detecta una avería. Para localizar y resolver todos los códigos de error, está disponible la aplicación “Diagnostic Tool (App)” para plataformas Microsoft, Android e iOS mediante la tienda de aplicaciones del smartphone / tablet; busque “Control Techniques diagnostics tool”...
-
Seite 28: Statusanzeigen
Status indications Drive output String Description stage The drive is inhibited and cannot be run. The Drive Enable signal is not Disabled applied to the drive enable terminal or is set to 0. The drive is ready to run. The drive enable is active, but the drive Disabled inverter is not active because the final drive run is not active. -
Seite 29: Indicazioni Di Stato
Indicazioni di stato Stadio di uscita Stringa Descrizione azionamento L'azionamento è inibito e non può essere avviato. Il segnale di Abilitazione azionamento non è applicato al terminale di abilitazione Disabilitato azionamento, oppure è impostato a 0. L'azionamento è pronto per essere avviato. L'abilitazione azionamento è... - Seite 30 Basic parameters range and default For information on parameters beyond P00.001 to P00.010 refer to the Quick Start Guide. Parameter Range () Default () Minimum Speed 0.00 to P00.002 Hz 0.00 Hz 0.00 to 599.00 Hz Def.50: 50.00 Hz Maximum Speed (HS30 0 to 1000 Hz) Def.60: 60.00 Hz Acceleration Rate 1...
-
Seite 31: Basisparameterbereich Und Standardeinstellung
Basisparameterbereich und Standardeinstellung Informationen zu anderen Parametern als P00.001 bis P00.010 finden Sie in der Kurzanleitung. Parameter Bereich () Standardwerte () Sollwertbegrenzung 0,00 bis P00.002 Hz 0,00 Hz (Minimum) 0,00 bis 599,00 Hz Def.50: 50,00 Hz Max. Drehzahl (HS30 0 bis 1000 Hz) Def.60: 60,00 Hz Beschleunigungszeit 1 0,0 bis 3000,0 s... - Seite 32 Rango y valores por defecto de los parámetros básicos Para información sobre parámetros distintos de P00.001 a P00.010 consulte la Guía de inicio rápido. Parámetro Rango () Valor por defecto () Velocidad mínima 0,00 a P00.002 Hz 0,00 Hz 0,00 a 599,00 Hz Def.50: 50,00 Hz Velocidad máxima (HS30 0 a 1000 Hz)
-
Seite 33: Electrical Installation
Appendix A UL listing information This addendum provides additional information requested by UL to be supplied with the product. UL file reference All models are UL Listed to both Canadian and US requirements. The UL file reference is: NMMS/7.E171230. Products that incorporate the Safe Torque Off function have been investigated by UL. The UL file reference is: FSPC.E171230. - Seite 34 OPENING OF BRANCH CIRCUIT Opening of the branch-circuit protective device may be an indication that a fault has been interrupted. To reduce the risk of fire or electric shock, the equipment should be examined and replaced if damaged. If burnout of the current element of an overload relay occurs, the complete overload relay must be replaced.
- Seite 35 Avertissement Warning Avant d’utiliser ce produit, il est impératif de lire et de bien Before using this product you must read and understand the comprendre les consignes de sécurité du Guide de mise en safety information within the User Guide at the URL below. service, disponible à...
- Seite 36 Free 5-year Manufacturer’s Warranty In order to qualify for the free 5-year manufacturer’s warranty, you must register your drive on www.controltechniques.com/shield within six (6) months of date of purchase. Failure to register within the specified period will mean that your drive will only benefit from the warranty given to you by the person or entity that sold the drive to you.
-
Seite 38: Unternehmensinformationen
Company information Control Techniques Limited. Registered Office: The Gro, Newtown, Powys SY16 3BE. Registered in England and Wales. Company Reg. No. 01236886. Moteurs Leroy-Somer SAS. Headquarters: Bd Marcellin Leroy, CS 10015, 16915 Angoulême Cedex 9, France.Share Capital: 65 800 512 €, RCS Angoulême 338567258. Informations sur la société...