Beem 3260 ESPRESSO-PERFECT Bedienungsanleitung
Inhaltsverzeichnis
Verfügbare Sprachen
Verfügbare Sprachen
Quicklinks
Bedienungsanleitung - Produkt 1:
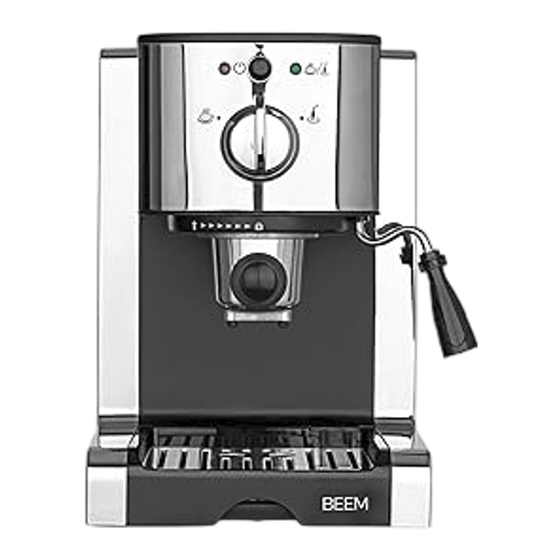
BEEM 3260 ESPRESSO-PERFECT Siebträgermaschine |
Espressomaschine mit 20 bar Pumpe | Für Kapseln,
Pulver&Pads; für den Kaffeegenuss zu Hause | Mit
Milchschaumdüse für Kaffeespezialitäten wie vom Barista
Bedienungsanleitung - Produkt 2:
ROMMELSBACHER Kaffeemühle EKM 200 –
aromaschonendes Scheibenmahlwerk, Mahlgrad einstellbar
von grob bis fein, 2-12 Portionen, Füllmenge Bohnenbehälter
250 g, 110 Watt, schwarz
Kapitel
Inhaltsverzeichnis

Verwandte Anleitungen für Beem 3260 ESPRESSO-PERFECT


Inhaltszusammenfassung für Beem 3260 ESPRESSO-PERFECT
- Seite 1 Bedienungsanleitung - Produkt 1: BEEM 3260 ESPRESSO-PERFECT Siebträgermaschine | Espressomaschine mit 20 bar Pumpe | Für Kapseln, Pulver&Pads; für den Kaffeegenuss zu Hause | Mit Milchschaumdüse für Kaffeespezialitäten wie vom Barista Bedienungsanleitung - Produkt 2: ROMMELSBACHER Kaffeemühle EKM 200 –...
- Seite 2 Lieferumfang Geräteübersicht Informationen zu Deiner Gebrauchsanleitung Bestimmungsgemäßer Gebrauch Sicherheitshinweise Vor dem ersten Gebrauch Gerät aufstellen und anschließen Bedienung und Betrieb Kontrollleuchten Wahlschalter Warmhalteplatte Abtropfschale einsetzen / herausnehmen Wassertank füllen Siebeinsatz einsetzen / herausnehmen Siebeinsätze für Pulver und Pads befüllen Siebeinsatz für Kapseln befüllen Siebträger in das Gerät einsetzen Siebträger aus dem Gerät herausnehmen Siebeinsatz für Pulver und Pads entleeren...
-
Seite 3: Lieferumfang
Lieferumfang Hauptgerät Siebträger für Pulver- und Pad-Einsätze Siebträger für Kapseleinsatz Siebeinsatz groß für Kaffeepulver zur Zubereitung von 2 Tassen Espressi bzw. 1 Tasse doppelten Espresso Siebeinsatz klein für Kaffeepulver oder Kaffeepads Typ E.S.E. , Senseo (Markenzeichen Dritter) o. - Seite 4 Du Dich für diese Espressomaschine entschieden hast. Solltest Du Fragen zum Gerät sowie zu Ersatz- / Zubehörteilen haben, kontaktiere den Kundenservice über unsere Website: www.beem.de Informationen zu Deiner Gebrauchsanleitung Lies vor dem ersten Gebrauch des Gerätes die Gebrauchsanleitung sorgfältig durch und bewahre sie zum späteren Nachlesen auf.
-
Seite 5: Sicherheitshinweise
Sicherheitshinweise WARNUNG: Alle Sicherheitshinweise, Anweisungen, Bebilderungen und technischen Daten, mit denen dieses Gerät versehen ist, beachten. Versäumnisse bei der Einhaltung der Sicherheitshinweise und Anweisungen können elektrischen Schlag, Brand und / oder Verletzungen verursachen. Dieses Gerät kann von Kindern ab 8 Jahren sowie von Personen ... - Seite 6 Keine Veränderungen am Gerät vornehmen. Die Anschlussleitung nicht selbst austauschen. Wenn das Gerät oder die Anschlussleitung des Gerätes beschädigt sind, müssen diese durch den Hersteller, Kundenservice oder autorisierte Fachhändler ersetzt bzw. repariert werden, um Gefährdungen zu vermeiden. Unbedingt die Hinweise im Kapitel „Reinigung und Pege“ ...
-
Seite 7: Warnung - Brandgefahr
Die Klingen im Siebeinsatz für Kapseln sind sehr spitz und scharf. Nicht in den Siebeinsatz greifen. Im Interesse der eigenen Sicherheit das Gerät und die Anschlussleitung vor jeder Inbetrieb- nahme auf Beschädigungen überprüfen. Das Gerät nur benutzen, wenn es funktionsfähig ist. ... -
Seite 8: Gerät Aufstellen Und Anschließen
Vor dem ersten Gebrauch 1. Wische das Gerät mit einem sauberen, feuchten Tuch ab. Reinige alle Zubehörteile mit etwas Spülmittel und klarem Wasser. 2. Stelle das Gerät auf und schließe es an (siehe Kapitel „Gerät aufstellen und anschließen“). 3. Vor dem ersten Espresso- oder Kaffeegenuss empfehlen wir einen Probelauf durchzu- führen, um eventuelle Produktionsrückstände im Wassersystem zu entfernen. -
Seite 9: Wahlschalter
Bedienung und Betrieb Kontrollleuchten Das Gerät verfügt über zwei Kontrollleuchten: Die Betriebsleuchte (17) leuchtet, wenn das Gerät eingeschaltet ist. Die Temperaturleuchte (2) leuchtet, wenn die korrekte Temperatur erreicht ist und der Brühvorgang gestartet werden kann. Wahlschalter Der Wahlschalter (15) kann auf drei Positionen gestellt werden: In dieser Position ist das Gerät im Stand-by-Modus. -
Seite 10: Siebeinsatz Einsetzen / Herausnehmen
Wasser zum Kaffeekochen, fülle keine Milch oder andere Flüssigkeiten in den Wassertank! 4. Setze den Wassertank in das Gerät ein, indem Du ihn von oben in das Gerät schiebst. Achte darauf, dass die Rastnasen des Wassertanks in den dafür vorgesehenen Aus- sparungen am Gerät sitzen (Bild C). -
Seite 11: Siebträger In Das Gerät Einsetzen
Siebträger in das Gerät einsetzen 1. Halte den befüllten Siebträger (10) am Griff fest und setze ihn unter dem Symbol in das Gerät ein. steht (Bild E). 2. Drehe den Siebträger nach rechts ( ) , bis er unter dem Symbol Siebträger aus dem Gerät herausnehmen 1. -
Seite 12: Zubereitung
Auch der Mahlgrad des Espresso- / Kaffeepulvers hat Einuss auf das Aroma und die Crema. Experimentiere auch hier mit verschiedenen Mahlgraden. Drücke das Espresso- / Kaffeepulver im Siebeinsatz nicht zu fest an. Bei zu stark gepresstem Espresso- / Kaffeepulver kann sich die Durchlaufzeit erhöhen, wodurch vermehrt Bitterstof- fe auftreten können. -
Seite 13: Milchschaum Zubereiten
Milchschaum zubereiten 1. Befülle den Wassertank (18) (siehe Kapitel „Bedienung und Betrieb“ – „Wassertank füllen“). 2. Schalte das Gerät ein, indem Du den Ein- / Ausschalter (16) drückst. Die Betriebsleuch- te (17) leuchtet und das Gerät beginnt mit dem Heizvorgang. 3. -
Seite 14: Getränke Mit Dampf Erhitzen
Getränke mit Dampf erhitzen Mit dem vom Gerät erzeugten Dampf können Milch, Getränke und Teewasser erhitzt werden. 1. Folge den Schritten 1. – 5. im Abschnitt „Milchschaum zubereiten“. 2. Tauche die Dampfdüse ganz in das Gefäß mit dem zu erwärmenden Getränk ein. 3. -
Seite 15: Latte Macchiato
5. Schöpfe den Milchschaum mit einem Löffel aus dem Aufschäumbehälter und verteile ihn als Haube auf dem Cappuccino. 6. Streue nach Belieben etwas Kakaopulver oder Zimt über den Milchschaum. Latte Macchiato Latte Macchiato besteht klassischerweise aus drei Schichten: einer untersten Schicht heißer Milch (2/3), einer obersten Schicht geschäumter Milch (1/3) und einem Espresso, der durch den Milchschaum gegossen wird. -
Seite 16: Dampfdüse Reinigen
Erste Anzeichen, dass eine Entkalkung notwendig ist, sind starke Dampfentwicklung und ver- langsamtes Brühen des Kaffees. Zur Entkalkung empfehlen wir das BEEM Premium Entkalker Konzentrat. Das efziente und le- bensmittelsichere sowie umweltschonende BEEM Premium Entkalker Konzentrat ist im ausgewähl- ten Fachhandel, über unsere Homepage www.beem.de oder auf Anfrage bei unserem Kundenser- vice erhältlich. -
Seite 17: Aufbewahrung
6. Lass etwa ein Drittel der Lösung durchlaufen und drehe dann den Wahlschalter auf die Position 7. Lass die Entkalkungslösung einige Zeit einwirken. 8. Stelle den Wahlschalter nach ca. 30 Minuten erneut auf die Position und lass die restliche Lösung durchlaufen. 9. -
Seite 18: Mögliche Ursache
Problem Mögliche Ursache Behebung Es bendet sich zu viel Wasser Überfülle den Wassertank nicht! im Wassertank (18). Stelle den Wahlschalter immer auf die Position Es läuft Wasser aus Die Brüh- oder Dampfposition wenn kein Gefäß unter dem dem Gerät. ist eingestellt. Siebträgerauslauf oder der Dampfdüse (3) steht. -
Seite 19: Gewährleistung Und Haftungsbeschränkungen
Gewährleistung und Haftungsbeschränkungen Von der Gewährleistung ausgeschlossen sind alle Mängel, die durch unsachgemäße Behandlung, Verkalkung, Beschädigung oder Reparaturversuche entstehen. Dies gilt auch für den normalen Verschleiß. Wir übernehmen keine Haftung bei Schäden oder Folgeschäden bei: Nichtbeachtung der Bedienungsanleitung nicht bestimmungsgemäßer Verwendung ... - Seite 94 Bedienungsanleitung Instruction manual EKM 200 Kaffeemühle mit Scheibenmahlwerk Coffee mill with disc grinder...
-
Seite 95: Produktbeschreibung
Produktbeschreibung - Product description Taste für EIN/AUS ON/OFF switch Drehwähler für Pulvermengeneinstellung rotary knob for setting the powder quantity Drehwähler für Mahlgradeinstellung rotary knob for coarseness setting Pulverauffangbehälter powder container with cover Mahlstempel grinding block Reinigungspinsel (in Mahlstempel integriert) cleaning brush (inserted in grinding block) Netzstecker mit Kabel plug with cord Bohnenvorratsbehälter mit Deckel beans tank with cover... -
Seite 96: Inhaltsverzeichnis
Inhaltsverzeichnis Seite Produktbeschreibung .................. 2 Einleitung ........................ 4 Bestimmungsgemäßer Gebrauch ................. 4 Technische Daten ...................... 4 Lieferumfang ........................ 4 Verpackungsmaterial ....................4 Für Ihre Sicherheit ....................4 Vor dem ersten Gebrauch ................... 6 Wissenswertes ....................... 6 Inbetriebnahme des Gerätes ................ 7 Pulverauffangbehälter einbauen .................. 7 Bohnenvorratsbehälter befüllen ................... 7 Mahlgrad einstellen ...................... 7 Pulvermenge einstellen .................... 7 Gerät ein- bzw. ausschalten .................. 8... -
Seite 97: Einleitung
Einleitung Die Zubehörteile können Sie in heißem Wasser mit etwas Spülmittel säubern oder in de Einleitung spüler geben. Tauchen Sie das Gerät nie in Wasser und achten Sie auch darauf, dass von unten kein Wir freuen uns, dass Sie sich für diesen vielseitigen Backofen entschieden hab Wir freuen uns, dass Sie sich für diese hochwertige Kaffeemühle entschieden haben und Wasser eindringen kann! Gerät nicht mit einem Dampfreiniger behandeln! bedanken uns für Ihr Vertrauen. Die einfache Bedienung sowie das hervorragende Mahlergebnis... - Seite 98 sensorischen oder geistigen Fähigkeiten eingeschränkt sind, dürfen das Gerät nicht ohne Aufsicht oder Anleitung durch eine für ihre Sicherheit verantwortliche Person benutzen. Lassen Sie das Gerät nicht ohne Aufsicht in Betrieb. • Kinder sollen beaufsichtigt werden, um sicherzustellen, dass sie nicht mit dem Gerät spielen. • Verpackungsmaterialien wie z. B. Folienbeutel gehören nicht in Kinderhände. • Dieses Gerät keinesfalls über eine externe Zeitschaltuhr oder ein separates Fernwirksystem betreiben. • Vor jeder Inbetriebnahme das Gerät und die Zubehörteile auf einwandfreien Zustand kontrollieren, es darf nicht in Betrieb genommen werden, wenn es einmal heruntergefallen sein sollte oder sichtbare Schäden aufweist. In diesen Fällen das Gerät vom Netz trennen und von einer Elektro-Fachkraft überprüfen lassen. • Beachten Sie bei der Verlegung des Netzkabels, dass niemand sich darin verheddern oder darüber stolpern kann, um ein versehentliches Herunterziehen des Gerätes zu vermeiden. • Halten Sie das Netzkabel fern von heißen Oberflächen, scharfen Kanten und mechanischen Belastungen. Überprüfen Sie das Netzkabel regelmäßig auf Beschädigungen und Verschleiß. Beschädigte oder verwickelte Netzkabel erhöhen das Risiko eines elektrischen Schlages. • Um das Gerät vom Stromnetz zu trennen, ziehen Sie nur am Stecker, niemals an der Leitung! • Tauchen Sie Gerät, Netzkabel und Netzstecker zum Reinigen nie in Wasser. • Lagern Sie das Gerät nicht im Freien oder in feuchten Räumen. • Dieses Elektrogerät entspricht den einschlägigen Sicherheitsbestimmungen. Ist das Gerät oder das Netzkabel beschädigt, sofort den Netzstecker ziehen. Reparaturen dürfen nur von autorisierten Fachbetrieben oder durch unseren Werkskundendienst durchgeführt werden. Durch unsachgemäße Reparaturen können erhebliche Gefahren für den Benutzer entstehen. • Unsachgemäßer Gebrauch und Missachtung der Bedienungsanleitung führen zum Verlust des Garantieanspruchs.
-
Seite 99: Arbeiten Sie Mit Vorsicht
Sicherheitshinweise zum Gebrauch des Gerätes ACHTUNG: Verletzungsgefahr! Während der Benutzung nicht mit Gegenständen im Bohnenbehälter hantieren und nie in das laufende Mahlwerk greifen! Arbeiten Sie mit Vorsicht: • Um Verletzungen zu verhindern, müssen Haare, Hände und Kleidung unbedingt vom laufenden Mahlwerk ferngehalten werden. • Das Gerät nie im Leerlauf oder mit feuchten Händen betreiben. • Stellen Sie das Gerät auf eine stabile und ebene Fläche und betreiben Sie es nicht in der Nähe von Wärmequellen (Herd, Gasfl amme etc.) sowie in explosionsgefährdeter Umgebung, in der sich brennbare Flüssigkeiten oder Gase befi nden. • Außerhalb der Reichweite von Kindern aufstellen. • Für eine sichere Ausschaltung ziehen Sie nach jedem Gebrauch den Netzstecker. -
Seite 100: Inbetriebnahme Des Gerätes
Inbetriebnahme des Geräts Das Gerät ist für eine maximale Dauerbetriebszeit von 2 Minuten (2 x 12 Tassen) ausgelegt. Ist diese Zeit erreicht, muss das Gerät für mindestens 2 Minuten abkühlen. Wird dies nicht beachtet, kann der Motor Schaden nehmen! HINWEIS: Das Gerät ist nicht zum Verarbeiten von Mohn, Nüssen, Zucker usw. geeignet! Bei Nichtbeachtung erlischt die Garantie. -
Seite 101: Gerät Ein- Bzw. Ausschalten
Gerät ein- bzw. ausschalten • Netzstecker in eine Steckdose stecken. Nicht benö- tigtes Kabel können Sie in der dafür vorgesehenen Kabelaufwicklung an der Unterseite des Gerätes verstauen. • Taste „EIN/AUS“ drücken. Das Gerät startet den zeit- gesteuerten Vermahlungsvorgang. Nach Erreichen der eingestellten Zeit schaltet das Gerät automatisch ab. • Sie können den Vermahlungsvorgang jederzeit unterbrechen, wenn Sie erneut die Taste „EIN/AUS“ drücken. • Nach Beendung des Vermahlungsvorganges immer den Netzstecker aus der Steckdose ziehen. Mahlstempel ein- bzw. ausbauen Mahlstempel ausbauen • Netzstecker aus der Steckdose ziehen. • Sämtliche Bohnen aus dem Bohnenvorratsbehälter entnehmen. • Mahlstempel nach rechts drehen, um den Bajonettverschluss zu öffnen. • Anschließend den Mahlstempel nach oben aus dem Bohnenvorratsbehälter entnehmen. Mahlstempel einbauen • Netzstecker aus der Steckdose ziehen. • Mahlstempel in den Bohnenvorratsbehälter einführen und auf den Bajonettverschluss aufsetzen. • Anschließend den Mahlstempel nach links bis zum Anschlag drehen, um den Bajonettverschluss zu s chließen. HINWEIS: Beim Ein- und Ausbauen des Mahlstempels kann sich die Einstellung des Mahlgrades ver- ändern. Dies können Sie verhindern, indem Sie beim Lösen oder Festdrehen des Mahlstempels den Drehwähler für den Mahlgrad festhalten. So verhindern Sie ein Verstellen der Mahlgradeinstellung! -
Seite 102: Fremdkörper Aus Dem Mahlwerk Entfernen - Verstopfung Beseitigen
Fremdkörper aus dem Mahlwerk entfernen – Verstopfung beseitigen • Es kann vorkommen, dass sich kleine Fremdkörper (z. B. Steinchen) in den Bohnen befi nden. Dies kann dazu führen, dass das Gerät dem Mahlvorgang nicht startet oder dass das Mahlwerk während des Mahlvorganges blockiert. • Im Falle eines Blockierens stoppen Sie das Gerät sofort, indem Sie Taste „EIN/AUS“ drücken. • Sie entfernen den Fremdkörper, indem Sie den Mahlstempel ausbauen und das Mahlwerk reinigen (siehe „Mahlstempel ein- bzw. ausbauen). • Kommt beim Mahlen kein Pulver aus der Maschine oder Sie bemerken eine leichte Rauchentwicklung, dann ist meist die Pulverauswurföff nung verstopft . Schalten Sie die Kaff eemühle aus und entf ernen Sie festsitzendes Kaff... -
Seite 104: Introduction
Einleitung Die Zubehörteile können Sie in heißem Wasser mit etwas Spülmittel säubern oder in den Geschirr- Introduction spüler geben. Tauchen Sie das Gerät nie in Wasser und achten Sie auch darauf, dass von unten kein Dampf oder Wir freuen uns, dass Sie sich für diesen vielseitigen Backofen entschieden hab We are pleased you decided in favour of this versatile coffee mill and would like to thank you for Wasser eindringen kann! Gerät nicht mit einem Dampfreiniger behandeln! your confi dence. Its easy operation as well as the excellent grinding result will certainly fi ll you... -
Seite 109: Service Und Garantie
Service und Garantie (gültig nur innerhalb Deutschlands) Sehr geehrter Kunde, ca. 95 % aller Reklamationen sind leider auf Bedienungsfehler zurückzuführen und könnten ohne Probleme behoben werden, wenn Sie sich telefonisch oder per E-Mail mit unserem Kundenservice in Verbindung setzen. Wir bitten Sie daher um Kontaktaufnahme mit uns, bevor Sie Ihr Gerät an Ihren Händler zurückgeben.