Inhaltsverzeichnis
Werbung
Verfügbare Sprachen
Verfügbare Sprachen
Quicklinks
All manuals and user guides at all-guides.com
INSTALLATION AND USERS MANUAL
Oven
MANUAL DE INSTALACIÓN Y DE UTILIZACION
Horno
MANUAL DE INSTALAÇAO E DO UTILIZADOR
Forno
MANUEL D'INSTALLATION ET D'UTILISATEUR
Four
INSTALLATIONS- UND BEDIENUNGSANLEITUNGEN
Backofen
EINBAU- UND BETRIEBSANLEITUNG
Backofen
N N Á Á V V O O D D N N A A I I N N S S T T A A L L A A C C I I A A P P O O U U Ž Ž I I T T Í Í
T T r r o o u u b b a a
INŠTALAČNÁ A POUŽÍVATEĽSKÁ PRÍRUČKA
Rúra
TELEPÍTÉSI ÉS HASZNÁLATI ÚTMUTATÓ
Sütő
Werbung
Inhaltsverzeichnis

Verwandte Anleitungen für Fagor 6H-760 N


Inhaltszusammenfassung für Fagor 6H-760 N
- Seite 1 All manuals and user guides at all-guides.com INSTALLATION AND USERS MANUAL Oven MANUAL DE INSTALACIÓN Y DE UTILIZACION Horno MANUAL DE INSTALAÇAO E DO UTILIZADOR Forno MANUEL D’INSTALLATION ET D’UTILISATEUR Four INSTALLATIONS- UND BEDIENUNGSANLEITUNGEN Backofen EINBAU- UND BETRIEBSANLEITUNG Backofen N N Á Á V V O O D D N N A A I I N N S S T T A A L L A A C C I I A A P P O O U U Ž Ž I I T T Í Í T T r r o o u u b b a a INŠTALAČNÁ...
- Seite 2 Your new FAGOR oven will fit harmoniously into your kitchen and perfectly combine cooking performance and ease of use. In the line of FAGOR products, you will also find a wide range of microwaves, ventilation hoods, dishwashers and refrigerators, all of which can be built in and all of which can be coordinated with your new FAGOR oven.
-
Seite 3: Inhaltsverzeichnis
All manuals and user guides at all-guides.com TABLE OF CONTENTS 1 / DESCRIPTION OF YOUR APPLIANCE • Introduction to your oven ____________________________________ • Introduction to the programmer ______________________________ 2 / USING YOUR OVEN • Using the programmer ______________________________________ º How to set the time _____________________________________ º... -
Seite 4: Description Of Your Appliance
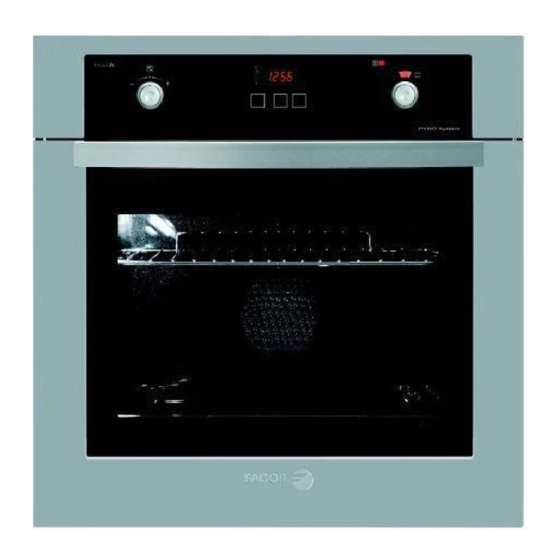
All manuals and user guides at all-guides.com 1 / DESCRIPTION OF YOUR APPLIANCE INTRODUCTION TO YOUR OVEN • APPLIANCE DESCRIPTION Temperature selector switch Shelf support indicator Programmer Level detection Door open sensor Function selector switch Lamp... -
Seite 5: Introduction To The Programmer
All manuals and user guides at all-guides.com 1 / DESCRIPTION OF YOUR APPLIANCE • INTRODUCTION TO THE PROGRAMMER Time, cooking time and Timer indicator temperature display Selection buttons Temperature indicator Adjustment buttons Cooking time indicator Cooking end time indicator... -
Seite 6: Using Your Oven
All manuals and user guides at all-guides.com 2 / USING YOUR OVEN USING THE PROGRAMMER • • How to set the time fig.1 When supplied with electricity The display flashes at 12:00 (fig.1) Set the time by pressing the + or — buttons (holding down the button allows you to scroll through the numbers rapidly) (fig.2). -
Seite 7: º Immediate Cooking
All manuals and user guides at all-guides.com 2 / USING YOUR OVEN •Immediate cooking — The programmer should display only the time. It should not be flashing (fig.1). fig.1 Turn the function selector to the position of your choice. Example: position (fig.2). -
Seite 8: Programmed Cooking
All manuals and user guides at all-guides.com 2 / USING YOUR OVEN PROGRAMMED COOKING • Cooking with immediate start and programmed duration - Select the desired cooking mode and adjust the temperature. fig.0 Example: position , temperature 200° (fig. 0). - Press the “... - Seite 9 All manuals and user guides at all-guides.com 2 / USING YOUR OVEN Cooking with delayed start and chosen cooking end time Proceed as with programmed cooking. - After setting the cooking time, press on the “ ” button until the cooking end time indicator “...
-
Seite 10: Using The Timer Function
All manuals and user guides at all-guides.com 2 / USING YOUR OVEN USING THE TIMER FUNCTION • Your oven’s programmer can be used as an independent timer that allows you to count down a time without operating the oven. In this case, the timer display has priority over the clock display. -
Seite 11: Oven Cooking Modes
All manuals and user guides at all-guides.com 3 / OVEN COOKING MODES OVEN COOKING MODES • Circulating heat (recommended temperature 200°C min 35°C max 275°C) • Cooking controlled by the upper element and by the fan. • Requires preheating before placing the dish in the oven. •... - Seite 12 All manuals and user guides at all-guides.com 3 / OVEN COOKING MODES Traditional fan assisted (recommended temperature 180°C min 35°C max 275°C) • Cooking is controlled by the upper and lower heating elements and by the fan. • This position allows you to cook identical or different types of food on up to 2 levels. •...
-
Seite 13: Pyrolytic Oven
All manuals and user guides at all-guides.com 4 / CARING FOR AND CLEANING YOUR OVEN PYROLYTIC OVEN • - By using high temperatures, this type of oven destroys dirtiness caused by spattering or overflow. - The smoke released is destroyed as it moves through a catalyser. You should not wait until the oven is overly coated in grease to initiate a cleaning cycle. -
Seite 14: Starting The Cleaning Cycle
All manuals and user guides at all-guides.com 4 / CARING FOR AND CLEANING YOUR OVEN STARTING THE CLEANING CYCLE • In order to make the most of the heat which is already stored in the oven, thus saving energy: Start a pyrolysis cycle immediately after cooking. -
Seite 15: Replace The Fuse In Your
All manuals and user guides at all-guides.com 5 / WHAT TO DO IF YOUR OVEN MALFUNCTIONS If you have a doubt about the correct functioning of your oven, this does not necessarily mean that there is a malfunction. In any event, check the following items: POSSIBLE WHAT SHOULD YOU DO? YOU OBSERVE... - Seite 16 All manuals and user guides at all-guides.com...
- Seite 17 All manuals and user guides at all-guides.com...
- Seite 18 All manuals and user guides at all-guides.com Estimada Clienta, Estimado Cliente, Acaba de adquirir un horno FAGOR por lo que le quedamos sumamente agradecidos. Hemos diseñado para usted esta nueva generación de aparatos que le permitirán dar rienda suelta cada día a su talento de chef y a su creatividad, para su propio placer y el de sus amigos y familiares.
- Seite 19 All manuals and user guides at all-guides.com ÍNDICE 1 / DESCRIPCIÓN DEL APARATO • Descripción del horno ______________________________________ • Presentación del programador _______________________________ 2 / UTILIZACIÓN DEL HORNO • Utilización del programador __________________________________ º Regulación de la hora ___________________________________ º Cocción inmediata _____________________________________ •...
-
Seite 20: Descripción Del Aparato
All manuals and user guides at all-guides.com 1 / DESCRIPCIÓN DEL APARATO DESCRIPCION DEL HORNO • DESCRIPCIÓN DEL APARATO Selector de temperatura Indicador de altura Programador Contacto de detección de apertura de puerta Selector de funciones Bombilla... - Seite 21 All manuals and user guides at all-guides.com 1 / DESCRIPCIÓN DEL APARATO PRESENTACIÓN DEL PROGRAMADOR • Presentación de la hora, la Indicador del minutero duración y la temperatura Mandos de selección Indicador de temperatura Mandos de regulación Indicador de duración de cocción Indicador de final de cocción...
- Seite 22 All manuals and user guides at all-guides.com 2 / UTILIZACIÓN DEL HORNO UTILIZACIÓN DEL PROGRAMADOR • • Regulación de la hora fig. 1 Al conectar el horno El visor parpadea a las 12:00 (fig. 1). Regule la hora pulsando los mandos + o — (manteniendo pulsado el mando, los números pasan rápidamente) (fig.
-
Seite 23: Utilización Del Horno
All manuals and user guides at all-guides.com 2 / UTILIZACIÓN DEL HORNO •Cocción inmediata — El programador sólo debe indicar la hora. Ésta no debe parpadear (fig. 1). fig. 1 Gire el selector de funciones a la posición seleccionada. (fig. 2) . Ejemplo: posición fig. -
Seite 24: Cocción Programada
All manuals and user guides at all-guides.com 2 / UTILIZACIÓN DEL HORNO COCCIÓN PROGRAMADA • Cocción con puesta en marcha inmediata y duración programada - Elija el modo de cocción deseado y ajuste la temperatura. fig. 0 Ejemplo: posición , temperatura 200°... - Seite 25 All manuals and user guides at all-guides.com 2 / UTILIZACIÓN DEL HORNO Cocción con puesta en marcha retar- dada y hora de fin de cocción elegida Proceda como para una cocción progra- mada. - Después de regular el tiempo de cocción, pulse el mando “...
- Seite 26 All manuals and user guides at all-guides.com 2 / UTILIZACIÓN DEL HORNO UTILIZACION DE LA FUNCION • MINUTERIA El programador del horno puede utilizarse como minutero independiente que permite la cuenta atrás de cierto tiempo sin funciona- miento del horno. En ese caso, la visualización del minutero pre- domina sobre la visualización de la hora.
-
Seite 27: Los Modos De Cocción Del Horno
All manuals and user guides at all-guides.com 3 / LOS MODOS DE COCCIÓN DEL HORNO MODOS DE COCCIÓN DEL HORNO • Calor giratorio (temperatura recomendada 200°C mín. 35°C máx. 275°C) • La cocción se realiza alternativamente con el elemento calefactor y con la hélice para mover el aire. - Seite 28 All manuals and user guides at all-guides.com 3 / LOS MODOS DE COCCIÓN DEL HORNO Tradicional Ventilado (temperatura recomendada 180°C mín. 35°C máx. 275°C) • La cocción se efectúa con la resistencia inferior y la superior y con la hélice de movimiento de aire.
-
Seite 29: Mantenimiento Y Limpieza Del Horno
All manuals and user guides at all-guides.com 4 / MANTENIMIENTO Y LIMPIEZA DEL HORNO HORNO PIROLÍTICO • -Este tipo de hornos se limpian por eliminación a alta temperatura de los residuos procedentes de salpicaduras o desbordamientos. - Los humos y olores emitidos se destruyen al pasar por un catalizador. No hay que esperar a que el horno tenga mucha grasa para efectuar esta limpieza. - Seite 30 All manuals and user guides at all-guides.com 4 / MANTENIMIENTO Y LIMPIEZA DEL HORNO INICIO DE LA LIMPIEZA • Para aprovechar la cantidad de calor que ya tiene el horno y ahorrar energía: Ponga en marcha la pirólisis después de una cocción.
-
Seite 31: En Caso De Anomalías En El Funcionamiento Del Horno
All manuals and user guides at all-guides.com 5 / EN CASO DE ANOMALÍAS EN EL FUNCIONAMIENTO DEL HORNO Aunque tenga una duda sobre el correcto funcionamiento del horno, esto no significa forzosamente que se haya producido una avería. En todo caso, compruebe los siguientes puntos: CAUSAS ¿QUÉ... - Seite 32 All manuals and user guides at all-guides.com...
- Seite 33 All manuals and user guides at all-guides.com...
- Seite 34 O seu novo forno FAGOR integra-se harmoniosamente na sua cozinha e alia perfeitamente a facilidade de utilização e os mais altos desempenhos de cozedura.
- Seite 35 All manuals and user guides at all-guides.com ÍNDICE 1 / DESCRIÇÃO DO SEU APARELHO • Apresentação do seu forno __________________________________ • Apresentação do programador _______________________________ 2 / UTILIZAÇÃO DO SEU FORNO • Utilização do programador ___________________________________ º Como acertar a hora ____________________________________ º...
-
Seite 36: Descrição Do Aparelho
All manuals and user guides at all-guides.com 1 / DESCRIÇÃO DO SEU APARELHO APRESENTAÇÃO DO SEU FORNO • DESCRIÇÃO DO APARELHO Selector de temperatura Indicador de encaixes Programador Contacto de detecção da abertura da porta Selector de funções Lâmpada... - Seite 37 All manuals and user guides at all-guides.com 1 / DESCRIÇÃO DO SEU APARELHO • APRESENTAÇÃO DO PROGRAMADOR Apresentação da hora, durações e Indicador do temporizador temperatura Botão de selecção Indicador da temperatura Botões de regulação Indicador de duração de cozedura Indicador de fim de cozedura...
- Seite 38 All manuals and user guides at all-guides.com 2 / UTILIZAÇÃO DO SEU FORNO UTILIZAÇÃO DO PROGRAMADOR • imagem 1 • Como acertar a hora Aquando da ligação eléctrica imagem 2 O visor pisca nas 12:00. (imagem 1) Acerte a hora, premindo os botões + e - (para obter um desfile rápido, prima continuamente o botão) (imagem 2).
- Seite 39 All manuals and user guides at all-guides.com 2 / UTILIZAÇÃO DO SEU FORNO •Cozedura imediata — O programador deve apenas visualizar a hora. Esta não deve estar a piscar (imagem 1). imagem 1 Rode o selector de funções para a posição pretendida.
-
Seite 40: Cozedura Programada
All manuals and user guides at all-guides.com 2 / UTILIZAÇÃO DO SEU FORNO COZEDURA PROGRAMADA • Cozedura com início imediato e duração programada - Escolha o modo de cozedura pretendido e ajuste a temperatura. imagem 0 Exemplo: Posição , temperatura 200° (imagem - Prima o botão “... - Seite 41 All manuals and user guides at all-guides.com 2 / UTILIZAÇÃO DO SEU FORNO Cozedura com início diferido e hora fi- nal escolhida Proceda como para uma cozedura progra- mada. - Após a regulação da duração de cozedura, prima o botão “ ”...
- Seite 42 All manuals and user guides at all-guides.com 2 / UTILIZAÇÃO DO SEU FORNO UTILIZAÇÃO DA FUNÇÃO • TEMPORIZADOR O programador do seu forno pode ser utili- zado como temporizador independente, per- mitindo uma contagem decrescente de tem- po sem funcionamento do forno. Nesse caso, o tempo indicado pelo tempori- zador é...
-
Seite 43: Modos De Cozedura Do Forno
All manuals and user guides at all-guides.com 3 / OS MODOS DE COZEDURA DO FORNO MODOS DE COZEDURA DO FORNO • Calor ventilado (temperatura recomendada 200 °C mín. 35 °C máx. 275 °C) • A cozedura é feita pelo elemento de aquecimento que se encontra no fundo do forno e pela hélice de ventilação do ar. - Seite 44 All manuals and user guides at all-guides.com 3 / OS MODOS DE COZEDURA DO FORNO Tradicional ventilado (temperatura recomendada 180 °C mín. 35 °C máx. 275 °C) • A cozedura é efectuada através dos elementos inferior e superior e através da ventoinha de ventilação.
- Seite 45 All manuals and user guides at all-guides.com 4 / MANUTENÇÃO E LIMPEZA DO SEU FORNO FORNO PIROLÍTICO • - Este tipo de forno limpa-se por destruição a alta temperatura da sujidade resultante dos salpicos ou derrames. - Os fumos libertados são destruídos após a passagem num catalisador. Não deixe o forno acumular demasiadas gorduras para efectuar esta limpeza.
- Seite 46 All manuals and user guides at all-guides.com 4 / MANUTENÇÃO E LIMPEZA DO SEU FORNO INÍCIO DA LIMPEZA • Para beneficiar da quantidade de calor já ar- mazenado no forno e poupar energia: imagem 1 Inicie uma pirólise após uma cozedura. Retire os acessórios do forno e remova os eventuais derrames importantes.
- Seite 47 All manuals and user guides at all-guides.com 5 / ANOMALIAS DE FUNCIONAMENTO Tem dúvidas relativamente ao bom funcionamento do seu forno, no entanto isto não significa que haja necessariamente uma avaria. Em todo caso, verifique os seguintes pontos: AS CAUSAS O QUE FAZER? SE CONSTATAR POSSÍVEIS...
- Seite 48 All manuals and user guides at all-guides.com...
- Seite 49 All manuals and user guides at all-guides.com...
- Seite 50 Votre nouveau four FAGOR s'intègrera harmonieusement dans votre cuisine et alliera parfaitement facilité d'utilisation et performances de cuisson. Vous trouverez également dans la gamme des produits FAGOR, un vaste choix de fours à micro-ondes, de hottes aspirantes, de lave-vaisselle, et de réfrigérateurs intégrables, que vous pourrez coordonner à...
- Seite 51 All manuals and user guides at all-guides.com SOMMAIRE 1 / DESCRIPTION DE VOTRE APPAREIL • • Présentation de votre four ___________________________________ • • Présentation du programmateur ______________________________ 2 / UTILISATION DE VOTRE FOURL • • Utilisation du programmateur ________________________________ º Comment régler l’heure _________________________________ º...
- Seite 52 All manuals and user guides at all-guides.com 1 / DESCRIPTION DE VOTRE APPAREIL DESCRIPTION DE VOTRE FOUR • • DESCRIPTIF APPAREIL Sélecteur de température Indicateur de gradin Programmateur Contact de détection d’ouverture de porte Sélecteur de fonctions Lampe...
-
Seite 53: Description De Votre Appareil
All manuals and user guides at all-guides.com 1 / DESCRIPTION DE VOTRE APPAREIL PRESENTATION DU PROGRAMMATEUR Affichage de l’heure, des durées Indicateur du minuteur et de la température Touche de sélection Indicateur de température Touches de réglage Indicateur de durée de cuisson Indicateur de fin de cuisson... -
Seite 54: Utilisation Du Programmateur
All manuals and user guides at all-guides.com 2 / UTILISATION DE VOTRE FOUR UTILISATION DU PROGRAMMATEUR • • • Réglage de l’heure fig.1 A la mise sous tension L’afficheur clignote à 12:00. (fig.1) Réglez l’heure en appuyant sur les touches + ou - (le maintien de la touche permet d’obtenir un défilement rapide) (fig.2). -
Seite 55: º Cuisson Immédiate
All manuals and user guides at all-guides.com 2 / UTILISATION DE VOTRE FOUR •Cuisson immédiate — Le programmateur ne doit afficher que l’heure. Celle-ci ne doit pas clignoter (fig.1). fig.1 Tournez le sélecteur de fonctions sur la posi- tion de votre choix. Exemple : position (fig.2). - Seite 56 All manuals and user guides at all-guides.com 2 / UTILISATION DE VOTRE FOUR CUISSON PROGRAMMEE • • Cuisson avec départ immédiat et durée programmée - Choisissez le mode de cuisson souhaité et ajustez la température. fig.0 Exemple : position température 200°(fig. - Appuyez sur la touche “...
- Seite 57 All manuals and user guides at all-guides.com 2 / UTILISATION DE VOTRE FOUR Cuisson avec départ différé et heure de fin choisie P P r r o o c c é é d d e e z z c c o o m m m m e e u u n n e e c c u u i i s s s s o o n n p p r r o o g g r r a a m m m m é é e e . . - Après le réglage de la durée de cuisson, appuyez sur la touche “...
-
Seite 58: º Utilisation De La Fonction Minuterie
All manuals and user guides at all-guides.com 2 / UTILISATION DE VOTRE FOUR UTILISATION DE LA FONCTION • • MINUTERIE L L e e p p r r o o g g r r a a m m m m a a t t e e u u r r d d e e v v o o t t r r e e f f o o u u r r p p e e u u t t ê ê t t r r e e u u t t i i l l i i s s é... -
Seite 59: Les Modes De Cuisson Du Four
All manuals and user guides at all-guides.com 3 / LES MODES DE CUISSON DU FOUR MODES DE CUISSON DU FOUR • • C C h h a a l l e e u u r r t t o o u u r r n n a a n n t t e e (température préconisée 2 2 0 0 0 0 °... - Seite 60 All manuals and user guides at all-guides.com 3 / LES MODES DE CUISSON DU FOUR T T r r a a d d i i t t i i o o n n n n e e l l V V e e n n t t i i l l é é (température préconisée 1 1 8 8 0 0 °...
-
Seite 61: Entretien Et Nettoyage De Votre Four
All manuals and user guides at all-guides.com 4 / ENTRETIEN ET NETTOYAGE DE VOTRE FOUR FOUR PYROLYTIQUE • • - Ce type de four nettoie par destruction à haute température les salissures qui proviennent des éclaboussures ou des débordements. - Les fumées dégagées sont détruites par leur passage dans un catalyseur. Il ne faut pas attendre que le four soit trop chargé... -
Seite 62: Démarrage Du Nettoyage
All manuals and user guides at all-guides.com 4 / ENTRETIEN ET NETTOYAGE DE VOTRE FOUR DEMARRAGE DU NETTOYAGE • • Pour bénéficier de la quantité de chaleur déjà emmagasinée dans le four, et économiser de l’énergie : Débutez une pyrolyse après une cuisson. Retirez les accessoires du four et enlevez les débordements importants qui auraient pu se fig.1... - Seite 63 All manuals and user guides at all-guides.com 5 / EN CAS D’ANOMALIES DE FONCTIONNEMENT DE VOTRE FOUR V V o o u u s s a a v v e e z z u u n n d d o o u u t t e e s s u u r r l l e e b b o o n n f f o o n n c c t t i i o o n n n n e e m m e e n n t t d d e e v v o o t t r r e e f f o o u u r r , , ceci ne signifie pas forcément qu'il y a une panne.
- Seite 64 All manuals and user guides at all-guides.com...
- Seite 65 All manuals and user guides at all-guides.com...
- Seite 66 Tag Ihre Kreativität und Ihre Talente als Küchenchef unter Beweis stellen können, um sich selbst und Ihren Freunden und Ihrer Familie Freude zu bereiten. Ihr neuer FAGOR Backofen fügt sich harmonisch in Ihre Küche ein und verbindet perfekt einfache Benutzung mit Kochleistung.
- Seite 67 All manuals and user guides at all-guides.com INHALT 1 / BESCHREIBUNG DES GERÄTS • Übersicht über den Ofen ____________________________________ • Programmiervorrichtung ____________________________________ 2 / NUTZUNG DES BACKOFENS • Nutzung der Programmiervorrichtung _________________________ º Einstellung der Uhr _____________________________________ º Sofortiger Garvorgang __________________________________ •...
-
Seite 68: Beschreibung Des Geräts
All manuals and user guides at all-guides.com 1 / BESCHREIBUNG DES GERÄTS ÜBERSICHT ÜBER DEN OFEN • GERÄTEBESCHREIBUNG Temperaturwahlschalter Anzeiger der Einschubleiste Programmierer Kontakt zur Feststellung der geöffneten Tür Funktionswahlschalter Lampe... -
Seite 69: Programmiervorrichtung
All manuals and user guides at all-guides.com 1 / BESCHREIBUNG DES GERÄTS • PROGRAMMIERVORRICHTUNG Anzeige der Uhrzeit, der Gardauer Anzeige des Kurzzeitweckers und der Temperatur Auswahltaste Temperaturanzeiger Einstelltasten Anzeiger der Gardauer Anzeige des Endes der Garzeit... -
Seite 70: Nutzung Des Backofens
All manuals and user guides at all-guides.com 2 / NUTZUNG DES BACKOFENS NUTZUNG DER • PROGRAMMIERVORRICHTUNG •Einstellung der Uhr Abb.1 Bei Anschluss an den Strom In der Anzeige blinkt 12:00 (Abb.1) Die Uhrzeit über die Tasten + und — einstellen (bei Festhalten der Taste erfolgt ein Schnelldurchlauf) (Abb. -
Seite 71: º Sofortiger Garvorgang
All manuals and user guides at all-guides.com 2 / NUTZUNG DES BACKOFENS •Sofortiger Garvorgang — Die Programmiervorrichtung darf nur die Uhrzeit anzeigen. Diese darf nicht blinken (Abb. 1). Abb.1 Den Funktionswahlschalter auf die gewünsch- te Position drehen. Beispiel: Position (Abb. 2). Abb.2 Der Backofen schlägt die für die gewählte Ga- rart optimale Temperatur vor (Abb. -
Seite 72: Programmierter Garvorgang
All manuals and user guides at all-guides.com 2 / NUTZUNG DES BACKOFENS PROGRAMMIERTER • GARVORGANG Unmittelbar anlaufender Garvorgang über vorprogrammierte Zeit - Garmodus wählen und Temperatur anpas- sen. Abb. Beispiel: Position , Temperatur 200° (Abb. - Die Taste „ “ drücken, bis die Anzeige für die Dauer der Garzeit „... - Seite 73 All manuals and user guides at all-guides.com 2 / NUTZUNG DES BACKOFENS Zeitlich versetzt anlaufende Garzeit und Wahl des Endzeitpunkts des Garvor- gangs Wie bei einem programmierten Garvorgang vorgehen. - Nach Einstellung der Gardauer die Taste „ “ drücken, bis die Anzeige für das Garen- de„...
-
Seite 74: Nutzung Der Funktion Kurzzeitwecker
All manuals and user guides at all-guides.com 2 / NUTZUNG DES BACKOFENS NUTZUNG DER FUNKTION • KURZZEITWECKER Der Programmierer des Ofens kann als un- abhängiger Kurzzeitwecker eingesetzt wer- den, ohne dass der Ofen eingeschaltet ist. In diesem Fall hat die Anzeige des Kurzzeitwe- ckers Vorrang vor der Anzeige der Tageszeit. -
Seite 75: Zubereitungsarten Im Backofen
All manuals and user guides at all-guides.com 3 /ZUBEREITUNGSARTEN IM BACKOFEN BACKTABELLE FÜR DEN BACKOFEN • Umluft (empfohlene Temperatur 200°C mindestens 35°C, maximal 275°C) • Das Garen erfolgt durch das Heizelement und durch die Schraube für die Luftumwäl- zung. • Erfordert ein Vorheizen, bevor das Gericht in den Backofen gestellt wird. •... - Seite 76 All manuals and user guides at all-guides.com 3 /ZUBEREITUNGSARTEN IM BACKOFEN Traditionell belüftet (empfohlene Temperatur 180° mindestens 35°C, maximal 275°) • Das Garen erfolgt durch die Heizelemente unten und oben sowie durch Umluft • Bei dieser Position können auf mehreren Ebenen (maximal 2) identische oder unter- schiedliche Gerichte gegart werden.
-
Seite 77: Pflege Und Reinigung Des Backofens
All manuals and user guides at all-guides.com 4 / PFLEGE UND REINIGUNG DES BACKOFENS PYROLYSEOFEN • - Die Reinigung dieser Ofenart erfolgt unter hohen Temperaturen und zerstört Verschmutzungen durch Spritzer oder Überlaufen. - Freigesetzter Rauch wird beim Durchgang durch den Katalysator vernichtet. Backofen reinigen, bevor er stark verfettet ist. -
Seite 78: Reinigung Starten
All manuals and user guides at all-guides.com 4 / PFLEGE UND REINIGUNG DES BACKOFENS REINIGUNG STARTEN • Nutzen Sie die bereits im Ofen vorhandene Wärme und sparen Sie Energie: Führen Sie die Pyrolyse nach einem Garvor- gang durch. Das Zubehör aus dem Backofen nehmen und eventuell vorhandene stark übergelaufene Abb.1 Reste entfernen. -
Seite 79: Empfehlung
All manuals and user guides at all-guides.com 5 / BEI FEHLFUNKTIONEN DES BACKOFENS Wenn Sie Zweifel haben, ob der Backofen richtig funktioniert, bedeutet das nicht unbedingt, dass eine Störung vorliegt. Überprüfen Sie zunächst die folgenden Punkte: MÖGLICHE WAS IST ZU TUN? SIE STELLEN FEST, URSACHEN DASS... - Seite 80 All manuals and user guides at all-guides.com...
- Seite 81 All manuals and user guides at all-guides.com...
- Seite 82 All manuals and user guides at all-guides.com Geachte Klant, U hebt net een FAGOR oven aangeschaft. Wij willen u hier graag voor bedanken. Onze onderzoeksteams hebben voor u een nieuwe generatie van apparaten ontwikkeld om elke dag uw kooktalenten en creativiteit te gebruiken en uw vrienden en familie lekkere gerechten voor te schotelen.
- Seite 83 All manuals and user guides at all-guides.com INHOUD 1 / BESCHRIJVING VAN UW APPARAAT • Voorstelling van de oven ____________________________________ • Voorstelling van de programmaschakelaar______________________ 2 / GEBRUIK VAN DE OVEN • Gebruik van de programmaschakelaar _________________________ º Instellen van de tijd _____________________________________ º...
-
Seite 84: Voorstelling Van De Oven
All manuals and user guides at all-guides.com 1 / BESCHRIJVING VAN HET APPARAAT VOORSTELLING VAN DE OVEN • BESCHRIJVING VAN DE OVEN Temperatuurknop Indicator van de richel Programmaschakelaar Detectiecontact voor openen en sluiten van de ovendeur Keuzeknop Lamp... -
Seite 85: Voorstelling Van De Programmaschakelaar
All manuals and user guides at all-guides.com 1 / BESCHRIJVING VAN HET APPARAAT • VOORSTELLING VAN DE PROGRAMMASCHAKELAAR Weergave van de tijd, bakduur en Indicator van de schakelklok temperatuur Selectietoets Temperatuurindicator Regeltoetsen Indicator bakduur Weergave einde bakduur... -
Seite 86: Gebruik Van De Oven
All manuals and user guides at all-guides.com 2 / GEBRUIK VAN DE OVEN GEBRUIK VAN DE • PROGRAMMASCHAKELAAR • Instelling van de tijd fig.1 Tijdens het aansluiten van de oven Het display knippert op 12:00. (fig.1) Stel de tijd in met de toetsen + en — (houd de toetsen ingedrukt als u de cijfers sneller wilt laten gaan) (fig. -
Seite 87: º Onmiddellijk Bakken
All manuals and user guides at all-guides.com 2 / GEBRUIK VAN DE OVEN •Onmiddellijk bakken — De programmaschakelaar moet enkel de tijd weergeven. Deze mag niet knipperen (fig. 1). fig.1 Draai de keuzeknop op de stand van uw keu- Bijvoorbeeld: stand (fig.2). -
Seite 88: Geprogrammeerd Bakken
All manuals and user guides at all-guides.com 2 / GEBRUIK VAN DE OVEN GEPROGRAMMEERD BAKKEN • Onmiddellijk bakken met geprogrammeerde baktijd - Kies de gewenste bakwijze en pas de tempe- ratuur aan. fig.0 Bijvoorbeeld: stand , temperatuur 200° (fig. - Druk op de toets “ ”... - Seite 89 All manuals and user guides at all-guides.com 2 / GEBRUIK VAN DE OVEN Uitgesteld bakken met gekozen eindtijd Volg de aanwijzingen bij bakcyclus instellen. - Na instelling van de bakduur, druk op de toets “ ” tot de Indicator einde baktijd knippert “ ”...
-
Seite 90: Gebruik Van De Schakelklok
All manuals and user guides at all-guides.com 2 / GEBRUIK VAN DE OVEN GEBRUIK VAN DE • SCHAKELKLOK De programmaschakelaar van uw oven kan als onafhankelijke schakelklok worden ge- bruikt zodat u een tijd kunt aftellen zonder de oven te laten werken. Bij het gebruik van de schakelklok wordt op de display de tijdweergave vervangen door weergave van de schakelklok. -
Seite 91: Bakwijzen Van De Oven
All manuals and user guides at all-guides.com 3 / BAKWIJZEN VAN DE OVEN BAKWIJZEN VAN DE OVEN • Hete lucht (aanbevolen temperatuur 200°C mini 35°C maxi 275°C) • Het bakken gebeurt door het bovenste verwarmingselement en de luchtvermengings- schroef. • Verwarm de oven voor u de schotel inschuift. •... - Seite 92 All manuals and user guides at all-guides.com 3 / BAKWIJZEN VAN DE OVEN Traditioneel hete lucht (aanbevolen temperatuur 180°C mini 35°C maxi 275°C) • Het bakken gebeurt met het onderste en het bovenste verwarmingselement en de luchtver- mengingsschroef • In deze stand kunt u op meerdere niveaus (2 maximum) dezelfde of verschillende gerech- ten bakken.
-
Seite 93: Onderhoud En Reiniging Van Uw Apparaat
All manuals and user guides at all-guides.com 4 / ONDERHOUD EN REINIGING VAN UW APPARAAT PYROLISE OVEN • - Dit type van oven reinigt door vernietiging bij hoge temperatuur van de vuilafzettingen afkomstig van voedselspatten of overgekookt voedsel. - De bij de pyrolyse vrijkomende rook wordt via een katalysator vernietigd. Wacht niet tot de oven als het ware onder het vet bedolven zit alvorens een pyrolysereiniging uit te voeren. -
Seite 94: Starten Van De Reiniging
All manuals and user guides at all-guides.com 4 / ONDERHOUD EN REINIGING VAN UW APPARAAT STARTEN VAN DE REINIGING • Om te profiteren van de hoeveelheid warmte die reeds aanwezigheid is in de oven en zo energie te besparen: Start de pyrolysereiniging na een bakcyclus. Verwijder alle toebehoren uit de oven en ver- wijder eventuele grove bakresten. -
Seite 95: Problemen En Oplossingen
All manuals and user guides at all-guides.com 5 / PROBLEMEN EN OPLOSSINGEN U twijfelt over de goede werking van de oven. Dit betekent niet automatisch dat er een defect is. Controleer in elk geval eerst de volgende punten: MOGELIJKE OPLOSSINGEN U MERKT DAT…... - Seite 96 All manuals and user guides at all-guides.com...
- Seite 97 All manuals and user guides at all-guides.com...
- Seite 98 Vaša nová rúra FAGOR veľmi dobre zapadne do vašej kuchyne a spojí jednoduché používanie s kvalitným výkonom. V sérií výrobkov FAGOR nájdete aj širokú ponuku zabudovateľných mikrovlnných rúr, odsávačov, umývačiek riadu a chladničiek, ktoré...
- Seite 99 All manuals and user guides at all-guides.com OBSAH 1 / POPIS PRÍSTROJA • Popis rúry _________________________________________________ • Popis programovateľného displeja ____________________________ 2 / POUŽÍVANIE RÚRY • Používanie programovateľného displeja ________________________ o Ako nastaviť čas _______________________________________ o Okamžité pečenie______________________________________ • Naprogramované pečenie ___________________________________ •...
-
Seite 100: Popis Prístroja
All manuals and user guides at all-guides.com 1 / POPIS PRÍSTROJA POPIS RÚRY • POPIS PRÍSTROJA Regulátor teploty Ukazovateľ stupienka Programovateľný displej Kontaktné miesto detekcie otvorených dvierok Prepínač funkcií Lampa... -
Seite 101: Popis Programovateľného Displeja
All manuals and user guides at all-guides.com 1 / POPIS PRÍSTROJA • POPIS PROGRAMOVATEĽNÉHO DISPLEJA Zobrazenie času, doby a teploty Symbol časovača Symbol teploty Prepínacie tlačidlo Nastavovacie tlačidlá Symbol doby pečenia Symbol ukončenia pečenia... -
Seite 102: Používanie Rúry
All manuals and user guides at all-guides.com 2 / POUŽÍVANIE RÚRY POUŽÍVANIE PROGRAMOVATEĽNÉHO • DISPLEJA • Nastavenie času obr. 1 Po zapnutí Na displeji bliká 12:00 (obr. 1). Pomocou tlačidiel + + alebo — — nastavte čas (čas nastavíte rýchlejšie, ak budete tlačidlo držať stlačené) (obr. -
Seite 103: Okamžité Pečenie
All manuals and user guides at all-guides.com 2 / POUŽÍVANIE RÚRY •Okamžité pečenie — Na programovateľnom displeji musí byť zobrazený len čas. Čas nesmie blikať (obr. 1). obr. 1 Prepínač funkcií otočte do požadovanej polohy. Príklad: poloha (obr. 2). obr. 2 Rúra nastaví... -
Seite 104: Naprogramované Pečenie
All manuals and user guides at all-guides.com 2 / POUŽÍVANIE RÚRY NAPROGRAMOVANÉ PEČENIE • Okamžité pečenie s naprogramovanou dobou pečenia - Zvoľte si spôsob pečenia a nastavte teplotu. Príklad: poloha , teplota 200° (obr. obr. 0 - Tlačidlo „ ” stláčajte, až kým nezačne blikať symbol doby pečenia „... - Seite 105 All manuals and user guides at all-guides.com 2 / POUŽÍVANIE RÚRY Oddialené pečenie a zvolená hodina ukončenia pečenia Postupujte ako pri naprogramovanom pečení. - Po nastavení doby pečenia tlačidlo „ ” stláčajte, až kým nezačne blikať symbol doby ukončenia pečenia „ ”.
-
Seite 106: Používanie Funkcie Časovača
All manuals and user guides at all-guides.com 2 / POUŽÍVANIE RÚRY POUŽÍVANIE FUNKCIE • ČASOVAČA Programovateľný displej rúry sa môže používať aj ako nezávislý časovač, ktorý odrátava čas aj bez toho, aby bola rúra zap- nutá. V tomto prípade má zobrazovanie časovača prednosť... -
Seite 107: Prevádzkové Režimy Rúry
All manuals and user guides at all-guides.com 3 / PREVÁDZKOVÉ REŽIMY RÚRY PREVÁDZKOVÉ REŽIMY RÚRY • Horúci vzduch (odporúčaná teplota 200°C min. 35°C max. 275°C) • Pri tomto pečení funguje ohrievacie teleso umiestnené a ventilátor, ktorý rozháňa vzduch. • Pred vložením jedla do rúry je potrebné rúru predhriať. •... - Seite 108 All manuals and user guides at all-guides.com 3 / PREVÁDZKOVÉ REŽIMY RÚRY Tradičná rúra s funkciou ventilátora (odporúčaná teplota 180°C min. 35°C max. 275°C) • Pri tomto pečení funguje vrchné a spodné ohrievacie teleso a ventilátor, ktorý rozháňa vzduch. • Táto poloha slúži na pečenie rovnakých alebo rôznych jedál na viacerých úrovniach (maximálne 2).
-
Seite 109: Údržby A Čistenie Rúry
All manuals and user guides at all-guides.com 4 / ÚDRŽBA A ČISTENIE RÚRY RÚRA S FUNKCIOU PYROLÝZY • - Tento typ rúry sa čistí samočinne, tým že sa pri vysokej teplote spaľujú nečistoty, ktoré vznikli pri vyprsknutí alebo pri vyliatí. - Dym sa zničí... -
Seite 110: Spustenie Čistenia
All manuals and user guides at all-guides.com 4 / ÚDRŽBA A ČISTENIE RÚRY SPUSTENIE ČISTENIA • Aby ste využili teplo nahromadené v rúre a spálili menej energie. Pyrolýzu spustite po pečení. Z rúry vyberte všetko príslušenstvo a odstráňte väčšie nečistoty. Skontrolujte, či programovateľný... - Seite 111 All manuals and user guides at all-guides.com 5 / V PRÍPADE, ŽE RÚRA NEFUNGUJE Pochybujete o prevádzke rúry, to ešte neznamená, že došlo k poruche. V každom prípade skontrolujte nasledujúce body: MOŽNÉ ČO JE POTREBNÉ UROBIť? SKONŠTATUJETE, PRÍČINY ŽE... ➡ Rúru zapojte. - Rúra nie je zapojená.
- Seite 112 All manuals and user guides at all-guides.com...
- Seite 113 All manuals and user guides at all-guides.com...
- Seite 114 Vyvinuli jsme pro vás tuto novou generaci přístrojů, které Vám každý den umožňují rozvíjet Vaše kuchařské umění a Vaši tvořivost pro potěšení Vaše i Vaší rodiny a přátel. Nová trouba FAGOR harmonicky zapadne do Vaší kuchyně a dokonale skloubí snadné použití s vynikajícími výsledky pečení.
- Seite 115 All manuals and user guides at all-guides.com OBSAH 1 / POPIS PŘÍSTROJE • Prezentace trouby _________________________________________ • Programovací panel ________________________________________ 2 / POUŽITÍ TROUBY • Použití programovacího panelu ______________________________ o Jak nastavit čas _______________________________________ o Okamžitý start ________________________________________ • Naprogramované pečení ____________________________________ •...
-
Seite 116: Popis Přístroje
All manuals and user guides at all-guides.com 1 / POPIS PŘÍSTROJE PREZENTACE TROUBY • POPIS PŘÍSTROJE Volič teploty Ukazatel vodící lišty Programovací panel Kontakt pro detekci otevřených dvířek Volič funkcí Žárovka... - Seite 117 All manuals and user guides at all-guides.com 1 / POPIS PŘÍSTROJE • PROGRAMOVACI PANEL Zobrazení času, délky a teploty Ukazatel minutky Tlačítko volby Ukazatel teploty Tlačítka nastavení Ukazatel doby pečení Ukazatel konce pečení...
-
Seite 118: Použití Trouby
All manuals and user guides at all-guides.com 2 / POUŽITÍ TROUBY POUŽITÍ PROGRAMOVACÍHO PANELU • obr. 1 • Jak nastavit čas Při zapojení trouby do elektrické sítě obr. 2 Na displeji bliká12:00. (obr.1) Nastavte aktuální čas stiskem tlačítka + nebo — (přidržením prstu na tlačítku umožníte rychlejší... -
Seite 119: Okamžitý Start
All manuals and user guides at all-guides.com 2 / POUŽITÍ TROUBY • Okamžitý start — Programátor má zobrazovat pouze hodiny. Ty nesmějí blikat (obr. 1). obr. 1 Otočte volič funkcí do zvolené polohy. Příklad: poloha (obr. 2). obr. 2 obr. 3 Trouba Vám navrhne optimální... -
Seite 120: Naprogramované Pečení
All manuals and user guides at all-guides.com 2 / POUŽITÍ TROUBY NAPROGRAMOVANÉ PEČENÍ • Pečení s okamžitým startem a naprogramovanou dobou. - Nastavte požadovaný režim pečení a teplotu. obr. 0 Příklad: poloha , teplota 200° (obr. - Podržte tlačítko “ ”, dokud nezačne blikat ukazatel doby pečení... - Seite 121 All manuals and user guides at all-guides.com 2 / POUŽITÍ TROUBY Pečení s odloženým startem a zvolenou dobou ukončení. Postupujte jako u naprogramovaného pečení. - Pro nastavení doby pečení stiskněte tlačítko “ ” a podržte, dokud nezačne blikat ukaza- tel konce pečení “ ”.
-
Seite 122: Použití Minutky
All manuals and user guides at all-guides.com 2 / POUŽITÍ TROUBY POUŽITÍ MINUTKY • - Programovací panel trouby může být používán jako nezávislá minutka, umožnující odpočítávat čas, aniž by byla trouba zapnu- V tomto případě má zobrazení minutky před- nost před zobrazením aktuálního času. - Stiskněte talčítko “... -
Seite 123: Režimy Pečení
All manuals and user guides at all-guides.com 3 / REŽIMY PEČENÍ REŽIMY PEČENÍ TROUBY • Horkovzdušné pečení (doporučená teplota 200°C min. 35°C max. 275°C) • Pečení zajišťuje vyhřívací těleso a vrtule pro rozhánění vzduchu. • Před vložením pokrmu je troubu nutno předehřát. •... - Seite 124 All manuals and user guides at all-guides.com 3 / REŽIMY PEČENÍ Tradiční s ventilátorem (doporučená teplota 180°C min. 35°C max. 275°C) • Pečení zespodu a shora s rozháněním vzduchu ventilátorem • V této poloze můžete péct na několika úrovních (maximálně 2) stejné nebo různé pokrmy. •...
-
Seite 125: Údržba A Čištění Trouby
All manuals and user guides at all-guides.com 4 / ÚDRŽBA A ČIŠTĚNÍ TROUBY TROUBA S PYROLÝZOU • - Tento typ odstraňuje vysokou teplotou nečistoty z připečených nebo přeteklých pokrmů. - Uvolňovaný kouř se odstraní při průchodu katalyzátorem. Nečekejte s provedením tohoto čištění, až bude trouba zanesena tukem. V jakém případě... -
Seite 126: Spuštění Čištění
All manuals and user guides at all-guides.com 4 / ÚDRŽBA A ČIŠTĚNÍ TROUBY SPUŠTĚNÍ ČIŠTĚNÍ • Chcete-li využít množství tepla již nahro- maděného v troubě a ušetřit energii: obr. 1 - Spusťte pyrolýzu po pečení. Vyjměte z trouby příslušenství a odstraňte velké... -
Seite 127: Provozní Závady
All manuals and user guides at all-guides.com 5 / PROVOZNÍ ZÁVADY Máte-li pochybnosti o správném fungování Vaší trouby, nemusí se bezpodmínečně jednat o poruchu. V každém případě ověřte tyto body : MOŽNÉ PŘÍČINY CO BYSTE MĚLI UDĚLAT: ZJISTÍTE, ŽE… ➡ Zapojte troubu. - Trouba není... - Seite 128 All manuals and user guides at all-guides.com...
- Seite 129 All manuals and user guides at all-guides.com...
- Seite 130 All manuals and user guides at all-guides.com Kedves vásárló! Ön most egy FAGOR sütőt vásárolt és ezt szeretnénk megköszönni önnek. Önnek készítettük ezt az új generációs készüléket, hogy nap mint nap főzési tehetségét és kreativitását szabadon gyakorolhassa és ezzel örömet okozzon saját magának, barátainak és családjának.
- Seite 131 All manuals and user guides at all-guides.com TARTALOM 1 / KÉSZÜLÉKÉNEK LEÍRÁSA • Tűzhelyének leírása _________________________________________ • A programkapcsoló bemutatása ______________________________ 2 / TŰZHELYÉNEK HASZNÁLATA • A programkapcsoló használata _______________________________ o Az idő beállítása _______________________________________ o Azonnali sütés ________________________________________ • Programozott sütés ________________________________________ •...
-
Seite 132: Készülékének Leírása
All manuals and user guides at all-guides.com 1 / KÉSZÜLÉKÉNEK LEÍRÁSA TŰZHELYÉNEK LEÍRÁSA • A KÉSZÜLÉK LEÍRÁSA Hőmérséklet kiválasztó kapcsoló Fokozatkijelző Programozó Ajtónyitást érzékelő érintkező Funkció kiválasztó kapcsoló Lámpa... -
Seite 133: A Programkapcsoló Bemutatása
All manuals and user guides at all-guides.com 1 / KÉSZÜLÉKÉNEK LEÍRÁSA • A PROGRAMKAPCSOLÓ BEMUTATÁSA Az idő, időtartam és hőmérséklet kijelzése Az időzítő kijelzője Kiválasztó gomb Hőmérsékletkijelző Beállító gombok Sütési időtartam kijelző Sütési idő vége kijelző... -
Seite 134: Tűzhelyének Használata
All manuals and user guides at all-guides.com 2 / TŰZHELYÉNEK HASZNÁLATA A PROGRAMKAPCSOLÓ HASZNÁLATA • • Az idő beállítása 1. ábra - Feszültség alá helyezéskor A kijelző villog és 12:00 órát mutat (1. ábra) Állítsa be az időt a + vagy a — gombok megnyomásával (a gomb folyamatos nyomása gyors futtatást tesz lehetővé) 2. -
Seite 135: Azonnali Sütés
All manuals and user guides at all-guides.com 2 / TŰZHELYÉNEK HASZNÁLATA •Azonnali sütés — A programkapcsoló csak az időt jelzi, A programkapcsoló nem villog (1. ábra). 1. ábra Forgassa a funkcióválasztó gombot az ön által óhajtott helyzetbe. Példa: helyzet (2. ábra). 2. -
Seite 136: Programozott Sütés
All manuals and user guides at all-guides.com 2 / TŰZHELYÉNEK HASZNÁLATA PROGRAMOZOTT SÜTÉS • - Sütés azonnali kezdéssel és programozott sütési időtartammal - Válassza ki a kívánt sütési módot és állítsa be a hőmérsékletet. Príklad: poloha , hőmérséklet 200° (0. ábra). 0. - Seite 137 All manuals and user guides at all-guides.com 2 / TŰZHELYÉNEK HASZNÁLATA - Sütés időzített kezdéssel és megvá- lasztott befejezési idővel A programozott sütés lépései szerint járjon - A sütési időtartam beállítása után tartsa lenyomva a “ ” gombot mindaddig, amíg a "...
-
Seite 138: Az Időzítő Használata
All manuals and user guides at all-guides.com 2 / TŰZHELYÉNEK HASZNÁLATA AZ IDŐZÍTŐ HASZNÁLATA • - Sütőjének programkapcsolóját önálló idő- kapcsolóként használhatja, amellyel időt számlálhat vissza a sütő használatán kívül. Ebben az esetben az időzítő megjelenítése elsőbbséget élvez a pontos idővel szemben. - Tartsa lenyomva a “... -
Seite 139: A Sütő Sütési Módjai
All manuals and user guides at all-guides.com 3 / A SÜTŐ SÜTÉSI MÓDJAI A SÜTŐ SÜTÉSI MÓDJAI • Hőlégkeverés (ajánlott hőmérséklet 200°C minimum 35 C°, maximum 275°C) • A sütést a fűtőelem és a légkeverő ventillátor végzi. • A tál beheyezése előtt a sütőt elő kell melegíteni. •... - Seite 140 All manuals and user guides at all-guides.com 3 / A SÜTŐ SÜTÉSI MÓDJAI Hagyományos Légkeveréssel (ajánlott hőmérséklet 180°C minimum 35 C°, maximum 275°C) • A sütés az alsó és a felső fűtőelemek és a légkeverő ventillátor segítségével történik. • Ezzel a beállítással több szinten (maximum kettő) süthet azonos vagy különböző ételeket. •...
-
Seite 141: A Sütő Karbantartása És Tisztítása
All manuals and user guides at all-guides.com 4 / A SÜTŐ KARBANTARTÁSA ÉS TISZTÍTÁSA SÜTŐ PIROLÍZIS FUNKCIÓVAL • - Az ilyen tűzhely tisztítása a szétfröccsenésekből és a túlcsordulásokból származó szennyezések magas hőmérsékleten való eltávolításával történik. - A keletkező füst egy semlegesítő katalizátoron halad át. Nem kell a tisztítással addig várni, amíg a sütő... -
Seite 142: A Tisztítás Megkezdése
All manuals and user guides at all-guides.com 4 / A SÜTŐ KARBANTARTÁSA ÉS TISZTÍTÁSA A TISZTÍTÁS MEGKEZDÉSE • A sütőben már megévő hőmennyiséget kihasználva és energiatakarékosság céljából: a pirolízist sütés után kezdje el. Vegye ki a tartozékokat a sütőből és távolítsa el az esetleg keletkezett nagyobb szen- 1. -
Seite 143: Sütőjének Rendellenes Működése Esetén
All manuals and user guides at all-guides.com 5 / SÜTŐJÉNEK RENDELLENES MŰKÖDÉSE ESETÉN Amennyiben a sütő hibátlan működését illetően kétségei támadnának, ez nem jelent feltétlenül meghibásodást. Minden esetben ellenőrizze az alábbi pontokat: LEHETSÉGES MI A TEENDŐ? AZT TAPASZTALJA, OKOK HOGY: ➡... - Seite 144 All manuals and user guides at all-guides.com...
- Seite 145 All manuals and user guides at all-guides.com...
- Seite 146 All manuals and user guides at all-guides.com FAGOR. FAGOR FAGOR FAGOR. www.fagor.com, WWW.FAGOR.COM FAGOR...
- Seite 147 All manuals and user guides at all-guides.com _____________________________ • • _____________________________ _____________________________ • ___________________________________ _____________________________ • ___________________________ • ____________________________ ________________ • ______________________________ • _____________________________________________ • ________________________________________ _______________________________________...
- Seite 148 All manuals and user guides at all-guides.com •...
- Seite 149 All manuals and user guides at all-guides.com •...
- Seite 150 All manuals and user guides at all-guides.com • • — — ( .2). : 12.30 “ ” .1). “ ” .2), — — .3). “ ” . 4). “ ”,...
- Seite 151 All manuals and user guides at all-guides.com • — . 1) . 2). .3) . — ( 210°C ( .5).
- Seite 152 All manuals and user guides at all-guides.com • 200°( “ ” “ ”. 0.00, — — , : 25 0:00 ( “ ”.
- Seite 153 All manuals and user guides at all-guides.com “ ”, “ ”. 13.00 13.00. 0:00 “ ”.
- Seite 154 All manuals and user guides at all-guides.com • “ ” ( .1), —> 0.00. “ ” .2). “ ”.
- Seite 155 All manuals and user guides at all-guides.com • 200°C 35°C, 275°C) • • • 200°C 35°C, 275°C) • • • 180°C, 35°C, 275°C) • • ...). • “ ” ( ..), 200°C 180°C, 230°C) • • • • 275°C, 180°C, 275°C) •...
- Seite 156 All manuals and user guides at all-guides.com 180°C 35°C, 275°C) • • • 80°C, 35°C, 100°C) • “ ” • 40° ((...
- Seite 157 All manuals and user guides at all-guides.com • ...).
- Seite 158 All manuals and user guides at all-guides.com • .1). “Pyrolyse” ( .2). .3). 275°C, • 0:00. .4).
- Seite 159 All manuals and user guides at all-guides.com E O ? … ➡ ➡ , “ ”). ➡ ➡ ➡ ➡ ➡ ➡ ➡ ➡ 125°C ➡...
- Seite 160 All manuals and user guides at all-guides.com 99645832 07/08...