Herunterladen Inhalt Inhalt Diese Seite drucken
Toro Emotion 43 Bedienungsanleitung
Vorschau ausblenden Andere Handbücher für Emotion 43:
Inhaltsverzeichnis

Werbung

Verfügbare Sprachen

Verfügbare Sprachen

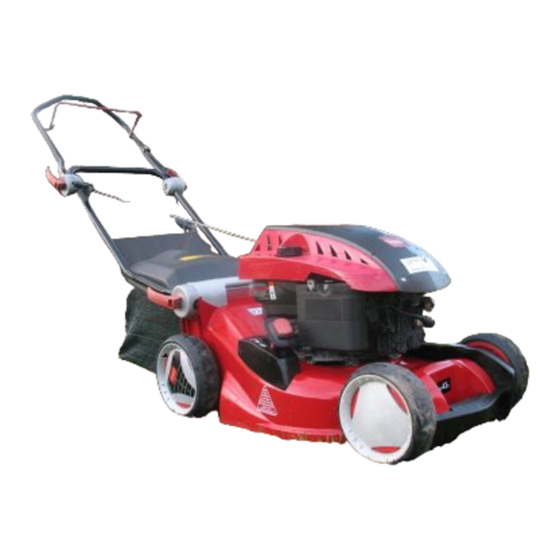
Emotion 43 Lawn Mower
Model No. 21025—Serial No. 280000001 and Up
Model No. 21026—Serial No. 280000001 and Up
Model No. 21027—Serial No. 280000001 and Up
Introduction
Read this information carefully to learn how to operate
and maintain your product properly and to avoid injury
and product damage. You are responsible for operating
the product properly and safely.
You may contact Toro directly at www.Toro.com for
product and accessory information, help finding a
dealer, or to register your product.
Whenever you need service, genuine Toro parts, or
additional information, contact an Authorized Service
Dealer or Toro Customer Service and have the model
and serial numbers of your product ready. Figure 1
identifies the location of the model and serial numbers
on the product.
Figure 1
1. Model and serial number plate
Write the product model and serial numbers in the space
below:
Model No.
Serial No.
This manual identifies potential hazards and has
safety messages identified by the safety alert symbol
(Figure 2), which signals a hazard that may cause serious
injury or death if you do not follow the recommended
precautions.
© 2008—The Toro® Company
8111 Lyndale Avenue South
Bloomington, MN 55420
1. Safety alert symbol
This manual uses 2 words to highlight information.
Important calls attention to special mechanical
information and Note emphasizes general information
worthy of special attention.
For models with stated engine horsepower, the gross
horsepower of the engine was laboratory rated by the
engine manufacturer in accordance with SAE J1940.
As configured to meet safety, emission, and operating
requirements, the actual engine horsepower on this class
of lawn mower will be significantly lower.
Safety
Improperly using or maintaining this mower can
result in injury. To reduce the potential for injury,
comply with these safety instructions.
Toro designed and tested this mower for reasonably safe
service; however, failure to comply with the following
instructions may result in personal injury.
To ensure maximum safety, best performance, and
to gain knowledge of the product, it is essential
that you and any other operator of the mower read
and understand the contents of this manual before
the engine is ever started. Pay particular attention
to the safety alert symbol (Figure 2) which means
Caution, Warning, or Danger—"personal safety
instruction." Read and understand the instruction
because it has to do with safety. Failure to comply
with the instruction may result in personal injury.
Register at www.Toro.com.
Form No. 3360-187 Rev B
Operator's Manual
Figure 2
Original Instructions (EN)
Printed in Poland
All Rights Reserved

Werbung

Inhaltsverzeichnis
loading

Inhaltszusammenfassung für Toro Emotion 43

  • Seite 1 Authorized Service horsepower of the engine was laboratory rated by the Dealer or Toro Customer Service and have the model engine manufacturer in accordance with SAE J1940. and serial numbers of your product ready. Figure 1...
  • Seite 2 General Lawn Mower Safety or damaged. Replace worn or damaged blades and bolts in sets to preserve balance. The following instructions have been adapted from EN 836. Starting This cutting machine is capable of amputating hands • Disengage all blade and drive clutches and shift into and feet and throwing objects.
  • Seite 3: Maintenance And Storage

    • To ensure the best performance and safety, purchase only genuine Toro replacement parts and accessories. Do not use will fit parts and accessories; they may cause a safety hazard.
  • Seite 4: Safety And Instructional Decals

    Safety and Instructional Decals Important: Safety and instruction decals are located near areas of potential danger. Replace damaged decals. Manufacturer’s Mark 1. Indicates the blade is identified as a part from the original machine manufacturer. 115-3114 1. Read the Operator’s Manual. 2.
  • Seite 5 Setup 1. Assembling and Unfolding the Handle Procedure Assembling and unfolding the handle improperly can damage the cables, causing an unsafe operating condition. • Do not damage the cables when assembling and unfolding the handle. • Ensure that the cables are routed to the outside of the handle.
  • Seite 6: Assembling The Grass Bag

    3. Assembling the Grass Bag Note: If a handle lever is loose, open the lever, rotate it clockwise 1 or 2 turns to tighten it, then close the lever (Figure 5). Procedure Attach the lip onto the front of the grass bag frame as shown in (Figure 7).
  • Seite 7: Charging The Battery

    5. Charging the Battery Operation Procedure Filling the Fuel Tank Model 21027 only Refer to Charging the Battery in the Maintenance section. Gasoline is extremely flammable and explosive. A fire or explosion from gasoline can burn you and others. Product Overview •...
  • Seite 8: Checking The Engine Oil Level

    Checking the Engine Oil Level Service Interval: Before each use or daily 1. Remove the dipstick, wipe it clean, and fully install the dipstick (Figure 8). 2. Remove the dipstick and check the oil level (Figure 8). If the oil level is below the Add mark on the dipstick, slowly pour oil into the oil fill tube to raise the oil level to the Full mark on the dipstick.
  • Seite 9: Starting The Engine

    Starting the Engine Using the Self-propel Drive 1. Hold the blade control bar against the handle Models 21026 and 21027 only (Figure 12). To operate the self-propel drive, simply walk with your hands on the upper handle and your elbows at your sides, and the mower will automatically keep pace with you (Figure 15).
  • Seite 10: Recycling The Clippings

    Check the grass bag frequently. If it is damaged, install a new Toro replacement bag. The blade is sharp; contacting the blade can result in serious personal injury. Stop the engine and wait for all moving parts to stop before leaving the operating position.
  • Seite 11: Rear-Discharging The Clippings

    • For best performance, install a new blade before the not cut the leaves finely enough. cutting season begins. • Replace the blade when necessary with a Toro replacement blade. Cutting Grass • Cut only about a third of the grass blade at a time.
  • Seite 12: Recommended Maintenance Schedule(S)

    Maintenance Note: Determine the left and right sides of the machine from the normal operating position. Recommended Maintenance Schedule(s) Maintenance Service Maintenance Procedure Interval • Change the engine oil. After the first 5 hours • Check the engine oil level. •...
  • Seite 13: Replacing The Air Filter

    Replacing the Air Filter 4. After draining the oil, return the mower to its operating position. Service Interval: Yearly 5. Slowly pour oil into the oil fill tube until the oil level 1. Perform the pre-maintenance procedures; refer to reaches the Full mark on the dipstick (Figure 8). Preparing for Maintenance.
  • Seite 14: Adjusting The Self-Propel Drive

    Figure 26 Figure 24 3. Install the rear wheels. 3. Connect the charger to the battery (Figure 25). Adjusting the Self-propel Drive Models 21026 and 21027 only If your mower does not self-propel properly, adjust the self-propel drive cable. 1. Loosen the locking nut by hand (Figure 27). Figure 25 4.
  • Seite 15: Replacing The Blade

    operating position), depending on the amount of correction needed. • If the mower does not self-propel, turn the adjusting nut 1 to 3 turns clockwise (from the operating position), depending on the amount of correction needed. 3. Start the mower and use the self-propel drive to check the adjustment.
  • Seite 16: Cleaning The Mower

    Cleaning the Mower Scraping Method Washing Method Service Interval: Before each use or daily—Clean the Tipping the mower may cause the fuel to leak mower. from the carburetor or the fuel tank. Gasoline is extremely flammable, highly explosive, and, under certain conditions, can cause personal injury or property damage.
  • Seite 17 Storage Store the mower in a cool, clean, dry place. Preparing the Mower for Storage Gasoline vapors can explode. • Do not store gasoline more than 30 days. • Do not store the mower in an enclosure near an open flame. •...
  • Seite 18 Notes:...
  • Seite 19 Spypros Stavrinides Limited Cyprus 357 22 434131 Surge Systems India Limited India 91 1 292299901 T-Markt Logistics Ltd Hungary 36 26 525 500 Toro Australia Australia 61 3 9580 7355 Toro Europe BVBA Belgium 32 14 562 960 374-0102 Rev B...
  • Seite 20 Contact your seller to arrange service of the product. If for any reason materials or workmanship. The following time periods apply from the date it is impossible for you to contact your seller, you may contact any Toro of original purchase: Authorized Distributor to arrange service.
  • Seite 21: Einführung

    Produkts direkt an Toro unter www.Toro.com. Hervorhebung von Informationen verwendet. Wichtig weist auf spezielle technische Informationen hin, und Wenden Sie sich an Ihren Toro Vertragshändler Hinweis hebt allgemeine Informationen hervor, die oder Kundendienst, wenn Sie eine Serviceleistung, Ihre besondere Beachtung verdienen.
  • Seite 22: Allgemeine Hinweise Zur Sicherheit Von Rasenmähern

    Vorbereitung „Sicherheitshinweis“ bedeutet. Lesen und verstehen Sie die Anweisungen, da sie wichtig • Tragen Sie beim Mähen immer feste Schuhe und für die Sicherheit sind. Das Nichtbeachten der lange Hosen. Fahren Sie die Maschine nie barfuss Anweisungen kann zu Körperverletzungen führen. oder mit Sandalen.
  • Seite 23: Wartung Und Lagerung

    – Vor dem Entfernen von Behinderungen und Verstopfungen aus dem Auswurfkanal. • Für eine optimale Leistung und Sicherheit sollten Sie nur Toro Originalersatzteile und – Vor dem Prüfen, Reinigen oder Ausführen von -zubehör kaufen. Verwenden Sie nie ungefähr Wartungsarbeiten am Rasenmäher.
  • Seite 24: Sicherheits- Und Bedienungsschilder

    Vibration, Hand/Arm Diese Maschine hat auf der Grundlage von Messungen an baugleichen Maschinen gemäß EN 836 und EN 1033 an der Hand bzw. dem Arm des Bedieners ein maximales Vibrationsniveau von 6,8 m/s Sicherheits- und Bedienungsschilder 115-3114 1. Lesen Sie die Bedienungsanleitung. Wichtig: Sicherheits- und Bedienungsschilder 2.
  • Seite 25: Einrichtung

    Einrichtung 1. Zusammen- und Aufklappen des Griffs Verfahren Wenn Sie den Griff falsch montieren und aufklappen, können Sie die Kabel beschädigen und den sicheren Geräteeinsatz gefährden. • Beschädigen Sie beim Montieren und Aufklappen des Griffs nicht die Kabel. • Stellen Sie sicher, dass die Kabel zur Außenseite des Griffs verlegt sind.
  • Seite 26: Montieren Des Fangkorbs

    3. Montieren des Fangkorbs Hinweis: Wenn ein Griffhebel lose ist, öffnen Sie den Hebel, drehen Sie in eine oder zwei Umdrehungen nach rechts, um ihn anzuziehen, Verfahren schließen Sie dann den Hebel (Bild 5). Hängen Sie die Lippe vorne am Fangkorbrahmen ein, siehe (Bild 7).
  • Seite 27: Aufladen Der Batterie

    Betrieb Wichtig: Wechseln Sie das Motoröl nach den ersten fünf Betriebsstunden und danach jährlich. Siehe „Wechseln des Motoröls“. Betanken 5. Aufladen der Batterie Verfahren Benzin ist brennbar und explodiert schnell. Feuer und Explosionen durch Benzin können Nur Modell 21027 Verbrennungen bei Ihnen und anderen Personen verursachen.
  • Seite 28: Prüfen Des Motorölstands

    Prüfen des Motorölstands Hinweis: Das SmartWheel ® berechnet die optimale Einstellung, um sicherzustellen, dass Sie nie mehr als ein Wartungsintervall: Bei jeder Verwendung oder täglich Drittel der Grashalme abschneiden (Bild 11). 1. Nehmen Sie den Peilstab heraus und wischen Sie ihn ab.
  • Seite 29: Anlassen Des Motors

    Anlassen des Motors Einsatz des Antriebs 1. Halten Sie den Schaltbügel gegen den Griff gedrückt Nur Modelle 21026 und 21027 (Bild 12). Um den Antrieb zu benutzen, gehen Sie einfach vorwärts mit Ihren Händen am oberen Griffteil und Ihren Ellbogen an Ihren Seiten; der Rasenmäher hält automatisch mit Ihnen Schritt (Bild 15).
  • Seite 30: Einhängen Des Fangkorbs

    Teile zum Stillstand gekommen sind. Sie ihn, wenn er beschädigt ist, gegen einen 2. Heben Sie den Fangkorb an und vom Griff weg. neuen Toro Ersatzkorb aus. Hinweis: Kippen Sie den Fangkorb etwas nach hinten, damit das Schnittgut nicht herausfällt.
  • Seite 31: Schnetzeln Von Laub

    Schnetzeln von Laub • Tauschen Sie die Messer bei Bedarf durch ein • Stellen Sie nach dem Mähen sicher, dass die Hälfte Ersatzmesser von Toro aus. des Rasens durch die Schnittgutdecke sichtbar ist. Dabei müssen Sie unter Umständen mehrmals über Mähen...
  • Seite 32: Empfohlener Wartungsplan

    Wartung Hinweis: Bestimmen Sie die linke und rechte Seite der Maschine anhand der üblichen Einsatzposition. Empfohlener Wartungsplan Wartungsintervall Wartungsmaßnahmen • Wechseln Sie das Motoröl. Nach fünf Betriebsstunden • Prüfen Sie den Ölstand im Motor. • Stellen Sie sicher, dass der Motor innerhalb von 3 Sekunden nach dem Loslassen Bei jeder Verwendung des Schaltbügels abstellt.
  • Seite 33: Auswechseln Des Luftfilters

    Auswechseln des Luftfilters Wartungsintervall: Jährlich 1. Führen Sie die wartungsvorbereitenden Arbeiten aus, siehe „Vorbereiten für die Wartung“. 2. Öffnen Sie die Luftfilterabdeckung und nehmen Sie den alten Luftfilter heraus (Bild 21). Bild 22 4. Stellen Sie den Rasenmäher nach dem Ablassen des Öls wieder in die Betriebsstellung.
  • Seite 34: Einstellen Des Antriebs

    2. Nehmen Sie die Batterie aus dem Fach, schließen Sie die Batteriekabel vom Rasenmäherkabel ab (Bild 24). Bild 26 3. Montieren Sie die Hinterräder. Bild 24 Einstellen des Antriebs 3. Schließen Sie das Ladegerät an die Batterie an Nur Modelle 21026 und 21027 (Bild 25).
  • Seite 35: Auswechseln Des Messers

    Umdrehungen nach links (aus der Sicht der Bedienerposition), abhängig von der benötigten Korrektur. • Wenn der Selbstantrieb des Rasenmähers nicht funktioniert, drehen Sie die Einstellmutter eine bis drei Umdrehungen nach rechts (aus der Sicht der Bedienerposition), abhängig von der benötigten Korrektur. 3.
  • Seite 36: Reinigen Des Mähwerks

    Reinigen des Mähwerks 8. Drehen Sie den Wasserhahn zu und trennen Sie den Gartenschlauch vom Rasenmäher. Waschen 9. Starten Sie den Motor und lassen Sie ihn für ein paar Minuten laufen, um das Gehäuse auszutrocknen, Wartungsintervall: Bei jeder Verwendung oder damit es nicht rostet.
  • Seite 37: Einlagerung

    Einlagerung Herausnehmen des Rasenmähers aus der Lagern Sie den Rasenmäher an einem kühlen, sauberen Einlagerung und trockenen Ort ein. 1. Entfernen Sie die Zündkerze und drehen Sie den Motor schnell mit Hilfe des Anlassers, um Vorbereiten des Rasenmähers überflüssiges Öl aus dem Zylinder zu entfernen. für die Einlagerung 2.
  • Seite 38 Hinweise:...
  • Seite 39 Spypros Stavrinides Limited Cyprus 357 22 434131 Surge Systems India Limited India 91 1 292299901 T-Markt Logistics Ltd Hungary 36 26 525 500 Toro Australia Australia 61 3 9580 7355 Toro Europe BVBA Belgium 32 14 562 960 374-0102 Rev B...
  • Seite 40 Aufsitzrasenmäher mit Heckmotor Wenn Sie mit der Analyse oder dem Support des Vertragshändlers nicht Rasen- und Gartentraktore 2-jährige eingeschränkte Garantie zufrieden sind, wenden Sie sich an den Importeur von Toro oder an uns: Tragbare Elektroprodukte 2-jährige eingeschränkte Garantie 2-jährige eingeschränkte Garantie Schneefräsen...
  • Seite 41 Figure 1 La société Toro a conçu et testé votre tondeuse pour 1. Plaque des numéros de modèle et de série qu'elle fonctionne correctement et sans danger à condition de respecter rigoureusement les instructions de sécurité...
  • Seite 42 portent sur votre sécurité. Ne pas les respecter, • Inspectez soigneusement la zone de travail et enlevez c'est risquer de vous blesser. tous les objets susceptibles d'être projetés par la machine (pierres, branches, câbles, etc.). Sécurité générale de la • Avant d'utiliser la tondeuse, vérifiez toujours si les capots et les dispositifs de sécurité, comme les tondeuse déflecteurs et/ou les bacs à...
  • Seite 43: Entretien Et Remisage

    • Coupez le moteur et débranchez la bougie sécurité de la machine, n'utilisez que des – avant de dégager ou désobstruer l'éjecteur. pièces de rechange et des accessoires Toro d'origine. N'utilisez pas de pièces et accessoires – avant tout contrôle, tout nettoyage ou toute soit-disant compatibles , car ils présentent un...
  • Seite 44: Autocollants De Sécurité Et D'instruction

    Autocollants de sécurité et d'instruction Important: Les autocollants de sécurité et d'instruction sont placés près des endroits potentiellement dangereux. Remplacez les autocollants endommagés. 115-3114 1. Lisez le Manuel de l'utilisateur. 2. Risque de projections – tenez les spectateurs à bonne Marque du fabricant distance de la machine.
  • Seite 45: Mise En Service

    Mise en service 1. Assemblage et dépliage du guidon Procédure Vous risquez d'endommager les câbles et de rendre la machine dangereuse si vous assemblez ou dépliez mal le guidon. • Veillez à ne pas endommager les câbles en assemblant ou dépliant le guidon. •...
  • Seite 46: Plein D'huile Moteur

    3. Assemblage du bac à herbe sur l'un des 3 repères à l'intérieur des verrous de la partie supérieure du guidon (Figure 4). Procédure Remarque: Si un levier de verrouillage est desserré, ouvrez-le et faites-le pivoter 1 ou 2 Fixez le rebord à l'avant du cadre du bac à herbe, comme fois dans le sens horaire pour le resserrer, puis illustré...
  • Seite 47: Charge De La Batterie

    Utilisation Important: Changez l'huile moteur après les 5 premières heures de fonctionnement , puis une fois par an. Voir Vidange de l'huile moteur. Plein du réservoir de carburant 5. Charge de la batterie Procédure L'essence est extrêmement inflammable et explosive. Un incendie ou une explosion Modèle 21027 uniquement causé(e) par l'essence peut vous brûler, ainsi que les personnes se tenant à...
  • Seite 48: Contrôle Du Niveau D'huile Moteur

    Contrôle du niveau d'huile en sélectionnant une hauteur de coupe normale. L'herbe trop haute risque de boucher la tondeuse et moteur de faire caler le moteur. Périodicité des entretiens: À chaque utilisation ou une Remarque: Le système SmartWheel ® calcule le fois par jour réglage correct pour vous éviter de tondre l'herbe de plus du tiers de sa hauteur (Figure 11).
  • Seite 49: Démarrage Du Moteur

    4. Appuyez sur le bouton de réglage de hauteur de coupe et déplacez la poignée pour augmenter ou diminuer la hauteur de coupe (Figure 11). 5. Tirez ou poussez la poignée et utilisez l'échelle de hauteur de coupe pour régler la tondeuse à la hauteur de coupe voulue (Figure 11).
  • Seite 50: Ramassage De L'herbe Coupée

    Examinez fréquemment le bac. S'il est Figure 16 endommagé, remplacez-le par un bac TORO neuf d'origine. 2. Lorsque le moteur s'arrête, retirez la clé de contact avant de laisser la tondeuse sans surveillance.
  • Seite 51: Éjection Arrière De L'herbe Coupée

    2. Soulevez le bac à herbe pour l'enlever du guidon. • Remplacez la lame dès que nécessaire par une lame Remarque: Inclinez légèrement le bac en arrière Toro d'origine. pour éviter de faire tomber l'herbe qu'il contient. La tonte Éjection arrière de l'herbe •...
  • Seite 52: Programme D'entretien Recommandé

    • Alternez la direction de la tonte pour disperser exemple, réglez les roues avant à la position C et les déchets plus uniformément et obtenir une les roues arrière à la position D. fertilisation plus homogène. Hachage de feuilles • Si l'aspect de la pelouse tondue n'est pas satisfaisant, essayez une ou plusieurs des solutions suivantes : •...
  • Seite 53: Préparation À L'entretien

    Préparation à l'entretien 1. Arrêtez le moteur et attendez l'arrêt de toutes les pièces mobiles. 2. Débranchez la bougie (Figure 20) avant de procéder à un quelconque entretien. Figure 21 Figure 20 3. Montez un filtre à air neuf et remettez le couvercle. 3.
  • Seite 54 repère du plein (Full) sur la jauge (Figure 8). Ne remplissez pas excessivement. (Remplissage max. : 0,59 l, type : huile détergente SAE 30, classe de service API SF, SG, SH, SJ, SL ou supérieure.) 6. Revissez la jauge fermement en place. 7.
  • Seite 55: Remplacement De La Lame

    Réglage de l'autotraction Remplacement de la lame Modèles 21026 et 21027 seulement Périodicité des entretiens: Toutes les 25 heures—Remplacez la lame ou Si votre tondeuse n'avance pas correctement, réglez le faites-la aiguiser (plus souvent si elle câble de commande d'autotraction. s'émousse rapidement).
  • Seite 56: Nettoyage De La Tondeuse

    De l'herbe peut être projetée de sous la tondeuse. • Portez des lunettes de protection. • Restez à la position de conduite (derrière le guidon) quand le moteur est en marche. • Ne laissez personne pénétrer dans la zone de travail. Figure 28 Pour obtenir des résultats optimaux, nettoyez rapidement la tondeuse après la tonte.
  • Seite 57 Raclage Remisage Remisez la tondeuse dans un local frais, propre et sec. Lorsque vous basculez la tondeuse, du Préparation de la tondeuse au carburant risque de s'échapper du carburateur ou du réservoir. L'essence est extrêmement remisage inflammable et explosive et risque de causer des blessures corporelles ou des dégâts matériels dans certaines conditions.
  • Seite 58: Remise En Service Après Remisage

    Remise en service après remisage 1. Déposez la bougie et faites tourner le moteur rapidement à l'aide du lanceur pour éliminer l'excédent d'huile dans le cylindre. 2. Montez et serrez la bougie à 20 Nm à l'aide d'une clé dynamométrique. 3.
  • Seite 59 Spypros Stavrinides Limited Cyprus 357 22 434131 Surge Systems India Limited India 91 1 292299901 T-Markt Logistics Ltd Hungary 36 26 525 500 Toro Australia Australia 61 3 9580 7355 Toro Europe BVBA Belgium 32 14 562 960 374-0102 Rev B...
  • Seite 60 Conditions et produits couverts Comment faire intervenir la garantie ? La société The Toro® Company et sa liale, la société Toro Warranty, en vertu Si vous pensez que votre produit Toro présente un défaut de fabrication ou de l'accord passé entre elles, s'engagent conjointement auprès de l'acheteur de matériau, procédez comme suit :...
  • Seite 61 Service Dealer of met de klantenservice van SAE J1940. Omdat bij de configuratie rekening Toro. Figuur 1 toont de locatie van het modelnummer is gehouden met de veiligheids-, emissie- en en het serienummer van het product.
  • Seite 62: Voor Ingebruikname

    Algemene veiligheidsregels • Controleer vóór gebruik altijd of de beschermplaten en veiligheidsvoorzieningen zoals grasgeleiders en i.v.m. de maaimachine grasvanger, op hun plaats zitten en naar behoren werken. De volgende instructies zijn ontleend aan EN 836. • Controleer de messen, bevestigingsbouten en het Deze maaimachine kan handen of voeten amputeren maaimechanisme altijd op sporen van slijtage of en voorwerpen uitwerpen.
  • Seite 63: Geluidsniveau

    – voordat u verstoppingen losmaakt of het • Om de beste prestaties en een veilig gebruik uitwerpkanaal ontstopt. te verzekeren, dient u uitsluitend originele Toro-onderdelen en accessoires gebruiken. – voordat u de maaimachine controleert, reinigt of Nooit universele onderdelen en accessoires daaraan werkzaamheden verricht.
  • Seite 64: Veiligheids- En Instructiestickers

    3. Handen of voeten kunnen worden gesneden/geamputeerd, 1. Geeft aan dat het mes onderdeel van een originele maaimes—Trek de bougiekabel los en raadpleeg de Toro-maaimachine is. instructies vóór u service- of onderhoudswerkzaamheden uitvoert. 110-9329 1.
  • Seite 65 Montage 1. De handgreep assembleren en uitklappen Procedure Als de handgreep verkeerd wordt geassembleerd en uitgeklapt, kunnen de kabels schade oplopen, waardoor de machine niet veilig kan worden gebruikt. • Zorg ervoor dat u de kabels niet beschadigt als u de handgreep assembleert en uitklapt. •...
  • Seite 66: De Motor Bijvullen Met Olie

    3. Graszak monteren op een lijn met een van de drie merktekens op de binnenkant van de vergrendelingen van de bovenste handgreep (Figuur 4). Procedure Opmerking: Als een handgreephendel los zit, Bevestig de lip op de voorkant van het graszakframe moet u de hendel openen en 1 of 2 slagen rechtsom zoals wordt getoond in (Figuur 7).
  • Seite 67: De Accu Opladen

    Gebruiksaanwijzing Belangrijk: Ververs de motorolie na de eerste 5 bedrijfsuren , daarna moet dit elk jaar gebeuren. Zie "De motorolie verversen". De brandstoftank vullen 5. De accu opladen Procedure Benzine is uitermate ontvlambaar en explosief. Brand of explosie van benzine kan Uitsluitend model 21027 brandwonden veroorzaken.
  • Seite 68: Het Motoroliepeil Controleren

    Het motoroliepeil controleren Onderhoudsinterval: Bij elk gebruik of dagelijks 1. Verwijder de peilstok uit de buis en veeg deze schoon. Schuif daarna de peilstok weer helemaal terug (Figuur 8). 2. Haal de peilstok eruit en controleer het oliepeil (Figuur 8). Als het peil onder de Bijvullen-markering op de peilstok staat, giet dan lanzaam voldoende olie in de vulbuis totdat het peil de Vol-markeringhop de peilstok bereikt.
  • Seite 69: Motor Starten

    Motor starten Zelfaandrijving gebruiken 1. Houd de bedieningsstang van het maaimes tegen de Uitsluitend modellen 21026 en 21027 handgreep (Figuur 12). Om de zelfaandrijving te activeren, loopt u eenvoudig vooruit met uw handen op het bovenste deel van de handgreep en uw ellebogen naast uw lichaam; de maaimachine richt zich automatisch naar uw loopsnelheid (Figuur 15).
  • Seite 70: Maaisel Recyclen

    1. Zet de motor af en wacht totdat alle bewegende Controleer de graszak regelmatig. Plaats onderdelen tot stilstand gekomen zijn. een nieuwe Toro-grasvanger als de oude is 2. Til de grasvanger omhoog en trek deze los van de beschadigd. hendel.
  • Seite 71: Achteruitworp Gebruiken

    Dit kan een of meerdere rondgangen over de bladeren vereisen. • Vervang indien nodig het maaimes door een Toro-mes • Als er een laag bladeren van meer dan 13 cm op het gazon ligt, moet u de voorwielen een of twee Gras maaien uitsparingen hoger zetten dan de achterwielen.
  • Seite 72: Aanbevolen Onderhoudsschema

    Onderhoud Opmerking: Bepaal vanuit de normale bedieningspositie de linker- en rechterzijde van de machine. Aanbevolen onderhoudsschema Onderhoudsinterval Onderhoudsprocedure • De motorolie verversen. Na de eerste 5 bedrijfsuren • Het motoroliepeil controleren. • Controleer of de motor binnen 3 seconden stopt nadat u de bedieningsstang van Bij elk gebruik of dagelijks het maaimes hebt losgelaten.
  • Seite 73: Het Luchtfilter Vervangen

    Het luchtfilter vervangen Onderhoudsinterval: Jaarlijks 1. Voer de voorbereidingen voor het onderhoud uit, zie "Voorbereidingen voor onderhoudswerkzaamheden". 2. Open het luchtfilterdeksel en verwijder het oude luchtfilter (Figuur 21). Figuur 22 4. Nadat de olie is afgetapt, zet u de maaimachine terug in de werkstand.
  • Seite 74 Figuur 26 Figuur 24 3. Monteer de achterwielen. 3. Sluit de acculader aan op de accu (Figuur 25). De zelfaandrijving afstellen Uitsluitend modellen 21026 en 21027 Als de zelfaandrijving van uw maaimachine niet goed werkt moet u de kabel van de zelfaandrijving afstellen. 1.
  • Seite 75: Het Maaimes Vervangen

    de bedieningspositie), afhankelijk van de mate waarin correctie is vereist. • Als de zelfaandrijving van de maaimachine niet werkt, moet u de stelmoer 1 tot 3 slagen rechtsom draaien (vanuit de bedieningspositie), afhankelijk van de mate waarin correctie is vereist. 3.
  • Seite 76 De maaimachine reinigen 8. Draai de kraan dicht en maak de tuinslang los van de maaimachine. Wassen 9. Start de motor en laat deze een paar minuten lopen om de maaikast te drogen zodat deze niet gaat Onderhoudsinterval: Bij elk gebruik of roesten.
  • Seite 77: Voorbereidingen Voor Stalling

    Stalling 3. Laad de accu gedurende 24 uur op (uitsluitend model 21027). Stal de maaimachine op een koele, schone en droge 4. Sluit de bougiekabel aan op de bougie. plaats. Voorbereidingen voor stalling Benzinedampen kunnen tot ontploffing komen. • Bewaar benzine niet langer dan 30 dagen. •...
  • Seite 78 Opmerkingen:...
  • Seite 79 Spypros Stavrinides Limited Cyprus 357 22 434131 Surge Systems India Limited India 91 1 292299901 T-Markt Logistics Ltd Hungary 36 26 525 500 Toro Australia Australia 61 3 9580 7355 Toro Europe BVBA Belgium 32 14 562 960 374-0102 Rev B...
  • Seite 80 Hierop is de garantie voor commercieel gebruik van toepassing. Plichten van de eigenaar Garantie voor commercieel gebruik U dient uw Toro product te onderhouden zoals wordt beschreven in de Toro Op consumentenproducten en werktuigen die worden gebruikt voor gebruikershandleiding. Dit routineonderhoud is voor uw rekening, ongeacht of commerciële en institutionele doeleinden of worden verhuurd, wordt garantie...

Diese Anleitung auch für:

210252102621027

Inhaltsverzeichnis