TOOLCRAFT Digimicro LAB 3.0 Softwareanleitung
Inhaltsverzeichnis
Verfügbare Sprachen
Verfügbare Sprachen
Softwareanleitungen
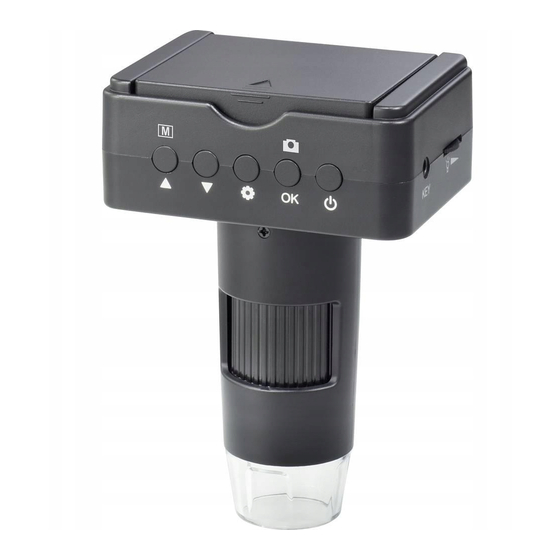
Mikroskopkamera Digimicro LAB 3.0
Best.-Nr. 2373534
Software Instructions
Microscope camera Digimicro LAB 3.0
Item No. 2373534
Instructions du logiciel
Camera microscope Digimicro LAB 3.0
Nº de commande 2373534
Software-instructies
Microscoopcamera Digimicro LAB 3.0
Bestelnr. 2373534
Seite 02 - 09
Page 10 - 17
Page 18- 25
Pagina 26 - 33
Inhaltsverzeichnis

Verwandte Anleitungen für TOOLCRAFT Digimicro LAB 3.0


Inhaltszusammenfassung für TOOLCRAFT Digimicro LAB 3.0
- Seite 1 Softwareanleitungen Mikroskopkamera Digimicro LAB 3.0 Best.-Nr. 2373534 Seite 02 - 09 Software Instructions Microscope camera Digimicro LAB 3.0 Item No. 2373534 Page 10 - 17 Instructions du logiciel Camera microscope Digimicro LAB 3.0 Nº de commande 2373534 Page 18- 25 Software-instructies Microscoopcamera Digimicro LAB 3.0...
-
Seite 2: Inhaltsverzeichnis
1 Inhaltsverzeichnis 2 Neueste Informationen zum Produkt ..................3 3 Betriebsvorbereitungen ......................4 3.1 Installation der mitgelieferten Software .................4 3.2 Anschließen des Mikroskops ..................4 3.3 Einstellen der Sprache der Benutzeroberfläche ............4 3.4 Auflösungseinstellungen ....................4 3.5 Datum und Uhrzeit einstellen ..................4 3.6 Ein- und Ausblenden von XY-Achsenführungen ............4 3.7 Einstellen der Bildschirmmodi ..................5 4 Aufnehmen von Fotos und Videos ...................5 4.1 Aufnehmen von Fotos ....................5... -
Seite 3: Neueste Informationen Zum Produkt
2 Neueste Informationen zum Produkt Laden Sie die neuesten Produktinformationen unter www.conrad.com/downloads herunter oder scannen Sie den abgebildeten QR-Code. Folgen Sie den Anweisun- gen auf der Website. Befolgen Sie die Anweisungen auf der Webseite. -
Seite 4: Betriebsvorbereitungen
3 Betriebsvorbereitungen 3.1 Installation der mitgelieferten Software Software-Installationsprogramme sind für Windows und MacOS verfügbar. ® 1. Laden Sie das Installationsprogramm hier herunter www.conrad.com/downloads. 2. Installieren Sie die Software auf Ihrem Computer. 3.2 Anschließen des Mikroskops Schließen Sie das Mikroskop an den Computer an, um das Live-Bild auf den Com- puterbildschirm zu übertragen. -
Seite 5: Einstellen Der Bildschirmmodi
3.7 Einstellen der Bildschirmmodi Sie können das Bild in einem von zwei Bildschirmmodi anzeigen: normal und Voll- bild. 1. Gehen Sie zu Options > Fullscreen mode, um den Vollbildmodus zu aktivieren. 2. Um zum normalen Modus zurückzukehren, drücken Sie die ESC-Taste auf der Tastatur. -
Seite 6: Einstellen Von Timern Für Die Aufnahme Von Fotos Und Videos
4.3 Einstellen von Timern für die Aufnahme von Fotos und Videos Mit der zeitgesteuerten Aufnahme können Sie Fo- tos oder Videos zu einem bestimmten Datum und einer bestimmten Uhrzeit aufnehmen. 1. Drücken Sie auf die Timer-Schaltfläche 2. Wählen Sie aus, ob Sie Fotos oder Videos auf- nehmen möchten. - Seite 7 Berechnen des Vergrößerungsfaktors Sie haben das Kalibrierungslineal platziert. Sie haben die Vergrößerung eingestellt. 1. Klicken Sie auf die Foto-Schaltfläche , um ein Foto zu machen. 2. Doppelklicken Sie auf das Foto, um die Messoberfläche zu öffnen. 3. Klicken Sie auf das Kalibrierungs-Tool 4.
-
Seite 8: Messen
6 Messen 6.1 Messungen durchführen 1. Drücken Sie auf die Foto-Schaltfläche , um ein Foto zu machen. --ODER-- Öffnen Sie ein Foto aus dem Pool. 2. Doppelklicken Sie auf das Foto, um die Messoberfläche zu öffnen. 3. Klicken Sie auf das Mess-Tool und wählen Sie eine Form aus. -
Seite 9: Einstellen Der Bildvergrößerung
6.3 Einstellen der Bildvergrößerung Wenn die Bildvergrößerung nicht Ihren Wünschen entspricht, können Sie Ihre eige- ne Vergrößerung einstellen. 1. Klicken Sie auf das Kalibrierungs-Tool und wählen Sie Reset Mag- nification > Reset picture magnification. Die Bildvergrößerung wird zurückgesetzt. Æ 2. Klicken Sie auf das Kalibrierungs-Tool und wählen Sie Set Magni- fication >... - Seite 34 Dies ist eine Publikation der Conrad Electronic SE, Klaus-Conrad-Str. 1, D-92240 Hirschau (www.conrad.com). Alle Rechte einschließlich Übersetzung vorbehalten. Reproduktionen jeder Art, z. B. Fotokopie, Mikroverfilmung oder die Erfassung in elektronischen Datenverarbeitungsanlagen bedürfen der schriftlichen Genehmigung des Herausgebers. Nachdruck, auch auszugsweise, sind verboten. Die Publikation entspricht dem technischen Stand bei Drucklegung.