Werbung
Quicklinks
Werbung

Verwandte Anleitungen für HEIDENHAIN AE ECI4010 EnDat22


Inhaltszusammenfassung für HEIDENHAIN AE ECI4010 EnDat22
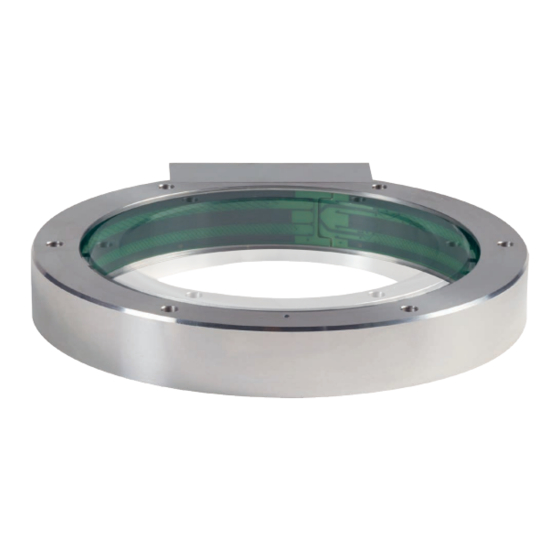
- Seite 1 Montageanleitung Mounting Instructions Instructions de montage Istruzioni di montaggio Instrucciones de montaje AE ECI4010 EnDat22 ID 1130167-xx AE EBI4010 EnDat22 Abtasteinheit ID 1130173-xx Scanning unit Tête captrice FOABA3: AA02 Testina ANELA1: 5PS15 Cabezal BELEA1: T9, EZ 12/2021...
- Seite 2 Inhalt Seite Page Contents 3 Hinweise 3 Notes Sommaire 4 Warnhinweise 4 Warnings Indice 6 Lieferumfang 6 Items supplied 8 Kundenseitige Anschlussmaße (mm) Índice 8 Required mating dimensions (mm) 10 Hinweise zur Montage 10 Mounting information 12 Montage 12 Mounting 13 Anschlussbelegung 13 Pin layout 14 Kabelanschluss...
- Seite 3 Hinweise Notes Remarques Note Indicaciones Für die bestimmungsgemäße Verwendung des Messgeräts sind die Angaben in der zugehörigen Produktinformation ECI 4010/EBI 4010 einzuhalten. Adhere to the applicable Product Information sheet for ECI 4010/EBI 4010 to ensure the correct and intended operation of the encoder. Pour une utilisation conforme du système de mesure, respecter les données contenues dans l’information produit relative à...
-
Seite 4: Avertissements
– Do not clean the encoder with organic solvents like thinners, alcohol or benzine. – Encoders that have contributed to the failure of a safety function in the application must be returned to HEIDENHAIN, together with the fasteners (screws - feather key). - Seite 5 – No limpiar el aparato con disolventes orgánicos como diluyentes, alcohol o gasolina. – Los sistemas de medida que durante su aplicación hayan contribuido al fallo de una función de seguridad deben ser devueltos a HEIDENHAIN incluyendo las piezas de sujeción (tornillos - chavetero).
- Seite 6 Lieferumfang Items supplied Objet de la fourniture Standard di fornitura Elementos suministrados Abtasteinheit Scanning unit Tête captrice Testina di scansione Cabezal Nicht im Lieferumfang: Befestigungsschrauben Not included in delivery: Mounting screws Non inclus dans la livraison : Vis de fixation Non inclusi nello standard di fornitura: viti di fissaggio No figura entre los elementos suministrados: Tornillos de sujeción...
- Seite 7 Separat bestellen: Order separately: Commander séparément: Ordinare separatamente: Pedir por separado: Montagehilfe ID 1075573-01 Mounting aid Outil de montage Aiuto di montaggio Ayuda para el montaje Schrauben zur Befestigung Screws for fastening Vis de fixation ISO 4762–M4x25–8.8–MKL, ID 202264-88 Viti per il fissaggio xxxxxxxxxxxx Tornillos para la sujeción MKL (DIN 267-27) =...
- Seite 8 Kundenseitige Anschlussmaße (mm) Required mating dimensions (mm) Conditions requises pour le montage (mm) Quote per il montaggio (mm) Cotas de montaje requeridas (mm) Lagerung Kundenwelle Bearing of mating shaft Roulement de l'arbre client Asse cuscinetti lato cliente Rodamiento eje del cliente...
- Seite 9 1 = Auflagefläche Stator 2 = Auflagefläche Rotor 3 = Fase am Gewindeanfang obligatorisch für stoffschlüssige Losdrehsicherung 4 = Erforderlicher Einbauraum mit geschlossenem Gehäusedeckel 5 = Erforderlicher Einbauraum zum Öffnen des Gehäusedeckels 6 = In diesem Bereich ist die vollflächige Auflage der Abtasteinheit nicht zwingend erforderlich 1 = Bearing surface of stator 2 = Bearing surface of rotor 3 = Chamfer at start of thread is obligatory for materially bonding anti-rotation lock...
-
Seite 10: Mounting Information
Hinweise zur Montage Mounting information Procédure de montage Avvertenze per il montaggio Indiciones para el montaje Montagehinweise dringend beachten! Follow the Mounting Instructions carefully! Respecter impérativement les instructions de montage! Attenersi scrupolosamente alle indicazioni di montaggio! Seguir fielmente las indicaciones para el montaje! Bitte beachten Sie die Verarbeitungshinweise im Prospekt ”Messgeräte für elektrische Antriebe”... - Seite 11 En raison du frein de filet, le montage des vis de HEIDENHAIN doit être terminé en 5 minutes ! Il montaggio delle viti deve essere completato entro 5 minuti per garantire l’efficace funzionamento del frenafiletti. Por causa del seguro del tornillo, el montaje del tornillo de HEIDENHAIN debe estar concluido en el transcurso de 5 minutos.
- Seite 12 Montage Mounting Montage Montaggio Montaje Nullposition ±5° Zero position ±5° Position zéro ±5° Punto di zero ±5° Posición cero ±5° ISO 4762–M4x25–8.8–MKL, ID 202264-88 = 2.2 ±0.13 Nm Beschriftung muss sichtbar sein. The labeling must be visible. L ’inscription doit être visible. La scritta deve essere visibile.
- Seite 13 Anschlussbelegung Pin layout Affectation des plots Piedinatura Distribución del conector ECI4010 Sensor U Sensor 0 V DATA DATA CLOCK CLOCK T– EBI4010 DATA DATA CLOCK CLOCK T– BNGN WHGN Nichtverwendete Pins oder Adern dürfen nicht belegt werden! Temperatursensor Vacant pins or wires must not be used! Temperature sensor Les plots ou fils non utilisés ne doivent pas être raccordés! Sonde de température...
- Seite 14 (cf. instructions de montage ID 1123826-xx) Utilizzare cavi in uscita HEIDENHAIN. (Vedere istruzioni di montaggio ID 1123826-xx) Utilizar el conjunto de cables de salida de HEIDENHAIN. (ver instrucciones de montaje ID 1123826-xx) Elektrischen Widerstand zwischen Flanschdose und Rotor a), Stator b) und Crimphülse c) prüfen. Sollwert: < 1 Ohm.
- Seite 15 Gewindestift herausdrehen. Screw out the setscrew. Retirer la vis sans tête. Svitare la vite senza testa. Desatornillar el pasador. Kabel einfädeln und Crimphülse bis auf Anschlag einschieben. Thread the cable and insert the crimp sleeve as far as it will go. Enfiler le câble et insérer la douille à...
- Seite 16 Außenschirm auf Crimphülse External shield on crimp sleeve Blindage externe sur la douille à sertir Schermatura esterna sulla boccola a crimpare Apantallado externo sobre el manguito de engarzar Zur Vermeidung von Kabelbeschädigungen die Montagehilfe zum Anstecken und Abziehen der Kabelbaugruppe ID 1075573-01 verwenden.
- Seite 17 Kabel durch Zugentlastung sichern Biegeradius R Secure cable with strain relief (fest verlegt) Consolider le câble per décharge de traction Bending radius R Fissare il cavo con fermacavo (Rigid configuration) Asegurar el cable mediante la descarga de tracción Rayon de courbure R (Fixé) Raggio di curvatura R (Posa fissa)
-
Seite 18: Operazioni Finali
Abschließende Arbeiten Final steps Opérations finales Operazioni finali Trabajos finales Drehende Teile sind nach erfolgtem Anbau gegen unbeabsichtiges Berühren im Betrieb ausreichend zu sichern. After installation, all rotating parts must be secured adequately against accidental contact during operation. Une fois le système de mesure monté, les pièces en rotation doivent être suffisamment protégées de tout contact lors du fonctionnement. Dopo il montaggio, le parti rotanti devono essere sufficientemente protette contro il contatto accidentale durante il funzionamento. -
Seite 19: Demontage
Demontage Disassembly Demontage Smontaggio Desmontaje Die Steckverbindung darf nur spannungsfrei gelöst werden. Do not disengage any connections while under power. La déconnexion ne doit être faite qu’hors potentiel. Il connettore può essere rimosso solo quando è stata tolta tensione. Desconectar el conector sólo en ausencia de tensión. Zum Demontieren die Montageschritte der Seiten 12-18 in umgekehrter Reihenfolge durchführen. - Seite 20 DR. JOHANNES HEIDENHAIN GmbH Dr.-Johannes-Heidenhain-Straße 5 83301 Traunreut, Germany { +49 8669 31-0 | +49 8669 32-5061 E-mail: info@heidenhain.de Technical support | +49 8669 32-1000 Measuring systems { +49 8669 31-3104 E-mail: service.ms-support@heidenhain.de NC support { +49 8669 31-3101 E-mail: service.nc-support@heidenhain.de...