Werbung
Setup Guide
EN
Guide d'installation
FR
Installationshandbuch
DE
Installatiehandleiding
NL
Guida di installazione
IT
ES
Guía de instalación
Manual de instalação
PT
EN
Assembly
FR
Assemblage
DE
Montage
14
NL
Montage
EN
Installing the Software
FR
Installation du logiciel
DE
Installation der Software
29
NL
De software installeren
EN
Using the Printer
FR
Utiliser l'imprimante
DE
Drucker verwenden
37
NL
De printer gebruiken
IT
Montaggio
ES
Montaje
PT
Montagem
IT
Installazione del software
ES
Instalación del software
PT
Instalar o Software
IT
Uso della stampante
ES
Uso de la impresora
PT
Utilizar a Impressora
Werbung
Inhaltsverzeichnis

Verwandte Anleitungen für Epson SC-F9400H-Serie


Inhaltszusammenfassung für Epson SC-F9400H-Serie
- Seite 1 Assembly Montaggio Assemblage Montaje Montage Montagem Montage Installing the Software Installazione del software Setup Guide Installation du logiciel Instalación del software Installation der Software Instalar o Software Guide d’installation De software installeren Using the Printer Uso della stampante Installationshandbuch Utiliser l'imprimante Uso de la impresora Drucker verwenden Utilizar a Impressora...
- Seite 2 Introductions Introductions Meaning of Symbols Signification des symboles This manual uses the following symbols to indicate dangerous operations or handling procedures Ce manuel utilise les symboles suivants pour indiquer des opérations ou des procédures de to prevent harm to users or other people or damage to property. Make sure you understand these manipulation dangereuses afin d’éviter tout dommage aux utilisateurs ou à...
-
Seite 3: Einleitung
Einleitung Introducties Bedeutung der Symbole Betekenis van symbolen In diesem Handbuch werden die folgenden Symbole verwendet, um gefährliche Bedienaktionen oder In deze handleiding worden de volgende symbolen gebruikt om gevaarlijke taken of procedures aan Handhabungsverfahren zu kennzeichnen, um Schäden an Benutzern oder anderen Personen oder te geven om letsel bij gebruikers of andere personen, of schade aan eigendommen te voorkomen. - Seite 4 Introduzioni Introducción Significato dei simboli Significado de los símbolos Questo manuale utilizza i seguenti simboli per indicare operazioni o procedure di manipolazione En este manual se utilizan los siguientes símbolos para indicar operaciones peligrosas o pericolose in modo da prevenire danni a utenti, altre persone o danni materiali. Assicurarsi di aver procedimientos de manipulación que eviten daños a los usuarios, otras personas o materiales.
- Seite 5 Introduções Significado dos Símbolos O presente manual utiliza os seguintes símbolos para indicar operações perigosas ou procedimentos de manipulação para evitar danos a utilizadores ou outras pessoas ou danos na propriedade. Certifique-se que compreende estas advertências antes de ler o conteúdo do presente manual. Atenção Os alertas devem ser seguidos para evitar ferimentos graves.
- Seite 6 I simboli indicano il significato seguente. Assicurarsi di comprendere a fondo il significato dei simboli su questo prodotto prima di utilizzarlo. Los símbolos en este producto Epson se usan para garantizar la seguridad y el uso correcto del dispositivo y para evitar riesgos de lesiones a los clientes y otras personas así...
- Seite 7 Introductions Introductions Einleitung Introducties Introduzioni Introducción Introduções Stand-by Hot surface Risk of electric shock Caution, Warning Veille Surface chaude Risque de choc électrique Attention, Avertissement Stand-by Heiße Oberfläche Gefahr von Stromschlag Vorsicht, Warnung Stand-by Heet oppervlak Gevaar voor elektrische schok Let op, Waarschuwing Stand-by Superficie calda...
- Seite 8 Choosing a Place for the Printer Choix d’un emplacement pour l’imprimante Auswahl eines Standorts für den Drucker Een plaats voor de printer kiezen Scegliere un luogo per la stampante Selección del lugar de instalación de la impresora Escolher um Local para a Impressora Instructions pour le placement de l’imprimante ❏...
- Seite 9 Choosing a Place for the Printer Choix d’un emplacement pour l’imprimante Auswahl eines Standorts für den Drucker Een plaats voor de printer kiezen Scegliere un luogo per la stampante Selección del lugar de instalación de la impresora Escolher um Local para a Impressora Instructies om de printer te plaatsen Instrucciones al instalar la impresora ❏...
- Seite 10 Unpacking Déballage Auspacken Uitpakken Disimballare Desembalaje Desempacotar A to E are not used during setup. For information on using the printer and more details, see the “Operator’s Guide” (PDF) or the “User’s Guide” (online manual). A à E ne sont pas utilisés pendant l’installation. Pour plus d’informations sur l’utilisation de l’imprimante et plus de détails, consultez le « Guide de l’opérateur »...
- Seite 11 Unpacking Déballage Auspacken Uitpakken Disimballare Desembalaje Desempacotar The “C” screws are used for parallel adjustment. /Les vis « C » sont utilisées pour le réglage parallèle. / Die „C“-Schrauben werden für die Parallele Ausrichtung verwendet. /De „C”-schroeven worden gebruikt voor parallelle uitlijning. / Le viti “C”...
- Seite 12 Epson accepts no responsibility for any dysfonctionnement ; veuillez noter qu’Epson Drucker beschädigen oder zu Fehlfunktionen raken. Let op: Epson is niet aansprakelijk voor damage or malfunction so caused. n’est responsable d’aucun dommage ou führen. Bitte beachten Sie, dass Epson keine door u veroorzaakte schade of defecten.
- Seite 13 Epson declina se produzcan fallos; tenga en cuenta que Epson um funcionamento incorreto; atente que a ogni responsabilità per danni o anomalie causati.
- Seite 14 Assembly Assemblage Montage Montage Montaggio Montaje Montagem We recommend that this task be performed by a team of three people. Stand Nous conseillons d’effectuer cette tâche en groupe de trois personnes. Support Wir empfehlen eine Ausführung dieser Arbeit durch eine Gruppe von drei Personen.
- Seite 15 Assembly Assemblage Montage Montage Montaggio Montaje Montagem Printer Installation Installation de l’imprimante Druckerinstallation Printerinstallatie Installazione della stampante Instalación de la impresora Instalação da Impressora Before using the printer, be sure the stand is fixed in place. When moving the printer unlock the casters. Avant d’utiliser l’imprimante, assurez-vous que le support est fixé...
- Seite 16 Assembly Assemblage Montage Montage Montaggio Montaje Montagem When carrying the printer, use at least eight persons. Caution: N’essayez pas de soulever l’imprimante si vous êtes moins de huit personnes. Important : Vorsicht: Wenn Sie den Drucker tragen, tun Sie dies mit mindestens acht Personen. Draag de printer met minstens acht personen.
- Seite 17 Assembly Assemblage Montage Montage Montaggio Montaje Montagem [10]...
- Seite 18 Assembly Assemblage Montage Montage Montaggio Montaje Montagem [11] Place the caution label for your language over the English label. Placez l'étiquette d'avertissement de votre langue au-dessus de l'étiquette en anglais. Platzieren Sie das Warnetikett in Ihrer Sprache über dem englischen Etikett. Plaats het waarschuwingslabel voor uw taal over het Engelse label.
- Seite 19 Assembly Assemblage Montage Montage Montaggio Montaje Montagem Media Feeding Unit Unité chargement papier Medieneinzugseinheit Mediadoorvoer eenheid Unità di alimentazione supporto Unidad alimentadora de documentos Unidade de alimentação de papel ❏ Two people should hold the two bars when carrying the Media Feeding Unit. ❏...
- Seite 20 Assembly Assemblage Montage Montage Montaggio Montaje Montagem Fasten the screws on the side, keeping the pipes pressed as shown, and then fasten the screws on the side. Serrez les vis sur le côté , tout en appuyant sur les tuyaux comme illustré, puis serrez les vis sur le côté...
- Seite 21 Assembly Assemblage Montage Montage Montaggio Montaje Montagem Auto Take-up Reel Unit Enrouleur papier Automatique Aufrolleinheit Automatische oproleenheid Riavvolgitore automatico Unidad de recogida automática Unidade de enrolador de Papel Do not dispose of the roll core, as it will be used as for media take-up. Keep it in a safe place.
- Seite 22 Assembly Assemblage Montage Montage Montaggio Montaje Montagem Lift the end, loosen the lock screw, and move the unit into position. Soulevez l’extrémité, desserrez la vis de verrouillage, et déplacez l’unité jusqu’à sa position. Heben Sie die Kante an, lösen Sie die Verschlussschraube und richten Sie die Einheit aus.
- Seite 23 Assembly Assemblage Montage Montage Montaggio Montaje Montagem Use the eight screws shown at left to hold the unit in place temporarily until parallel adjustment is complete. Utilisez les huit vis indiquées à gauche pour maintenir l’unité en place temporairement jusqu’à ce que le réglage parallèle soit terminé. Verwenden Sie die acht Schrauben wie in der linken Darstellung, um die Einheit vorübergehend zu befestigen, bis die parallele Ausrichtung beendet ist.
- Seite 24 Assembly Assemblage Montage Montage Montaggio Montaje Montagem Request a service engineer to attach the Ink Supply System and perform parallel adjustment on the Auto Take-up Reel Unit. Do not turn the printer on until the service engineer’s work is complete. Attempting to perform these tasks yourself could result in product malfunction or damage to the product and will void the product warranty.
- Seite 25 Assembly Assemblage Montage Montage Montaggio Montaje Montagem Connecting Cables Raccordement des câbles Kabel anschließen Kabels aansluiten Cavi di connessione Conexión de los cables Ligar os Cabos...
- Seite 26 Assembly Assemblage Montage Montage Montaggio Montaje Montagem...
- Seite 27 Assembly Assemblage Montage Montage Montaggio Montaje Montagem ❏ Use only the type of power source indicated on the printer’s label. Warning: ❏ To prevent ground leak accidents, connect to a grounded (earthed) outlet. ❏ Utilisez uniquement le type de source d’alimentation électrique indiqué sur l’étiquette de l’imprimante. Avertissement: ❏...
- Seite 28 Assembly Assemblage Montage Montage Montaggio Montaje Montagem Check that the status of the levels are OK as shown in the illustration before moving to the next step. indicates that the status of the printer is not level. You can adjust the printer’s level by using the adjusters. After adjusting the adjusters, we recommend checking that the nearest caster is raised from the floor.
-
Seite 29: Installation Du Logiciel
Installing the Software Installation du logiciel Installation der Software De software installeren Installazione del software Instalación del software Instalar o Software Ready the printer and computer for connection before proceeding, but do not connect the cables until the installer prompts you to do so. The essential software will not be installed if Installing the Essential Software the devices are not connected according to the on-screen instructions. - Seite 30 Epson Manuals y Epson Communication Driver. *2 Utilisez le RIP Epson fourni (Epson Edge Print) ou un RIP disponible à la vente. Epson Edge Print est *2 Utilice el Epson RIP (Epson Edge Print) suministrado o un RIP disponible en el mercado. Epson Edge compatible uniquement avec Windows.
- Seite 31 Inserire il “epson.sn” e il modello della stampante in un browser web e fare clic su Introduzca “epson.sn” y el nombre de modelo de la impresora en un navegador web y haga clic en Insira “epson.sn” e o nome do modelo de impressora num navegador web e clique em...
- Seite 32 Windows Next, install the RIP. Instructions for installing Epson Edge Print can be If this dialog box appears, make sure the publisher is “SEIKO EPSON CORPORATION”, and found in the next section; for information on installing a commercially then click Allow access.
- Seite 33 Install Epson Edge Print to the computer to which you installed the basic software. The software needed to install Epson Edge Print is available online; be sure the computer is connected to the Internet and then access the URL printed on the sheet in the Epson Edge Print Installing Epson Edge Print package.
- Seite 34 La prima volta che si utilizza Epson Edge Print, viene richiesto di accettare il contratto di licenza. Consultare la guida di Epson Edge Print per ulteriori informazioni. La primera vez que utilice Epson Edge Print, se le pedirá que acepte el acuerdo de licencia. Consulte la ayuda de Epson Edge Print para obtener más información.
- Seite 35 Installing the Software Installation du logiciel Installation der Software De software installeren Installazione del software Instalación del software Instalar o Software In a network connection, continue by setting a password for protecting the network settings. Do not forget the administrator password. For information on what to do if you forget the password, see “Problem Solver” in the Setting a Password (Networks Only) User’s Guide (online manual).
- Seite 36 Installing the Software Installation du logiciel Installation der Software De software installeren Installazione del software Instalación del software Instalar o Software In Optional, click Password. Dans Optionnel, cliquez sur Mot de passe. In Optional klicken Sie auf Password. Klik in Optioneel op Wachtwoord. In Opzionale, fare clic su Password.
-
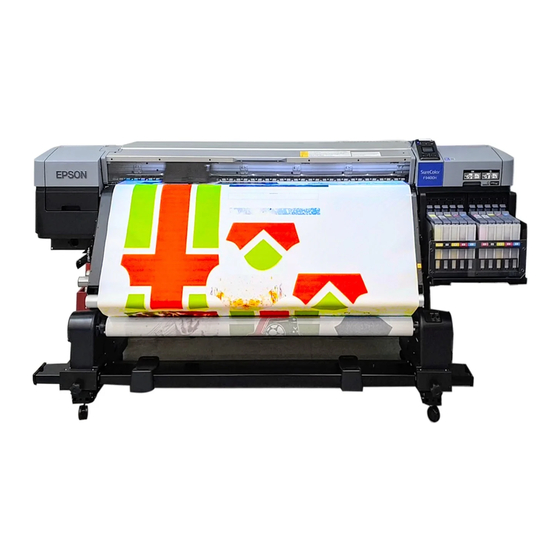
Seite 37: Drucker Verwenden
Using the Printer Utiliser l'imprimante Drucker verwenden De printer gebruiken Uso della stampante Uso de la impresora Utilizar a Impressora Next, load media and start using the printer. For information on loading media and performing maintenance, see the “Operator’s Guide” (PDF). You can also scan the following QR code to access videos on loading media and performing maintenance. - Seite 38 No “Epson Manuals” Icon Per i dettagli sul funzionamento e la manutenzione della stampante, nonché su soluzioni alle If there is no Epson Manuals icon on the desktop, visit Epson Setup Navi (http://epson.sn/) and follow domande frequenti, consultare le guide in linea.