Klarstein Skytower 360 Smart Bedienungsanleitung
Vorschau ausblenden
Andere Handbücher für Skytower 360 Smart:
- Bedienungsanleitung (96 Seiten) ,
- Bedienungsanleitung (68 Seiten) ,
- Bedienungsanleitung (68 Seiten)

Verwandte Anleitungen für Klarstein Skytower 360 Smart


Inhaltszusammenfassung für Klarstein Skytower 360 Smart
- Seite 1 Skytower 360° Smart Luftkühler Air Cooler Enfriador de aire Rafraîchisseur d’air Raffreddatore d’aria 10035818...
-
Seite 3: Inhaltsverzeichnis
Sehr geehrter Kunde, wir gratulieren Ihnen zum Erwerb Ihres Gerätes. Lesen Sie die folgenden Hinweise sorgfältig durch und befolgen Sie diese, um möglichen Schäden vorzubeugen. Für Schäden, die durch Missachtung der Hinweise und unsachgemäßen Gebrauch entstehen, übernehmen wir keine Haftung. Scannen Sie den folgenden QR-Code, um Zugriff auf die aktuellste Bedienungsanleitung und weitere Informationen rund um das Produkt zu erhalten. -
Seite 4: Sicherheitshinweise
SICHERHEITSHINWEISE • Prüfen Sie vor der Benutzung die Spannungsangabe auf dem Typenschild. Schließen Sie das Gerät nur an Steckdosen an, die der Spannung des Geräts entsprechen. • Halten Sie das Kabel fern von heißen Oberflächen und scharfkantigen Gegenständen. • Verlegen Sie das Kabel nicht unter einem Teppich und decken Sie es auch nicht mit anderen Gegenständen oder Stoffen ab. -
Seite 5: Produkteigenschaften
• Während des Betriebs befeuchtet das Gerät die Umgebungsluft. Vermeiden Sie jedoch zu hohe Luftfeuchtigkeit. Wir empfehlen Ihnen eine Luftfeuchtigkeit zwischen 40-50 %. Zu hohe Luftfeuchtigkeit kann zu Schimmel oder gesundheitlichen Problemen führen. • Stellen Sie das Gerät nur auf Untergründe, die unempfindlich gegenüber Nässe und hoher Luftfeuchtigkeit sind. -
Seite 6: Geräteübersicht
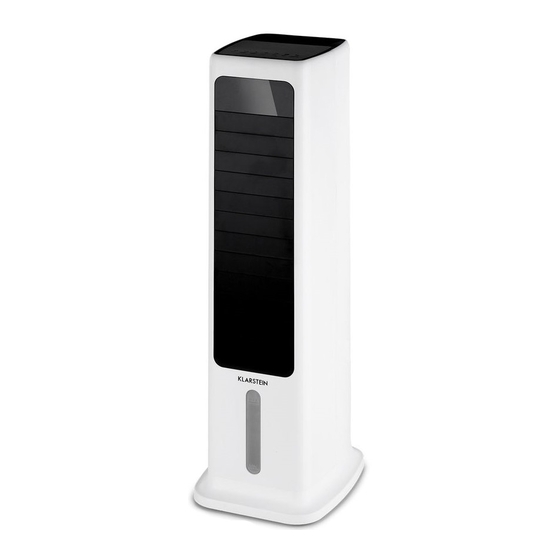
GERÄTEÜBERSICHT Vorderes Gehäuse Hinteres Gehäuse Bedienfeld Hinteres Lüftungsgitter Horizontale Lüftungsschlitze Kabelaufwickelung Dekorative Abdeckung Netzkabel Gerätebasis Wassertank Hinweis zur Benutzung des Wassertanks Prinzipiell können Sie Ihren Luftkühler jederzeit ohne Wasser im Tank nutzen. Er funktioniert dann wie ein ganz normaler Ventilator. Wasser im Tank wird nur für die Kühl-Funktion benötigt. -
Seite 7: Zubehör
ZUBEHÖR Fernbedienung Eisbehälter Verwendung der Fernbedienung 1. Öffnen Sie das Batteriefach der Fernbedienung und legen Sie eine 3 V CR2032 Batterie ein. Drücken Sie zum Öffnen des Batteriefachs die Abdeckung in Pfeilrichtung (1) herunter und ziehen Sie das Batteriefach in Pfeilrichtung (2) heraus. -
Seite 8: Bedienfeld Und Fernbedienung
BEDIENFELD UND FERNBEDIENUNG Bedienfeld (Tasten) Schwing Schwing Wind Kühlung/ funktion Windmodus/ EIN/AUS funktion geschwin Timer Luft befeuch (Links WLAN (AufAb) digkeit tung Rechts) Fernbedienung (Tasten) EIN/AUS Timer Schwingfunktion (LinksRechts) Bildschirm Aus Schwingfunktion (AufAb) Windmodus Windgeschwindigkeit Kühlung/Luftbefeuchtung... -
Seite 9: Displayanzeigen
DISPLAYANZEIGEN EIN/AUS Natürlicher Windmodus Schwingfunktion (LinksRechts) SchlafWindmodus Schwingfunktion (AufAb) Kühlung/Luftbefeuchtung NegativIonenFunktion WLANFunktion Anzeigefenster Timer Windgeschwindigkeit... -
Seite 10: Inbetriebnahme Und Bedienung
INBETRIEBNAHME UND BEDIENUNG Vor der Verwendung • Entnehmen Sie das Gerät aus der Verpackung und entfernen Sie alle Verpackungsmaterialien. • Stellen Sie das Gerät auf eine stabile und ebene Oberfläche. • Stecken Sie den Netzstecker in die Steckdose. Das Gerät kann dann direkt verwendet werden und es ist keine Installation erforderlich. -
Seite 11: Windgeschwindigkeit Einstellen
Der Links-Rechts-Schwingmodus funktioniert folgendermaßen: Die Lamellen schwingen in einem Winkel von 80° nach links und rechts. Beim Richtungswechsel pausieren die Lamellen für 1 Sekunde und schwingen dann in die andere Richtung. Wenn die Auf-Ab-Schwingfunktion nach dem ersten Einschalten aktiviert wird, stellt das Gerät zunächst die richtige Ausgangsposition ein. - Seite 12 Nachdem der Timer aktiviert wurde, werden auf dem Bildschirm abwechselnd, in Intervallen von 10 Sekunden, die verbleibende Zeit bis zum Ausschalten und die aktuell eingestellte Geschwindigkeit angezeigt. Es leuchtet jeweils die entsprechende Anzeigeleuchte (1 1/6) auf. Sobald die Zeit abgelaufen ist, schaltet sich das Gerät automatisch aus und geht in den Standbymodus über.
- Seite 13 SchlafWind: Wenn der Schlaf-Windmodus aktiviert wird, läuft das Gerät zunächst mit der zuvor eingestellten Windgeschwindigkeit weiter. Nach 30 Minuten wird in Intervallen von 30 Minuten reduziert. Sobald der Timer abgelaufen ist, wird das Gerät automatisch in den Standby-Modus versetzt. Falls kein Timer eingestellt wurde, läuft das Gerät mit niedriger Geschwindigkeit weiter.
- Seite 14 • Bei der Verwendung der WLAN-Funktion, muss die WLAN-Anzeige (10) schnell blinken. Ein Router (muss mit externen Netzwerken verbunden werden können) und ein mobiles Endgerät (z. B. Smartphone) sind zur Verwendung der Klarstein-App erforderlich. Die Klarstein-App muss auf dem mobilen Endgerät, das ebenfalls mit dem WLAN-Netzwerk verbunden ist, installiert werden.
-
Seite 15: Gerätesteuerung Per Smartphone
GERÄTESTEUERUNG PER SMARTPHONE Wenn Sie Ihr Klarstein-Gerät in Ihr heimisches WLAN einbinden, können Sie es ganz bequem über die dazugehörige Klarstein-App bedienen. Die App ermöglicht es Ihnen, nicht nur das Gerät über Ihr Smartphone fernzusteuern, sondern bietet Ihnen zudem Zugang zu Rezepten und weiterführenden Informationen. -
Seite 16: Schutzfunktionen
Fehlerbehebung bei Verbindungsproblemen Wenn Ihr Klarstein-Gerät im WLAN nicht gefunden werden kann, überprüfen Sie Folgendes: • Ist das Gerät eingesteckt? • Ist die WLAN-Funktion des Smartphones aktiviert? • Ist die WLAN-Funktion des Klarstein-Gerätes aktiviert? (Befolgen Sie die Anweisungen in der App.) •... -
Seite 17: Wassertank Befüllen
WASSERTANK BEFÜLLEN Füllen Sie bei Verwendung der Kühl- und Luftbefeuchtungsfunktion Wasser in den Wassertank. Drehen Sie vor dem Befüllen die Kabelaufwicklung um 90°. Ziehen Sie den Wassertank zur Hälfte heraus. Schütten Sie das Wasser langsam in den Wassertank. Schieben Sie den Wassertank nach dem Befüllen wieder in das Gerät hinein. -
Seite 18: Reinigung Und Pflege
REINIGUNG UND PFLEGE Reinigung • Schalten Sie das Gerät vor der Reinigung aus und ziehen Sie den Netzstecker aus der Steckdose. • Verwenden Sie zur Reinigung des Geräts keine Chemikalien, Benzin, Verdünnungsmittel oder andere Substanzen, durch welche die Geräteoberfläche beschädigt werden könnte. •... -
Seite 19: Wassertankreinigung
Wassertankreinigung 1. Ziehen Sie den Netzstecker aus der Steckdose. Drehen Sie die Kabelaufwicklung in horizontale Position und ziehen Sie den Wassertank bis zur Hälfte heraus. 2. Gehen Sie mit Ihrer Hand in den Wassertank hinein und drehen Sie die Fixierung um 90°. -
Seite 20: Hinweise Zur Entsorgung
HINWEISE ZUR ENTSORGUNG Befindet sich die linke Abbildung (durchgestrichene Mülltonne auf Rädern) auf dem Produkt, gilt die Europäische Richtlinie 2012/19/EU. Diese Produkte dürfen nicht mit dem normalen Hausmüll entsorgt werden. Informieren Sie sich über die örtlichen Regelungen zur getrennten Sammlung elektrischer und elektronischer Gerätschaften.