Herunterladen Inhalt Inhalt Diese Seite drucken
Klarstein IceWind Handbuch
Vorschau ausblenden Andere Handbücher für IceWind:

Werbung

Verfügbare Sprachen
  • DE

Verfügbare Sprachen

  • DEUTSCH, seite 1
IceWind
Luftkühler
Air Cooler
Enfriador de aire
Rafraîchisseur d'air
Raffreddatore d'aria
10033433

Werbung

Inhaltsverzeichnis
loading

Inhaltszusammenfassung für Klarstein IceWind

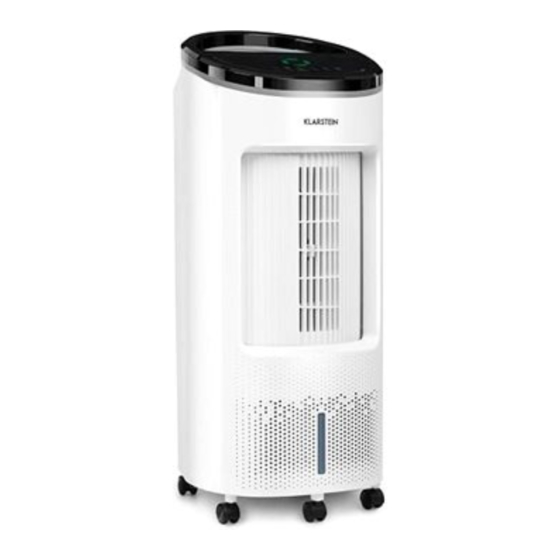
  • Seite 1 IceWind Luftkühler Air Cooler Enfriador de aire Rafraîchisseur d’air Raffreddatore d’aria 10033433...
  • Seite 3: Inhaltsverzeichnis

    Sehr geehrter Kunde, wir gratulieren Ihnen zum Erwerb Ihres Gerätes. Lesen Sie die folgenden Hinweise sorgfältig durch und befolgen Sie diese, um möglichen Schäden vorzubeugen. Für Schäden, die durch Missachtung der Hinweise und unsachgemäßen Gebrauch entstehen, übernehmen wir keine Haftung. Scannen Sie den folgenden QR-Code, um Zugriff auf die aktuellste Bedienungsanleitung und weitere Informationen rund um das Produkt zu erhalten.
  • Seite 4: Sicherheitshinweise

    SICHERHEITSHINWEISE • Prüfen Sie vor der Benutzung die Spannung auf der Geräteplakette. Schließen Sie das Gerät nur an Steckdosen an, die der Spannung des Geräts entsprechen. • Halten Sie das Kabel fern von heißen Oberflächen und scharfkantigen Gegenständen. • Verlegen Sie das Kabel nicht unter einem Teppich und decken Sie es auch nicht mit anderen Gegenständen oder Stoffen ab.
  • Seite 5: Geräteübersicht

    • Während des Betriebs, befeuchtet das Gerät die Umgebungsluft. Vermeiden Sie jedoch zu hohe Luftfeuchtigkeit. Wir empfehlen Ihnen eine Luftfeuchtigkeit zwischen 40-50%. Zu hohe Luftfeuchtigkeit kann zu Schimmel oder gesundheitlichen Problemen führen. • Stellen Sie das Gerät nur auf Untergründe, die unempfindlich gegenüber Nässe und hoher Luftfeuchtigkeit sind.
  • Seite 6: Bedienfeld Und Tastenfunktionen

    BEDIENFELD UND TASTENFUNKTIONEN Ein/Aus Timer einstellen: 1, 2, 4, 8 h (Stunden) Luftbefeuchtung Schwingen Modus: Normal > Natürlich ( ) > Schlafmodus ( Windgeschwindigkeit: hoch > mittel > niedrig > leise...
  • Seite 7: Installation Und Bedienung

    INSTALLATION UND BEDIENUNG Vor dem ersten Gebrauch Entfernen Sie das komplette Verpackungsmaterial und lesen Sie sich die Anleitung komplett durch. Das Gerät ist sofort gebrauchsfertig. Gerät einschalten Sobald das Gerät eingeschaltet wird, gehen alle Anzeigen kurz an. Ein zweifaches Signal ertönt, der Luftauslass bewegt sich vom aktuellen Winkel auf 0° zurück und das Gerät wechselt in den Standby-Modus.
  • Seite 8: Reinigung Und Pflege

    REINIGUNG UND PFLEGE Vor der Reinigung • Schalten Sie das Gerät aus und ziehen Sie das Netzkabel ab. Ziehen Sie vor der Reinigung immer den Netzstecker, um Stromschläge oder mechanische Beschädigungen zu vermeiden. • Verwenden Sie zur Reinigung handelsübliches Reinigungsmittel und eine weiche Bürste.
  • Seite 9: Technical Data

    Dear Customer, Congratulations on purchasing this equipment. Please read this manual carefully and take care of the following hints to avoid damages. Any failure caused by ignoring the items and cautions mentioned in the instruction manual is not covered by our warranty and any liability. Scan the QR code to get access to the latest user mannual and other information about the product.
  • Seite 10: Safety Instrcutions

    SAFETY INSTRCUTIONS • Connect to a main power supplier of 220-240V~ 50-60 Hz only. • Keep the appliance and cable away from sources of heat, sharp objects or anything that may cause damage. • Do not place the cord under carpets. Do not cover the cord with small clothes, shirts or other similar elements.
  • Seite 11: Product Description

    • When in operation, evaporative coolers moisturize the ambient air. Over- humidification of residential rooms should be avoided. Recommendation: 40 – 50 % relative humidity. (Excessive humidity of the air can damage the home and cause health problems.) • The appliance may only be set up on water- and moisture-proof flooring materials (spilling some drops of water is unavoidable when the content of the tank is changed).
  • Seite 12: Control Panel And Key Functions

    CONTROL PANEL AND KEY FUNCTIONS On/Off Timer setting: 1, 2, 4, 8 h (hours) Air humidification Swing Mode: normal > natural ( ) > sleep mode ( Wing speed: high > medium > low > quiet...
  • Seite 13 INSTALLATION AND OPERATION Before first use Remove all packing material and read the instructions completely. The device is ready for use immediately. Switching on the unit As soon as the device is switched on, all displays light up briefly. A double signal sounds, the air outlet moves back from the current angle to 0°...
  • Seite 14: Cleaning And Care

    CLEANING AND CARE Before cleaning • Turn the power off and unplug the power cord. Always disconnect the power plug before cleaning to avoid electric shock or mechanical damage. • Use a commercially available cleaning agent and a soft brush for cleaning. Do not use chemical cleaners.
  • Seite 15: Fiche Technique

    Chère cliente, cher client, Toutes nos félicitations pour l’acquisition de ce nouvel appareil. Veuillez lire attentivement et respecter les instructions de ce mode d’emploi afin d’éviter d’éventuels dommages. Nous ne saurions être tenus pour responsables des dommages dus au non-respect des consignes et à...
  • Seite 16: Consignes De Sécurité

    CONSIGNES DE SÉCURITÉ • Vérifiez la tension sur l‘étiquette de l‘appareil avant utilisation. Ne branchez l‘appareil que sur des prises correspondant à la tension de l‘appareil. • Maintenez le câble à l’écart des surfaces chaudes et des objets coupants. • Ne faites pas passer le câble sous un tapis et ne le recouvrez pas d’objets ou de tissus.
  • Seite 17: Aperçu De L'appareil

    • Pendant le fonctionnement, l‘appareil humidifie l‘air ambiant. Évitez toutefois une humidité trop élevée. Nous recommandons une humidité comprise entre 40 et 50%. Une humidité trop élevée peut entraîner des moisissures ou des problèmes de santé. • Placez l‘appareil uniquement sur des surfaces insensibles à l‘eau et à l‘humidité. Il peut parfois arriver de renverser quelques gouttes lors de l’installation et de la dépose du réservoir d’eau.
  • Seite 18: Panneau De Commande Et Fonctions Des Touches

    PANNEAU DE COMMANDE ET FONCTIONS DES TOUCHES Marche /arrêt Réglage de la minuterie : 1, 2, 4, 8 h Humidificateur Oscillation Mode : Normal > Naturel ( ) > Nuit ( Vitesse de ventilation : élevée > moyenne > basse > silencieuse...
  • Seite 19: Installation Et Utilisation

    INSTALLATION ET UTILISATION Avant la première utilisation Retirez tout le matériel d’emballage et lisez intégralement les instructions. L‘appareil est prêt à être utilisé immédiatement. Allumer l‘appareil Au démarrage de l‘appareil, tous les témoins s‘allument brièvement. Un double bip retentit, la sortie d‘air retourne de l‘angle actuel à 0° et l‘appareil passe en mode veille. Si vous n‘intervenez pas pendant plus d‘une minute, la luminosité...
  • Seite 20: Nettoyage Et Entretien

    NETTOYAGE ET ENTRETIEN Avant le nettoyage • Éteignez l‘appareil et débranchez le cordon d‘alimentation. Débranchez toujours le cordon d‘alimentation avant le nettoyage pour éviter tout risque d‘électrocution ou de dommages mécaniques. • Utilisez un détergent disponible dans le commerce et une brosse douce pour le nettoyage.
  • Seite 21: Datos Técnicos

    Estimado cliente: Le felicitamos por la adquisición de este producto. Lea atentamente el siguiente manual y siga cuidadosamente las instrucciones de uso con el fin de evitar posibles daños. La empresa no se responsabiliza de los daños ocasionados por un uso indebido del producto o por haber desatendido las indicaciones de seguridad.
  • Seite 22: Indicaciones De Seguridad

    INDICACIONES DE SEGURIDAD • Antes de utilizar el aparato, compruebe la tensión en la placa técnica del mismo. Conecte el aparato solamente a tomas de corriente que se adecuen a la tensión del mismo. • Mantenga alejado el cable de superficies calientes y objetos puntiagudos. •...
  • Seite 23: Visión General Del Aparato

    VISIÓN GENERAL DEL APARATO Cubierta superior Control remoto Panel de control Parte trasera Sensor del mando a distancia Filtro Anilla decorativa Marco del filtro Salida de aire Depósito de agua Cubierta delantera Cable de alimentación Ruedas...
  • Seite 24: Panel De Control Y Funciones De Los Botones

    PANEL DE CONTROL Y FUNCIONES DE LOS BOTONES On/off Ajustar el temporizador: 1, 2, 4, 8 h (horas) Humidificador Oscilación Modo: Normal > natural ( ) > modo noche ( Velocidad de la brisa: alta > media > baja > suave...
  • Seite 25: Encender El Aparato

    INSTALACIÓN Y UTILIZACIÓN Antes del primer uso Retire todo el material de embalaje y lea atentamente el manual de instrucciones. El aparato se entrega listo para utilizar. Encender el aparato En cuanto enciende el aparato, todos los indicadores se iluminan brevemente. Suena una señal doble, la salida de aire se mueve del ángulo actual hasta 0°...
  • Seite 26: Limpieza Y Cuidado

    LIMPIEZA Y CUIDADO Antes de la limpieza • Apague el aparato y desconecte el enchufe. Desconecte el enchufe antes de limpiar el aparato para evitar descargas eléctricas o daños mecánicos. • Para la limpieza, utilice productos comunes y un cepillo de cerdas blandas. No utilice productos químicos.
  • Seite 27: Dati Tecnici

    Gentile Cliente, La ringraziamo per aver acquistato il dispositivo. La preghiamo di leggere attentamente le seguenti istruzioni per l’uso e di seguirle per evitare possibili danni tecnici. Non ci assumiamo alcuna responsabilità per danni scaturiti da una mancata osservazione delle avvertenze di sicurezza e da un uso improprio del dispositivo.
  • Seite 28: Avvertenze Di Sicurezza

    AVVERTENZE DI SICUREZZA • Controllare la tensione sulla targhetta del dispositivo prima dell’utilizzo. Collegare il dispositivo solo a prese elettriche con tensione corrispondente. • Tenere il cavo lontano da superfici bollenti e oggetti taglienti. • Non far passare il cavo sotto a tappeti e non coprirlo con altri oggetti o tessuti. Posizionare il cavo in modo da non inciamparvi e da non restarvi impigliati.
  • Seite 29: Descrizione Del Dispositivo

    DESCRIZIONE DEL DISPOSITIVO Copertura superiore Telecomando Pannello di controllo Retro Sensore del telecomando Filtro Anello decorativo Telaio del filtro Punto di emissione dell’aria Serbatoio dell’acqua Pannello frontale Cavo di alimentazione Rotelle...
  • Seite 30: Pannello Di Controllo E Tasti Funzione

    PANNELLO DI CONTROLLO E TASTI FUNZIONE On/Off Impostare timer: 1, 2, 3, 4, 8 h (ore) Umidificazione dell’aria Oscillazione Modalità: normale>naturale ( ) > notturna ( Velocità di ventilazione: alta>media>bassa>silenziosa...
  • Seite 31: Installazione E Utilizzo

    INSTALLAZIONE E UTILIZZO Prima del primo utilizzo Rimuovere tutto il materiale d’imballaggio e leggere l’intero manuale. Il dispositivo è subito pronto all’uso. Accendere il dispositivo Quando il dispositivo viene acceso, tutte le indicazioni si illuminano brevemente. Viene emesso un doppio segnale acustico, il punto di emissione dell’aria si sposta dall’inclinazione attuale a 0°...
  • Seite 32: Pulizia E Manutenzione

    PULIZIA E MANUTENZIONE Prima della pulizia • Spegnere il dispositivo e scollegare il cavo di alimentazione. Prima della pulizia, staccare sempre la spina, in modo da evitare folgorazioni o danni meccanici. • Per la pulizia, utilizzare detergenti standard che si trovano in commercio e una spazzola morbida.

Inhaltsverzeichnis