Herunterladen Inhalt Inhalt Diese Seite drucken
Inhaltsverzeichnis

Werbung

Verfügbare Sprachen
  • DE

Verfügbare Sprachen

  • DEUTSCH, seite 31
ERW0673AOA
EN
Wine Cabinet
FR
Cave à vin
DE
Weinkühlschrank
IT
Cantinetta
ES
Cava de vinos
User Manual
Notice d'utilisation
Benutzerinformation
Istruzioni per l'uso
Manual de instrucciones
2
16
31
47
63

Werbung

Inhaltsverzeichnis

Fehlerbehebung

loading

Inhaltszusammenfassung für Electrolux ERW0673AOA

  • Seite 1 ERW0673AOA Wine Cabinet User Manual Cave à vin Notice d'utilisation Weinkühlschrank Benutzerinformation Cantinetta Istruzioni per l’uso Cava de vinos Manual de instrucciones...
  • Seite 2: Inhaltsverzeichnis

    13. ENVIRONMENTAL CONCERNS..............15 WE’RE THINKING OF YOU Thank you for purchasing an Electrolux appliance. You’ve chosen a product that brings with it decades of professional experience and innovation. Ingenious and stylish, it has been designed with you in mind. So whenever you use it, you can be safe in the knowledge that you’ll get great results every time.
  • Seite 3: Children And Vulnerable People Safety

    ENGLISH responsible for any injuries or damage that are the result of incorrect installation or usage. Always keep the instructions in a safe and accessible location for future reference. 1.1 Children and vulnerable people safety This appliance can be used by children aged from 8 •...
  • Seite 4: Safety Instructions

    To avoid contamination of food respect the following • instructions: do not open the door for long periods; – clean regularly surfaces that can come in contact – with food and accessible drainage systems; WARNING: Keep ventilation openings, in the •...
  • Seite 5: Electrical Connection

    ENGLISH • At first installation or after reversing • The mains cable must stay below the the door wait at least 4 hours before level of the mains plug. connecting the appliance to the power • Connect the mains plug to the mains supply.
  • Seite 6: Installation

    They are not door hinges, trays and baskets.
  • Seite 7 ENGLISH 3.1 Dimensions 90° 3.2 Location Overall dimensions ¹ To ensure appliance's best functionality, you should not install the appliance in the nearby of the heat source (oven, stoves, radiators, cookers or hobs) or in a place with direct sunlight. Make sure that air can circulate freely around the back of the cabinet.
  • Seite 8: Door Reversibility

    3.3 Electrical connection 3.6 Door reversibility • Before plugging in, ensure that the WARNING! voltage and frequency shown on the Before carrying out any rating plate correspond to your operations, remove the plug domestic power supply. from the power socket.
  • Seite 9: Product Description

    ENGLISH the appliance. Transfer and insert the 8. Set the door into its new place. covers to screw holes at the other 9. Secure the lower hinge and do not side. tighten the screws, until the door is in the closed position and levelled. 10.
  • Seite 10: Temperature Regulation

    Temperature warmer button Temperature colder button 5.2 Switching on 5.5 Temperature regulation 1. Insert the plug into the wall socket. The default set temperature 2. Press the power button if the display for the wine cabinet is 12°C. is off.
  • Seite 11 ENGLISH Half shelf level 1 Top shelf can fit: • 2 bottles with the humid box, • 3 bottles without the humid box. 6.3 Removing and installing shelves To remove any shelf from the wine cabinet: Full shelf levels 2,3,4,5,6 1.
  • Seite 12: Hints And Tips

    7. HINTS AND TIPS 7.1 Hints for energy saving • Do not open the door frequently or leave it open longer than necessary. • The internal configuration of the • Ensure a good ventilation. Do not appliance is the one that ensures the cover the ventilation grilles or holes.
  • Seite 13: Troubleshooting

    ENGLISH 9. TROUBLESHOOTING WARNING! Refer to Safety chapters. 9.1 What to do if... Problem Possible cause Solution The appliance does not The appliance is switch‐ Switch on the appliance. operate. ed off. The mains plug is not Connect the mains plug to connected to the mains the mains socket correctly.
  • Seite 14: Closing The Door

    Problem Possible cause Solution Water flows inside the Products prevent that Make sure that products do wine cabinet. water flows into the water not touch the rear plate. collector. The temperature in the The temperature regula‐ Set a higher or lower tem‐...
  • Seite 15: Technical Data

    ENGLISH 11. TECHNICAL DATA The technical information is situated in It is also possible to find the same the rating plate on the internal side of the information in EPREL using the link https://eprel.ec.europa.eu and the model appliance and on the energy label. name and product number that you find The QR code on the energy label on the rating plate of the appliance.
  • Seite 16: Informations De Sécurité

    13. EN MATIÈRE DE PROTECTION DE L'ENVIRONNEMENT......30 NOUS PENSONS À VOUS Merci d’avoir choisi un appareil Electrolux. Vous avez choisi un produit qui bénéficie de décennies d'expérience professionnelle et d'innovation. Ingénieux et élégant, il a été pensé pour vous. C'est la raison pour laquelle vous pouvez avoir la certitude d'obtenir d'excellents résultats à...
  • Seite 17: Sécurité Des Enfants Et Des Personnes Vulnérables

    FRANÇAIS pourra être tenu pour responsable des blessures et dégâts résultant d'une mauvaise installation ou utilisation. Conservez toujours les instructions dans un lieu sûr et accessible pour vous y référer ultérieurement. 1.1 Sécurité des enfants et des personnes vulnérables Cet appareil peut être utilisé par des enfants âgés •...
  • Seite 18 Cet appareil peut être utilisé dans les bureaux, les • chambres d’hôtel, les chambres d’hôtes, les maisons d’hôtes de ferme et d’autres hébergements similaires lorsque cette utilisation ne dépasse pas le niveau (moyen) de l’utilisation domestique. Utilisez cet appareil pour la conservation du vin •...
  • Seite 19: Consignes De Sécurité

    FRANÇAIS Si le câble d’alimentation est endommagé, il doit être • remplacé par le fabricant, son service après-vente ou par un professionnel qualifié afin d’éviter un danger. 2. CONSIGNES DE SÉCURITÉ 2.1 Installation 2.2 Branchement électrique AVERTISSEMENT! AVERTISSEMENT! L'appareil doit être installé Risque d'incendie ou uniquement par un d'électrocution.
  • Seite 20: Éclairage Intérieur

    2.3 Utilisation informations sur le statut opérationnel de l’appareil. Elles ne sont pas AVERTISSEMENT! destinées à être utilisées dans Risque de blessures, de d'autres applications et ne brûlures, d'électrocution ou conviennent pas à l’éclairage des d'incendie. pièces d’un logement.
  • Seite 21: Mise Au Rebut

    FRANÇAIS 2.7 Mise au rebut • Le circuit frigorifique et les matériaux d'isolation de cet appareil préservent AVERTISSEMENT! la couche d'ozone. Risque de blessure ou • La mousse isolante contient un gaz d'asphyxie. inflammable. Contactez votre service municipal pour obtenir des •...
  • Seite 22: Emplacement

    à celles du réseau électrique domestique. Espace total requis en service ³ • L’appareil doit être relié à la terre. La fiche du câble d'alimentation comporte un contact à cet effet. Si la ³ hauteur, largeur et profondeur de prise de courant n'est pas mise à...
  • Seite 23 FRANÇAIS Outils dont vous aurez besoin : 6. Utilisez un couteau à mastic ou un • tournevis cruciforme, tournevis à lame fine pour retirer les • spatule à mastic ou tournevis à lame 3 caches des trous de vis du coin mince.
  • Seite 24: Description De L'appareil

    4. DESCRIPTION DE L'APPAREIL 4.1 Présentation du produit Bandeau de commande Étagères Pieds Cadre décoratif Porte à double vitrage Poignée Joint d’étanchéité 5. FONCTIONNEMENT 5.1 Bandeau de commande Temp. Bouton d’alimentation Touche d'augmentation de la température Bouton de l’éclairage Touche de diminution de la Indicateur de température...
  • Seite 25: Utilisation Quotidienne

    FRANÇAIS température. Les réglages de la La température peut être température s'affichent. réglée entre +5 et +18°C. Pour régler la bonne température pour Ajustez la température en appuyant sur chaque type de vin, reportez-vous au les touches de réglage de la chapitre «...
  • Seite 26: Conseils

    6.3 Retrait et installation des amovible. Versez de l’eau dans la boîte humide pour éviter un niveau d’humidité étagères de l’air trop faible. Pour retirer une étagère de la cave à vin : 1. Ouvrez complètement les portes de la cave à...
  • Seite 27: Nettoyage De L'intérieur

    FRANÇAIS bicarbonate de soude pour un litre Cet appareil contient des d'eau. hydrocarbures dans son 2. Essorez l'excès d'eau de l'éponge ou circuit de réfrigération ; du chiffon lors du nettoyage de la l'entretien et la recharge ne zone des commandes ou de tout doivent donc être effectués composant électrique.
  • Seite 28 Problème Cause probable Solution La fiche d’alimentation Branchez la fiche secteur sur n’est pas correctement la prise de courant. branchée à la prise de courant. Il n’y a pas de tension Branchez un autre appareil dans la prise de courant.
  • Seite 29: Fermeture De La Porte

    FRANÇAIS Problème Cause probable Solution La porte n’est pas correc‐ Reportez-vous à la section tement fermée. « Fermeture de la porte ». par un technicien du service après-vente. Si le conseil n’aboutit pas au Contactez votre service après-vente résultat souhaité, appelez le agréé.
  • Seite 30: Informations Pour Les Laboratoires D'essais

    Le code QR présent sur l’étiquette l’aide du lien énergétique fournie avec l’appareil avec le nom du modèle et le numéro de contient un lien Web vers les produit se trouvant sur la plaque informations relatives aux performances signalétique de l’appareil.
  • Seite 31: Kundendienst Und Service

    12. INFORMATIONEN FÜR PRÜFINSTITUTE............45 13. UMWELTTIPPS....................46 WIR DENKEN AN SIE Vielen Dank für Ihren Kauf eines Electrolux-Geräts. Sie haben ein Produkt gewählt, das jahrzehntelange professionelle Erfahrung und Innovation mit sich bringt. Das ausgeklügelte und stilvolle Produkt wurde für Sie entwickelt. So können Sie jedes Mal, wenn Sie das Produkt verwenden, sicher sein, dass Sie...
  • Seite 32: Sicherheitshinweise

    SICHERHEITSHINWEISE Lesen Sie vor der Montage und dem Gebrauch des Geräts zuerst die Bedienungsanleitung. Bei Verletzungen oder Schäden infolge nicht ordnungsgemäßer Montage oder Verwendung übernimmt der Hersteller keine Haftung. Bewahren Sie die Anleitung zum Nachschlagen an einem sicheren und zugänglichen Ort auf.
  • Seite 33: Allgemeine Sicherheit

    DEUTSCH 1.2 Allgemeine Sicherheit Dieses Gerät ist nur für die Aufbewahrung von • Lebensmitteln und Getränken bestimmt. Dieses Gerät ist für den Hausgebrauch in einem • Einfamilienhaus in Innenräumen bestimmt. Dieses Gerät darf in Büros, Hotelzimmern, • Gästezimmern in Pensionen, Bauernhöfen und anderen ähnlichen Unterkünften verwendet werden, wenn diese Nutzung das (durchschnittliche) Nutzungsniveau im Haushalt nicht überschreitet.
  • Seite 34: Sicherheitsanweisungen

    Wenn das Gerät längere Zeit leer steht, schalten Sie • es aus, tauen Sie es ab, reinigen und trocknen Sie es und lassen Sie die Tür offen, um Schimmelbildung im Gerät zu vermeiden. Bewahren Sie keine explosiven Substanzen wie •...
  • Seite 35: Innenbeleuchtung

    DEUTSCH • Stellen Sie sicher, dass die Daten auf vorhanden sind. Lüften Sie den dem Typenschild mit den elektrischen Raum. Nennwerten der Netzspannung • Achten Sie darauf, dass keine heißen übereinstimmen. Gegenstände auf die Kunststoffteile • Schließen Sie das Gerät nur an eine des Geräts gelangen.
  • Seite 36: Entsorgung

    2.7 Entsorgung sich das Abtauwasser am Boden des Geräts an. WARNUNG! 2.6 Wartung Verletzungs- und Erstickungsgefahr. • Wenden Sie sich zur Reparatur des Geräts an den autorisierten • Trennen Sie das Gerät von der Kundendienst. Dabei dürfen Stromversorgung. ausschließlich Originalersatzteile •...
  • Seite 37: Aufstellungsort

    DEUTSCH Dieses Gerät ist für den Einsatz bei einer Umgebungstemperatur von 16°C bis Gesamtabmessungen ¹ 38°C vorgesehen. Der ordnungsgemäße Betrieb des Geräts wird nur innerhalb des angegebenen Temperaturbereichs gewährleistet. ¹ Höhe, Breite und Tiefe des Geräts ohne Griff Wenn Sie Zweifel bezüglich der Installation des Geräts Platzbedarf während des Betriebs ²...
  • Seite 38: Montage Der Oberen

    3.5 Montage der oberen ist. Legen Sie das untere Scharnier zusammen mit den Schrauben an Halterung einen sicheren Ort. Fixieren Sie Ihr Gerät: • Befestigen Sie die obere Halterung mit zwei Schrauben an der Oberseite des Geräts. • Stellen Sie das Gerät in den Schrank...
  • Seite 39: Gerätebeschreibung

    DEUTSCH 7. Schrauben Sie das obere Scharnier 10. Warten Sie mindestens 4 Stunden, an der linken Seite des Geräts fest. bevor Sie das Gerät an die 8. Setzen Sie die Tür an ihren neuen Stromversorgung anschließen. Platz. 9. Befestigen Sie das untere Scharnier und ziehen Sie die Schrauben erst dann fest, wenn die Tür geschlossen und waagerecht ausgerichtet ist.
  • Seite 40: Einschalten

    Taste zum Erhöhen der Temperatur Taste zum Senken der Temperatur 5.2 Einschalten keinen negativen Effekt auf die Qualität des Weines. 1. Stecken Sie den Stecker in die Wandsteckdose. 5.5 Temperaturregelung 2. Drücken Sie die Ein-/Aus-Taste, wenn das Display nicht leuchtet.
  • Seite 41: Entfernen Und Einsetzen Von Regalen

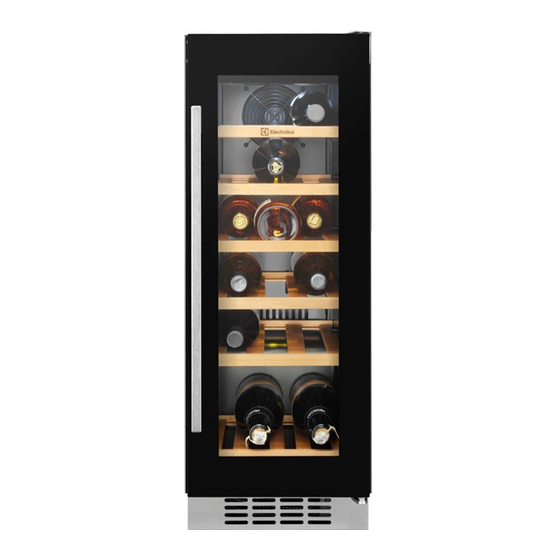
    DEUTSCH Halbe Einschubebene 1 Ganze Einschubebenen 2,3,4,5,6 In das obere Regal passen: • 2 Flaschen mit Humid Box, • 3 Flaschen ohne Humid Box. 6.2 Humid Box 6.3 Entfernen und Einsetzen Die Box für die Luftfeuchtigkeit befindet von Regalen sich im obersten Regal des Weinschranks.
  • Seite 42: Tipps Und Hinweise

    Um das Regal wieder in seine ursprüngliche Position zu bringen, führen Sie die oben genannten Schritte in umgekehrter Reihenfolge aus. 7. TIPPS UND HINWEISE 7.1 Tipps zum Energiesparen • Sorgen Sie für eine gute Belüftung. Bedecken Sie die Belüftungsgitter •...
  • Seite 43: Fehlersuche

    DEUTSCH 8.4 Stillstandszeiten Wenn das Gerät aufgrund eines Stromausfalls nicht in Betrieb ist: Bei längerem Stillstand des Geräts • Die meisten Stromausfälle werden müssen Sie folgende Vorkehrungen innerhalb weniger Stunden behoben treffen: und haben keinen Einfluss auf die 1. Trennen Sie das Gerät von der Temperatur Ihres Geräts, wenn Sie Stromversorgung.
  • Seite 44: Austauschen Der Lampe

    Störung Mögliche Ursache Lösung Das Licht funktioniert nicht. Das Gerät ist nicht an die Schließen Sie das Gerät an. Stromversorgung ange‐ schlossen. Der Schutzschalter hat Schalten Sie den Schutz‐ ausgelöst oder eine Si‐ schalter ein oder wechseln cherung ist durchge‐...
  • Seite 45: Geräusche

    DEUTSCH 10. GERÄUSCHE SSSRRR! BRRR! CLICK! HISSS! BLUBB! 11. TECHNISCHE DATEN Die technischen Daten befinden sich auf Es ist auch möglich, die gleichen dem Typenschild innen im Gerät sowie Informationen in EPREL zu finden, https:// auf der Energieplakette. indem Sie den Link eprel.ec.europa.eu sowie den Der QR-Code auf der Energieplakette Modellnamen und die Produktnummer,...
  • Seite 46: Umwelttipps

    13. UMWELTTIPPS Recyceln Sie Materialien mit dem Entsorgen Sie Geräte mit diesem Symbol nicht mit dem Hausmüll. Bringen Sie Symbol . Entsorgen Sie die das Gerät zu Ihrer örtlichen Verpackung in den entsprechenden Sammelstelle oder wenden Sie sich an Recyclingbehältern.
  • Seite 47 13. CONSIDERAZIONI SULL'AMBIENTE............62 PENSIAMO A TE Grazie per aver acquistato un elettrodomestico Electrolux. Hai scelto un prodotto che ha alle spalle decenni di esperienza professionale e innovazione. Ingegnoso ed elegante, è stato progettato pensando a te. Quindi, in qualsiasi momento lo utilizzi, avrai la certezza di ottenere sempre i migliori risultati.
  • Seite 48: Informazioni Di Sicurezza

    INFORMAZIONI DI SICUREZZA Leggere attentamente le istruzioni fornite prima di installare e utilizzare l'apparecchiatura. I produttori non sono responsabili di eventuali lesioni o danni derivanti da un'installazione o un uso scorretti. Conservare sempre le istruzioni in un luogo sicuro e accessibile per poterle consultare in futuro.
  • Seite 49 ITALIANO Quest’apparecchiatura è progettata per un uso • domestico singolo in un ambiente interno. Quest’apparecchiatura può essere utilizzata in uffici, • camere d'albergo, camere di bed & breakfast, alloggi in agriturismi e altre sistemazioni simili in cui tale utilizzo non superi i livelli di utilizzo domestico (medi). Utilizzare questa apparecchiatura solo per la •...
  • Seite 50: Istruzioni Di Sicurezza

    Non conservare in questa apparecchiatura sostanze • esplosive come bombolette spray contenenti un propellente infiammabile. Se il cavo di alimentazione è danneggiato, deve • essere sostituito dal produttore, da un tecnico autorizzato o da una persona qualificata per evitare situazioni di pericolo.
  • Seite 51: Illuminazione Interna

    ITALIANO 2.4 Illuminazione interna Autorizzato o un elettricista per sostituire i componenti elettrici. • Il cavo di alimentazione deve AVVERTENZA! rimanere sotto il livello della spina di Pericolo di scosse elettriche. alimentazione. • Per quanto riguarda la lampada o le •...
  • Seite 52: Smaltimento

    • Tagliare il cavo di rete e smaltirlo. luminose, maniglie delle porte, • Rimuovere la porta per evitare che cerniere delle porte, vassoi e cestelli. bambini e animali domestici Si prega di notare che alcuni di questi rimangano chiusi all’interno...
  • Seite 53 ITALIANO In caso di dubbi sul luogo di Spazio necessario durante l’uso ² installazione dell’apparecchiatura, contattare il venditore, il nostro Centro di Assistenza ² l’altezza, la larghezza e la profondità o il Centro di Assistenza dell’apparecchio, compresa la maniglia, Autorizzato più vicino. più...
  • Seite 54 4. Rimuovere la porta e riporla su una superficie morbida. 3.6 Come invertire la porta AVVERTENZA! Prima di eseguire le 5. Svitare le viti che collegano la operazioni descritte, estrarre cerniera superiore all’angolo...
  • Seite 55: Descrizione Del Prodotto

    ITALIANO 9. Fissare la cerniera inferiore e non 10. Attendere almeno 4 ore prima di serrare le viti, finché la porta non è in collegare l'apparecchio alla rete posizione chiusa e a livello. elettrica. 4. DESCRIZIONE DEL PRODOTTO 4.1 Panoramica del prodotto Pannello dei comandi Ripiani Piedini...
  • Seite 56: Regolazione Della Temperatura

    5.2 Accensione alcun effetto negativo sulla qualità del vino. 1. Inserire la spina nella presa a muro. 2. Premere il tasto di accensione se il 5.5 Regolazione della display è spento. temperatura 3. Il display mostra la temperatura predefinita (12 °C).
  • Seite 57: Rimozione E Installazione Dei Ripiani

    ITALIANO Livelli ripiani completi 2,3,4,5,6 Il ripiano superiore consente la collocazione di: • 2 bottiglie con la scatola umida, • 3 bottiglie senza la scatola umida. 6.3 Rimozione e installazione dei ripiani Per rimuovere un ripiano dall’armadietto del vino del vino: 1.
  • Seite 58: Consigli E Suggerimenti Utili

    7. CONSIGLI E SUGGERIMENTI UTILI 7.1 Consigli per il risparmio • Garantire una buona ventilazione. Non coprire le griglie o i fori di energetico ventilazione. • L’uso più efficiente dell’energia dipende dalla configurazione interna dell’apparecchiatura. • Non aprire frequentemente la porta e limitare il più...
  • Seite 59: Risoluzione Dei Problemi

    ITALIANO dell’apparecchiatura se si riduce al necessario adottare le misure corrette minimo l’apertura della porta. di cui sopra. • Se l’alimentazione sarà disattivata per un periodo di tempo più lungo, è 9. RISOLUZIONE DEI PROBLEMI AVVERTENZA! Fare riferimento ai capitoli sulla sicurezza.
  • Seite 60: Sostituzione Della Lampadina

    Problema Causa possibile Soluzione Troppe vibrazioni. L’apparecchiatura non è Controllare che l'apparec‐ supportata correttamen‐ chiatura abbia una posizione stabile. L’apparecchiatura è rumo‐ L’apparecchiatura non è Controllare che l'apparec‐ rosa. supportata correttamen‐ chiatura abbia una posizione stabile. L’acqua scorre sulla pia‐...
  • Seite 61: Rumori

    ITALIANO 10. RUMORI SSSRRR! BRRR! CLICK! HISSS! BLUBB! 11. DATI TECNICI I dati tecnici sono riportati sulla targhetta manuale d’uso e a tutti gli altri documenti dei dati applicata sul lato esterno forniti con questa apparecchiatura. dell’apparecchiatura e sull’etichetta dei È...
  • Seite 62: Considerazioni Sull'ambiente

    13. CONSIDERAZIONI SULL'AMBIENTE apparecchiature che riportano il simbolo Riciclare i materiali con il simbolo insieme ai normali rifiuti domestici. Buttare l'imballaggio negli appositi Portare il prodotto al punto di riciclaggio contenitori per il riciclaggio. Aiutare a più vicino o contattare il comune di proteggere l’ambiente e la salute umana...
  • Seite 63 13. ASPECTOS MEDIOAMBIENTALES.............. 77 PENSAMOS EN USTED Gracias por adquirir un electrodoméstico Electrolux. Ha elegido un producto que lleva décadas de experiencia e innovación profesionales. Ingenioso y elegante, ha sido diseñado pensando en usted. Así pues, cada vez que lo utilice, puede tener la seguridad de que obtendrá...
  • Seite 64: Información Sobre Seguridad

    INFORMACIÓN SOBRE SEGURIDAD Antes de instalar y utilizar el aparato, lea atentamente las instrucciones facilitadas. El fabricante no se hace responsable de lesiones o daños producidos como resultado de una instalación o un uso incorrectos. Conserve siempre estas instrucciones en lugar seguro y accesible para futuras consultas.
  • Seite 65 ESPAÑOL Este aparato está diseñado para uso doméstico en • interiores. Este aparato se puede utilizar en oficinas, • habitaciones de hotel, habitaciones de Bed&Breakfast, casas de campo y otros alojamientos similares donde dicho uso no exceda (en promedio) los niveles de uso doméstico. Utilice este aparato únicamente para almacenar vino.
  • Seite 66: Instrucciones De Seguridad

    No almacene sustancias explosivas tales como latas • de aerosol con un propulsor inflamable en este aparato. Si el cable de alimentación sufre algún daño, el • fabricante, su servicio técnico autorizado o un profesional tendrán que cambiarlo para evitar riesgos.
  • Seite 67: Asistencia Tecnica

    ESPAÑOL • No desconecte el aparato tirando del vibración, la humedad, o están cable de conexión a la red. Tire destinadas a señalar información siempre del enchufe. sobre el estado de funcionamiento del aparato. No están destinadas a 2.3 Uso utilizarse en otras aplicaciones y no son adecuadas para la iluminación de ADVERTENCIA!
  • Seite 68: Instalación

    2.7 Desecho • El circuito del refrigerante y los materiales aislantes de este aparato ADVERTENCIA! no dañan la capa de ozono. Existe riesgo de lesiones o • La espuma aislante contiene gas asfixia. inflamable. Póngase en contacto con las autoridades locales para saber •...
  • Seite 69: Cambio Del Sentido De Apertura De La Puerta

    ESPAÑOL ³ la altura, anchura y profundidad del se suministra con un contacto para tal aparato, incluido el mango, más el fin. Si la toma de red de la vivienda espacio necesario para la libre carece de conexión a tierra, conecte circulación del aire de refrigeración, más el aparato a una toma de tierra el espacio necesario para permitir la...
  • Seite 70 • destornillador en forma de cruz, 6. Utilice una espátula o un • espátula o destornillador de hoja fina. destornillador de hoja fina para retirar las 3 tapas de los orificios de los tornillos de la esquina superior izquierda del aparato. Transfiera e inserte las cubiertas en los orificios de los tornillos del otro lado.
  • Seite 71: Descripción Del Producto

    ESPAÑOL 4. DESCRIPCIÓN DEL PRODUCTO 4.1 Descripción del producto Panel de mandos Estantes Patas Marco decorativo Puerta de vidrio templado Tirador Junta 5. FUNCIONAMIENTO 5.1 Panel de mandos Temp. Botón de encendido Botón de calentamiento Botón de luz Botón de enfriamiento Indicador de temperatura Pantalla 5.2 Encendido...
  • Seite 72: Uso Diario

    Para ajustar la temperatura adecuada La temperatura se puede para cada tipo de vino, consulte el regular entre +5 y +18°C. capítulo "Uso diario". Para ajustar la temperatura, pulse los reguladores de temperatura. La pantalla muestra los ajustes de temperatura.
  • Seite 73: Consejos

    ESPAÑOL 6.2 Caja húmeda • 3 botellas sin la caja húmeda. La caja húmeda se encuentra en el 6.3 Extracción e instalación de estante superior de la cava para vinos. estantes Es desmontable. Vierta un poco de agua en la caja húmeda para evitar un nivel de Para retirar cualquier estante de la cava humedad del aire demasiado bajo.
  • Seite 74: Periodos Sin Funcionamiento

    2. Extraiga el exceso de agua de la Este aparato contiene esponja o el paño cuando limpie el hidrocarburos en la unidad área de los controles o cualquier de refrigeración por lo que pieza eléctrica. cualquier tarea de 3. Limpie el exterior del aparato con mantenimiento o recarga agua tibia y jabón neutro.
  • Seite 75 ESPAÑOL Problema Posible causa Solución El enchufe no está bien Conecte el aparato a la toma conectado a la toma de de corriente correctamente. corriente. No hay tensión en la to‐ Conecte un aparato diferen‐ ma de corriente. te a la de corriente. Póngase en contacto con un electri‐...
  • Seite 76: Cierre De La Puerta

    Problema Posible causa Solución La puerta no está bien Consulte la sección "Cierre cerrada. de la puerta". Póngase en contacto con el servicio Si el consejo no conduce al técnico. resultado deseado, llame al servicio de marca más 9.3 Cierre de la puerta cercano.
  • Seite 77: Información Para Institutos De Pruebas

    ESPAÑOL aparato en la base de datos EPREL de nombre del modelo y el número de la UE. Guarde la etiqueta energética producto que se encuentran en la placa como referencia junto con el manual de de datos técnicos del aparato. usuario y todos los demás documentos Consulte el enlace que se proporcionan con este aparato.
  • Seite 80 www.electrolux.com/shop...

Inhaltsverzeichnis