Herunterladen Inhalt Inhalt Diese Seite drucken
Motion CM-07 Handbuch
Vorschau ausblenden Andere Handbücher für CM-07:

Werbung

Verfügbare Sprachen
  • DE

Verfügbare Sprachen

M OT I ON C M - 0 7 DC M I D M O TO R
M A N U A L C M -07
DC mid motor with remote operation

Werbung

Inhaltsverzeichnis
loading

Inhaltszusammenfassung für Motion CM-07

  • Seite 1 M OT I ON C M - 0 7 DC M I D M O TO R M A N U A L C M -07 DC mid motor with remote operation...
  • Seite 2 M OT I ON C M - 0 7 DC M I D M O TO R CM-07 DC mid motor with remote operation Motor features DC Motor Transformer/Battery Speed Control Bi-directional Direct current motor Powered by a 12V Consistent...
  • Seite 3: Warranty & Service

    M OT I ON C M- 0 7 D C M I D M O T O R WARNING Read the instructions carefully before assembling and using the product. Assembly can be completed by non- professionals. For indoor use only. Young children can strangle Cords may ensnare a child’s themselves with the loop...
  • Seite 4: Important Safety Instructions

    M OT I ON C M - 0 7 DC M I D M O TO R Important Safety instructions Important Installation instructions WARNING: To reduce the risk of severe injury or WARNING: important safety instructions. Follow all death, it is important to follow these instructions for instructions, since incorrect installation can lead to personal safety.
  • Seite 5: Regulatory Information

    M OT I ON C M- 0 7 D C M I D M O T O R FCC Manual If this equipment does cause harmful interference This device complies with Part 15 of the FCC Rules. to radio or television reception, which can be Operation is subject to the following two conditions: determined by turning the equipment off and on, the (1) this device may not cause harmful interference,...
  • Seite 6 Single Channel Max. mount blinds select select blinds CM-11 unlimited Hand-held remote CM-12 unlimited Hand-held remote CM-13 unlimited Hand-held remote CM-15 unlimited Wall remote CM-16 unlimited Wall remote CM-17 unlimited Table remote CM-18 unlimited Pull remote CM-20 Motion Wi-Fi bridge...
  • Seite 7 M OT I ON C M- 0 7 D C M I D M O T O R Max. Frequency Range Power supply Length Width Height Certificates scenes 30 m with 433 MHz CR2430 3.0V 120 mm 45 mm 14 mm 1 concrete wall 30 m with 433 MHz...
  • Seite 8 M OT I ON C M - 0 7 DC M I D M O TO R CM-11 CM-12 1 Channel Remote 5 Channel Remote Channel Channel indicator indicator Centre Centre (stop/favourite) (stop/favourite) Right Left Down Down Channel Selection Pair Pair button button...
  • Seite 9 M OT I ON C M- 0 7 D C M I D M O T O R CM-13 CM-17 15 Channel Remote 4 Channel Table Remote Channel indicator Centre Channel 1 (stop/favourite) Channel 3 Right Left Centre (stop/favourite) Down Channel 2 Channel 4 Previous...
  • Seite 10 M OT I ON C M - 0 7 DC M I D M O TO R CM-15 CM-16 1 Channel Wall Remote 4 Channel Wall Remote Down Centre (stop/ Centre favourite) (stop/favourite) Left Right Down Pair button Pair button...
  • Seite 11 M OT I ON C M - 0 7 DC M I D M O TO R CM-18 CM-20 1 Channel Tassel Remote Motion Bridge Pair button See manual CM-20...
  • Seite 12: Connect Power Supply

    M OT I ON C M - 0 7 DC M I D M O TO R Connect power supply Only connect CM-21 (12VDC transformer) or CM-24 (rechargeable battery tube) Find the program button on your blind Roman blind Venetian blind Pleated blind...
  • Seite 13 M OT I ON C M- 0 7 D C M I D M O T O R Pair a remote Pair a remote control that is able to program blinds. See pages 4 and 5 for remote control details. In this manual, CM-12 is displayed. Shortly press the program button on the motor.
  • Seite 14 M OT I ON C M - 0 7 DC M I D M O TO R Set bottom position Press and hold the down button until the blind reaches the desired bottom position. WARNING: risk of damage. Down Slowly approach the bottom position. Simultaneously hold the centre and the up button until the blind stops stepping and Centre...
  • Seite 15 M OT I ON C M- 0 7 D C M I D M O T O R Set top position Press and hold the up button until the blind reaches the desired top position. WARNING: risk of damage. Slowly approach the top position. Simultaneously hold the centre and down button until the blind stops stepping and Centre...
  • Seite 16 M OT I ON C M - 0 7 DC M I D M O TO R Set favourite position (optional) Move the blind to a desired favourite position. Centre Hold the centre button to save this favourite position. The blind shortly stops stepping, indicating the favorite position has been saved.
  • Seite 17 M OT I ON C M- 0 7 D C M I D M O T O R Operate the blind Remote control: choose the channel to which the blind Centre has been paired using the channel button. Press the up or down button to operate the blind. Press the centre button to stop the blind.
  • Seite 18 M OT I ON C M - 0 7 DC M I D M O TO R Reset favourite position Move the blind to a desired favourite position. 13.1 Press the program button on the motor to activate 13.2 Centre program mode.
  • Seite 19 M OT I ON C M- 0 7 D C M I D M O T O R Reset the blind It is possible to only delete end limits or to do a factory reset. Factory reset will delete the end limits and remove the connection to any paired remote. 15.1 Press the program button on the motor to activate program mode.
  • Seite 20: Advanced Options

    M OT I ON C M - 0 7 DC M I D M O TO R Advanced options Manual control In case there is no remote control or pull control, the blind can be operated with the program button on the motor. Hold the program button to manually operate 16.1 the blind.
  • Seite 21 M OT I ON C M - 0 7 DC M I D M O TO R Single select 15 channel remote Single select makes it possible to activate program mode on a single blind through a remote control, without having to physically press the program button on the blind. To activate Single The remote starts 18.1...
  • Seite 22 M OT I ON C M - 0 7 DC M I D M O TO R Channel select 5 channel remote Channel select makes it possible to copy blinds in between channels/remotes without having to physically press the program button on the motors. Select the channel To activate 19.1...
  • Seite 23: Frequently Asked Questions

    M OT I ON C M- 0 7 D C M I D M O T O R Frequently Asked Questions Problem Cause Solution Power supply is not connected or Connect the power supply to the motor the rechargeable battery is empty. or charge the rechargeable battery tube.
  • Seite 24 M OT I ON C M - 0 7 DC M I D M O TO R...
  • Seite 25 Although this manual has been composed with the utmost For the latest information and updated care, Coulisse B.V. does not accept any responsibility for damage manuals, visit rtube.nl/cm-07 due to mistakes and/or faults in this manual. Coulisse B.V. reserves the right to revise the manual and to revise and/or change its content at any time, without obligation to notify any person or entity of such revisions or changes.
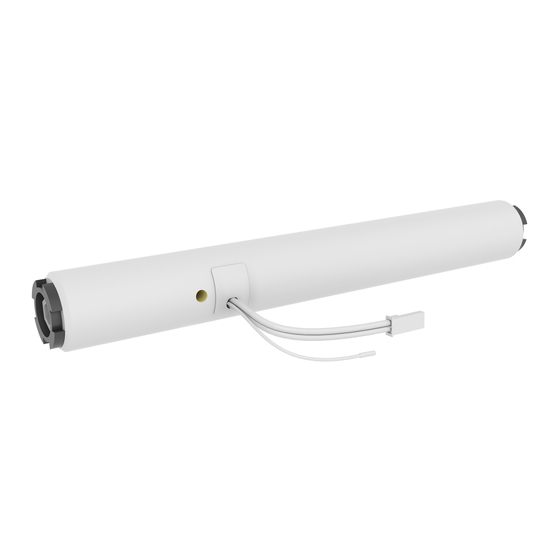
  • Seite 26: Dc Mid-Motor Mit Fernsteuerung

    M O TI ON C M- 0 7 D C M I D M O T O R CM-07 DC Mid-Motor mit Fernsteuerung Motoreigenschaften DC-Motor Transformator/ Geschwindigkeits- Bidirektional Batterie steuerung Gleichstrommotor Zwei-Wege- Angetrieben von Gleichmäßige Kommunikation für 12V-Transformator Rollgeschwindigkeit Echtzeit-Antwort oder Batteriehülse...
  • Seite 27 M OT I ON C M - 0 7 DC M I D M O TO R ACHTUNG Lesen Sie die Gebrauchs- anweisung sorgfältig vor der Montage und Verwendung des um Strangulierung und Ver- Produkts. Montage kann durch wicklung zu vermeiden. Nicht-Profis gemacht sein.
  • Seite 28: Wichtige Sicherheitshinweise

    M OT I ON C M - 0 7 DC M I D M O TO R Wichtige Sicherheitshinweise nicht, wenn Reparaturen oder Anpassungen WARNUNG: Zur Vermeidung von Verletzungs- erforderlich sind. und Todesrisiken. Für die Sicherheit von Trennen Sie das Gerät von der Stromquelle Menschen ist es wichtig, diese Hinweise zu oder schalten Sie die automatische Steuerung beachten.
  • Seite 29: Fcc Hinweis Zu Elektronischen Emissionen

    M OT I ON C M - 0 7 DC M I D M O TO R kompatibel sein mit dem Nenndrehmoment Richtlinien. Bei Betrieb müssen die folgenden und der Nennbetriebszeit. zwei Bedingungen erfüllt sein: Die festen Steuerelemente sollten nach der 1.
  • Seite 30 M OT I ON C M - 0 7 DC M I D M O TO R Kanäle Wand Program- Einze- Kana- Max. Montage mierung lauswahl lauswahl Rollos des Rollos CM-11 unbegrenzt Handfernbedienung CM-12 unbegrenzt Handfernbedienung CM-13 unbegrenzt Handfernbedienung CM-15 unbegrenzt Wand-Fernbedienung CM-16 unbegrenzt Wand-Fernbedienung CM-17 unbegrenzt Tisch-Fernbedienung CM-18 unbegrenzt Pull-Fernbedienung CM-20 Motion Wi-Fi-Brücke...
  • Seite 31 M OT I ON C M - 0 7 DC M I D M O TO R Max. Frequenz Bereich Stromquelle Länge Breite Höhe Zertifikate Szenen 30 m mit 433 MHz CR2430 3,0V 120 mm 45 mm 14 mm 1 konkreten Mauer 30 m mit 433 MHz...
  • Seite 32 M OT I ON C M - 0 7 DC M I D M O TO R CM-11 CM-12 1 Kanal-Fernbedienung 5 Kanal-Fernbedienung Kanalanzeige Kanalanzeige Hoch Hoch Mitte Mitte (stop/bevorzugt) (stop/bevorzugt) Rechts Links Runter Runter Kanal Auswahl Kopplung Kopplung Knopf Knopf...
  • Seite 33 M OT I ON C M - 0 7 DC M I D M O TO R CM-13 CM-17 15 Kanal-Fernbedienung 4 Kanal Tisch-Fernbedienung Kanalanzeige Hoch Hoch Mitte Kanal 1 (stop/bevorzugt) Kanal 3 Rechts Links Mitte (stop/ bevorzugt) Runter Kanal 2 Kanal 4 Vorheriger Nächster...
  • Seite 34 M OT I ON C M - 07 DC M I D MO TO R CM-15 CM-16 1 Kanal Wand-Fernbedienung 4 Kanal Wand-Fernbedienung Hoch Runter Hoch Mitte (stop/ Mitte (stop/ bevorzugt) bevorzugt) Links Rechts Runter Kopplung Knopf Kopplung Knopf...
  • Seite 35 M OT I ON C M - 0 7 DC M I D M O TO R CM-18 CM-20 1 Channel Qasten-Fernbedienung Bewegungsachse Kopplung Knopf Siehe Anleitung CM-20...
  • Seite 36: Stromversorgung Anschließen

    M O TI ON C M- 0 7 D C M I D MO TO R Stromversorgung anschließen Nur mit CM-21 (12VDC Transformator) oder CM-24 (wiederaufladbare Batteriehülse) verbinden Den Programmknopf auf Ihrem Rollo finden Römisches Rollo Venezianisches Rollo Plissiertes Rollo...
  • Seite 37: Mit Einer Fernbedienung Koppeln

    M OT I ON C M - 0 7 DC M I D M O TO R Mit einer Fernbedienung koppeln Mit einer Fernbedienung koppeln, mit der sich Rollos programmieren lassen. Siehe Seiten 4 und 5 für Fernbedienungsdetails. In diesem Handbuch ist ein CM-12 dargestellt. Drücken Sie kurz den Programm-Knopf auf dem Motor.
  • Seite 38: Untere Position Einstellen

    M OT ION C M - 07 D C M I D M O T O R Untere Position einstellen Drücken und halten Sie den Runter-Knopf, bis das Rollo die gewünschte untere Position WARNUNG: erreicht. Beschädigungsgefahr. Runter Bringen Sie das Rollo langsam in die untere Position.
  • Seite 39: Obere Position Einstellen

    M OT ION C M - 07 DC M I D M O TO R Obere Position einstellen Hoch Drücken und halten Sie den Rauf- Knopf, bis das Rollo die gewünschte obere Position erreicht. WARNUNG: Beschädigungsgefahr. Bringen Sie das Rollo langsam in die obere Position.
  • Seite 40: Lieblingsposition Einstellen (Optional)

    M OT I ON C M - 0 7 DC M I D M O TO R Lieblingsposition einstellen (optional) Bringen Sie das Rollo in Ihre gewünschte Lieblingsposition. Mitte Halten Sie den mittleren Knopf gedrückt, um diese Lieblingsposition zu speichern. Das Rollo hört kurz auf, sich zu bewegen, um anzuzeigen, dass die Lieblingsposition gespeichert wurde.
  • Seite 41: Das Rollo Benutzen

    M OT I ON C M - 0 7 DC M I D M O TO R Das Rollo benutzen Hoch Fernbedienung: Wählen Sie mithilfe des Kanal-Knopfs Mitte den Kanal aus, mit dem das Rollo gekoppelt wurde. Drücken Sie den Hoch- oder Runter-Knopf, um das Rollo zu steuern.
  • Seite 42: Lieblingsposition Neu Einrichten

    M OT I ON C M - 0 7 DC M I D M O TO R Lieblingsposition neu einrichten Bringen Sie das Rollo in Ihre gewünschte Lieblingsposition. 13.1 Drücken Sie den Programm-Knopf auf dem Motor, um den Programmier- 13.2 Mitte modus zu aktivieren.
  • Seite 43: Rollo Neu Einrichten

    M OT I ON C M - 0 7 DC M I D M O TO R Rollo neu einrichten Sie können entweder nur die Endpositionen neu einstellen oder das Gerät auf die Werkseinstellungen zurücksetzen. Wenn Sie das Gerät auf die Werkseinstellungen zurücksetzen, werden die Endpositionen sowie die Verbindung zu sämtlichen gekoppelten Fernbedienungen gelöscht.
  • Seite 44: Erweiterte Optionen

    M OT I ON C M - 0 7 DC M I D M O TO R Erweiterte Optionen Manuelle Steuerung Falls keine Fern- oder Pull-Steuerung verfügbar ist, kann das Rollo mit dem Programmknopf auf dem Motor gesteuert werden. Halten Sie den Programm-Knopf gedrückt, 16.1 um das Rollo manuell zu bedienen.
  • Seite 45: Einzelauswahl 15 Kanal-Fernbedienung

    M OT I ON C M - 0 7 DC M I D M O TO R Einzelauswahl 15 Kanal-Fernbedienung Die Einzelauswahl ermöglicht es, den Programmiermodus auf einem einzelnen Rollo durch eine Fernbedienung zu aktivieren, ohne dass Sie den Programmknopf auf dem Rollo physisch betätigen müssen.
  • Seite 46: Kanalauswahl 5 Kanal-Fernbedienung

    M OT I ON C M - 0 7 DC M I D M O TO R Kanalauswahl 5 Kanal-Fernbedienung Kanalauswahl ermöglicht es, Rollos zwischen Kanälen/Fernbedienungen zu kopieren, ohne dass Sie den Programmknopf auf den Motoren physisch betätigen müssen. Wählen Sie den Um die 19.1 19.2...
  • Seite 47: Häufig Gestellte Fragen

    M OT I ON C M- 0 7 D C M I D M O T O R Häufig gestellte Fragen Problem Grund Lösung Das Rollo ist nicht mit der Stromquelle Verbinden Sie den Motor mit der verbunden, oder die wiederaufladbare Stromquelle oder laden Sie die Batterie ist leer.
  • Seite 48 M OT I ON C M - 0 7 DC M I D M O TO R...
  • Seite 49 Schäden, die aufgrund von fehlerhaften Informationen dieser Bedienungsanleitung zustande rtube.nl/cm-07 gekommen sind und übernimmt keinerlei Haftung. Coulisse B.V. behält sich das Recht vor, diese Bedienungsanleitung jederzeit zu überarbeiten und im Zuge dessen die Inhalte zu ändern. Coulisse B.V. ist nicht dazu verpflichtet, Personen oder Institutionen über vorgenommene Änderungen in dieser...
  • Seite 50 Options de contrôle Télécommande Contrôle de Connectivité l'application Fonctionne avec une Compatible avec l' télécommande automatisation Fonctionne avec domestique et l' a pplication MOTION d'immeuble Support Vidéo App Store Google Play Comment installer, Téléchargez le Téléchargez le programmer et faire MOTION...
  • Seite 51: Entretien Et Assistance

    M OT I ON C M- 0 7 D C M ID M O TE U R AVERTISSEMENT Lisez attentivement les instructions avant d'assembler et d' u tiliser le produit. Le montage peut être effectué cordons hors de portée des par des non professionnels.
  • Seite 52: Instructions De Sécurité Importantes

    M OT I ON C M- 0 7 D C M ID M O TE U R Instructions de sécurité importantes Lors de l' u tilisation d' u n commutateur de décalage, AVERTISSEMENT : pour réduire le risque de blessure assurez-vous que les autres personnes se grave ou de mort.
  • Seite 53 M OT I ON C M- 0 7 D C M ID M O TE U R environnement commercial. Cet équipement génère, La déconnexion de tous les pôles doit être utilise et peut émettre de l' é nergie de fréquence incorporée dans le câblage fixe conformément aux radio et, s' i l n' e st pas installé...
  • Seite 54 M OT I ON C M- 0 7 D C M ID M O TE U R Chaînes Program- Sélection Sélection de Stores max. montage mer les unique chaîne stores CM-11 illimité Télécommande manuelle CM-12 illimité Télécommande manuelle CM-13 illimité Télécommande manuelle CM-15 illimité...
  • Seite 55 M OT I ON C M- 0 7 D C M ID M O TE U R Scènes Fréquence Portée Alimentation Longueur Largeur Hauteur Certificats max. 30 m avec 433 MHz CR2430 3.0V 120 mm 45 mm 14 mm 1 mur de béton 30 m avec 433 MHz CR2430 3.0V...
  • Seite 56 M OT I ON C M- 0 7 D C M ID M O TE U R CM-11 CM-12 Télécommande à 1 chaîne Télécommande à 5 chaînes Indicateur Indicateur de chaîne de chaîne Croissant Croissant Centre Centre (arrêt / favori) (arrêt / favori) Droit Gauche...
  • Seite 57 M OT I ON C M- 0 7 D C M ID M O TE U R CM-13 CM-17 Télécommande à 15 chaînes Télécommande de table à 4 chaînes Indicateur de chaîne Croissant Croissant Centre Chaîne 1 (arrêt / favori) Chaîne 3 Droit Gauche...
  • Seite 58 M OT IO N C M - 07 D C M I D MO TE U R CM-15 CM-16 Télécommande murale à 1 chaîne Télécommande murale à 4 chaînes Croissant Croissant Centre Centre (arrêt / favori) (arrêt / favori) Gauche Droit Coupler bouton...
  • Seite 59 M OT I ON C M- 07 D C M ID M O TE U R CM 18 CM-20 Télécommande à gaine à 1 chaîne Motion hub Coupler bouton Voir le manuel CM-20...
  • Seite 60: Connexion De L'alimentation Électrique

    M OT IO N C M - 07 D C M I D MO TE U R Connexion de l’alimentation électrique Connecter uniquement le CM-21 (transformateur 12VDC) ou le CM-24 (tube de batterie rechargeable) Trouvez le bouton de programme sur votre store Store romain Store vénitien Store plissé...
  • Seite 61 M O TI ON C M - 07 D C M I D MO TE U R Associez une télécommande Associez une télécommande capable de programmer des stores. Voir les pages 4 et 5 pour plus de détails sur les télécommandes. Dans ce manuel CM-12 est affiché. Appuyez brièvement sur le bouton programme sur le moteur.
  • Seite 62 M OT I ON C M- 0 7 D C M I D M O T EU R Définir la position du bas Appuyez et maintenez la touche down jusqu' à ce que le store atteigne la position inférieure ATTENTION : désirée.
  • Seite 63 M OT I ON C M- 0 7 D C M I D M O T E U R Définir la position du haut Croissant Appuyez et maintenez la touche croissant jusqu' à ce que le store atteigne la position supérieure désirée.
  • Seite 64 M OT I ON C M- 0 7 D C M ID M O TE U R Définir la position favorite (facultatif) Déplacez le store vers une position favorite souhaitée. Centre Maintenez le bouton central pour enregistrer cette position favorite. Le store cessera bientôt de marcher, indiquant que la position favorite a été...
  • Seite 65 M OT I ON C M- 0 7 D C M ID M O TE U R Faire fonctionner le store Croissant Télécommande :choisissez la chaîne auquel le store a Centre été associé en utilisant le bouton chaîne. Appuyez sur la touche croissant ou bas pour actionner le store.
  • Seite 66 M OT I ON C M- 0 7 D C M ID M O TE U R Réinitialiser la position favorite Déplacez le store vers une position favorite 13.1 souhaitée. Appuyez sur le bouton programme sur le moteur pour activer le 13.2 Centre mode programme.
  • Seite 67 M OT I ON C M- 0 7 D C M ID M O TE U R Réinitialiser le store Il est possible de supprimer uniquement les limites finales ou de réinitialiser les paramètres d' u sine. La réinitialisation d' u sine effacera les limites et supprimera la connexion à toute télécommande couplée.
  • Seite 68: Options Avancées

    M OT I ON C M- 0 7 D C M ID M O TE U R Options avancées Commande manuelle Dans le cas où il n' y a pas de commande à distance ou de contrôle de traction, le store peut être actionné avec le bouton de programme sur le moteur. Tenez le bouton de programme pour actionner 16.1 manuellement le store.
  • Seite 69 M OT I ON C M- 0 7 D C M ID M O TE U R Sélection unique de télécommande à 15 chaînes La sélection simple permet d' a ctiver le mode programme sur un seul store grâce à une télécommande, sans avoir à...
  • Seite 70 M OT I ON C M- 0 7 D C M ID M O TE U R Sélection de chaîne de télécommande à 5 chaînes La sélection de chaîne permet de copier les stores entre les chaînes / télécommandes sans avoir à...
  • Seite 71: Foires Aux Questions

    M O TI ON C M - 07 D C M I D MO TE U R Foires aux Questions Problème Cause Solution Connectez l'alimentation au moteur L'alimentation n'est pas connectée ou la ou chargez le tube de la batterie batterie rechargeable est vide.
  • Seite 72 M OT I ON C M- 0 7 D C M ID M O TE U R...
  • Seite 73 Coulisse B.V. décline toute responsabilité pour les dommages dus à des erreurs et / ou des défauts dans ce manuel. rtube.nl/cm-07 Coulisse B.V.se réserve le droit de réviser le manuel et de réviser et / ou modifier son contenu à tout moment, sans obligation d'informer toute personne ou entité...
  • Seite 74 M OT ION C M - 07 - T U S SE NM O T O R , G E LI J K S TR O O M CM-07 Middenmotor op gelijkstroom met afstandsbediening Kenmerken van de motor Gelijkstroommotor Transformator/accu...
  • Seite 75 M OT ION C M - 0 7 - T U SS E NMO TO R , GE L IJ KS TR O O M WAARSCHUWING Lees deze handleiding aandachtig alvorens het product te monteren en te Houd alle koorden buiten het bereik van kleine kinderen om gebruiken.
  • Seite 76: Belangrijke Veiligheidsinstructies

    M OT ION C M - 0 7 - T U SS E NMO TO R , GE L IJ KS TR O O M Belangrijke veiligheidsinstructies Bedien het product niet wanneer er WAARSCHUWING: Om het risico op ernstige onderhoudswerkzaamheden in de buurt verwondingen of op de dood te verminderen is worden uitgevoerd, zoals tijdens het wassen het belangrijk voor de veiligheid van personen...
  • Seite 77 M OT ION C M - 0 7 - T U SS E NMO TO R , GE L IJ KS TR O O M 3 FFC-verklaring inzake storingen door De ontkoppeling van alle polen moet volgens radiofrequentie de bedradingsregels in de vaste bedrading worden verwerkt.
  • Seite 78 Max. montage ding pro- selectie selecteren raam- grammeren bekleding CM-11 onbeperkt Afstandsbediening CM-12 onbeperkt Afstandsbediening CM-13 onbeperkt Afstandsbediening CM-15 onbeperkt Afstandsbediening op muur CM-16 onbeperkt Afstandsbediening op muur CM-17 onbeperkt Afstandsbediening op tafel CM-18 onbeperkt Afstandsbediening (trekken) CM-20 n.v.t. Motion-wifi-bridge...
  • Seite 79 M OT ION C M - 0 7 - T U SS E NMO TO R , GE L IJ KS TR O O M Max. Frequentie- Bereik Voeding Lengte Breedte Hoogte Certificaten scènes 30 m bij 433 MHz 1 betonnen n.v.t.
  • Seite 80 M OT ION C M - 0 7 - T U SS E NMO TO R , GE L IJ KS TR O O M CM-11 CM-12 Afstandsbediening met 1 kanaal Afstandsbediening met 5 kanalen Kanaal- Kanaal- aanduiding aanduiding Omhoog Omhoog Midden Midden...
  • Seite 81 M OT ION C M - 0 7 - T U SS E NMO TO R , GE L IJ KS TR O O M CM-13 CM-17 Afstandsbediening met 15 kanalen Tafel-afstandsbediening met 4 kanalen Kanaal- aanduiding Omhoog Omhoog Midden Kanaal 1 (stop/favoriet) Kanaal 3...
  • Seite 82 M O TI ON C M - 07- T U S SE NM O T O R , G EL I J KS T R O O M CM-15 CM-16 Afstandsbediening met 1 kanaal op muur Afstandsbediening met 4 kanalen op muur Omhoog Omlaag Omhoog...
  • Seite 83 M OT I ON C M- 0 7 - T U SS E N MO TO R , GE L IJ KS TR O O M CM-18 CM-20 Afstandsbediening met 1 kanaal Motion-bridge Koppelings- knop Zie handleiding CM-20...
  • Seite 84 M OT ION C M- 07- T U S SE NMO T O R , GE L I J KS TR O O M Sluit de voeding aan Sluit alleen CM-21 (transformator van 12 volt, gelijkstroom) of CM-24 (oplaadbare accu's) aan Zoek de programmeerknop op uw raambekleding Vouwgordijn Jaloezie...
  • Seite 85 M OT I ON C M- 0 7 - TU SS E NM O T O R , GE L IJ K S TR O O M Koppel een afstandsbediening Koppel een afstandsbediening die raambekleding kan programmeren. Raadpleeg pagina 4 en 5 voor meer informatie over de afstandsbediening.
  • Seite 86 M OT IO N C M - 07 - T U S SE NMO T O R , G E LI J K S TR O O M Onderste positie instellen Houd de knop omlaag ingedrukt totdat de raambekleding de gewenste onderste positie WAARSCHUWING: bereikt.
  • Seite 87 M OT I ON C M- 0 7 - TU SS E NM O TO R , GE L IJ K S TR O O M Bovenste positie instellen Omhoog Houd de knop omhoog ingedrukt totdat de raambekleding de gewenste bovenste positie bereikt.
  • Seite 88 M OT ION C M - 0 7 - T U SS E NMO TO R , GE L IJ KS TR O O M Optioneel: Favoriete positie instellen Stel de raambekleding in op een gewenste favoriete positie. Midden Houd de knop ‘midden’ ingedrukt om deze favoriete positie op te slaan.
  • Seite 89 M OT ION C M - 0 7 - T U SS E NMO TO R , GE L IJ KS TR O O M De raambekleding bedienen Omhoog Afstandsbediening: Kies met behulp van de knop Midden kanaal het kanaal waaraan de raambekleding is gekoppeld.
  • Seite 90 M OT ION C M - 0 7 - T U SS E NMO TO R , GE L IJ KS TR O O M De favoriete positie opnieuw instellen Stel de raambekleding in op een gewenste favoriete positie. 13.1 Druk op de knop programmeren op de motor om de programmeermodus 13.2 Midden...
  • Seite 91 M OT ION C M - 0 7 - T U SS E NMO TO R , GE L IJ KS TR O O M De raambekleding opnieuw instellen Het is mogelijk om alleen eindposities te verwijderen of om terug te gaan naar de fabrieksinstellingen. Als de fabrieksinstellingen worden hersteld, worden de eindposities verwijderd en de verbinding met een gekoppelde afstandsbediening gewist.
  • Seite 92: Handmatige Bediening

    M OT ION C M - 0 7 - T U SS E NMO TO R , GE L IJ KS TR O O M Uitgebreide opties Handmatige bediening Als er geen afstandsbediening of trekbediening is, kan de raambekleding worden bediend via de programmeerknop op de motor. Houd de knop programmeren ingedrukt om 16.1 de raambekleding handmatig te bedienen.
  • Seite 93 M OT ION C M - 0 7 - T U SS E NMO TO R , GE L IJ KS TR O O M Afstandsbediening met 15 kanalen en enkele selectie Met ‘Enkele selectie’ kunt u een programmeermodus voor raambekleding activeren via een afstandsbediening, zonder dat u op de fysieke programmeerknop op de raambekleding hoeft te drukken.
  • Seite 94 M OT ION C M - 0 7 - T U SS E NMO TO R , GE L IJ KS TR O O M Afstandsbediening met 5 kanalen en kanaal selecteren Met ‘Kanaal selecteren’ kan raambekleding tussen kanalen/afstandsbedieningen worden gekopieerd zonder dat er op de programmeerknop op de motoren hoeft te worden gedrukt.
  • Seite 95: Veelgestelde Vragen

    M OT IO N C M- 0 7 - TU S S E NM O T O R , GE LI J K S TR O O M Veelgestelde vragen Probleem Oorzaak Oplossing De voeding is niet aangesloten of de Sluit de voeding aan op de motor of laad oplaadbare accu is leeg.
  • Seite 96 M OT ION C M - 0 7 - T U SS E NMO TO R , GE L IJ KS TR O O M...
  • Seite 97 Ga naar rtube.nl/cm-07 voor de nieuwste Hoewel deze handleiding met zeer veel zorg is samengesteld, aanvaardt Coulisse B.V. geen enkele aansprakelijkheid voor...
  • Seite 98 M OT ION C M- 07 M O T O R M I D D E C C CM-07 Motor MID de CC con operación remota Características del motor Motor de CC Transformador/ Control de velocidad Bi-direccional Batería Motor de corriente Velocidad de enrollado Comunicación en dos...
  • Seite 99 M OT I ON C M- 0 7 M O T O R M I D D E C C ADVERTENCIA Lea detenidamente las instrucciones antes de instalar y usar el producto. El proceso de montaje puede ser completado por personas quedarse atrapados en ellos y no profesionales.Para uso en estrangularse.
  • Seite 100: Instrucciones De Seguridad Importantes

    M OT I ON C M- 0 7 M O T O R M I D D E C C Instrucciones de seguridad mantenimiento en las inmediaciones, tales importantes como la limpieza de cristales. ADVERTENCIA: Para reducir el riesgo de lesiones Cuando se use en el modo de hombre muerto, graves o la muerte.
  • Seite 101: Información Reglamentaria

    M OT I ON C M- 0 7 M O T O R M I D D E C C La parte accionada debe ser compatible con interferencia que reciba, incluida aquella que el par de giro nominal (0.8N.m) y el tiempo de pueda causar un funcionamiento no deseado del funcionamiento nominal (12min).
  • Seite 102 Control remoto de mano CM-12 ilimitado Control remoto de mano CM-13 ilimitado Control remoto de mano CM-15 ilimitado Control remoto de pared CM-16 ilimitado Control remoto de pared CM-17 ilimitado Control remoto de mesa CM-18 ilimitado Mecanismo tirador CM-20 Puente wifi MOTION...
  • Seite 103 M OT I ON C M- 0 7 M O T O R M I D D E C C Máx. de Frecuencia Alcance Alimentación Largo Ancho Alto Certificados escenas 30 m con 433 MHz 1 muro de CR2430 3.0V 120 mm 45 mm 14 mm...
  • Seite 104 M OT I ON C M- 0 7 M O T O R M I D D E C C CM-11 CM-12 Mando de 1 canales Mando de 5 canales Indicador Indicador de canal de canal Subir Subir Centro Centro (parar/favorito) (parar/favorito) Derecha...
  • Seite 105 M OT I ON C M- 0 7 M O T O R M I D D E C C CM-13 CM-17 Mando de 15 canales Mando de mesa de 4 canales Indicador de canal Subir Subir Centro Canal 1 (parar/favorito) Canal 3 Derecha...
  • Seite 106 M OT I ON C M- 0 7 M O T O R M ID D E C C CM-15 CM-16 Mando de pared de 1 canales Mando de pared de 4 canales Subir Bajar Subir Centro (parar/ Centro (parar/ favorito) favorito) Izquierda...
  • Seite 107 M OT I ON C M- 0 7 M O T O R M I D D E C C CM-18 CM-20 Mecanismo tirador de 1 canal Puente Motion Botón emparejar Consultar manual CM-20...
  • Seite 108 M O TI ON C M - 07 MO TO R M ID D E C C Conectar el suministro eléctrico Solo conecte al CM-21 (transformador de 12V CC) o al CM-24 (batería tubo recargable) Encontrar el botón de programación de su persiana Estor plegable Veneciana Cortina plisada...
  • Seite 109: Emparejar Un Mando

    M OT I ON C M- 0 7 M O T O R MI D D E C C Emparejar un mando Empareje un mando a distancia para programar las persianas. Consulte las páginas 4 y 5 para obtener más detalles. En este manual se muestra el CM-12. Pulse brevemente el botón programar del motor.
  • Seite 110 M OT ION C M - 0 7 MO TO R M I D D E C C Ajustar la posición inferior Pulse y sostenga el botón bajar hasta que la persiana alcance la posición inferior deseada. ADVERTENCIA: Riesgo de daños. Bajar Acérquese lentamente a la posición inferior.
  • Seite 111 M OT I ON C M- 0 7 M O T O R M I D D E C C Ajustar la posición superior Subir Pulse y sostenga el botón subir hasta que la persiana alcance la posición superior deseada. ADVERTENCIA: Riesgo de daños.
  • Seite 112 M OT I ON C M- 0 7 M O T O R M I D D E C C Ajustar la posición favorita (opcional). Mueva la persiana a la posición favorita deseada. Centro Mantenga pulsado el botón centro para guardar esta posición favorita.
  • Seite 113 M OT I ON C M- 0 7 M O T O R M I D D E C C Activar la persiana Subir Operación remoto: Elija el canal al que se ha Centro emparejado la persiana mediante el botón canal. Pulse el botón subir o bajar para operar la persiana.
  • Seite 114 M OT I ON C M- 0 7 M O T O R M I D D E C C Restablecer la posición favorita Mueva la persiana a la posición favorita deseada. 13.1 Pulse el botón programar del motor para activar el modo de 13.2 Centro programación.
  • Seite 115 M OT I ON C M- 0 7 M O T O R M I D D E C C Restablecer la persiana Es posible borrar solamente las posiciones finales o restablecer los valores de fábrica. Al restablecer los valores de fábrica, se borrarán las posiciones finales y la conexión a cualquier mando emparejado.
  • Seite 116: Opciones Avanzadas

    M OT I ON C M- 0 7 M O T O R M I D D E C C Opciones avanzadas Control manual Si no dispone de un mando a distancia o mecanismo de tracción, la persiana se puede operar con el botón de programación situado en el motor. Mantenga el botón programar pulsado para 16.1 operar la persiana manualmente.
  • Seite 117 M OT I ON C M- 0 7 M O T O R M I D D E C C Mando de 15 canales con Selección individual La Selección individual permite activar el modo de programación de una sola persiana con el mando a distancia, sin tener que pulsar físicamente el botón de programación de la persiana.
  • Seite 118 M OT I ON C M- 0 7 M O T O R M I D D E C C Mando de 5 canales con Selección de canal La Selección de canal permite copiar persianas entre canales/mandos sin tener que pulsar físicamente el botón de programación de los motores.
  • Seite 119: Preguntas Frecuentes

    M OT ION C M- 0 7 M O T O R M I D D E C C Preguntas frecuentes Problema Causa Solución La fuente de alimentación no está Conecte la fuente de alimentación conectada o la batería recargable está al motor o cargue la batería tubo vacía.
  • Seite 120 M OT I ON C M- 0 7 M O T O R M I D D E C C...
  • Seite 121 Coulisse B.V. no aceptará ninguna responsabilidad por y los manuales actualizados, daños debido a errores y/o defectos en este manual. visite rtube.nl/cm-07 Coulisse B.V. se reserva el derecho de revisar el manual y revisar y/o cambiar el contenido en cualquier momento, sin la obligación de notificar a cualquier persona o entidad de tales revisiones o cambios.
  • Seite 122 M OT I ON C M - 0 7 DC M I D M O TO R...
  • Seite 123 M OT I ON C M - 0 7 DC M I D M O TO R...
  • Seite 124 M OT I ON C M - 0 7 DC M I D M O TO R Coulisse B.V. Vonderweg 48 7468 DC Enter The Netherlands +31 547 85 55 55 +31 547 85 55 50 info@coulisse.com coulisse.com...

Inhaltsverzeichnis