Motion CM-03 Gebrauchsanweisung
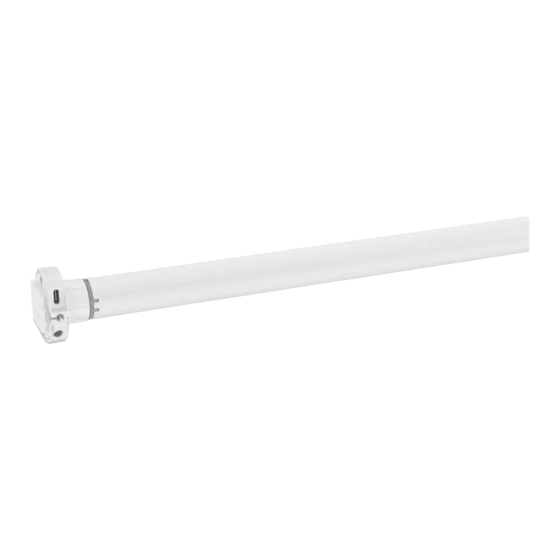
Li-ion rohrmotor
Vorschau ausblenden
Andere Handbücher für CM-03:
- Bedienungsanleitung (25 Seiten) ,
- Bedienungsanleitung (65 Seiten)
Inhaltsverzeichnis
Verfügbare Sprachen
Verfügbare Sprachen
Quicklinks
Inhaltsverzeichnis

Verwandte Anleitungen für Motion CM-03


Inhaltszusammenfassung für Motion CM-03
-
Seite 26: Li-Ion Batteriebetriebene Rohrmotoren Mit Zieh- Und Ferngesteuertem Betrieb
M OT I ON C M- 0 3 /05 LI- IO N R O H R M O T O R CM-03/05 Li-ion batteriebetriebene Rohrmotoren mit Zieh- und ferngesteuertem Betrieb Motoreigenschaften Li-ion-Batterie USB wiederaufladbar Kabellos Geschwindigkeits- Bidirektional kontrolle Integrierte Wiederaufladbar mit... -
Seite 27: Reinigung
M OT I ON C M- 0 3 /05 LI- IO N R O H R M O T O R ACHTUNG Lesen Sie die Gebrauchs- anweisung sorgfältig vor der Montage und Verwendung des um Strangulierung und Ver- Produkts. Montage kann durch wicklung zu vermeiden. -
Seite 28: Wichtige Sicherheitshinweise
M OT I ON C M- 0 3 /05 LI- IO N R O H R M O T O R Wichtige Sicherheitshinweise Trennen Sie das Gerät von der Stromquelle WARNUNG: Zur Vermeidung von Verletzungs- oder schalten Sie die automatische Steuerung und Todesrisiken. -
Seite 29: Fcc Hinweis Zu Elektronischen Emissionen
M OT I ON C M- 0 3 /05 LI- IO N R O H R M O T O R Die festen Steuerelemente sollten nach der Bei Betrieb müssen die folgenden zwei Installation deutlich sichtbar sein. Bedingungen erfüllt sein: Das Antriebsteil sollte kompatibel sein mit 1. - Seite 30 M OT I ON C M- 0 3 /05 LI- IO N R O H R M O T O R Wand Program- Max. Kanäle Einze- Kana- Montage mierung Rollos lauswahl lauswahl des Rollos CM-11 unbegrenzt Handfernbedienung CM-12 unbegrenzt Handfernbedienung CM-13 unbegrenzt Handfernbedienung CM-15 unbegrenzt Wand-Fernbedienung CM-16 unbegrenzt Wand-Fernbedienung CM-17 unbegrenzt Tisch-Fernbedienung CM-18 unbegrenzt Zieh-Fernbedienung CM-20 Motion Wi-Fi-Brücke...
- Seite 31 M OT I ON C M- 0 3 /05 LI- IO N R O H R M O T O R Max. Frequenz Bereich Stromquelle Länge Breite Höhe Zertifikate Szenen 30 m mit 433 MHz 1 konkreten CR2430 3.0V 120 mm 45 mm 14 mm Mauer...
- Seite 32 M OT I ON C M- 0 3 /05 LI- IO N R O H R M O T O R CM-11 CM-12 1 Kanal-Fernbedienung 5 Kanal-Fernbedienung Kanalanzeige Kanalanzeige Hoch Hoch Mitte Mitte (stop/bevorzugt) (stop/bevorzugt) Rechts Links Runter Runter Kanal Auswahl Kopplung Kopplung...
- Seite 33 M OT I ON C M- 0 3 /05 LI- IO N R O H R M O T O R CM-13 CM-17 15 Kanal-Fernbedienung 4 Kanal Tisch-Fernbedienung Kanalanzeige Hoch Hoch Mitte Kanal 1 (stop/bevorzugt) Kanal 3 Rechts Links Mitte (stop/bevorzugt) Runter Kanal 2...
- Seite 34 M OT IO N C M- 03/0 5 LI - IO N R O H R MO TO R CM-15 CM-16 1 Kanal Wand-Fernbedienung 4 Kanal Wand-Fernbedienung Hoch Runter Hoch Mitte (stop/ Mitte bevorzugt) (stop/bevorzugt) Links Rechts Runter Kopplung Knopf Kopplung Knopf...
- Seite 35 M OT I ON C M- 0 3 /05 LI- IO N R O H R M O T O R CM-18 CM-20 1 Channel Qasten-Fernbedienung Motion hub Kopplung Knopf Siehe Anleitung CM-20...
-
Seite 36: Das Rollo Installieren
M OT I ON C M- 0 3 /05 LI- IO N R O H R M O T O R Das Rollo installieren Click! Click! Click! Aktivieren Sie den Motor, indem Sie ihn mit Den Motor aktivieren einem Mikro-USB-Kabel aufladen. Eine grüne LED wird beginnen, zu blinken. -
Seite 37: Mit Einer Fernbedienung Koppeln
M OT I ON C M- 0 3 /05 LI- IO N R O H R M O T O R Mit einer Fernbedienung koppeln Mit einer Fernbedienung koppeln, mit der sich Rollos programmieren lassen. Siehe Seiten 4 und 5 für Fernbedienungsdetails. In diesem Handbuch ist ein CM-12 dargestellt. -
Seite 38: Untere Position Einstellen
M OT ION C M - 0 3 /05 LI- I O N R O H R M O T O R Untere Position einstellen Drücken und halten Sie den Runter-Knopf, bis das Rollo die gewünschte untere Position WARNUNG: erreicht. Beschädigungsgefahr. -
Seite 39: Obere Position Einstellen
M OT I ON C M- 0 3 /05 LI- IO N R O H R M O T O R Obere Position einstellen Hoch Drücken und halten Sie den Rauf-Knopf, bis das 10.1 Rollo die gewünschte obere Position erreicht. WARNUNG: Beschädigungsgefahr. -
Seite 40: Lieblingsposition Einstellen (Optional)
M OT I ON C M- 0 3 /05 LI- IO N R O H R M O T O R Lieblingsposition einstellen (optional) Bringen Sie das Rollo in Ihre gewünschte Lieblingsposition. 12.1 Mitte Halten Sie den mittleren Knopf gedrückt, um 12.2 diese Lieblingsposition zu speichern. -
Seite 41: Das Rollo Benutzen
M OT I ON C M- 0 3 /05 LI- IO N R O H R M O T O R Das Rollo benutzen Zieh-Steuerung: Ziehen Sie einmal, um das Rollo in die Endpositionen zu versetzen. Ziehen Sie noch mal, um das Rollo zu stoppen. -
Seite 42: Lieblingsposition Neu Einrichten
M OT I ON C M- 0 3 /05 LI- IO N R O H R M O T O R Lieblingsposition neu einrichten Versetzen Sie das Rollo in Ihre gewünschte Lieblingsposition. 16.1 Drücken Sie den Programm-Knopf auf dem Motor, um den Programmier- 16.2 Mitte modus zu aktivieren. -
Seite 43: Rollo Auf Werkseinstellungen Zurücksetzen
M OT I ON C M- 0 3 /05 LI- IO N R O H R M O T O R Rollo auf Werkseinstellungen zurücksetzen Sie können entweder nur die Endpositionen neu einstellen oder das Gerät auf die Werkseinstellungen zurücksetzen. Wenn Sie das Gerät auf die Werkseinstellungen zurücksetzen, werden die Endpositionen sowie die Verbindung zu sämtlichen gekoppelten Fernbedienungen gelöscht. -
Seite 44: Erweiterte Optionen
M OT I ON C M- 0 3 /05 LI- IO N R O H R M O T O R Erweiterte Optionen Manuelle Steuerung Falls keine Fern- oder Zieh-Steuerung verfügbar ist, kann das Rollo mit dem Programmknopf auf dem Motor gesteuert werden. Halten Sie den Programm-Knopf gedrückt, um das 20.1 Rollo manuell zu bedienen. -
Seite 45: Einzelauswahl 15 Kanal-Fernbedienung
M OT I ON C M- 0 3 /05 LI- IO N R O H R M O T O R Einzelauswahl 15 Kanal-Fernbedienung Die Einzelauswahl ermöglicht es, den Programmiermodus auf einem einzelnen Rollo durch eine Fernbedienung zu aktivieren, ohne dass Sie den Programmknopf auf dem Rollo physisch betätigen müssen. -
Seite 46: Kanalauswahl 5 Kanal-Fernbedienung
M OT ION C M- 0 3/05 LI - IO N R O H R M O T O R Kanalauswahl 5 Kanal-Fernbedienung Kanalauswahl ermöglicht es, Rollos zwischen Kanälen/Fernbedienungen zu kopieren, ohne dass Sie den Programmknopf auf den Motoren physisch betätigen müssen. Wählen Sie den Um die 23.1... -
Seite 47: Motor Aktivieren / Deaktivieren
M OT I ON C M- 0 3 /05 LI- IO N R O H R M O T O R Motor aktivieren / deaktivieren Um eine Beschädigung des Rollos zu vermeiden, verfügt der Motor über einen Transportmodus, der sicherstellt, dass das Rollo nicht vor der Installation in Betrieb genommen wird. Halten Sie den Programmknopf gedrückt und ziehen Sie zweimal, um den Motor zu 25.1 aktivieren oder zu deaktivieren. - Seite 48 M OT I ON C M- 0 3 /05 LI- IO N R O H R M O T O R...
- Seite 49 Für die neuesten Informationen und Obwohl diese Bedienungsanleitung sorgfältig zusammengestellt wurde, können Fehler enthalten sein. aktualisierte Handbücher besuchen Sie bitte rtube.nl/cm-03 Coulisse B.V. ist nicht verantwortlich für Schäden, die aufgrund von fehlerhaften Informationen in dieser Bedienungsanleitung zustande gekommen sind und übernimmt keinerlei Haftung.
- Seite 122 M OT I ON C M- 03/0 5 LI - IO N T U B U LA R M O T O R...
- Seite 123 M OT I ON C M- 03/0 5 LI - IO N T U B U LA R M O T O R...