AEG FSK93600P Benutzerinformation

Verwandte Anleitungen für AEG FSK93600P


Inhaltszusammenfassung für AEG FSK93600P
- Seite 1 All manuals and user guides at all-guides.com FSK93600P User Manual Dishwasher Benutzerinformation Geschirrspüler USER MANUAL...
-
Seite 27: Reparatur- Und Kundendienst
14. ZUSÄTZLICHE TECHNISCHE DATEN..............54 FÜR PERFEKTE ERGEBNISSE Danke, dass Sie sich für dieses AEG Produkt entschieden haben. Wir haben es geschaffen, damit Sie viele Jahre von seiner ausgezeichneten Leistung und den innovativen Technologien, die Ihnen das Leben erleichtern, profitieren können. -
Seite 28: Sicherheitshinweise
All manuals and user guides at all-guides.com SICHERHEITSHINWEISE Lesen Sie vor der Montage und dem Gebrauch des Geräts zuerst die Gebrauchsanleitung. Bei Verletzungen oder Schäden infolge nicht ordnungsgemäßer Montage oder Verwendung des Geräts übernimmt der Hersteller keine Haftung. Bewahren Sie die Anleitung immer an einem sicheren und zugänglichen Ort zum späteren... - Seite 29 DEUTSCH All manuals and user guides at all-guides.com Bauernhöfe, Personalküchenbereiche in – Geschäften, Büros und anderen Arbeitsumfeldern. Für Gäste in Hotels, Motels, Pensionen und – anderen wohnungsähnlichen Räumlichkeiten. Nehmen Sie keine technischen Änderungen am Gerät • vor. Der Betriebswasserdruck (Mindest- und Höchstdruck) •...
-
Seite 30: Sicherheitsanweisungen
All manuals and user guides at all-guides.com 2. SICHERHEITSANWEISUNGEN 2.1 Montage • Stecken Sie den Netzstecker erst nach Abschluss der Montage in die WARNUNG! Steckdose. Stellen Sie sicher, dass der Die Montage des Geräts Netzstecker nach der Montage noch darf nur von einer zugänglich ist. -
Seite 31: Innenbeleuchtung
DEUTSCH All manuals and user guides at all-guides.com • Drehen Sie sofort den Wasserhahn zu • Die Innenbeleuchtung des Geräts und ziehen Sie den Netzstecker aus wird automatisch beim Öffnen der Tür der Steckdose, wenn der eingeschaltet und beim Schließen der Wasserzulaufschlauch beschädigt ist. -
Seite 32: Produktbeschreibung
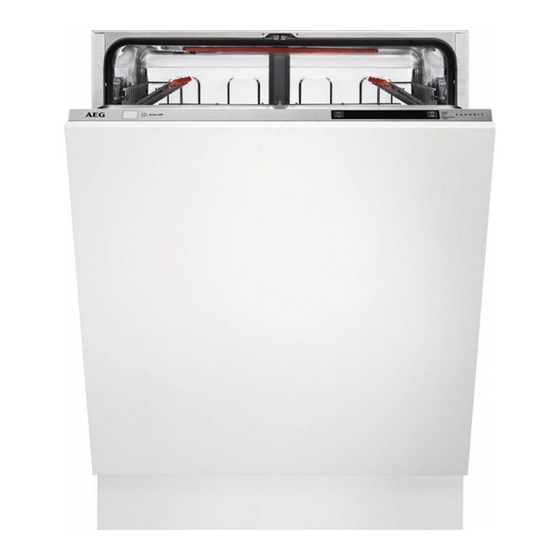
All manuals and user guides at all-guides.com 3. PRODUKTBESCHREIBUNG Oberen Sprüharm Klarspülmittel-Dosierer Oberer Sprüharm Reinigungsmittelfach Unterer Sprüharm Besteckkorb Siebe Unterkorb Typenschild Oberkorb Salzbehälter Entlüftung 3.1 TimeBeam TimeBeam projiziert folgende Informationen auf den Boden unter der Gerätetür: • Die Programmdauer am Programmstart. -
Seite 33: Bedienfeld
DEUTSCH All manuals and user guides at all-guides.com Wird AirDry während der Trockenphase eingeschaltet, ist die Projektion auf dem Boden möglicherweise nicht vollständig sichtbar. Die verbleibende Zeit des laufenden Programms kann dann auf dem Display des Bedienfelds überprüft werden. 4. BEDIENFELD Taste „Ein/Aus“... -
Seite 34: Programme
All manuals and user guides at all-guides.com 5. PROGRAMME Programm Verschmutzungs- Programmphasen Optionen grad Beladung • Normaler Ver- • Vorspülgang • Extra Hygiene ECO 50° schmutzungsgrad • Hauptspülgang 50 • XtraDry • Geschirr und Be- °C steck • Spülen •... - Seite 35 DEUTSCH All manuals and user guides at all-guides.com Programm Verschmutzungs- Programmphasen Optionen grad Beladung • Alle • Vorspülgang Prewash 1) Dieses Programm gewährleistet den wirtschaftlichsten Wasser- und Energieverbrauch für normal ver- schmutztes Geschirr und Besteck. Dies ist das Standardprogramm für Prüfinstitute. 2) Das Gerät erkennt den Verschmutzungsgrad und die Anzahl der Geschirrteile in den Körben.
-
Seite 36: Einstellungen
All manuals and user guides at all-guides.com Bezüglich anderer Fragen zu Ihrem Geschirrspüler siehe die mit dem Gerät gelieferte Bedienungsanleitung. 6. EINSTELLUNGEN 6.1 Übersicht der Einstellungen Einstellungen Einstellmöglichkeiten Bezeichnung MyFavourite einschalten Programmübersicht Zum Einstellen Ihres täglich benutzten Programms. Für... -
Seite 37: Ändern Einer Einstellung Mit Mehreren Einstellmöglichkeiten
DEUTSCH All manuals and user guides at all-guides.com Einstellungen Einstellmöglichkeiten Bezeichnung Sprachen Übersicht der Spra- Einstellen der bevorzugten chen Sprache. Voreingestellte Sprache: English. Fußboden-Display Farbübersicht Einstellen der Farbe des Keine TimeBeam oder Auschalten des TimeBeam . Einstellungen zurücksetzen Zurücksetzen Zurücksetzen aller Einstellun- Abbrechen gen auf die Werkseinstellun- gen. - Seite 38 All manuals and user guides at all-guides.com 3. Wählen Sie MyFavourite Während der Trockenphase einschalten. und drücken Sie wird die Tür automatisch Im Display wird die Programmübersicht geöffnet und bleibt einen angezeigt. Spaltbreit offen. 4. Wählen Sie ein Programm aus, und VORSICHT! drücken Sie...
-
Seite 39: Optionen
DEUTSCH All manuals and user guides at all-guides.com 7. OPTIONEN Sie müssen die gewünschten Die eingeschalteten Optionen vor dem Optionen können sich auf Programmstart einschalten. den Wasser- und Es ist nicht möglich, Energieverbrauch sowie die Optionen während eines Programmdauer auswirken. laufenden Programms ein- oder auszuschalten. -
Seite 40: Vor Der Ersten Inbetriebnahme
All manuals and user guides at all-guides.com 7.3 XtraDry Wassertemperatur. Die Spül- und Trockenphasen verkürzen sich. Schalten Sie diese Option ein, um die Die Spülergebnisse entsprechen denen Trocknungsleistung zu erhöhen. einer normalen Programmdauer. Die Die Option XtraDry bleibt permanent für Trockenergebnisse können... -
Seite 41: Salzbehälter
DEUTSCH All manuals and user guides at all-guides.com informieren. Der Wasserenthärter muss Durch die Enthärtung von unbedingt auf die richtige Stufe hartem Wasser erhöht sich eingestellt werden, um gute der Wasser- und Spülergebnisse zu garantieren. Energieverbrauch und verlängert sich die Programmdauer. -
Seite 42: So Füllen Sie Den Salzbehälter
All manuals and user guides at all-guides.com 8.3 Klarspülmittel-Dosierer So füllen Sie den Salzbehälter Das Klarspülmittel ermöglicht das 1. Drehen Sie den Deckel des Trocknen des Geschirrs ohne Streifen Salzbehälters gegen den und Flecken. Uhrzeigersinn und entfernen Sie ihn. -
Seite 43: Täglicher Gebrauch
DEUTSCH All manuals and user guides at all-guides.com Wenn Sie Multi-Reinigungstabletten Für eine bessere verwenden und die Trockenleistung Trocknungsleistung zufriedenstellend ist, kann die empfehlen wir stets Klarspülmittelnachfüllanzeige durch die Klarspülmittel zu verwenden, Einstellung der Klarspülmittelstufe auf 0 auch wenn Sie Multi- ausgeschaltet werden. -
Seite 44: So Können Sie Den Start Eines Programms Verzögern
All manuals and user guides at all-guides.com Starten des Programms angezeigt: Spülen anhalten? und zwei Optionen. MyFavourite • Stopp: Wählen Sie diese Option zum Abbruch der Zeitvorwahl. 1. Halten Sie ca. 3 Sekunden lang Drücken Sie gedrückt, bis im Display das Bestätigung. -
Seite 45: Tipps Und Hinweise
DEUTSCH All manuals and user guides at all-guides.com Programmende Funktion Auto Off Wenn das Programm beendet ist, zeigt Mit dieser Funktion wird der der TimeBeam 0:00 und CLEAN an. Energieverbrauch gesenkt, da sich das Gerät automatisch ausschaltet, wenn es 1. Drücken Sie die Taste Ein/Aus oder nicht in Betrieb ist. -
Seite 46: Beladen Der Körbe
All manuals and user guides at all-guides.com kein Reinigungsmittel und beladen • Vergewissern Sie sich, dass sich die Sie die Körbe nicht. Sprüharme ungehindert bewegen 4. Stellen Sie den Wasserenthärter nach können, bevor Sie ein Programm Ablauf des Programms auf die starten. - Seite 47 DEUTSCH All manuals and user guides at all-guides.com 5. Achten Sie darauf, dass sich keine Lebensmittelreste oder 1. Drehen Sie den Filter (B) nach links Verschmutzungen in oder um den und nehmen Sie ihn heraus. Rand der Wanne befinden. 6. Setzen Sie den flachen Filter (A) wieder ein.
-
Seite 48: Reinigen Der Außenseiten
All manuals and user guides at all-guides.com 4. Drücken Sie zum Einsetzen des VORSICHT! Sprüharms diesen nach oben und Eine falsche Anordnung der drehen Sie ihn gleichzeitig gegen Filter führt zu schlechten den Uhrzeigersinn, bis er einrastet. Spülergebnissen und kann das Gerät beschädigen. -
Seite 49: Fehlersuche
DEUTSCH All manuals and user guides at all-guides.com 12. FEHLERSUCHE Die meisten Störungen, die auftreten, WARNUNG! können behoben werden, ohne dass Eine unsachgemäße der autorisierte Kundendienst gerufen Reparatur des Geräts kann werden muss. eine Gefahr für die Informationen zu möglichen Störungen Sicherheit des Benutzers finden Sie in der nachfolgenden Tabelle. - Seite 50 All manuals and user guides at all-guides.com Störung Mögliche Ursache und Abhilfe Das Überlaufschutzsystem • Drehen Sie den Wasserhahn zu und wenden Sie sich an ist eingeschaltet. einen autorisierten Kundendienst. Im Display erscheint die Meldung: Wasser läuft aus oder Fehler im Wasserzu- lauf.
-
Seite 51: Die Spül- Und Trocknungsergebnisse Sind Nicht Zufriedenstellend
DEUTSCH All manuals and user guides at all-guides.com Problem erneut auf, wenden Sie sich an Siehe „Vor der ersten einen autorisierten Kundendienst. Inbetriebnahme“, Wenden Sie sich an einen autorisierten „Täglicher Gebrauch“ oder Kundendienst, wenn Meldungen oder „Tipps und Hinweise“ Probleme angezeigt werden, die nicht in bezüglich anderer möglicher der Tabelle angegeben sind. - Seite 52 All manuals and user guides at all-guides.com Störung Mögliche Ursache und Abhilfe Das Geschirr ist nass. • Schalten Sie XtraDry und AirDry ein, um die beste Trocknungsleistung zu erzielen. • Das Programm enthält keine Trocknungsphase oder eine Trocknungsphase mit niedriger Temperatur.
-
Seite 53: Produktdatenblatt
„Täglicher Gebrauch“ oder „Tipps und Hinweise“ bezüglich anderer möglicher Ursachen. 13. PRODUKTDATENBLATT Warenzeichen Modellkennung FSK93600P 911438323 Nennleistung (Standard-Einstellungen) Energieeffizienzklasse A+++ Energieverbrauch in kWh pro Jahr, basierend auf 280 Stanard-Reinigungszyklen bei Verwendung von kaltem Wasser und der Modi mit wenig Energiebedarf. Der tat- sächliche Verbrauch hängt davon ab, wie das Gerät ver-... -
Seite 54: Zusätzliche Technische Daten
All manuals and user guides at all-guides.com Energieverbrauch des Standard-Reinigungs-Zyklus in 0.832 Energieverbrauch im OFF-Modus in W 0.10 Energieverbauch im nicht-ausgeschalteten Zustand in Wasserverbrauch in Liter/Jahr, auf der Grundlage von 2940 280 Standardreinigungszyklen. Der tatsächliche Wasser- verbrauch hängt von der Art der Nutzung des Geräts Trocknungseffizienzklasse auf einer Skala von G (ge- ringste Effizienz) bis A (höchste Effizienz) - Seite 55 DEUTSCH All manuals and user guides at all-guides.com elektronische Geräte. Entsorgen Sie Ihrer örtlichen Sammelstelle oder wenden Sie sich an Ihr Gemeindeamt. Geräte mit diesem Symbol nicht mit dem Hausmüll. Bringen Sie das Gerät zu...