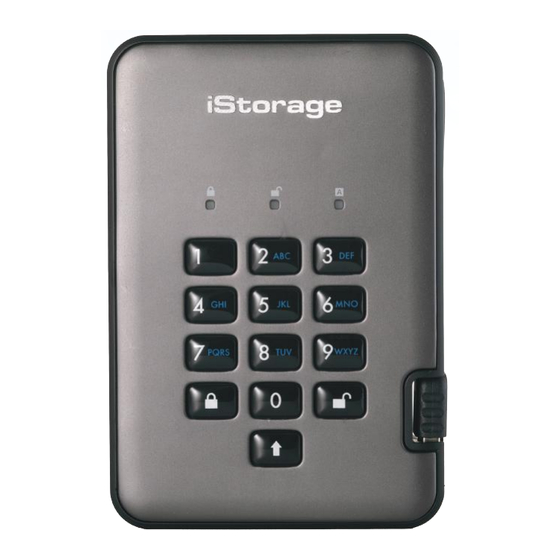
Herunterladen Inhalt Inhalt Diese Seite drucken
Vorschau ausblenden Andere Handbücher für diskAshur PRO2:
Inhaltsverzeichnis

Werbung

Verfügbare Sprachen

Verfügbare Sprachen

English User Manual - Table of Contents ...............................................4
Deutsch Benutzerhandbuch - Inhaltsverzeichnis ...................................29
Français Manuel d'utilisation - Table des matières ...............................50
#1
www.istorage-uk.com

Werbung

Inhaltsverzeichnis
loading

Inhaltszusammenfassung für iStorage diskAshur PRO2

  • Seite 1 English User Manual - Table of Contents ..........4 Deutsch Benutzerhandbuch - Inhaltsverzeichnis ........29 Français Manuel d’utilisation - Table des matières .......50 www.istorage-uk.com...
  • Seite 2 Please make sure you remember your PIN (password), without it there is no way to access the data on the drive. If you are having difficulty using your diskAshur PRO drive please contact our technical department by email - support@istorage-uk.com or by phone on +44 (0) 20 8991 6260. www.istorage-uk.com...
  • Seite 3 Copyright © iStorage, Inc 2017. All rights reserved. Windows is a registered trademark of Microsoft Corporation. All other trademarks and copyrights referred to are the property of their respective owners. Distribution of modified versions of this document is prohibited without the explicit permission of the copyright holder.
  • Seite 4: Inhaltsverzeichnis

    27. Hibernating, Suspending or Logging off from the Operating System ........23 28. How to check Firmware in Admin Mode ..................23 29. How to check Firmware in User Mode ..................24 30. Technical Support ........................25 31. Warranty and RMA information ....................25 www.istorage-uk.com...
  • Seite 5: Introduction

    In plain and simple terms, without the PIN there’s no way in! Box Contents diskAshur PRO Drive with integrated USB Cable 2. Elegant Travel Case 3. Quick Start Guide www.istorage-uk.com...
  • Seite 6: Diskashur Pro Led States

    LED will remain on and in a solid state. It can be locked down immediately by pressing the “LOCK” button once or by clicking the ‘Safely Remove Hardware/Eject’ icon within your operating system. To ensure no data is corrupted, we recommend using ‘Safely Remove Hardware/Eject’. www.istorage-uk.com...
  • Seite 7: Unlocking The Diskashur Pro

    BLUE for 1 second and then to the unlocked state, a solid GREEN LED. 5. If correct PIN is entered, the drive displays as “iStorage diskAshur PRO USB Device” under “Computer Management/ Device Manager”. In an unlocked state (GREEN LED), there are two possible behaviours for the LED indicators, shown in the table below.
  • Seite 8: Changing The Admin Pin

    • For “Password” you would press the following keys: 7 (pqrs) 2 (abc) 7 (pqrs) 7 (pqrs) 9 (wxyz) 6 (mno) 7 (pqrs) 3 (def) • For “iStorage” you would press: 4 (ghi) 7 (pqrs) 8 (tuv) 6 (mno) 7 (pqrs) 2 (abc) 4 (ghi) 3 (def) Using this method, long and easy to remember PINs can be created.
  • Seite 9: Adding A New User Pin In Admin Mode

    Solid BLUE LED will change to blinking buttons Blinking LED will change to solid 2. Press and hold down “SHIFT + 3” buttons again. LED and then to a solid BLUE LED indicating the User PIN was successfully deleted www.istorage-uk.com...
  • Seite 10: Set Read-Only In Admin Mode

    GREEN and solid BLUE LEDs GREEN LED will rapidly blink for several seconds and then changes to a solid BLUE 3. Re-enter the PIN and press the “UNLOCK” button to indicate the Self-Destruct PIN has been successfully configured www.istorage-uk.com...
  • Seite 11: How To Delete The Self-Destruct Pin

    Self-Destruct mechanism is activated. The diskAshur PRO will need to be reset (see ‘How to perform a complete reset’ Section 23, on page 15) first in order to create an Admin PIN with full Admin privileges including the ability to create a User PIN. www.istorage-uk.com...
  • Seite 12: How To Create An Admin Pin After A Brute Force Attack Or Reset

    20 for 20 minutes 99 for 99 minutes Blinking GREEN BLUE LEDs will change to 3. Press the “SHIFT” button a solid GREEN for a second and then finally to a solid BLUE LED indicating the Auto-Lock time out is successfully configured www.istorage-uk.com...
  • Seite 13: Turn Off The Unattended Auto-Lock Clock

    BLUE LEDs Blinking GREEN and solid BLUE LEDs will 3. Re-enter New User PIN and press the “UNLOCK” switch to a rapidly blinking GREEN LED and button then to a solid GREEN LED indicating successful User PIN change www.istorage-uk.com...
  • Seite 14: Set Read-Only In User Mode

    Note: 1. This setting is activated the next time the drive is unlocked. 2. If a User set the drive as Read-Only, Admin can override it by setting the drive as Read/Write in Admin mode. 3. If Admin set the drive as Read-Only, the User cannot set the drive as Read/Write www.istorage-uk.com...
  • Seite 15: Brute Force Protection

    Important: After a complete reset a new Admin PIN must be created, refer to Section 15 on page 12 on ‘How to Create an Admin PIN after a Brute Force attack or Reset’, the diskAshur PRO will also need to be partitioned and formatted before any new data can be added to the drive. www.istorage-uk.com...
  • Seite 16: Initialising And Formatting The Diskashur Pro

    In the Computer Manage window, click Disk Management. In the Disk Management window, the diskAshur PRO recognised as an unknown device that is uninitialised and unallocated. Note: If the Initialise Disk Wizard window opens, click Cancel. Right-click Unknown Disk, and then select Initialise Disk. www.istorage-uk.com...
  • Seite 17 11. Assign a drive letter or path and click Next. 12. Create a volume label, select Perform a quick format, and then click Next. 13. Click Finish. 14. Wait until the format process is complete. The diskAshur PRO will be recognised and it is available for use. www.istorage-uk.com...
  • Seite 18: Diskashur Pro 2 Setup For Mac Os

    1. Select diskAshur PRO from the list of drives and volumes. Each drive in the list will display its capacity, manufacturer, and product name, such as ‘iStorage diskAshur PRO Media’ or 232.9 diskAshur PRO 2. Click the ‘Erase’ button (figure 1).
  • Seite 19 (figure 4). We recommend using ‘GUID Partition Map’ on drives larger than 2TB. figure 3 figure 4 5. Click the ‘Erase’ button. Disk Utility will unmount the volume from the desktop, erase it, and then remount it on the desktop. www.istorage-uk.com...
  • Seite 20: Diskashur Pro Setup For Linux (Ubuntu 14.04)

    2. Click to select the drive (500 GB Hard Disk) under ‘Devices’. Next click on the gears icon under ‘Volumes’ and then click on ‘Format’. 3. Select ‘Compatible with all systems and devices(FAT)’ for the ‘Type’ option. And enter a name for the drive, e.g: diskAshur PRO . Then, click the ‘Format’ button. www.istorage-uk.com...
  • Seite 21 4. Click ‘Format’ again. 5. The drive will start to be formatted. 6. After the format process is finished, click to mount the drive to Ubuntu. www.istorage-uk.com...
  • Seite 22 OS to eject (lock) your diskAshur PRO , especially after data has been copied or deleted from the drive. 500 GB Hard Disk iStorage diskAshur PRO2 500 GB Hard Disk iStorage diskAshur PRO2 500 GB - 147 GB free diskAshur PRO2 www.istorage-uk.com...
  • Seite 23: Hibernating, Suspending Or Logging Off From The Operating System

    For example, if the firmware revision number is ‘1.2’, the LED will blink once (1) and the GREEN LED will blink two (2) times. Once the sequence has ended the RED, GREEN & BLUE LED’s will blink together once and then return to a solid BLUE LED. www.istorage-uk.com...
  • Seite 24: How To Check Firmware In User Mode

    For example, if the firmware revision number is ‘1.2’, the LED will blink once (1) and the GREEN LED will blink two (2) times. Once the sequence has ended the RED, GREEN & BLUE LED’s will blink together once and then return to a solid BLUE LED. www.istorage-uk.com...
  • Seite 25: Technical Support

    DAMAGED OR RENDERED DEFECTIVE: 1. AS A RESULT OF ACCIDENT, MISUSE, NEGLECT, ABUSE OR FAILURE AND/OR INABILITY TO FOLLOW THE WRITTEN INSTRUCTIONS PROVIDED IN THIS INSTRUCTION GUIDE: 2. BY THE USE OF PARTS NOT MANUFACTURED OR SOLD BY ISTORAGE; 3. BY MODIFICATION OF THE PRODUCT; OR 4. AS A RESULT OF SERVICE, ALTERNATION OR REPAIR BY ANYONE OTHER THAN ISTORAGE AND SHALL BE VOID.
  • Seite 26 © iStorage, 2017. All rights reserved. iStorage Limited, iStorage House, 13 Alperton Lane Perivale, Middlesex. UB6 8DH, England Tel: +44 (0) 20 8991 6260 | Fax: +44 (0) 20 8991 6277 e-mail: info@istorage-uk.com | web: www.istorage-uk.com www.istorage-uk.com...
  • Seite 27 Vergessen Sie Ihre PIN (Ihr Passwort) nicht, da Sie ohne PIN/Passwort nicht auf die Daten auf der Festplatte zugreifen können. Wenn Sie Probleme mit Ihrer diskAshur PRO -Festplatte haben, wenden Sie sich per E-Mail oder telefo- nisch an unsere Technical Support-Abteilung: support@istorage-uk.com oder +44 (0) 20 8991 6260. www.istorage-uk.com...
  • Seite 28 Copyright © iStorage, Inc 2017. Alle Rechte vorbehalten. Windows ist eine eingetragene Marke der Microsoft Corporation. Alle anderen erwähnten Marken und Copyrights sind Eigentum der jeweiligen Besitzer. Die Verteilung modifizierter Versionen dieses Dokuments ist ohne die explizite Zustimmung des Urheberrechtsinhabers nicht zulässig.
  • Seite 29 25. diskAshur PRO -Einrichtung für Mac OS ................43 26. Ruhezustand, Sperre oder Abmeldung beim Betriebssystem ..........44 27. Prüfen von Firmware im Admin-Modus ..................45 28. Prüfen von Firmware im Benutzermodus .................45 29. Technical Support ........................46 30. Garantie- und RMA-Informationen ..................46 www.istorage-uk.com...
  • Seite 30: Einführung

    Angriff, indem sie in den Deadlock-Zustand wechselt (einfriert), sodass sich alle diese Angriffe als vergeblich erweisen. Einfach ausgedrückt: Ohne PIN ist kein Zugriff möglich! Lieferumfang diskAshur PRO -Festplatte mit integriertem USB-Kabel 2. Eleganter Transportbehälter 3. Schnellstartanleitung www.istorage-uk.com...
  • Seite 31: Diskashur Pro 2 -Led-Zustände

    LED weiter. Die Festplatte kann umgehend gesperrt werden, indem Sie einmal die Taste SPERREN drücken oder auf das Symbol „Hardware sicher entfernen/Auswerfen“ Ihres Betriebssystems klicken. Um sicherzustellen, dass keine Daten beschädigt werden, empfehlen wir die Verwendung von „Hardware sicher entfernen/Auswerfen“. www.istorage-uk.com...
  • Seite 32: Entsperren Der Diskashur Pro

    LED abwechselnd. Dann leuchtet die BLAUE LED 1 Sekunde, bevor der Entsperrt-Zustand angezeigt wird und die GRÜNE LED leuchtet. 5. Wenn die korrekte PIN eingegeben wird, wird die Festplatte als „iStorage diskAshur PRO -USB-Gerät“ unter „Computer- verwaltung/Geräte-Manager“ angezeigt. Im Entsperrt-Zustand (GRÜNE LED) gibt es zwei mögliche Anzeigevarianten der LEDs (siehe Tabelle unten).
  • Seite 33: Ändern Der Admin-Pin

    7 (pqrs) 2 (abc) 7 (pqrs) 7 (pqrs) 9 (wxyz) 6 (mno) 7 (pqrs) 3 (def) • Für iStorage würden Sie die folgenden Tasten drücken: 4 (ghi) 7 (pqrs) 8 (tuv) 6 (mno) 7 (pqrs) 2 (abc) 4 (ghi) 3 (def) Mit dieser Methode können lange und einfach zu merkende PINs erstellt werden.
  • Seite 34: Hinzufügen Einer Neuen Benutzer-Pin Im Admin-Modus

    ROTE LED angezeigt. Statt der blinkenden ROTEN LED wird eine leuchtende ROTE LED und dann eine leuchtende 2. Halten Sie die Tasten SHIFT + 3 erneut gedrückt. BLAUE LED angezeigt. Dies gibt an, dass die Benutzer-PIN erfolgreich gelöscht wurde. www.istorage-uk.com...
  • Seite 35: Festlegen Des Schreibgeschützten Zugriffs Im Admin-Modus

    LED angezeigt. Statt der einige Sekunden schnell blinkenden 3. Geben Sie die PIN erneut ein, und drücken Sie die GRÜNEN LED wird eine leuchtende BLAUE Taste ENTSPERREN. LED angezeigt. Dies gibt an, dass die Selbst- zerstörungs-PIN erfolgreich konfiguriert wurde. www.istorage-uk.com...
  • Seite 36: Löschen Der Selbstzerstörungs-Pin

    Benutzer-PIN. Nach der Aktivierung des Selbstzerstörungsmechanismus ist keine Ad- min-PIN vorhanden. Die diskAshur PRO muss zunächst zurückgesetzt werden (siehe Komplettes Zurücksetzen in Abschnitt 23 auf Seite 40), um eine Admin-PIN mit umfassenden Admin-Privilegi- en (einschließlich Erstellung einer Benutzer-PIN) zu erstellen. www.istorage-uk.com...
  • Seite 37: Erstellen Einer Admin-Pin Nach Einem Brute Force-Angriff Oder Dem Zurücksetzen

    BLAUE LED ändern sich eine Sekunde in eine leuchtende 3. Drücken Sie die Taste SHIFT. GRÜNE LED und dann in eine leuchtende BLAUE LED. Dies gibt an, dass das Timeout für die auto- matische Sperre erfolgreich konfiguriert wurde. www.istorage-uk.com...
  • Seite 38: Deaktivieren Der Uhr Für „Automatische Sperre, Wenn Unbeaufsichtigt

    LED ändern sich in eine schnell blin- 3. Geben Sie die neue Benutzer-PIN erneut ein, und kende GRÜNE LED und dann in eine leucht- drücken Sie die Taste ENTSPERREN. ende GRÜNE LED. Dies gibt eine erfolgreiche Änderung der Benutzer-PIN an. www.istorage-uk.com...
  • Seite 39: Festlegen Des Schreibgeschützten Zugriffs Im Benutzermodus

    2. Wenn ein Benutzer die Festplatte als „Schreibgeschützt“ festgelegt hat, kann der Admin dies durch Festlegen der Festplatte als „Lesen/Schreiben“ im Admin-Modus überschreiben. 3. Wenn ein Admin die Festplatte als „Schreibgeschützt“ festgelegt hat, kann der Benutzer die Festplatte nicht als „Lesen/Schreiben“ festlegen. www.istorage-uk.com...
  • Seite 40: Brute Force-Schutz

    Wichtig: Nach dem kompletten Zurücksetzen muss eine neue Admin-PIN erstellt werden (siehe Abschnitt 15 auf Seite 37 Erstellen einer Admin-PIN nach einem Brute Force-Angriff oder dem Zurücksetzen). Die diskAshur PRO muss partitioniert und formatiert werden, bevor neue Daten zur Festplatte hinzugefügt werden können. www.istorage-uk.com...
  • Seite 41: Initialisieren Und Formatieren Der Diskashur Pro

    Gerät erkannt, das nicht initialisiert und nicht zugeordnet ist. Hinweis: Wenn das Fenster mit dem Assistenten für die Datenträgerinitialisierung geöffnet wird, klicken Sie auf Abbrechen. 6. Klicken Sie mit der rechten Maustaste auf „Unbekannter Datenträger“, und wählen Sie dann „Datenträger initialisieren“. www.istorage-uk.com...
  • Seite 42 11. Weisen Sie einen Laufwerksbuchstaben oder Pfad zu, und klicken Sie auf Weiter. 12. Erstellen Sie eine Volumebezeichnung, wählen Sie „Schnellformatierung durchführen“, und klicken Sie dann auf Weiter. 13. Klicken Sie auf Fertig stellen. 14. Warten Sie, bis der Formatierungsprozess abgeschlossen ist. Die diskAshur PRO wird erkannt und kann verwendet werden. www.istorage-uk.com...
  • Seite 43: Diskashur Pro -Einrichtung Für Mac Os

    1. Wählen Sie diskAshur PRO aus der Liste der Laufwerke und Volumes aus. Für jedes Laufwerk in der Liste werden Kapazi- tät, Hersteller und Produktname angezeigt, wie „iStorage diskAshur PRO -Datenträger“ oder 232.9 diskAshur PRO 2. Klicken Sie auf die Schaltfläche „Löschen“ (Abbildung 1).
  • Seite 44: Ruhezustand, Sperre Oder Abmeldung Beim Betriebssystem

    Die Festplatte kann gesperrt werden, indem Sie einmal die Taste „SPERREN“ auf der diskAshur PRO drücken oder auf das Symbol „Hardware sicher entfernen/Auswerfen“ Ihres Betriebssystems klicken. Achtung: Um dafür zu sorgen, dass Ihre Daten sicher sind, sperren Sie Ihre diskAshur PRO , wenn Sie nicht an Ihrem Computer arbeiten. www.istorage-uk.com...
  • Seite 45: Prüfen Von Firmware Im Admin-Modus

    GRÜNE LED leuchtet. Wenn die Firmware-Revisionsnummer beispielsweise 1.2 ist, blinkt die ROTE LED einmal (1) und die GRÜNE LED zweimal (2). Nach der Sequenz blinken die ROTE, GRÜNE BLAUE LED einmal, und dann wird eine leuchtende BLAUE LED angezeigt. www.istorage-uk.com...
  • Seite 46: Technical Support

    SPRECHEN. ES FALLEN KEINE ZUSÄTZLICHEN KOSTEN AN. ALLE IM RAHMEN DIESER GARANTIE AUSGETAUSCHTEN TEILE UND PRODUKTE SIND EIGENTUM VON ISTORAGE. DIESE GARANTIE GILT NICHT FÜR PRODUKTE, DIE NICHT DIREKT BEI ISTORAGE ODER EINEM AUTORISIERTEN RESELLER ERWORBEN WURDEN, ODER PRODUKTE, DIE AUS FOL- GENDEN GRÜNDEN BESCHÄDIGT WURDEN ODER DEFEKT SIND: 1.
  • Seite 47 © iStorage, 2017. Alle Rechte vorbehalten. iStorage Limited, iStorage House, 13 Alperton Lane Perivale, Middlesex. UB6 8DH, England Tel.: +44 (0) 20 8991 6260 | Fax: +44 (0) 20 8991 6277 E-Mail: info@istorage-uk.com | Web: www.istorage-uk.com www.istorage-uk.com...
  • Seite 48 Assurez-vous de vous souvenir de votre code PIN (mot de passe), sans lequel il est impossible d'accéder aux données du disque. Si vous rencontrez des difficultés à utiliser le disque diskAshur PRO , merci de contacter notre service technique par courriel à l'adresse support@istorage-uk.com ou par téléphone au +44 (0) 20 8991 6260. www.istorage-uk.com...
  • Seite 49 Copyright © iStorage, Inc 2017. Tous droits réservés. Windows est une marque déposée de Microsoft Corporation. L'ensemble des autres marques déposées et droits d'auteur auquel il est fait référence est la propriété de leurs fabricants respectifs. La distribution de versions modifiées du présent document sans l'autorisation explicite du détenteur des droits d'auteur est interdite.
  • Seite 50 27. Comment vérifier la version du firmware en mode administrateur ..............66 28. Comment vérifier la version du firmware en mode utilisateur ................. 66 29. Assistance technique ............................67 30. Informations de garantie et de service après-vente (SAV) ................67 www.istorage-uk.com...
  • Seite 51: Introduction

    Autrement dit, sans le code PIN, il est impossible de se connecter ! Contenu de la boîte Disque diskAshur PRO avec câble USB intégré 2. Étui de transport élégant 3. Guide de démarrage rapide www.istorage-uk.com...
  • Seite 52: États Des Led Du Diskashur Pro

    « Safely Remove Hardware/Eject » (Supprimer le périphérique en toute sécurité/Éjecter) dans votre système d'exploitation. Pour vous assurer que les données ne sont pas corrompues, nous vous recom- mandons d'utiliser l'option « Supprimer le périphérique en toute sécurité/Éjecter ». www.istorage-uk.com...
  • Seite 53: Déverrouiller Le Diskashur Pro

    1 seconde puis, à l'état déverrouillé, par la LED VERTE continue. 5. Si le code PIN saisi est correct, le disque apparaît en tant que « Périphérique USB iStorage diskAshur PRO  » sous « Computer Management/Device Manager » (Gestion de l'ordinateur/Gestionnaire de périphériques).
  • Seite 54: Modifier Le Code Pin Administrateur

    7 (pqrs) 2 (abc) 7 (pqrs) 7 (pqrs) 9 (wxyz) 6 (mno) 7 (pqrs) 3 (def) • Pour le terme « iStorage », vous appuieriez sur : 4 (ghi) 7 (pqrs) 8 (tuv) 6 (mno) 7 (pqrs) 2 (abc) 4 (ghi) 3 (def) Cette méthode permet de créer des codes PIN longs et faciles à...
  • Seite 55: Ajouter Un Nouveau Code Pin Utilisateur En Mode Administrateur

    La LED ROUGE clignotante est remplacée par la 2. Appuyez à nouveau sur les boutons « SHIFT + 3 » ROUGE continue, puis par la LED BLEUE et maintenez-les enfoncés. continue, indiquant que le code PIN utilisateur a été correctement supprimé. www.istorage-uk.com...
  • Seite 56: Définir Le Mode De Lecture Seule En Mode Administrateur

    La LED VERTE clignote rapidement pendant 3. Ressaisissez le code PIN et appuyez sur le bouton plusieurs secondes, puis est remplacée par la LED « DÉVERROUILLER ». BLEUE continue pour indiquer que le code PIN d'autodestruction a été correctement configuré. www.istorage-uk.com...
  • Seite 57: Comment Supprimer Le Code Pin D'autodestruction

    Le diskAshur PRO doit d'abord être réinitialisé (voir la section 23 « Comment effectuer une réinitialisation complète » à la page 61) afin de créer un code PIN administrateur avec les pleins privilèges administrateur, notamment la possibilité de créer un code PIN utilisateur. www.istorage-uk.com...
  • Seite 58: Comment Créer Un Code Pin Administrateur Après Une Attaque Par Force Brute Ou Une Réinitialisation

    Les LED VERTE BLEUE clignotantes sont remplacées par la LED VERTE continue pendant 3. Appuyez sur le bouton « SHIFT ». une seconde, puis enfin par la LED BLEUE continue, indiquant que le délai du verrouillage automatique a été correctement configuré. www.istorage-uk.com...
  • Seite 59: Désactiver Le Verrouillage Automatique

    LED VERTE qui se met 3. Ressaisissez le nouveau code PIN utilisateur et à clignoter rapidement avant d'être continue, appuyez sur le bouton « DÉVERROUILLER ». indiquant que le code PIN utilisateur a été correctement modifié. www.istorage-uk.com...
  • Seite 60: Définir Le Mode De Lecture Seule En Mode Utilisateur

    2. Si un utilisateur configure le disque en mode lecture seule, l'administrateur peut modifier ce paramètre par le mode lecture/écriture en mode administrateur. 3. Si l'administrateur configure le disque en mode lecture seule, l'utilisateur ne peut pas confi- gurer le disque en mode lecture/écriture. www.istorage-uk.com...
  • Seite 61: Protection Contre Les Attaques Par Force Brute

    Important : après une réinitialisation complète, un nouveau code PIN administrateur doit être créé : consultez la section 15, page 58 intitulée « Comment créer un code PIN administrateur après une attaque par force brute ou une réinitialisation ». Le diskAshur PRO doit aussi être partitionné et formaté avant que toute nouvelle donnée puisse être ajoutée au disque. www.istorage-uk.com...
  • Seite 62: Initialiser Et Formater Le Diskashur Pro

    5. Dans la fenêtre Gestion de l’ordinateur, cliquez sur Gestion des disques. Dans la fenêtre Gestion des disques, le diskAshur PRO est reconnu comme périphérique inconnu non initialisé et non alloué. Remarque : si la fenêtre Initialiser l'assistant de disque s'ouvre, cliquez sur Annuler. 6. Faites un clic droit sur Disque inconnu, puis sélectionnez Initialiser le disque. www.istorage-uk.com...
  • Seite 63 11. Affectez une lettre ou un chemin de disque et cliquez sur Suivant. 12. Créez un libellé de volume, sélectionnez Effectuer un formatage rapide, puis cliquez sur Suivant. 13. Cliquez sur Terminer. 14. Patientez jusqu'à la fin du formatage. Le diskAshur PRO est reconnu et peut être utilisé. www.istorage-uk.com...
  • Seite 64: Configuration Du Diskashur Pro

    1. Sélectionnez diskAshur PRO dans la liste des disques et des volumes. Chaque disque de la liste affiche sa capacité, son fabricant et le nom de produit, tel que « iStorage diskAshur PRO Media » ou 232.9 diskAshur PRO 2. Cliquez sur le bouton « Erase » (Effacer) (figure 1).
  • Seite 65: Mettre En Veille Prolongée, Suspendre Ou Se Déconnecter Du Système D'exploitation

    Pour verrouiller le disque, appuyez simplement sur le bouton « VERROUILLER » sur le diskAshur PRO ou en cliquant sur l'icône « Supprimer le périphérique en toute sécurité/Éjecter » dans votre système d'exploitation. Attention : pour vous assurer que vos données sont sécurisées, veillez à verrouiller le diskAshur PRO vous vous éloignez de votre ordinateur. www.istorage-uk.com...
  • Seite 66: Comment Vérifier La Version Du Firmware En Mode Administrateur

    Par exemple, si le numéro de la version du firmware est « 1.2 », la LED ROUGE clignote une (1) fois et la LED VERTE cli- gnote deux (2) fois. Une fois la séquence terminée, les LED ROUGE, VERTE BLEUE clignotent une fois simultanément, puis sont remplacées par la LED BLEUE continue. www.istorage-uk.com...
  • Seite 67: Assistance Technique

    AUCUNE AUTRE GARANTIE, EXPRESSE OU IMPLICITE, Y COMPRIS TOUTE GARANTIE IMPLICITE DE CONFORMITÉ D'USAGE POUR UN EMPLOI PARTICULIER, N'A ÉTÉ OU NE SERA FAITE PAR ISTORAGE, EN SON NOM OU EN VERTU DE LA LOI EN CE QUI CONCERNE LE PRODUIT OU SON INSTALLATION, UTILISATION, FONCTIONNEMENT, REMPLACEMENT OU RÉPARATION.
  • Seite 68 © iStorage, 2017. Tous droits réservés. iStorage Limited, iStorage House, 13 Alperton Lane Perivale, Middlesex. UB6 8DH, Angleterre Tél. : +44 (0) 20 8991 6260 | Fax : +44 (0) 20 8991 6277 Courriel : info@istorage-uk.com | Site Web : www.istorage-uk.com www.istorage-uk.com...

Inhaltsverzeichnis