Herunterladen Inhalt Inhalt Diese Seite drucken
Eneo IPD-73M2812MWA Schnellinstallationsanleitung
Vorschau ausblenden Andere Handbücher für IPD-73M2812MWA:
Inhaltsverzeichnis

Werbung

Verfügbare Sprachen

Verfügbare Sprachen

All manuals and user guides at all-guides.com
Quick Installation Guide
1/2.8" Network Dome, Fixed,
2048x1536, Day&Night, D-WDR,
2.8-12mm, Infrared, IP67
IPD-73M2812MWA
EN
DE
FR
IT

Werbung

Inhaltsverzeichnis
loading

Inhaltszusammenfassung für Eneo IPD-73M2812MWA

  • Seite 1 All manuals and user guides at all-guides.com Quick Installation Guide 1/2.8” Network Dome, Fixed, 2048x1536, Day&Night, D-WDR, 2.8-12mm, Infrared, IP67 IPD-73M2812MWA...
  • Seite 2: Inhaltsverzeichnis

    All manuals and user guides at all-guides.com Table of content Safety instructions General safety instructions Parts supplied .......................5 • Before switching on and operating the system, first read this safety advice and the operating instructions. • Keep the operating instructions in a safe place for later use. Part names ........................6 •...
  • Seite 3: Graphical Symbols

    All manuals and user guides at all-guides.com Parts supplied Class A device note This is a Class A device. This device can cause malfunctions in the living area; in such an event, the operator may • Dome Camera need to take appropriate measures to compensate for these. •...
  • Seite 4: Part Names

    All manuals and user guides at all-guides.com Part names Installation instructions CAUTION: The camera’s base should be attached to a structural Power cable object, such as concrete, hard wood, wall stud or ceiling rafter that supports the weight of the camera. If necessary use appro- priate mounting material (e.g.
  • Seite 5: Pan & Tilt Adjustments

    CAUTION: Optional mounting accessories Extreme care should be taken NOT to scratch the bubble dome For information on optional mounting accessories please visit the eneo website at www. eneo-security.com. surface while the camera installing or adjusting. Care should be taken the cable is NOT to be damaged, kinked or CAUTION: In the case of installation with Flush/ Surface/ Tilted exposed in the hazardous area.
  • Seite 6: How To Access Via Wi-Fi

    All manuals and user guides at all-guides.com How to access via Wi-Fi 1. Plug the Wi-Fi dongle into the Wi-Fi dongle connector. 2. Plug the Wi-Fi dongle connector into the Wi-Fi connector port on the camera. Wi-Fi connector port Wi-Fi dongle connector Attach the Signal Assignment Sticker in a visible spot for wiring reference.
  • Seite 7: Quick Network Setup

    IP addresses. The network camera‘s default IP address is: 192.168.1.10. 4. Right clicking the device name in the eneo Scan Device tool will bring up the context menu. Use the ‘Open Device Web Site’ option to access the camera.
  • Seite 8: Web Viewer Description

    All manuals and user guides at all-guides.com Web viewer description (5) Record: Records the live video in H.264 format to the equipped storage memory like SD, SDHC or SDXC from the video stream selected in the RECORD menu. (6) Window Fit: Display live view to fit the window size. (7) Full Screen: Resizes the live view display to fit to the monitor resolution.
  • Seite 9: User Manual

    All manuals and user guides at all-guides.com User Manual Setup Menu Table Help the menu function.Click and pop-up the page about current menu description. Category Menu Configuration Pause, Snapshot, Speaker, Microphone, Record Player Control Display (Window Fit, Full Screen, Custom) LIVE VIEW Video Stream Stream1, Stream2, Stream3...
  • Seite 10: Quick Setup

    All manuals and user guides at all-guides.com Quick Setup Overwrite when storage is full, Record Continuous record setting Record Schedule Storage Format, Remove, Storage Information Information Motion, VCA, Tamper, Alarm In, System, Manual, Network, Triggers Timer, Day/Night Shows the overall information about the system such as Model name, MAC address, IP Event Record, Alarm Out, E-Mail, FTP, Video Boost, Notification Actions...
  • Seite 11: Add

    All manuals and user guides at all-guides.com 2. Click the Edit tab, then new pop-up window appears. 3. Type a password (1 to 8 alphanumeric characters) and retype confirm password. The user name can’t be modified. 4. Select one of the groups you wish to assign to the user. 5.
  • Seite 12: Day & Time Display

    All manuals and user guides at all-guides.com Day & Time Display IP address, Subnet mask, Gateway: Select the date & time formats to be displayed. Displays the current IP address which is obtained from the DHCP Use the following IP address: Select the choice box if you want to assign the IP address manually.
  • Seite 13: Further Information

    All manuals and user guides at all-guides.com Further information Make sure to always upgrade to the latest firmware version available from the eneo web- site at www.eneo-security.com to receive the latest functionality for your product. The manual, and other software tools are available on the eneo website at www.eneo-security.com or on the included CD.
  • Seite 14 All manuals and user guides at all-guides.com Inhaltsverzeichnis Lieferumfang .......................28 Bezeichnungen von Gerätekomponenten ...............29 Installationsanweisungen ..................30 Einstellung von Schwenkung und Neigung ......................31 Stromversorgungsanschlüsse ............................ 32 Zugriff über WLAN ......................34 Schnelle Netzwerkkonfiguration ................36 Beschreibung des Web-Viewers ..........................37 Player-Steuerung & Anzeige ..........................37 PTZ-Steuerung ................................
  • Seite 15: Sicherheitsanweisungen

    All manuals and user guides at all-guides.com Sicherheitsanweisungen • Bei abgedunkelter Umgebung und direktem Blick in den IR-Scheinwerfer ist ein Sicherheitsabstand von > 1 m zum Scheinwerfer einzuhalten. • Unsichtbare LED Strahlung nicht direkt mit optischen Instrumenten (z.B. Lupe, Vergrößerungsglas oder Sicherheitshinweise allgemein Mikroskop) betrachten, da sie eine Augengefährdung verursachen kann, LED Klasse 1M.
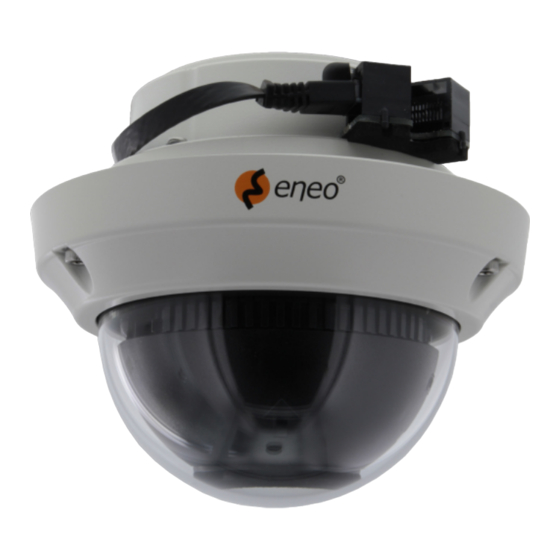
  • Seite 16: Lieferumfang

    All manuals and user guides at all-guides.com Lieferumfang Bezeichnungen von Gerätekomponenten • Dome-Kamera • Betriebsanleitung Netzkabel • CD • Kabelsignal-Aufkleber Einbau • Bohrschablone • Kunststoffdübel: 6 x 30mm (3x) • Befestigungsschraube: 4 x 30mm (3x) • Anschluss-Befestigungsschraube: 2,5 x 5mm (1x) •...
  • Seite 17: Installationsanweisungen

    All manuals and user guides at all-guides.com Installationsanweisungen Optionales Montagezubehör Für weitere Informationen zu optionalem Montagezubehör besuchen Sie bitte die eneo ACHTUNG: Die Kamerahalterung sollte an einem Bauelement Webseite unter www.eneo-security.com. wie etwa Beton, Hartholz, einem Wandständer oder Deckenbal- ken befestigt werden, welches das Gewicht der Kamera trägt.
  • Seite 18: Stromversorgungsanschlüsse

    All manuals and user guides at all-guides.com ACHTUNG: Achten Sie besonders darauf, die Abdeckkuppel der Dome- Kamera während der Installation oder der Einstellung NICHT zu verkratzen. Es muss sorgfältig darauf geachtet werden, das Kabel NICHT zu beschädigen, zu knicken oder Gefahrenbereichen auszusetzen. Ziehen sie die Befestigungsschrauben der Dome-Abdeckung so fest, dass KEIN Spalt zwischen der Streulichtblende und der transparenten Kuppel bleibt, um eine Lichteinstrahlung der IR-...
  • Seite 19: Zugriff Über Wlan

    All manuals and user guides at all-guides.com Zugriff über WLAN 4. Suchen Sie nach dem von der Kamera hergestellten WLAN-Netz und stellen Sie 1. Stecken Sie den WLAN-Dongle in den WLAN-Adapter ein. 2. Stecken Sie den WLAN-Adapter mit dem Dongle in die WLAN-Schnittstelle der WLAN-Schnittstelle WLAN-Adapter die Verbindung zu diesem auf.
  • Seite 20: Schnelle Netzwerkkonfiguration

    1. Nachdem die Kamera mit dem Netzwerk verbunden wurde, starten Sie das 'eneo Scan Device' Tool (auf der mitgelieferten CD). 2. Klicken Sie auf die 'Scan eneo' Taste, um die Kamera in Ihrem Netzwerk zu finden. Die Kamera ist standardmäßig auf DHCP eingestellt. Wenn kein DHCP-Server im Netzwerk vorhanden ist, wird die Kamera nach einer gewissen Zeit auf eine Standard-IP-Adresse zurückgesetzt.
  • Seite 21: Ptz-Steuerung

    All manuals and user guides at all-guides.com (2) Schnappschuss: Erfasst das Bild im .jpg-Format in der aktuellen Auflösung des VORSICHT: Streams. (3) Lautsprecher: Aktiviert das Ausgeben von Audio an den Audioausgang. • Wenn Sie die Konfiguration der Objektiveinstel- (4) Mikrofon: Aktiviert den Audioeingang am Audioeingang-Port. lungen abgeschlossen haben, stellen Sie Setup (5) Aufzeichnung: Aufzeichnung der Live-Ansicht mit der H.264-Kompression auf (Konfiguration)>Video&Image (Video und Bild)>Image...
  • Seite 22: Übersicht Des Konfigurationsmenüs

    All manuals and user guides at all-guides.com Übersicht des Konfigurationsmenüs Bei vollem Speicher überschreiben, Aufzeichnung Einstellungen für Daueraufnahme Aufzeichnung Zeitplan Kategorie Menü Konfiguration Speicher Formatieren, Entfernen, Speicherinformationen Pause, Snapshot, Lautsprecher, Mikrofon, Aufnahme Player-Steuerung Bewegung, Manipulation, VCA, Alarmeingang, System, Auslöser Anzeige: (An Fenstergröße anpassen, Vollbild, Benutzerdefiniert) Manuell, Netzwerk, Timer, Tag-Nacht LIVE-BILD Video-Stream...
  • Seite 23: Schnellkonfiguration

    All manuals and user guides at all-guides.com Schnellkonfiguration Information Zeigt allgemeine Informationen über das System an wie Modellname, MAC-Adresse, IP- Adresse, Zeroconf-IP-Adresse, Firmware-Version, Serverzeit, Betriebszeit, CPU-Auslastung, den ein- und ausgehenden Datenverkehr und die Open-Source-Liste. Klicken Sie auf die Schaltflächen Hinzufügen, Ändern oder Löschen, um die Benutzerkon- ten zu verwalten.
  • Seite 24: Bearbeiten

    All manuals and user guides at all-guides.com Bearbeiten • Synchronize with NTP Server (Synchronisation mit NTP-Server): Stellt die Uhrzeit alle 60 Minuten anhand des zugewiesenen NTP-Servers ein. Die IP-Adresse oder Zum Bearbeiten eines Benutzers: der Host-Name des NTP-Servers wird im Zeitserver angegeben. 1.
  • Seite 25: Netzwerk

    All manuals and user guides at all-guides.com Netzwerk • PRIMARY DNS SERVER (Primärer DNS-Server): Geben Sie die IP-Adresse des primä- ren DNS-Servers ein. Wenn im Netzwerk ein DHCP-Server (Dynamic Host Configuration Protocol) vorhanden • SECONDARY DNS SERVER (Sekundärer DNS-Server): Geben Sie die IP-Adresse des ist, weist dieser Netzwerkgeräten automatisch eine IP-Adresse zu.
  • Seite 26: Weitere Informationen

    Die aktuellsten Firmware-Versionen finden Sie auf unserer Website unter www.eneo-security.com. Das Benutzerhandbuch und weitere Software-Tools sind auf der eneo Website unter www.eneo-security.com oder auf der mitgelieferten CD verfügbar. Informationen zu kompatiblen Video Management Software-Lösungen finden Sie in der Kategorie Videomanagement unter www.eneo-security.com.
  • Seite 27 All manuals and user guides at all-guides.com Contenu Matériel livré .......................52 Noms des pièces ......................53 Instructions d'installation ..................54 Réglages Panoramique/Inclinaisons ........................55 Connexions d'alimentation ............................56 Méthode d'accès via le réseau Wi-Fi ................58 Configuration rapide du réseau .................60 Description de la visionneuse web (Web viewer) ..................... 61 Commande du lecteur &...
  • Seite 28: Instructions De Sécurité

    All manuals and user guides at all-guides.com Instructions de sécurité • Une distance de sécurité > 1 m doit être respectée par rapport au projecteur dans un environnement sombre, quand on regarde directement dans le projecteur IR. • Les rayons invisibles des LED ne doivent pas être observés directement avec des instruments optiques (par Consignes de sécurité...
  • Seite 29: Matériel Livré

    All manuals and user guides at all-guides.com Matériel livré Noms des pièces • Caméra dôme • Mode d'emploi Câble d'alimentation • CD • Étiquette de signalisation du câble Montage encastrable • Gabarit de perçage • Chevilles en plastique : 6 x 30mm (3x) •...
  • Seite 30: Instructions D'installation

    Pour plus d'iinformations concernant les accessoires de montage, visitez le site Internet ATTENTION : La base de la caméra doit être fixée à une surface d'eneo sous www.eneo-security.com. solide, comme du bois dur, un mur, pilier ou poutre au plafond apte à...
  • Seite 31: Connexions D'alimentation

    All manuals and user guides at all-guides.com ATTENTION : Il faudra veiller à ne pas érafler la surface de la coupole lors de l'installation ou le réglage de la caméra. Veillez à ne PAS endommager, déformer ou exposer le câble dans une zone dangereuse.
  • Seite 32: Méthode D'accès Via Le Réseau Wi-Fi

    All manuals and user guides at all-guides.com Méthode d'accès via le réseau Wi-Fi 4. Recherchez le réseau Wi-Fi généré par la caméra et connectez-vous à ce dernier. 1. Branchez le dongle Wi-Fi dans le connecteur du dongle Wi-Fi. 2. Branchez le connecteur du dongle Wi-Fi dans le port du connecteur Wi-Fi de la Port du connecteur Wi-Fi Connecteur du dongle Wi-Fi Dongle Wi-Fi...
  • Seite 33: Configuration Rapide Du Réseau

    Configuration rapide du réseau Description de la visionneuse web (Web viewer) 1. Après avoir connecté la caméra au réseau, démarrez l'outil de balayage ‘eneo Scan Device’ (CD inclus). 2. Utilisez le bouton ‘Scan eneo’ (Balayer) pour trouver la caméra dans votre réseau.
  • Seite 34: Commande Ptz

    All manuals and user guides at all-guides.com (2) Snapshot (Instantané) : capture l'image au format .jpg avec la résolution du flux ATTENTION : actuel. (3) Speaker (Haut-parleur) : permet la sortie du signal audio au port de sortie audio. • Réglez la fonction LENS LOCKING (Verrouillage de l'ob- (4) Microphone : permet d'entrer le signal audio à...
  • Seite 35: Tableau Du Menu Configuration

    All manuals and user guides at all-guides.com Tableau du menu Configuration Écraser lorsque le disque est plein, Enregistrement paramètres d'enregistrement continu Enregistrement Programmation Catégorie Menu Configuration Stockage Formater, supprimer, stocker des informations Pause, instantané, haut-parleur, microphone, enregistrer Commande du lecteur Motion, VCA, Manipulation, Alarme, Système, Manuel, Déclencheurs Afficher (Ajustement de la fenêtre, Plein écran, Personnalisé)
  • Seite 36: Configuration Rapide

    All manuals and user guides at all-guides.com Configuration rapide Information Affiche les informations générales sur le système telles que le nom du modèle, l'adresse MAC, l'adresse IP, Zeroconf, l'adresse IP, la version du micro-programme, l'heure du serveur, le temps de fonctionnement, l'utilisation du processeur, la bande passante en- trante / sortante et la liste des sources libres.
  • Seite 37: Éditer

    All manuals and user guides at all-guides.com Éditer Fuseau horaire Pour modifier un utilisateur : Sélectionnez le fuseau horaire à référencer sur le serveur NTP où la caméra est installée. Marquer la case à cocher AUTOMATICALLY ADJUST FOR DAYLIGHT SAVING CHANGES 1.
  • Seite 38: Adresse Ipv4

    All manuals and user guides at all-guides.com Adresse IPv4 Obtenir l'adresse IP via le serveur DHCP : Obtient l'adresse IP attribuée par le serveur DHCP (Dynamic Host Configuration Protocol). Statut : 'Allocated' montre que l'adresse IP est obtenue auprès du DHCP. Adresse IP, Masque de sous-réseau, Passerelle : Affiche l'adresse IP actuelle qui est obtenue à...
  • Seite 39: Complément D'information

    Le manuel utilisateur et d’autres outils logiciels sont disponibles sur le site web eneo www.eneo-security.com ou sur le CD joint. Des informations concernant les solutions logicielles de gestion vidéo compatibles sont disponibles dans la catégorie Videomanagement (gestion des vidéos) sur www.eneo-se-...
  • Seite 40 All manuals and user guides at all-guides.com Indice Parti fornite .........................76 Denominazione dei componenti ................77 Istruzioni per l'installazione ..................78 Regolazione della panoramica e dell'inclinazione ..................... 79 Collegamento all'alimentazione ..........................80 Come accedere tramite Wi-Fi ..................82 Configurazione rapida della rete ................84 Descrizione del visualizzatore Web .........................
  • Seite 41: Istruzioni Generali Per La Sicurezza

    All manuals and user guides at all-guides.com Istruzioni per la sicurezza • Deve essere mantenuto un margine di sicurezza di > 1 m dal proiettore se si guarda direttamente nel proiettore IR in un ambiente buio. • Non guardare direttamente le radiazioni LED invisibili utilizzando strumenti ottici (ad es. lente, lente di Istruzioni generali per la sicurezza ingrandimento o microscopio) per prevenire danni agli occhi ( LED classe 1M).
  • Seite 42: Parti Fornite

    All manuals and user guides at all-guides.com Parti fornite Denominazione dei componenti • Telecamera dome • Istruzioni per l'uso Cavo di alimentazione • CD • Adesivo identificazione cavi Montaggio a incasso • Dima di montaggio • Tasselli di plastica: 6 x 30 mm (3x) •...
  • Seite 43: Istruzioni Per L'installazione

    All manuals and user guides at all-guides.com Istruzioni per l'installazione Accessori di montaggio opzionali Per informazioni sugli accessori di montaggio opzionali visitare il sito web eneo all'indiriz- CAUTION: The camera’s base should be attached to a structural zo www.eneo-security.com. object, such as concrete, hard wood, wall stud or ceiling rafter that supports the weight of the camera.
  • Seite 44: Collegamento All'alimentazione

    All manuals and user guides at all-guides.com ATTENZIONE: prestare estrema attenzione a NON graffiare la superficie della cupola durante le operazioni di installazione o regolazione. Fare attenzione a NON danneggiare, piegare o avvicinare il cavo alla zona di pericolo. Serrare le viti di fissaggio del coperchio della telecamera in modo che NON vi sia alcuna fessura tra il coperchio dell'obbiettivo e la cupola trasparente per evitare riflessi della luce dei LED IR.
  • Seite 45: Come Accedere Tramite Wi-Fi

    All manuals and user guides at all-guides.com Come accedere tramite Wi-Fi 4. Cercare e connettersi al Wi-Fi generato dalla telecamera. 1. Inserire il dongle Wi-Fi nel connettore del dongle Wi-Fi. 2. Inserire il connettore del dongle Wi-Fi nella porta del connettore Wi-Fi sulla Porta del connettore Wi-Fi Connettore dongle Wi-Fi Dongle Wi-Fi...
  • Seite 46: Configurazione Rapida Della Rete

    L'indirizzo IP predefinito della telecamera di rete è: 192.168.1.10. 4. Facendo clic con il tasto destro del mouse sul nome del dispositivo nello strumen- to eneo Scan Device si apre il menu di scelta rapida. Utilizzare l'opzione "Open Device Web Site" per accedere alla telecamera.
  • Seite 47: Controllo Ptz

    All manuals and user guides at all-guides.com (1) Pausa: mette in pausa la visualizzazione live. ATTENZIONE: (2) Snapshot: cattura l'immagine in formato .jpg con la risoluzione dello stream corrente. • Impostare LENS LOCKING (Blocco obbiettivo) in Setup>- (3) Altoparlante: consente l'uscita audio alla porta uscita audio. Video&Image>Image>AF>impostare Lens Locking su ON (4) Microfono: consente l'ingresso audio dalla porta di ingresso audio.
  • Seite 48: Tabella Del Menu Di Impostazione

    All manuals and user guides at all-guides.com Tabella del menu di impostazione Sovrascrittura quando la memoria è piena, Registrazione registrazione continua Registrazione Schedule Categoria Menu Configurazione Storage Format, Remove, Storage Information Pause, Snapshot, Speaker, Microphone, Record Player Control Motion, VCA, Tamper, Alarm In, System, Manual, Network, Triggers Display (Window Fit, Full Screen, Custom) Timer, Day/Night...
  • Seite 49: Configurazione Rapida

    All manuals and user guides at all-guides.com Configurazione rapida Informazioni Visualizza le informazioni generali sul sistema come il nome del modello, l'indirizzo MAC, l'indirizzo IP, l'indirizzo IP Zeroconf, la versione del firmware, l'ora del server, il tempo di esecuzione, l'utilizzo della CPU, la larghezza di banda in entrata / in uscita e l'elenco Open Source.
  • Seite 50: Edit (Modifica)

    All manuals and user guides at all-guides.com Edit (Modifica) Time Zone (Fuso orario) Per modificare un utente: Selezionare il fuso orario da utilizzare sul server NTP in cui è installata la telecamera. Sele- zionare la casella di controllo AUTOMATICALLY ADJUST FOR DAYLIGHT SAVING CHANGES 1.
  • Seite 51: Indirizzo Ipv4

    All manuals and user guides at all-guides.com Indirizzo IPv4 Obtain IP address via DHCP (Ottieni indirizzo IP tramite DHCP): Ottiene l'indirizzo IP assegnato dal server DHCP (Dynamic Host Configuration Protocol). Status (Stato) 'Allocated' indica che l'indirizzo IP viene ottenuto dal DHCP. IP address (Indirizzo IP), Subnet mask, Gateway Mostra l'indirizzo IP corrente ottenuto da DHCP Use the following IP address (Utilizza il seguente indirizzo IP):...
  • Seite 52: Altre Informazioni

    Il software fornito con questo prodotto contiene software protetto da copyright il cui utilizzo viene concesso con licenze open source. È possibile richiedere a Eneo il codice sorgente completo per un periodo di tre anni dopo l'ultima spedizione di questo prodotto inviando un'e-mail a: opensource@eneo-security.com.
  • Seite 53 All manuals and user guides at all-guides.com...
  • Seite 54 All manuals and user guides at all-guides.com eneo® is a registered trademark of VIDEOR E. Hartig GmbH Exclusive distribution through specialised trade channels only. VIDEOR E. Hartig GmbH Carl-Zeiss-Straße 8 63322 Rödermark/Germany Tel. +49 (0) 6074 / 888-0 Technical changes reserved Fax +49 (0) 6074 / 888-100 www.videor.com...

Inhaltsverzeichnis