Herunterladen Diese Seite drucken
Saeco Odea Giro Bedienungsanleitung
Vorschau ausblenden Andere Handbücher für Odea Giro:

Werbung

Verfügbare Sprachen
  • DE

Verfügbare Sprachen

  • DEUTSCH, seite 51
All manuals and user guides at all-guides.com
Saeco
International Group S.p.A.
Via Torretta, 240
I-40041 Gaggio Montano, Bologna
Tel: + 39 0534 771111
Fax: + 39 0534 31025
www.saeco.com
De fabrikant behoudt zich het recht voor om zonder voorafgaande kennisgeving
wijzigingen aan te brengen.
Producent zastrzega sobie prawo do wprowadzenia jakichkolwiek zmian bez wcześniejszej zapowiedzi.
© Saeco International Group S.p.A.

Werbung

loading

Inhaltszusammenfassung für Saeco Odea Giro

  • Seite 1 Tel: + 39 0534 771111 Fax: + 39 0534 31025 www.saeco.com De fabrikant behoudt zich het recht voor om zonder voorafgaande kennisgeving wijzigingen aan te brengen. Producent zastrzega sobie prawo do wprowadzenia jakichkolwiek zmian bez wcześniejszej zapowiedzi. © Saeco International Group S.p.A.
  • Seite 2: Instrukcja Obsługi I Konserwacji

    All manuals and user guides at all-guides.com Handleiding voor gebruik en onderhoud Raadpleeg deze aanwijzingen alvorens de machine in gebruik te nemen. Lees aandachtig de veiligheidsvoorschriften. Instrukcja obsługi i konserwacji Przed użyciem urządzenia należy zapoznać się z niniejszą instrukcją obsługi. Przeczytać...
  • Seite 3: Inhaltsverzeichnis

    All manuals and user guides at all-guides.com INHOUD TECHNISCHE GEGEVENS ....................3 BELANGRIJKE VOORZORGSMAATREGELEN ...............4 APPARAAT ........................6 ACCESSOIRES ..............................6 INSTALLATIE ........................7 STARTEN VAN DE MACHINE ........................7 FILTER “AQUA PRIMA” ..........................8 BEDIENINGSPANEEL .......................9 INSTELLEN ........................10 HOEVEELHEID KOFFIE IN HET KOPJE .....................10 (OPTI-DOSE) INDICATIE HOEVEELHEID GEMALEN KOFFIE) ..............10 HOOGTE VAN HET LEKBAKJE VERSTELLEN ...................10 KOFFIEMOLEN INSTELLEN ........................11 KOFFIEAFGIFTE ......................12...
  • Seite 4: Technische Gegevens

    All manuals and user guides at all-guides.com TECHNISCHE GEGEVENS TECHNISCHE GEGEVENS • Nominale spanning Zie het plaatje op het apparaat • Nominale spanning Zie het plaatje op het apparaat • Voeding Zie het plaatje op het apparaat • Materiaal behuizing ABS - Thermoplastisch •...
  • Seite 5: Belangrijke Voorzorgsmaatregelen

    All manuals and user guides at all-guides.com BELANGRIJKE VOORZORGSMAATREGELEN Het is aangeraden om tijdens het gebruik van elektrische huishoudapparaten enkele voorzorgsmaatregelen in acht te nemen om het risico op brand, elektrische schokken en/of ongevallen te beperken. • Lees aandachtig alle aanwijzingen en informatie in deze handleiding en in alle brochures die zich in de verpakking bevinden alvorens de espressomachine te starten of te gebruiken.
  • Seite 6 All manuals and user guides at all-guides.com AANWIJZINGEN VOOR HET ELEKTRISCHE SNOER • Het bijgeleverde elektrische snoer is kort om te vermijden dat u er in verwikkeld geraakt of er over struikelt. • U kunt als u zeer voorzichtig bent verlengsnoeren gebruiken. Wanneer u een verlengsnoer gebruikt, ga dan na: a.
  • Seite 7: Apparaat

    All manuals and user guides at all-guides.com APPARAAT Koffi ebonenreservoir Plaats voor koffi ekopjes Deksel koffi ebonenreservoir Hoofdschakelaar Bedieningspaneel Serviceluikje Koffi euitloop Koffi ediklade Lekbakje + rooster en vlotter Kraanknop heet water/stoom Heetwaterpijpje Waterreservoir Druipbakje Centrale unit Kuipvormig aansluitpunt voor voedingskabel ACCESSOIRES Voedingskabel Sleutel voor het instellen...
  • Seite 8: Installatie

    All manuals and user guides at all-guides.com INSTALLATIE STARTEN VAN DE MACHINE Controleer of de hoofdschakelaar niet ingedrukt is. Controleer de kenmerken van de machine die zich op het gegevensplaatje aan de onderzijde van de machine bevinden. Til het deksel van het Vul het koffi...
  • Seite 9: Filter "Aqua Prima

    All manuals and user guides at all-guides.com FILTER “AQUA PRIMA” Wacht tot het water er vlot Draai de knop tot op de ruststand Druk opnieuw op de toets. Het uitstroomt. ( ). lampje gaat uit. Neem het bakje weg. De machine is gereed. Wanneer de machine is opgewarmd zal ze een spoelcyclus van de interne circuits uitvoeren.
  • Seite 10: Bedieningspaneel

    All manuals and user guides at all-guides.com BEDIENINGSPANEEL Alarmled koffi ediklade legen: • brandt constant: geeft aan dat de koffi ediklade geleegd moet worden; dit moet gebeuren terwijl de machine aanstaat (punten 4 en 5 van pag.17). Knop om de hoeveelheid koffi e in een kopje te regelen (zie pag. 10) Toets voor koffi...
  • Seite 11: Instellen

    All manuals and user guides at all-guides.com INSTELLEN HOEVEELHEID KOFFIE IN HET KOPJE Om de hoeveelheid koffi e in te stellen die verstrekt wordt in het kopje. Gewoon kopje koffi e Deze instelling heeft direct effect op de geselecteerde afgifte. Espressokoffi...
  • Seite 12: Koffiemolen Instellen

    All manuals and user guides at all-guides.com KOFFIEMOLEN INSTELLEN De machine biedt de mogelijkheid om de maalfi jnheid van de koffi e iets te wijzigen. Zo kunt u de koffi eafgifte aan uw persoonlijke smaak aanpassen. De instelling kan met de pin binnen in het koffi ereservoir veranderd worden, draai de pin uitsluitend met behulp van de bijgeleverde sleutel.
  • Seite 13: Koffieafgifte

    All manuals and user guides at all-guides.com AFGIFTE VAN KOFFIE KOFFIEAFGIFTE De koffi eafgiftecyclus kan op ieder moment onderbroken worden door op de toets te drukken. Bij de afgifte van 2 kopjes zal de machine de helft van de ingestelde hoeveelheid uitschenken en even stoppen om daarna de tweede dosis koffi...
  • Seite 14: Afgifte Van Heet Water

    All manuals and user guides at all-guides.com AFGIFTE VAN HEET WATER. AFGIFTE VAN HEET WATER Bij het starten van de afgifte kan het hete water enigszins spetteren met risico voor brandwonden. De tuit van het heet water/stoompijpje kan erg heet worden: vermijd direct contact met de handen, gebruik alleen de speciale handgreep.
  • Seite 15: Cappuccino

    All manuals and user guides at all-guides.com CAPPUCCINO CAPPUCCINO Bij het starten van de afgifte kan het hete water enigszins spetteren met risico voor brandwonden. De tuit van het heet water/stoompijpje kan erg heet worden: vermijd direct contact met de handen, gebruik alleen de speciale handgreep. Regel de hoogte van het Vul het kopje voor 1/3 met Steek het stoompijpje helemaal...
  • Seite 16: Ontkalking

    De ontkalking moet uitgevoerd worden wanneer dit door de machine wordt gesignaleerd. Gebruik een ontkalkingsmiddel van een type dat niet giftig of schadelijk is. Geadviseerd wordt om het ontkalkingsmiddel van Saeco te gebruiken. De gebruikte oplossing moet weggegoten worden volgens de instructies van de fabrikant en/of de geldende normen van het land waar het wordt gebruikt.
  • Seite 17 All manuals and user guides at all-guides.com ONTKALKING Giet de ontkalkingsoplossing uit Druk op de toets om de Herhaal de onder punt de houder. machine uit te zetten. Zet de 3 tot punt 8 beschreven machine na 10 minuten weer handelingen totdat er geen aan.
  • Seite 18: Reiniging En Onderhoud

    All manuals and user guides at all-guides.com REINIGING EN ONDERHOUD REINIGING VAN DE MACHINE De hieronder beschreven reiniging moet ten minste een keer per week worden uitgevoerd.Dompel de machine niet in water onder en was de componenten niet in de vaatwasmachine.
  • Seite 19: Reiniging Van De Centrale Unit

    All manuals and user guides at all-guides.com REINIGING EN ONDERHOUD REINIGING VAN DE CENTRALE UNIT De centrale unit moet ten minste een keer per week gereinigd worden. Om de centrale unit te kunnen verwijderen moet eerst de koffi ediklade weggenomen worden, zoals getoond in afb. 4 op pag.17. Nadat de centrale unit gewassen en teruggeplaatst is, de koffi...
  • Seite 20: Problemen - Oorzaken - Oplossingen

    All manuals and user guides at all-guides.com PROBLEMEN - OORZAKEN - OPLOSSINGEN ROBLEMEN ORZAKEN PLOSSINGEN De machine kan niet worden De machine is niet op het Sluit de machine op het ingeschakeld. elektriciteitsnet aangesloten. elektriciteitsnet aan. De stekker aan de achterzijde van Steek de stekker in het stopcontact de machine is niet aangesloten.
  • Seite 21: Veiligheidsnormen

    All manuals and user guides at all-guides.com VEILIGHEIDSNORMEN N NOODGEVALLEN Onmiddellijk de stekker uit het stopcontact van het elektriciteitsnet halen. ET APPARAAT MAG UITSLUITEND GEBRUIKT WORDEN - In een afgesloten ruimte. - Voor het bereiden van koffi e, heet water, voor het kloppen van melk of voor het opwarmen van dranken door middel van stoom.
  • Seite 22 All manuals and user guides at all-guides.com TORINGEN - Gebruik het apparaat niet als u weet of vermoedt dat het defect is, bijv. als het gevallen is. - Eventuele reparaties mogen alleen door een erkend servicecentrum worden uitgevoerd. - Gebruik geen apparaat met een defecte voedingskabel. Indien de voedingskabel beschadigd is moet deze door de fabrikant of door zijn klantenservice vervangen worden.
  • Seite 23 All manuals and user guides at all-guides.com...
  • Seite 24 All manuals and user guides at all-guides.com...
  • Seite 25 All manuals and user guides at all-guides.com SPIS TREŚCI DANE TECHNICZNE ......................3 WAŻNE OSTRZEŻENIA ....................4 URZĄDZENIE ........................6 AKCESORIA ..............................6 INSTALACJA........................7 URUCHOMIENIE URZĄDZENIA........................7 FILTR WODY ..............................8 PANEL STERUJĄCY ......................9 REGULACJE ........................10 ILOŚĆ KAWY W FILIŻANCE ........................10 (OPTI-DOSE) USTAWIENIE ILOŚCI ZMIELONEJ KAWY ................10 REGULACJA POZYCJI TACY OCIEKOWEJ ....................10 REGULACJA MŁYNKA ..........................11 NALEWANIE KAWY ......................12...
  • Seite 26: Dane Techniczne

    All manuals and user guides at all-guides.com DANE TECHNICZNE DANE TECHNICZNE Napięcie znamionowe Patrz tabliczka znamionowa umieszczona na urządzeniu. Moc znamionowa Patrz tabliczka znamionowa umieszczona na urządzeniu. Zasilanie Patrz tabliczka znamionowa umieszczona na urządzeniu. Materiał obudowy ABS – Odporny na wysoką temperaturę. Wymiary (dł.
  • Seite 27: Ważne Ostrzeżenia

    All manuals and user guides at all-guides.com WAŻNE OSTRZEŻENIA Podczas wykorzystywania urządzeń elektrycznych AGD zalecane jest przestrzeganie środków ostrożności, mających na celu ograniczenie możliwości zagrożenia pożarem, porażeniem prądem oraz nieszczęśliwymi wypadkami. • Przed włączeniem ekspresu lub przystąpieniem do jego użytkowania, należy uważnie przeczytać wszystkie wskazówki i informacje podane w niniejszej instrukcji oraz wszystkich innych materiałach, które zostały umieszczone w opakowaniu urządzenia.
  • Seite 28 All manuals and user guides at all-guides.com INSTRUKCJE DOTYCZĄCE PRZEWODU ZASILAJĄCEGO • Przewód zasilający ekspresu jest relatywnie krótki, co w zasadzie uniemożliwia zaplątanie się w nim lub potknięcie. Przedłużacze przewodu zasilającego mogą być stosowane, ale wymaga to większej ostrożności w obchodzeniu się...
  • Seite 29: Urządzenie

    All manuals and user guides at all-guides.com URZĄDZENIE Pojemnik na kawę ziarnistą Taca do odstawiania fi liżanek Pokrywa pojemnika do kawy ziarnistej Wyłącznik główny Panel sterujący Drzwiczki serwisowe Dozownik Kasetka na fusy Taca ociekowa + kratka i czujnik poziomu wody Pokrętło zaworu dyszy gorącej wody/pary Dysza gorącej...
  • Seite 30: Instalacja

    All manuals and user guides at all-guides.com INSTALACJA URUCHOMIENIE URZĄDZENIA Upewnić się czy wyłącznik główny nie jest włączony. Sprawdzić parametry podane na tabliczce danych umieszczonej w dolnej części urządzenia. Podnieść pokrywę pojemnika Napełnić pojemnik kawą ziarnistą. Wyciągnąć zbiornik wodyZaleca na kawę ziarnistą. Zamknąć, umieszczając pokrywę...
  • Seite 31: Filtr Wody

    All manuals and user guides at all-guides.com FILTR WODY Zaczekać, aż woda zacznie Obrócić pokrętło aż do pozycji Nacinąć ponownie przycisk. wypływać regularnym spoczynku ( ). Kontrolka gaśnie. Usunąć strumieniem. pojemnik. Urządzenie jest gotowe do pracy. Po rozgrzaniu się, urządzenie wykonuje cykl płukania obwodów wewnętrznych. Zostaje nalana mała ilość wody;...
  • Seite 32: Panel Sterujący

    All manuals and user guides at all-guides.com PANEL STERUJĄCY kontrolka alarmowa opróżnienia kasetki na fusy: • jeśli świeci ciągle: sygnalizuje konieczność opróżnienia kasetki na fusy; czynność ta musi być wykonana przy urządzeniu włączonym (Punkt 4 i 5 str.17). Pokrętło do regulacji ilości kawy w fi liżance (patrz str.10). Przycisk nalewania kawy: •...
  • Seite 33: Regulacje

    All manuals and user guides at all-guides.com REGULACJE ILOŚĆ KAWY W FILIŻANCE Aby uregulować ilość kawy nalewanej do fi liżanki. Kawa średnia Regulacja ta ma efekt natychmiastowy przy wybranym nalewaniu. Kawa espresso Kawa duża (OPTI-DOSE) USTAWIENIE ILOŚCI ZMIELONEJ KAWY Przy pomocy przycisku mamy możliwość...
  • Seite 34: Regulacja Młynka

    All manuals and user guides at all-guides.com REGULACJA MŁYNKA Urządzenie pozwala na dokonanie regulacji stopnia zmielenia kawy. Pozwoli to na dostosowanie jakości parzonej kawy do własnych upodobań i gustów. Ta regulacja musi być wykonana przez przekręcenie trzpienia znajdującego się wewnątrz zbiornika kawy;...
  • Seite 35: Nalewanie Kawy

    All manuals and user guides at all-guides.com NALEWANIE KAWY NALEWANIE KAWY Cykl nalewania kawy może być przerwany w każdej chwili przez naciśnięcie przycisku Do nalania 2 fi liżanek, urządzenie nalewa połowę określonej ilości i przerywa na krótko nalewanie, by zmielić drugą porcję kawy. Po czym nalewanie kawy zostanie wznowione i zakończone. Uregulować...
  • Seite 36: Nalewanie Gorącej Wody

    All manuals and user guides at all-guides.com NALEWANIE GORĄCEJ WODY NALEWANIE GORĄCEJ WODY Na początku mogą wystąpić krótkie wytryski gorącej wody z niebezpieczeństwem oparzeń. Dysza gorącej wody/pary może osiągać wysokie temperatury: unikać bezpośredniego dotykania jej rękami, używać jedynie przeznaczonego do tego celu uchwytu. Uregulować...
  • Seite 37: Cappuccino

    All manuals and user guides at all-guides.com CAPPUCCINO CAPPUCCINO Na początku mogą wystąpić krótkie wytryski gorącej wody z niebezpieczeństwem oparzeń. Dysza gorącej wody/pary może osiągać wysokie temperatury: unikać bezpośredniego dotykania jej rękami, używać jedynie przeznaczonego do tego celu uchwytu. Uregulować położenie tacy Napełnić...
  • Seite 38: Odwapnienie

    Odwapnienie musi być przeprowadzone co 2-3 miesiące lub gdy urządzenie sygnalizuje taką konieczność. Nie stosować środków odwapniających toksycznych lub szkodliwych. Zaleca się stosowanie środków odwapniających Saeco. Roztwór, który będzie używany musi być usunięty w sposób przewidziany przez producenta i/lub według norm obowiązujących w kraju używania.
  • Seite 39 All manuals and user guides at all-guides.com ODWAPNIENIE Opróżnić pojemnik z roztworu Nacisnąć przycisk by wyłączyć Powtórzyć czynności od punktu odwapniającego. urządzenie. Po 10 minutach 3 do punktu 8, aż do momentu włączyć ponownie urządzenie. zużycia całego roztworu odwapniającego obecnego w pojemniku.
  • Seite 40: Czyszczenie I Konserwacja

    All manuals and user guides at all-guides.com CZYSZCZENIE I KONSERWACJA CZYSZCZENIE URZĄDZENIA. Czyszczenie urządzenia powinno być wykonywane przynajmniej raz w tygodniu. Nie zanurzać urządzenia w wodzie i nie myć jego części w zmywarce do naczyń. Nie używać alkoholu etylowego, rozpuszczalników, benzyny i ostrych przedmiotów do czyszczenia urządzenia.
  • Seite 41: Czyszczenie Bloku Zaparzającego

    All manuals and user guides at all-guides.com CZYSZCZENIE I KONSERWACJA CZYSZCZENIE BLOKU ZAPARZAJĄCEGO Blok zaparzający musi być czyszczony przynajmniej raz w tygodniu. Przed wyjęciem bloku, należy wyjąć kasetkę na fusy tak jak to pokazane na rysunku 4 na str.17. Po umyciu i wlożeniu bloku zaparzającego, włożyć...
  • Seite 42: Problemy - Przyczyny - Rozwiązanie

    All manuals and user guides at all-guides.com PROBLEMY - PRZYCZYNY - ROZWIĄZANIE ROBLEMY RZYCZYNY OZWIĄZANIE Urządzenie nie włącza się. Urządzenie nie jest połączone do Podłączyć urządzenie do sieci sieci eletrycznej. elektycznej. Wtyczka nie została włożona do Włożyć wtyczkę do gniazdka gniazda w tylnej części ekspresu.
  • Seite 43: Normy Bezpieczeństwa

    All manuals and user guides at all-guides.com NORMY BEZPIECZEŃSTWA PRZYPADKU ZAGROŻENIA Wyciągnąć natychmiast wtyczkę z gniazdka sieci zasilania. ŻYWAĆ URZĄDZENIE JEDYNIE W NASTĘPUJĄCYCH WARUNKACH - W zamkniętym miejscu - Do przygotowywania kawy, gorącej wody, do spienienia mleka i do ogrzewania napojów przy użyciu pary. - Do użytku domowego.
  • Seite 44 All manuals and user guides at all-guides.com WARIE - Nie używać urządzenia w przypadku podejrzenia lub pewności uszkodzenia, na przykład po upadku. - Ewentualne reparacje muszą być wykonane przez autoryzowany serwis techniczny. - Nie używać urządzenia gdy kabel zasilający jest wadliwy. Gdy kabel zasilający jest uszkodzony, musi być wymieniony przez własny serwis obsługi klientów.
  • Seite 45 All manuals and user guides at all-guides.com...
  • Seite 46 All manuals and user guides at all-guides.com...
  • Seite 47 All manuals and user guides at all-guides.com...
  • Seite 48 All manuals and user guides at all-guides.com...
  • Seite 49 I-40041 Gaggio Montano, Bologna Tel: + 39 0534 771111 Fax: + 39 0534 31025 www.saeco.com Der Hersteller behält sich das Recht vor, Änderungen ohne Ankündigung vorzunehmen. Il produttore si riserva il diritto d `apportare qualsiasi modifica senza preavviso. © Saeco International Group S.p.A.
  • Seite 50 All manuals and user guides at all-guides.com Bedienungsanleitung Bitte lesen Sie diese Bedienungsanleitung und die Sicherheitsvorschriften vor Verwendung des Gerätes aufmerksam durch. Manuale uso e manutenzione Prima di utilizzare la macchina consultare le presenti istruzioni. Leggere attentamente le norme di sicurezza...
  • Seite 51 All manuals and user guides at all-guides.com INHALTSVERZEICHNIS TECHNISCHE DATEN .......................3 WICHTIGE VORSICHTSMASSNAHMEN .................4 GERÄT..........................6 ZUBEHÖR ...............................6 ANSCHLUSS ........................7 EINSCHALTEN DER MASCHINE ........................7 FILTER “AQUA PRIMA” ..........................8 BEDIENFELD ........................9 EINSTELLUNGEN ......................10 MENGE DES KAFFEES IN DER TASSE ......................10 (OPTI-DOSE) ANGABE MENGE GEMAHLENER KAFFEE ................10 HÖHENEINSTELLUNG DER ABTROPFSCHALE ..................10 MAHLWERKEINSTELLUNGEN ........................11 AUSGABE KAFFEE ......................12...
  • Seite 52: Technische Daten

    All manuals and user guides at all-guides.com TECHNISCHE DATEN TECHNISCHE DATEN • Nennspannung Siehe Typenschild auf dem Gerät • Nennleistung Siehe Typenschild auf dem Gerät • Stromversorgung Siehe Typenschild auf dem Gerät • Gehäusematerial ABS - Thermoplastisches Material • Abmessungen (L x H x T) (mm) 290 x 370 x 385 •...
  • Seite 53: Wichtige Vorsichtsmassnahmen

    HINWEIS Dieser Kaffeevollautomat wurde ausschließlich für den Haushalt entwickelt. Sämtliche Eingriffe, mit Ausnahme der Reinigung oder normalen Wartung dürfen ausschließlich durch den autorisierten Saeco Kundendienst vorgenommen werden. Das Gerät nicht ins Wasser tauchen. Reparaturen dürfen nur durch Fachpersonal des autorisierten Kundendienstes erfolgen.
  • Seite 54: Allgemeines

    All manuals and user guides at all-guides.com BETRIEBSANLEITUNGEN ZUM NETZKABEL • Das mitgelieferte Netzkabel ist relativ kurz, damit es sich nicht verdrehen kann oder Sie darüber stolpern. Längere Netzkabel können verwendet werden, doch sollte man dabei mit größter Vorsicht vorgehen. •...
  • Seite 55: Gerät

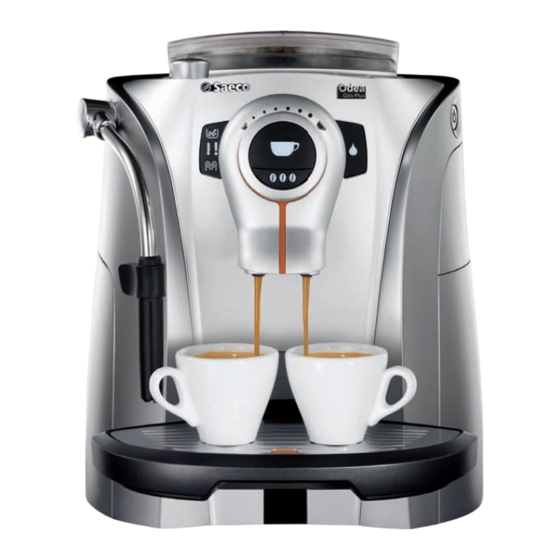
    All manuals and user guides at all-guides.com GERÄT Kaffeebohnenbehälter Tassenabstellfl äche Bohnenbehälterdeckel Hauptschalter Bedienfeld Servicetür Auslauf Kaffeesatzbehälter Abtropfschale + Abtropfgitter mit Schwimmer Verschlussknopf Heißwasser-/Dampfventil Heißwasser- /Dampfdüse Wassertank Auffangschale Brühgruppe Steckerbuchse für Netzkabel ZUBEHÖR Schlüssel für die Einstellung Filter “Aqua Prima” Netzkabel Reinigungspinsel des Mahlgrades...
  • Seite 56: Anschluss

    All manuals and user guides at all-guides.com ANSCHLUSS EINSCHALTEN DER MASCHINE Sicherstellen, dass der Hauptschalter ausgeschaltet ist. Die Spannungsangaben der Maschine, die auf dem Typenschild im unteren Bereich aufgeführt sind, mit dem vorhandenen Stromanschluss vergleichen. Den Deckel des Den Behälter mit Kaffeebohnen Den Wassertank Kaffeebohnenbehälters auffüllen.
  • Seite 57: Filter "Aqua Prima" (Optional)

    All manuals and user guides at all-guides.com WASSERFILTER “AQUA PRIMA” (OPTIONAL) Abwarten, bis das Wasser Den Regler bis in die Ruheposition Die Taste erneut drücken. Die regelmäßig austritt. ( ) drehen. Kontrolllampe schaltet sich aus. Den Behälter entfernen. Die Maschine ist betriebsbereit. Nach Abschluss der Heizphase führt die Maschine einen Spülzyklus der internen Systemen durch.
  • Seite 58: Bedienfeld

    All manuals and user guides at all-guides.com BEDIENFELD LED Satzbehälter leeren: • dauerhaft aufl euchtend: zeigt an, dass der Satzbehälter geleert werden muss. Bei diesem Arbeitsvorgang muss die Maschine eingeschaltet sein (Schritte 4 und 5 S.17). Regler für die Einstellung der ausgegebenen Kaffeemenge in der Tasse (siehe S. 10). Taste Kaffeeausgabe: •...
  • Seite 59: Einstellungen

    All manuals and user guides at all-guides.com EINSTELLUNGEN MENGE DES KAFFEES IN DER TASSE Für die Einstellung der Tassenfüllmenge. Diese Einstellung wirkt sich unmittelbar auf die angewählte Ausgabe aus. Mittelstarker Kaffee Espresso Langer Kaffee (OPTI-DOSE) ANGABE MENGE GEMAHLENER KAFFEE Durch Druck der Taste bestehen drei Anwahlmöglichkeiten (leicht, leichtes Aroma...
  • Seite 60: Mahlwerkeinstellungen

    All manuals and user guides at all-guides.com MAHLWERKEINSTELLUNGEN Auf der Maschine ist eine Einstellung des Mahlgrades des Kaffees in gewissem Umfange möglich. Damit kann die Zubereitung des Kaffees je nach den persönlichen Vorlieben optimiert werden. Die Einstellung erfolgt über den Bolzen im Kaffeebehälter. Dieser darf ausschließlich mit dem mitgelieferten Schlüssel gedreht werden.
  • Seite 61: Ausgabe Kaffee

    All manuals and user guides at all-guides.com AUSGABE KAFFEE AUSGABE KAFFEE Die Kaffeeausgabe kann durch Druck der Taste jederzeit unterbrochen werden. Bei der Ausgabe von 2 Tassen gibt die Maschine die erste Hälfte der eingestellten Kaffeemenge aus und unterbricht die Ausgabe kurz, um die zweite Kaffeeportion zu mahlen.
  • Seite 62: Ausgabe Heisswasser

    All manuals and user guides at all-guides.com AUSGABE HEISSWASSER AUSGABE VON HEISSEM WASSER Zu Beginn der Ausgabe können Spritzer mit heißem Wasser auftreten. Hierbei besteht Verbrennungsgefahr. Die Düse für die Ausgabe von heißem Wasser/Dampf kann hohe Temperaturen erreichen: Die direkte Berührung mit den Händen vermeiden. Nur am entsprechenden Griffstück anfassen.
  • Seite 63: Cappuccino

    All manuals and user guides at all-guides.com CAPPUCCINO CAPPUCCINO Zu Beginn der Ausgabe können Spritzer mit heißem Wasser auftreten. Hierbei besteht Verbrennungsgefahr. Die Düse für die Ausgabe von heißem Wasser/Dampf kann hohe Temperaturen erreichen: Die direkte Berührung mit den Händen vermeiden. Nur am entsprechenden Griffstück anfassen.
  • Seite 64: Entkalkung

    Achtung! Keinesfalls darf Essig als Entkalker verwendet werden. Die Entkalkung muss dann ausgeführt werden, wenn die Maschine dies anzeigt. Dabei sollten ungiftige und unschädliche Entkalker verwendet werden. Es wird empfohlen, den Saeco Entkalker auf Zitronensäurebasis zu benutzen. Die Entsorgung der für die Entkalkung verwendeten Lösung muss gemäß den Vorgaben des Herstellers oder den im Benutzerland geltenden Vorschriften erfolgen.
  • Seite 65 All manuals and user guides at all-guides.com ENTKALKUNG Die Entkalkungslösung aus dem Die Taste drücken, um die Die Schritte ab Punkt 3 bis Behälter ausschütten. Maschine auszuschalten. Punkt 8 so lange ausführen, bis Die Maschine nach einem keine Entkalkungslösung mehr Zeitraum von 10 Minuten erneut im Tank vorhanden ist.
  • Seite 66: Reinigung Und Wartung

    All manuals and user guides at all-guides.com REINIGUNG UND WARTUNG REINIGUNG DER MASCHINE Die Reinigung der Maschine muss mindestens einmal wöchentlich erfolgen. Die Maschine darf nicht in Wasser getaucht werden. Teile der Maschine dürfen nicht in der Spülmaschine gewaschen werden. Für die Reinigung sollte kein Äthylalkohol, Lösungsmittel, Benzin und/oder scheuernde Produkte verwendet werden.
  • Seite 67: Reinigung Brühgruppe

    All manuals and user guides at all-guides.com REINIGUNG UND WARTUNG REINIGUNG BRÜHGRUPPE Die Brühgruppe muss mindestens einmal wöchentlich gereinigt werden. Bevor die Brühgruppe herausgenommen wird, wird der Kaffeesatzbehälter herausgenommen, wie in der Abbildung 4 auf S. 17 gezeigt. Nach der Reinigung und dem Einsetzen der Brühgruppe wird der Kaffeesatzbehälter eingesetzt und die Servicetür geschlossen.
  • Seite 68: Probleme - Ursachen - Abhilfen

    All manuals and user guides at all-guides.com PROBLEME - URSACHEN - ABHILFEN ROBLEME RSACHEN BHILFEN Die Maschine schaltet sich Die Maschine ist nicht an das Schließen Sie die Maschine an das nicht ein. Stromnetz angeschlossen. Stromnetz an. Der Stecker wurde nicht in die Den Stecker in die Steckdose der Maschine Buchse auf der Maschinenrückseite einstecken.
  • Seite 69: Sicherheitsvorschriften

    All manuals and user guides at all-guides.com SICHERHEITSVORSCHRIFTEN OTFALL Den Stecker unverzüglich aus der Steckdose ziehen. ERÄT SOLLTE AUSSCHLIESSLICH BENUTZT WERDEN - in geschlossenen Räumen. - für die Zubereitung von Kaffee, heißem Wasser, für die Aufschäumung von Milch oder die Erwärmung von Getränken mit Dampf.
  • Seite 70 All manuals and user guides at all-guides.com EFEKTE - Im Falle von festgestellten oder vermuteten Defekten, zum Beispiel nach einem Sturz, darf das Gerät nicht benutzt werden. - Eventuelle Reparaturen müssen durch eine autorisierte Kundendienststelle durchgeführt wurden. - Das Gerät darf bei Schäden oder Defekten am Versorgungskabel nicht betrieben werden. Bei Schäden am Versorgungskabel muss dieses vom Hersteller oder von dessen Kundendienst ausgetauscht werden.
  • Seite 71 All manuals and user guides at all-guides.com...
  • Seite 72 All manuals and user guides at all-guides.com...
  • Seite 73 All manuals and user guides at all-guides.com INDICE DATI TECNICI ........................3 PRECAUZIONI IMPORTANTI ...................4 APPARECCHIO .........................6 ACCESSORI ..............................6 INSTALLAZIONE .......................7 AVVIO DELLA MACCHINA ..........................7 FILTRO “AQUA PRIMA” ..........................8 PANNELLO COMANDI ......................9 REGOLAZIONI ........................10 LUNGHEZZA DEL CAFFÈ IN TAZZA ......................10 "AROMA" (OPTI-DOSE) INDICAZIONE QUANTITÀ DI CAFFÈ MACINATO ..........10 REGOLAZIONE DELL’ALTEZZA DELLA VASCA ROCCOGLIGOCCE ............10 REGOLAZIONE MACINACAFFÈ...
  • Seite 74: Dati Tecnici

    All manuals and user guides at all-guides.com DATI TECNICI DATI TECNICI • Tensione nominale Vedere targhetta posta sull’apparecchio • Potenza nominale Vedere targhetta posta sull’apparecchio • Alimentazione Vedere targhetta posta sull’apparecchio • Materiale corpo ABS - Termoplastico • Dimensioni (l x a x p) (mm) 290 x 370 x 385 •...
  • Seite 75: Precauzioni Importanti

    All manuals and user guides at all-guides.com PRECAUZIONI IMPORTANTI Durante l’utilizzo di elettrodomestici, è consigliabile prendere alcune precauzioni per limitare il rischio di incendi, scosse elettriche e/o incidenti. • Leggere attentamente tutte le istruzioni ed informazioni riportate in questo manuale e in qualsiasi altro opuscolo contenuto nell’imballo prima di avviare od utilizzare la macchina espresso.
  • Seite 76: Generalità

    All manuals and user guides at all-guides.com ISTRUZIONI SUL CAVO ELETTRICO • Viene fornito un cavo elettrico correttamente dimensionato per evitare che si attorcigli o che vi inciampiate. • É possibile utilizzare, con molta attenzione, delle prolunghe. Qualora vengano utilizzati dei cavi di prolunga, verifi care: a.
  • Seite 77: Apparecchio

    All manuals and user guides at all-guides.com APPARECCHIO Contenitore caffè in grani Piano appoggiatazze Coperchio contenitore caffè in grani Interruttore generale Pannello comandi Sportello di servizio Erogatore Cassetto raccogli fondi Vasca raccogligocce + griglia e galleggiante Pomello rubinetto acqua calda/vapore Tubo erogazione acqua calda/vapore Serbatoio acqua...
  • Seite 78: Installazione

    All manuals and user guides at all-guides.com INSTALLAZIONE AVVIO DELLA MACCHINA Assicurarsi che l’interruttore generale non sia premuto. Verifi care le caratteristiche della macchina, riportate sulla targhetta dati posta nella parte inferiore. Sollevare il coperchio del Riempire il contenitore con Estrarre il serbatoio dell’acqua.
  • Seite 79: Filtro "Aqua Prima

    All manuals and user guides at all-guides.com FILTRO “AQUA PRIMA” Attendere fi no a quando non Ruotare il pomello fi no a portarlo Premere nuovamente il esce acqua in modo regolare. nella posizione di riposo ( ). pulsante. La spia si spegne. Rimuovere il recipiente.
  • Seite 80: Pannello Comandi

    All manuals and user guides at all-guides.com PANNELLO COMANDI Led allarme vuotare fondi: • acceso fi sso : segnala la necessità di vuotare i fondi; questa oprazione deve essere eseguita con la macchina accesa (Punti 4 e 5 pag.17). Pomello per la regolazione della lunghezza del caffè in tazza (vedi pag.10). Pulsante erogazione caffè: •...
  • Seite 81: Regolazioni

    All manuals and user guides at all-guides.com REGOLAZIONI LUNGHEZZA DEL CAFFÈ IN TAZZA Per regolare la quantità di caffè che viene erogata nella tazza. Questa regolazione ha un effetto Caffè medio immediato sull’erogazione selezionata. Caffè espresso Caffè lungo "AROMA" (OPTI-DOSE) INDICAZIONE QUANTITÀ DI CAFFÈ MACINATO Premendo il tasto sono possibili tre selezioni (leggero, medio, forte).
  • Seite 82: Regolazione Macinacaffè

    All manuals and user guides at all-guides.com REGOLAZIONE MACINACAFFÈ La macchina permette di effettuare una leggera regolazione del grado di macinatura del caffè per adattarlo al tipo di caffè utilizzato. La regolazione deve essere effettuata agendo sul perno presente all’interno del contenitore caffè; questo deve essere ruotato solo con la chiave fornita in dotazione.
  • Seite 83: Erogazione Caffè

    All manuals and user guides at all-guides.com EROGAZIONE CAFFÈ EROGAZIONE CAFFÈ Il ciclo d’erogazione del caffè può essere interrotto in qualsiasi momento premendo il tasto Per l’erogazione di 2 tazze, la macchina eroga metà della quantità impostata e interrompe brevemente l’erogazione per macinare la seconda dose di caffè.
  • Seite 84: Erogazione Di Acqua Calda

    All manuals and user guides at all-guides.com EROGAZIONE ACQUA CALDA EROGAZIONE DI ACQUA CALDA All’inizio dell’erogazione possono verifi carsi brevi spruzzi d’acqua calda con il pericolo di scottature. Il tubo per l’erogazione dell’acqua calda/vapore può raggiungere temperature elevate: evitare di toccarlo direttamente con le mani, utilizzare esclusivamente l’apposita impugnatura.
  • Seite 85: Cappuccino

    All manuals and user guides at all-guides.com CAPPUCCINO CAPPUCCINO All’inizio dell’erogazione possono verifi carsi brevi spruzzi d’acqua calda con il pericolo di scottature. Il tubo per l’erogazione dell’acqua calda/vapore può raggiungere temperature elevate: evitare di toccarlo direttamente con le mani, utilizzare esclusivamente l’apposita impugnatura.
  • Seite 86: Decalcificazione

    La decalcifi cazione deve essere eseguita quando la macchina lo segnala. Utilizzare un decalcifi cante di tipo non tossico o nocivo. Si consiglia d’utilizzare il decalcifi cante Saeco. La soluzione che viene utilizzata deve essere smaltita secondo quanto previsto dal costruttore e/o dalle norme vigenti nel Paese d’utilizzo.
  • Seite 87 All manuals and user guides at all-guides.com DECALCIFICAZIONE Svuotare il recipiente dalla Premere il pulsante per Ripetere le operazioni dal punto soluzione decalcifi cante. spegnere la macchina. Dopo 10 3 al punto 8 fi no ad esaurire minuti accendere nuovamente la soluzione decalcifi...
  • Seite 88: Pulizia E Manutenzione

    All manuals and user guides at all-guides.com PULIZIA E MANUTENZIONE PULIZIA MACCHINA La pulizia della macchina deve essere eseguita almeno una volta alla settimana. Non immergere la macchina nell’acqua e non lavare i componenti nella lavastoviglie. Non usare alcool etilico, solventi, benzine e/o oggetti abrasivi per la pulizia della macchina. L’...
  • Seite 89: Pulizia Gruppo Erogatore

    All manuals and user guides at all-guides.com PULIZIA E MANUTENZIONE PULIZIA GRUPPO EROGATORE Il gruppo erogatore deve essere pulito almeno una volta a settimana. Prima di estrarre il gruppo si deve estrarre il cassetto raccogli fondi come mostrato nella fi g. 4 a pag.17 . Dopo aver lavato ed inserito il gruppo erogatore inserire il cassetto raccogli fondi e chiudere la porta di servizio.
  • Seite 90: Risoluzione Problemi

    All manuals and user guides at all-guides.com RISOLUZIONE PROBLEMI ROBLEMI AUSE IMEDI La macchina non si accende. La macchina non è collegata alla Collegare la macchina alla rete rete elettrica. elettrica. Non è stata collegata la spina nella Inserire la spina nella presa della presa posta nella parte posteriore macchina.
  • Seite 91: Norme Di Sicurezza

    All manuals and user guides at all-guides.com NORME DI SICUREZZA ’ N CASO D EMERGENZA Estrarre immediatamente la spina dalla presa di rete. ’ TILIZZARE ESCLUSIVAMENTE L APPARECCHIO - In luogo chiuso. - Per la preparazione di caffè, acqua calda, per montare il latte o per riscaldare bevande utilizzando vapore. - Per l’impiego domestico.
  • Seite 92 All manuals and user guides at all-guides.com UASTI - Non utilizzare l’apparecchio in caso di guasto accertato o sospetto, ad es. dopo una caduta. - Eventuali riparazioni devono essere effettuate dal servizio assistenza autorizzato. - Non utilizzare un apparecchio con cavo di alimentazione difettoso. Se il cavo d’alimentazione è danneggiato, deve essere cambiato dal produttore o dal suo servizio assistenza clienti.
  • Seite 93 All manuals and user guides at all-guides.com...
  • Seite 94 All manuals and user guides at all-guides.com...
  • Seite 95 All manuals and user guides at all-guides.com...
  • Seite 96 All manuals and user guides at all-guides.com...
  • Seite 97 Tel: + 39 0534 771111 Fax: + 39 0534 31025 www.saeco.com The manufacturer reserves the right to change the features of the product without prior notice. Le producteur se réserve le droit d“apporter toutes modifications sans préavis. © Saeco International Group S.p.A.
  • Seite 98 All manuals and user guides at all-guides.com Operation and maintenance manual Before using the machine, please read the attached operating instructions. Carefully read the safety rules Mode d'emploi Veuillez lire attentivement le mode d'emploi (notamment les consignes de sécurité) avant d'utiliser l'appareil. FOR HOUSEHOLD USE ONLY...
  • Seite 99: Important Safeguards

    All manuals and user guides at all-guides.com IMPORTANT SAFEGUARDS When using electrical appliances, basic safety precautions should always be followed to reduce the risk of fire, electric shock, and/or injury to persons, including the following: 1 Read all instructions and information in this instruction book and any other literature included in this carton referring to this product before operating or using this appliance.
  • Seite 100 All manuals and user guides at all-guides.com CAUTION This appliance is for household use only. Any servicing, other than cleaning and user maintenance, should be performed by an authorized service centre. Do not immerse machine in water. To reduce the risk of fire or electric shock, do not disassemble the machine.
  • Seite 101 All manuals and user guides at all-guides.com CONTENTS GENERAL INFORMATION ....................5 APPLIANCE ........................6 ACCESSORIES ..............................6 INSTALLATION ........................7 STARTING THE MACHINE ..........................7 “AQUA PRIMA” FILTER ...........................8 CONTROL PANEL ......................9 ADJUSTMENTS ......................10 COFFEE VOLUME ADJUSTMENT PER CUP ....................10 "AROMA" (OPTI-DOSE) INDICATES THE COFFEE DOSE PER CUP ............10 DRIP TRAY HEIGHT ADJUSTMENT ......................10 COFFEE GRINDER ADJUSTMENT ......................11 COFFEE BREWING ......................12...
  • Seite 102: General Information

    All manuals and user guides at all-guides.com GENERAL INFORMATION This coffee machine is suitable for preparing espresso coffee using coffee beans, and it is equipped with a device to dispense steam and hot water. The machine is designed for domestic use only and is not suitable for heavy or professional use. Warning: no liability is assumed for any damage caused by: •...
  • Seite 103: Appliance

    All manuals and user guides at all-guides.com APPLIANCE Coffee bean hopper Cup stacking surface Coffee bean hopper cover Power button Control panel Service door Dispensing head Coffee grounds drawer Drip tray + grill and fl oat Hot water / steam knob Hot water / steam spout Water tank...
  • Seite 104: Installation

    All manuals and user guides at all-guides.com INSTALLATION STARTING THE MACHINE Make sure the power button is not pressed and the machine is turned off. Check the machine features on the label on the bottom of the appliance. Lift the cover of the coffee bean Fill the container with coffee Remove the water tank.
  • Seite 105: Aqua Prima" Filter

    All manuals and user guides at all-guides.com “AQUA PRIMA” WATER FILTER Wait until a steady fl ow of water Turn the knob until it is in the Press the water button again. comes out of the spout. rest position ( ). The indicator light turns off.
  • Seite 106: Control Panel

    All manuals and user guides at all-guides.com CONTROL PANEL Alarm light to empty the coffee grounds drawer: • permanently on: signals the need to empty the grounds drawer; this operation must be performed with the machine turned on (steps 4 and 5, page 17). Coffee dose adjusting knob (see page 10).
  • Seite 107: Adjustments

    All manuals and user guides at all-guides.com ADJUSTMENTS COFFEE VOLUME ADJUSTMENT PER CUP The coffee volume knob adjusts the amount of coffee brewed per cup. This adjustment has an immediate effect Medium coffee on the selected type of brewing. Espresso coffee Long coffee "AROMA"...
  • Seite 108: Coffee Grinder Adjustment

    All manuals and user guides at all-guides.com COFFEE GRINDER ADJUSTMENT The machine enables a slight adjustment of the coffee grinder. Coffee may be ground according to your own tastes. The adjustment must be performed turning the pin – located inside the coffee container – by means of the supplied key only.
  • Seite 109: Coffee Brewing

    All manuals and user guides at all-guides.com COFFEE BREWING COFFEE BREWING The coffee brewing cycle can be interrupted at any moment by pushing the button. To brew 2 cups, the machine dispenses half of the entered quantity and briefl y interrupts dispensing in order to grind the second serving of coffee.
  • Seite 110: Hot Water Dispensing

    All manuals and user guides at all-guides.com HOT WATER DISPENSING HOT WATER DISPENSING Dispensing may be preceded by short sprays of hot water, and scalding is possible. The hot water/steam spout may reach high temperatures: do not touch it with bare hands. Use the appropriate handle only.
  • Seite 111: Cappuccino

    All manuals and user guides at all-guides.com CAPPUCCINO CAPPUCCINO Dispensing may be preceded by short sprays of hot water, and scalding is possible. The hot water/steam spout may reach high temperatures: do not touch it with bare hands. Use the appropriate handle only. Adjust the height of the drip tray.
  • Seite 112: Descaling

    Caution! Do not use vinegar as a descaler. The descaling must be done when indicated by the machine. Use a non-toxic, non-harmful descaling solution. Saeco descaling solution is recommended. The used solution should be disposed according to the manufacturer instructions and/or regulations in the country of use.
  • Seite 113 All manuals and user guides at all-guides.com DESCALING Empty the container with the Press the button to turn off the Repeat steps 3 - 8 until all the used descaling solution. machine. After 10 minutes, turn descaling solution in the tank on the machine again.
  • Seite 114: Cleaning And Maintenance

    All manuals and user guides at all-guides.com CLEANING AND MAINTENANCE HOW TO CLEAN THE MACHINE The machine must be cleaned at least once a week. Do not immerse the machine in water or place any of its parts in a dishwasher. Do not use alcohol, solvents, benzene and/or abrasive objects to clean the machine.
  • Seite 115: Cleaning The Brew Group

    All manuals and user guides at all-guides.com CLEANING AND MAINTENANCE CLEANING THE BREW GROUP The Brew Group must be cleaned at least once a week. Before removing the Brew Group, remove the coffee grounds drawer as shown in fi g. 4 on page 17. Once you have washed and inserted the Brew Group, insert the grounds drawer and close the service door.
  • Seite 116: Troubleshooting

    All manuals and user guides at all-guides.com TROUBLESHOOTING ROBLEMS AUSES OLUTIONS The machine does not turn on. The machine is not connected to the Connect the machine to the power power source. source. The plug has not been plugged into Insert the plug into the machine’s power the back of the machine.
  • Seite 117: Safety Rules

    All manuals and user guides at all-guides.com SAFETY RULES N CASE OF EMERGENCY Immediately unplug the cable from the outlet. SE THE APPLIANCE ONLY - Indoors. - To prepare coffee, dispense hot water, froth milk or heat beverages using steam. - For domestic use only.
  • Seite 118 All manuals and user guides at all-guides.com AILURES - Do not use the appliance in case of sure or suspected faults such as after falls. - Any repairs must be performed by an authorized customer service centre. - Do not use the appliance with a defective power cable. If damaged, the power cable must be replaced by the manufacturer or authorized service centre.
  • Seite 119: Technical Data

    All manuals and user guides at all-guides.com TECHNICAL DATA TECHNICAL DATA • Nominal voltage See label on the appliance • Power rating See label on the appliance • Power supply See label on the appliance • Shell material ABS - Thermoplastic •...
  • Seite 120 All manuals and user guides at all-guides.com...
  • Seite 121 All manuals and user guides at all-guides.com IMPORTANT Lors de l’utilisation d’appareils électriques, il est important de prendre les précautions suivantes, afin d’éviter les décharges électriques, les courts circuits et les accidents corporels. 1 Lire toutes les instructions et les indications données dans cette brochure, ainsi que toute autre information indiquée sur l’emballage, avant de mettre la machine en marche.
  • Seite 122 All manuals and user guides at all-guides.com PRÉCAUTIONS Cette machine est réservée à un usage domestique. Tout entretien, en dehors du nettoyage et de l’entretien usuel par l’usager, doit être fait par un service après-vente autorisé. Ne pas plonger la base dans l’eau. Pour éviter les courts- circuits et les décharges électriques, ne pas démonter la base.
  • Seite 123 All manuals and user guides at all-guides.com TABLE DES MATIÈRES GÉNÉRALITÉS ........................5 APPAREIL ..........................6 ACCESSOIRES ..............................6 MONTAGE .........................7 MISE EN MARCHE DE LA MACHINE ......................7 FILTRE « AQUA PRIMA » ..........................8 TABLEAU DE COMMANDES ....................9 RÉGLAGES ........................10 QUANTITE DU CAFÉ EN TASSE .........................10 (OPTI-DOSE) INDICATION DE LA QUANTITÉ...
  • Seite 124: Généralités

    All manuals and user guides at all-guides.com GÉNÉRALITÉS Cette machine à café est prévue pour la préparation de café expresso avec du café en grains et dispose d’un dispositif pour la distribution d’eau chaude et de vapeur. Au design élégant, cet appareil a été conçu exclusivement pour un usage domestique et n’est donc pas indiqué...
  • Seite 125: Appareil

    All manuals and user guides at all-guides.com APPAREIL Réservoir à café en grains Plaque pour poser les tasses Couvercle du réservoir à café en grains Interrupteur général Tableau de commande Porte de service Distributeur Tiroir à marc Bac d’égouttement + grille et fl...
  • Seite 126: Montage

    All manuals and user guides at all-guides.com MONTAGE MISE EN MARCHE DE LA MACHINE S’assurer que l’interrupteur général ne soit pas actionné. Vérifi er les caractéristiques de la machine reportées sur la plaque signalétique située sur la partie inférieure. Soulever le couvercle du Remplir le réservoir à...
  • Seite 127: Filtre « Aqua Prima

    All manuals and user guides at all-guides.com Attendre jusqu’à ce que l’eau Tourner le bouton jusqu’à la Appuyer de nouveau sur le coule de manière régulière. position de repos ( ). bouton. Le voyant s’éteint. Retirer le récipient. La machine est prête.
  • Seite 128: Tableau De Commandes

    All manuals and user guides at all-guides.com TABLEAU DE COMMANDE DEL (diode lumineuse) alarme vider le marc : • allumée de manière fi xe : signale le besoin de vider les marcs ; cette opération doit être effectuée quand la machine est allumée (Points 4 et 5 page 17). Bouton pour régler la quantité...
  • Seite 129: Réglages

    All manuals and user guides at all-guides.com RÉGLAGES QUANTITE DU CAFÉ EN TASSE Pour régler la quantité de café distribuée dans une tasse. Ce réglage a un effet immédiat sur la Café moyen distribution sélectionnée. Café expresso Café allongé (OPTI-DOSE) INDICATION DE LA QUANTITÉ DE CAFÉ MOULU En appuyant sur la touche trois sélections sont possibles (léger, Arôme léger...
  • Seite 130: Réglage Du Moulin

    All manuals and user guides at all-guides.com RÉGLAGE DU MOULIN La machine permet de régler le degré de mouture du café. Ceci dans le but d’adapter la distribution du café au goût personnel de chacun. Le réglage doit être effectué en tournant le pivot situé à l’intérieur du réservoir à café, et ce uniquement avec la clé...
  • Seite 131: Distribution De Café

    All manuals and user guides at all-guides.com DISTRIBUTION DE CAFÉ DISTRIBUTION DE CAFÉ Le cycle de distribution du café peut être interrompu à tout moment en appuyant sur la touche Pour la préparation de 2 tasses, la machine distribue la moitié de la quantité réglée et interrompt brièvement la distribution pour moudre la seconde dose de café.
  • Seite 132: Distribution D'eau Chaude

    All manuals and user guides at all-guides.com DISTRIBUTION D’EAU CHAUDE DISTRIBUTION D’EAU CHAUDE Au début de la distribution, faire attention au risque de brûlures car il peut y avoir des éclaboussures d’eau chaude. La buse d’eau chaude/vapeur peut atteindre des températures élevées : éviter de la toucher directement avec les mains, utiliser exclusivement la poignée prévue à...
  • Seite 133: Cappuccino

    All manuals and user guides at all-guides.com CAPPUCCINO CAPPUCCINO Au début de la distribution, faire attention au risque de brûlures car il peut y avoir des éclaboussures d’eau chaude. La buse d’eau chaude/vapeur peut atteindre des températures élevées : éviter de la toucher directement avec les mains, utiliser exclusivement la poignée prévue à...
  • Seite 134: Détartrage

    Attention ! Ne jamais utiliser de vinaigre pour détartrer la machine. Le détartrage doit être effectué lorsque la machine le signale. Utiliser un détartrant non toxique ou non nocif. Nous recommandons l’emploi de la solution solution détartrante SAECO disponible auprès de votre revendeur ou de votre SAV.
  • Seite 135 All manuals and user guides at all-guides.com DÉTARTRAGE Vider le récipient de la solution Appuyer sur le bouton pour Répéter les opérations du point détartrante. éteindre la machine. Après 10 3 au point 8 jusqu’à ce qu’il n’y minutes, allumer de nouveau la ait plus de solution détartrante machine.
  • Seite 136: Nettoyage Et Entretien

    All manuals and user guides at all-guides.com NETTOYAGE ET ENTRETIEN NETTOYAGE DE LA MACHINE Le nettoyage de la machine doit être effectué au moins une fois par semaine. Ne pas immerger la machine dans l’eau. Ne pas laver les composants au lave-vaisselle. Ne pas utiliser d’alcool éthylique, de solvants, d’essences et/ou d’objets abrasifs pour le nettoyage de la machine.
  • Seite 137: Nettoyer Le Groupe De Distribution

    All manuals and user guides at all-guides.com NETTOYAGE ET ENTRETIEN NETTOYER LE GROUPE DE DISTRIBUTION Le nettoyage du groupe de distribution doit s’effectuer au moins une fois par semaine. Avant de retirer le groupe, il faut retirer le tiroir à marc comme indiqué à la fi g. 4 page 17. Après avoir lavé et inséré le groupe de distribution, introduire le tiroir à...
  • Seite 138: Problèmes - Causes - Remèdes

    All manuals and user guides at all-guides.com PROBLÈMES - CAUSES - REMÈDES ROBLÈMES AUSES EMÈDES La machine ne s’allume pas La machine n’est pas branchée sur Brancher la machine sur le réseau le réseau électrique. électrique. La fi che n’est pas branchée sur la Brancher la fi...
  • Seite 139: Consignes De Sécurité

    All manuals and user guides at all-guides.com CONSIGNES DE SÉCURITÉ ’ N CAS D URGENCE Débrancher immédiatement la fi che de la prise murale. ’ TILISER EXCLUSIVEMENT L APPAREIL - Dans un lieu fermé. - Pour la préparation de café, d’eau chaude, pour faire monter le lait ou pour réchauffer des boissons avec la vapeur.
  • Seite 140 All manuals and user guides at all-guides.com ANNES - Ne pas utiliser l’appareil en cas de panne identifi ée ou suspecte, par ex. après une chute. - Les éventuelles réparations doivent être effectuées par un service d’assistance agréé. - Ne pas utiliser un appareil présentant un câble d’alimentation défectueux. Si le câble d’alimentation est abîmé, celui-ci doit être remplacé...
  • Seite 141: Données Techniques

    All manuals and user guides at all-guides.com DONNÉES TECHNIQUES DONNÉES TECHNIQUES • Tension nominale Voir plaque signalétique placée sur l’appareil. • Puissance nominale Voir plaque signalétique placée sur l’appareil. • Alimentation Voir plaque signalétique placée sur l’appareil. • Matériau du corps ABS - Thermoplastique •...
  • Seite 142 All manuals and user guides at all-guides.com...
  • Seite 143 All manuals and user guides at all-guides.com...
  • Seite 144 All manuals and user guides at all-guides.com...
  • Seite 145 Tel: + 39 0534 771111 Fax: + 39 0534 31025 www.saeco.com El fabricante se reserva el derecho de modificar el producto sin aviso previo. O fabricante reserva-se o direito de efectuar qualquer alteração sem aviso prévio. © Saeco International Group S.p.A.
  • Seite 146 All manuals and user guides at all-guides.com Manual de uso y mantenimiento Consultar las siguientes instrucciones antes de utilizar la máquina. Leer con atención las normas de seguridad. Manual de uso e manutenção Antes de utilizar a máquina consulte estas instruções. Leia atentamente as normas de segurança.
  • Seite 147 All manuals and user guides at all-guides.com ÍNDICE DATOS TÉCNICOS ......................3 PRECAUCIONES IMPORTANTES ...................4 APARATO ..........................6 ACCESORIOS ..............................6 INSTALACIÓN ........................7 PUESTA EN MARCHA DE LA MÁQUINA .......................7 FILTRO “AQUA PRIMA” ..........................8 PANEL DE MANDOS ......................9 AJUSTES ........................10 CANTIDAD VOLUMÉTRICA DEL CAFÉ EN TAZA ..................10 INDICACIÓN DE LA CANTIDAD DE CAFÉ...
  • Seite 148: Datos Técnicos

    All manuals and user guides at all-guides.com DATOS TÉCNICOS DATOS TÉCNICOS • Tensión nominal Véase placa en el aparato • Potencia nominal Véase placa en el aparato • Alimentación Véase placa en el aparato • Estructura exterior ABS - Termoplástico •...
  • Seite 149: Precauciones Importantes

    All manuals and user guides at all-guides.com PRECAUCIONES IMPORTANTES Durante el uso de electrodomésticos se aconseja tomar algunas precauciones para evitar el riesgo de incendios, descargas eléctricas y/o accidentes. • Leer con atención todas las instrucciones e informaciones que se indican en este manual y en cualquier otro folleto que venga dentro del embalaje antes de activar o utilizar la máquina de café...
  • Seite 150 All manuals and user guides at all-guides.com INSTRUCCIONES SOBRE EL CABLE ELÉCTRICO • Se suministra un cable eléctrico bastante corto para evitar que se enrosque o tropiezos. • También se pueden utilizar alargadores, pero se debe tener mucho cuidado. Si se utiliza un alargador se debe comprobar que: a.
  • Seite 151: Aparato

    All manuals and user guides at all-guides.com APARATO Entrada de café en grano Superfi cie para tazas Tapa del contenedor del café en grano Interruptor general Panel de mandos Puerta de servicio Salida de café Cajón de recogida de Cubeta de goteo + posos rejilla y fl...
  • Seite 152: Instalación

    All manuals and user guides at all-guides.com INSTALACIÓN PUESTA EN MARCHA DE LA MÁQUINA Asegurarse de que el interruptor general no esté pulsado. Verifi car las características de la máquina indicadas en la placa de datos situada en la parte inferior. Levantar la tapa del contenedor Llenar el contenedor de café...
  • Seite 153: Filtro "Aqua Prima

    All manuals and user guides at all-guides.com FILTRO “AQUA PRIMA” Esperar hasta que el agua Girar el mando hasta la posición Pulsar de nuevo el botón. Se salga de forma regular. de reposo ( ). apagará el indicador. Quitar el recipiente.
  • Seite 154: Panel De Mandos

    All manuals and user guides at all-guides.com PANEL DE MANDOS Piloto luminoso de alarma eliminar posos: • luz fi ja: indica la necesidad de eliminar los posos; esta operación debe realizarse con la máquina encendida (Puntos 4 y 5 pág.17). Potenciómetro para ajustar la cantidad volumétrica (corto, medio, largo) a suministrar por taza (véase pág.10).
  • Seite 155: Ajustes

    All manuals and user guides at all-guides.com AJUSTES CANTIDAD DEL CAFÉ EN TAZA Para regular la cantidad volumétrica de café que se suminitrará en la taza. Café medio esta regulación produce un efecto inmediato en la bebida seleccionada. Café exprés Café...
  • Seite 156: Regulación Del Molinillo De Café

    All manuals and user guides at all-guides.com REGULACIÓN DEL MOLINILLO DE CAFÉ La máquina permite realizar una pequeña regulación del grado de molido del café. Esto le permitirá optimizar el suministro de café según sus gustos personales. Realizar dicha regulación mediante el tornillo presente en el interior del contenedor de café; girar el tornillo sólo usando la llave suministrada con la máquina.
  • Seite 157: Preparación De Café

    All manuals and user guides at all-guides.com PREPARACIÓN DE CAFÉ PREPARACIÓN DE CAFÉ El ciclo de suministro de café se puede interrumpir en cualquier momento pulsando el botón Para preparar 2 tazas la máquina suministra la mitad de la cantidad confi gurada e interrumpe brevemente el suministro para moler la segunda dosis de café.
  • Seite 158: Suministro De Agua Caliente

    All manuals and user guides at all-guides.com SUMINISTRO DE AGUA CALIENTE SUMINISTRO DE AGUA CALIENTE Al principio se pueden producir pequeñas salpicaduras de agua caliente que podrían provocar quemaduras. El tubo de suministro de agua puede alcanzar temperaturas elevadas: evitar el contacto directo con las manos, tocar sólo y exclusivamente la empuñadura diseñada a tal efecto.
  • Seite 159: Capuchino

    All manuals and user guides at all-guides.com CAPUCHINO PREPARACIÓN DE UN CAPUCHINO Al principio del suministro se pueden producir pequeñas salpicaduras de agua caliente que pueden provocar quemaduras. El tubo de suministro de agua caliente puede alcanzar temperaturas elevadas: evitar el contacto directo con las manos, tocar sólo y exclusivamente la empuñadura diseñada a tal efecto.
  • Seite 160: Descalcificación

    La descalcifi cación se tiene que llevar a cabo cuando lo señale la máquina. Utilizar un producto no tóxico o dañino. Se aconseja el uso del líquido descalcifi cante Saeco. La solución que se utiliza se debe eliminar según lo previsto por el fabricante y/o por las normas vigentes en el país donde de usa.
  • Seite 161 All manuals and user guides at all-guides.com DESCALCIFICACIÓN Vaciar el recipiente de la Pulsar el botón para apagar la Repetir las operaciones desde solución descalcifi cante. máquina. Encender de nuevo el punto 3 hasta el 8 hasta la máquina cuando hayan eliminar completamente la transcurrido 10 minutos.
  • Seite 162: Limpieza Y Mantenimiento

    All manuals and user guides at all-guides.com LIMPIEZA Y MANTENIMIENTO LIMPIEZA DE LA MÁQUINA Se debe limpiar la máquina al menos una vez a la semana. No sumergir la máquina en agua ni lavar sus componentes en el lavavajillas. No usar alcohol etílico, líquidos solventes, gasolina y/o sustancias abrasivas para limpiar la máquina.
  • Seite 163: Limpieza Del Grupo De Café

    All manuals and user guides at all-guides.com LIMPIEZA Y MANTENIMIENTO LIMPIEZA DEL GRUPO DE CAFÉ El grupo de café se debe limpiar por lo menos una vez a la semana. Antes de extraer el grupo se debe extraer el cajón de recogida de posos como se muestra en la fi gura 4 de la pág. 17. Después de haber lavado y haber introducido el grupo, introducir el cajón de recogida de posos y cerrar la puerta de servicio.
  • Seite 164: Problemas - Causas - Soluciones

    All manuals and user guides at all-guides.com PROBLEMAS - CAUSAS - SOLUCIONES ROBLEMAS AUSAS OLUCIONES La máquina no se enciende La máquina no está conectada a Conectar la máquina a la red eléctrica. la red eléctrica. No se ha conectado el enchufe Introducir el enchufe en la toma de la a la toma situada en la parte máquina.
  • Seite 165: Normas De Seguridad

    All manuals and user guides at all-guides.com NORMAS DE SEGURIDAD EN CASO DE EMERGENCIA Desconectar inmediatamente el enchufe de la toma de corriente. SAR EL APARATO SÓLO Y EXCLUSIVAMENTE - En un lugar cerrado. - Para la preparación de café, el suministro de agua caliente, para montar la leche o para calentar las bebidas con vapor.
  • Seite 166 All manuals and user guides at all-guides.com VERÍAS - No utilizar el aparato en caso de constatación o de sospecha de avería, por ejemplo, después de que se haya caído la máquina. - Las reparaciones necesarias las debe efectuar el servicio de asistencia autorizado. - No utilizar un aparato que tenga el cable de alimentación defectuoso.
  • Seite 167 All manuals and user guides at all-guides.com...
  • Seite 168 All manuals and user guides at all-guides.com...
  • Seite 169 All manuals and user guides at all-guides.com ÍNDICE DADOS TÉCNICOS......................3 PRECAUÇÕES IMPORTANTES ..................4 APARELHO........................6 ACESSÓRIOS ..............................6 INSTALAÇÃO ........................7 LIGAÇÃO DA MÁQUINA ..........................7 FILTRO “AQUA PRIMA” ..........................8 PAINEL DE COMANDO .....................9 AJUSTES .........................10 ALTURA DO CAFÉ NA CHÁVENA ........................10 (OPTI-DOSE) INDICAÇÃO DA QUANTIDADE DE CAFÉ MOÍDO ...............10 AJUSTE DA ALTURA DA BANDEJA DE LIMPEZA ..................10 AJUSTE DO MOINHO DE CAFÉ...
  • Seite 170: Dados Técnicos

    All manuals and user guides at all-guides.com DADOS TÉCNICOS DADOS TÉCNICOS • Tensão nominal Veja plaqueta posicionada no aparelho • Potência nominal Veja plaqueta posicionada no aparelho • Alimentação Veja plaqueta posicionada no aparelho • Material do corpo ABS - Termoplástico •...
  • Seite 171: Precauções Importantes

    All manuals and user guides at all-guides.com PRECAUÇÕES IMPORTANTES Durante a utilização de electrodomésticos, aconselha-se a tomar algumas precauções a fim de limitar o risco de incêndios, choques eléctricos e/ou acidentes. • Leia atentamente todas as instruções e informações indicadas neste manual e em qualquer outro folheto contido na embalagem antes de ligar ou utilizar a máquina de café...
  • Seite 172: Uso Destas Instruções

    All manuals and user guides at all-guides.com INSTRUÇÕES SOBRE O CABO ELÉCTRICO • É fornecido um cabo eléctrico bastante curto para evitar enrolamentos ou tropeçar nele. • É possível utilizar, com muito cuidado, extensões. Quando for utilizada uma extensão, certifi que-se de que: a.
  • Seite 173: Aparelho

    All manuals and user guides at all-guides.com APARELHO Recipiente de café em grãos Tampa recipiente de café Plano de apoio para chávenas em grãos Interruptor geral Painel de comando Portinhola de serviço Distribuidor Gaveta de recolha das Bandeja de limpeza + borras grelha e bóia Botão da torneira...
  • Seite 174: Instalação

    All manuals and user guides at all-guides.com INSTALAÇÃO LIGAÇÃO DA MÁQUINA Assegure-se de que o interruptor geral não esteja pressionado. Verifi que as características da máquina, indicadas na plaqueta de dados posicionada na parte inferior. Levante a tampa do recipiente Encha o recipiente com Retire o reservatório de água.
  • Seite 175: Filtro "Aqua Prima

    All manuals and user guides at all-guides.com FILTRO “AQUA PRIMA” Aguarde até a água sair de uma Vire o botão até a posição de Pressione de novo o botão. maneira regular. repouso ( ). O indicador luminoso apagar- se-á. Remova o recipiente. A máquina está...
  • Seite 176: Painel De Comando

    All manuals and user guides at all-guides.com PAINEL DE COMANDO Indicador luminoso de alarme borras: • aceso fi xo: sinaliza a necessidade de esvaziar as borras; esta operação deve ser realizada com a máquina ligada (Itens 4 e 5 de pág.17). Botão de ajuste da altura do café...
  • Seite 177: Ajustes

    All manuals and user guides at all-guides.com AJUSTES ALTURA DO CAFÉ NA CHÁVENA Para seleccionar a quantidade de café a ser distribuído na chávena. Café médio Este ajuste tem um efeito imediato na distribuição seleccionada. Café expresso Café longo (OPTI-DOSE) INDICAÇÃO DA QUANTIDADE DE CAFÉ MOÍDO Ao pressionar a tecla será...
  • Seite 178: Ajuste Do Moinho De Café

    All manuals and user guides at all-guides.com AJUSTE DO MOINHO DE CAFÉ A máquina permite realizar um leve ajuste do grau de moagem do café. Isto lhe permitirá optimizar a distribuição de café a seu gosto. O ajuste deverá ser realizado utilizando o pino presente dentro do recipiente de café; este deverá ser virado só...
  • Seite 179: Distribuição Café

    All manuals and user guides at all-guides.com DISTRIBUIÇÃO DE CAFÉ DISTRIBUIÇÃO DE CAFÉ O ciclo de distribuição de café pode ser interrompido a qualquer momento pressionando a tecla Para distribuir 2 chávenas, a máquina distribui metade da quantidade seleccionada e interrompe brevemente a distribuição para moer a segunda dose de café.
  • Seite 180: Distribuição De Água Quente

    All manuals and user guides at all-guides.com DISTRIBUIÇÃO DE ÁGUA QUENTE DISTRIBUIÇÃO DE ÁGUA QUENTE No início da distribuição podem se verifi car breves jactos de água quente com perigo de queimaduras. O bico de distribuição de água quente/vapor pode alcançar temperaturas elevadas: evite tocar nele directamente com as mãos, utilize exclusivamente a pega apropriada.
  • Seite 181: Cappuccino

    All manuals and user guides at all-guides.com CAPPUCCINO CAPPUCCINO No início da distribuição podem se verifi car breves jactos de água quente com perigo de queimaduras. O bico de distribuição de água quente/vapor pode alcançar temperaturas elevadas: evite tocar nele directamente com as mãos, utilize exclusivamente a pega apropriada. Ajuste a altura da bandeja de Encha 1/3 da chávena com Mergulhe o tubo de vapor no...
  • Seite 182: Descalcificação

    A descalcifi cação deve ser realizada quando a máquina a sinalizar. Utilize um descalcifi cante não tóxico ou nocivo. Aconselha-se a utilizar o descalcifi cante da Saeco. A solução a ser utilizada deverá ser eliminada de acordo com quanto previsto pelo fabricante e/ou pelas normas vigentes no país de utilização.
  • Seite 183 All manuals and user guides at all-guides.com DESCALCIFICAÇÃO Esvazie o recipiente da solução Pressione o botão para desligar Repita as operações do item 3 descalcifi cante. a máquina. Após 10 minutos ao item 8 até esgotar a solução ligue novamente a máquina. descalcifi...
  • Seite 184: Limpeza E Manutenção

    All manuals and user guides at all-guides.com LIMPEZA E MANUTENÇÃO LIMPEZA DA MÁQUINA A limpeza da máquina deve ser realizada pelo menos uma vez por semana. Não mergulhe a máquina na água e não lave os componentes na máquina de lavar louça. Não use álcool etílico, solventes, gasolina e/ou objectos abrasivos para a limpeza da máquina.
  • Seite 185: Limpeza Do Grupo De Distribuição

    All manuals and user guides at all-guides.com LIMPEZA E MANUTENÇÃO LIMPEZA DO GRUPO DE DISTRIBUIÇÃO O grupo de distribuição deve ser limpo pelo menos uma vez por semana. Antes de extrair o grupo será preciso retirar a gaveta de recolha das borras como indicado na fi g. 4 da pág.17. Depois de lavado e introduzido o grupo de distribuição, introduza a gaveta de recolha das borras e feche a portinhola de serviço.
  • Seite 186: Problemas - Causas - Soluções

    All manuals and user guides at all-guides.com PROBLEMAS - CAUSAS - SOLUÇÕES ROBLEMAS AUSAS OLUÇÕES A máquina não se liga. A máquina não está ligada à rede Ligue a máquina à rede eléctrica. eléctrica. Não foi ligada a fi cha na tomada Introduza a fi...
  • Seite 187: Normas De Segurança

    All manuals and user guides at all-guides.com NORMAS DE SEGURANÇA M CASO DE EMERGÊNCIA Retire imediatamente a fi cha da tomada de rede. TILIZE EXCLUSIVAMENTE O APARELHO - Em lugar fechado - Para preparar café, água quente, para bater o leite ou para aquecer bebidas utilizando o vapor. - Para uso doméstico.
  • Seite 188 All manuals and user guides at all-guides.com VARIAS - Não utilize o aparelho no caso de avaria verifi cada ou suspeita, por exemplo após uma queda. - Consertos eventuais deverão ser realizados pelo serviço de assistência autorizado. - Não utilize um aparelho com cabo de alimentação defeituoso. Se o cabo de alimentação estiver danifi cado, deverá...
  • Seite 189 All manuals and user guides at all-guides.com...
  • Seite 190 All manuals and user guides at all-guides.com...
  • Seite 191 All manuals and user guides at all-guides.com...
  • Seite 192 All manuals and user guides at all-guides.com...

Diese Anleitung auch für:

Odea giro plus