Herunterladen Inhalt Inhalt Diese Seite drucken
BRAND Transferpette S-8 Gebrauchsanleitung

BRAND Transferpette S-8 Gebrauchsanleitung

Mikroliterpipetten
Vorschau ausblenden Andere Handbücher für Transferpette S-8:
Inhaltsverzeichnis

Werbung

Verfügbare Sprachen
  • DE

Verfügbare Sprachen

  • DEUTSCH, seite 3
Gebrauchsanleitung | Operating manual |
Mode d'emploi | Instrucciones de manejo | 操
作手册
Transferpette® S -8/-12
Mikroliterpipetten | Microliter pipettes

Werbung

Inhaltsverzeichnis
loading

Inhaltszusammenfassung für BRAND Transferpette S-8

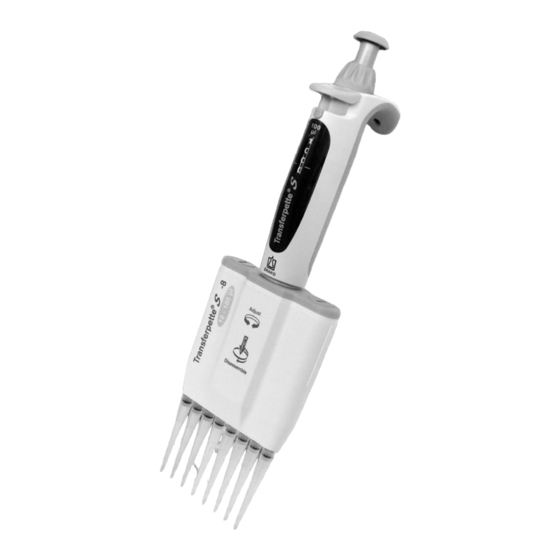
  • Seite 1 Gebrauchsanleitung | Operating manual | Mode d'emploi | Instrucciones de manejo | 操 作手册 Transferpette® S -8/-12 Mikroliterpipetten | Microliter pipettes...
  • Seite 2 F +49 9342 808 98000 info@brand.de www.brand.de Patents: Transferpette® S -8 / -12: US 6,627,160 US 8,011,257 U.S. Patents: www.brand.de/ip Link in Quick Response Code: www.brand.de/ip Languages Gebrauchsanleitung............2 Operating manual ............35 Mode d'emploi ..............66 Instrucciones de manejo ..........99 操作手册...
  • Seite 3: Inhaltsverzeichnis

    Inhaltsverzeichnis 1 Einleitung ................Lieferumfang ................Gebrauchsbestimmung ............... 2 Sicherheitsbestimmungen ............Allgemeine Sicherheitsbestimmungen........Verwendungszweck ..............Einsatzgrenzen ................Einsatzbeschränkungen .............. Einsatzausschlüsse ..............3 Funktions- und Bedienelemente ..........4 Pipettieren................11 5 Volumen kontrollieren ............. 14 6 Genauigkeitstabelle..............16 7 Justieren – Easy Calibration ............. 17 8 Desinfektion/Autoklavieren .............
  • Seite 4 Inhaltsverzeichnis 13 Reparatur ................31 13.1 Zur Reparatur einsenden............. 31 14 Kalibrierservice ............... 33 15 Mängelhaftung ................ 33 16 Entsorgung ................34 Gebrauchsanleitung Transferpette® S-8/-12 997208...
  • Seite 5: Einleitung

    • Die Gebrauchsanleitung ist Teil des Geräts und muss leicht zugäng- lich aufbewahrt werden. • Legen Sie die Gebrauchsanleitung bei, wenn Sie dieses Gerät an Drit- te weitergeben. • Sie finden aktualisierte Versionen der Gebrauchsanleitung auf unse- rer Homepage www.brand.de. 1.2.1 Gefährdungsstufen Folgende Signalworte kennzeichnen mögliche Gefährdungen: Signalwort Bedeutung GEFAHR Führt zu schwerer Verletzung oder Tod.
  • Seite 6: Sicherheitsbestimmungen

    2 Sicherheitsbestimmungen 2 Sicherheitsbestimmungen 2.1 Allgemeine Sicherheitsbestimmungen Bitte unbedingt sorgfältig durchlesen! Das Laborgerät Transferpette® S -8/-12 kann in Kombination mit gefährli- chen Materialien, Arbeitsvorgängen und Apparaturen verwendet werden. Die Gebrauchsanleitung kann jedoch nicht alle Sicherheitsprobleme auf- zeigen, die hierbei eventuell auftreten. Es liegt in der Verantwortung des Anwenders, die Einhaltung der Sicherheits- und Gesundheitsvorschriften sicherzustellen und die entsprechenden Einschränkungen vor Gebrauch festzulegen.
  • Seite 7: Verwendungszweck

    9. Vor Verwendung stets den ordnungsgemäßen Zustand des Gerätes prüfen. Sollten sich Störungen des Gerätes ankündigen (z. B. schwer- gängiger Kolben, Undichtigkeit), sofort aufhören zu pipettieren und das Kapitel Störung — Was tun?, siehe Störung – Was tun?, S. 26 be- achten. Ggf. an den Hersteller wenden. 2.2 Verwendungszweck Luftpolsterpipette zum Pipettieren von wässrigen Lösungen mittlerer Dichte und geringer bis mittlerer Viskosität.
  • Seite 8 2 Sicherheitsbestimmungen • für Flüssigkeiten, die Polyvinylidenfluorid und Silikon angreifen • für Flüssigkeiten, die Polyphenylsulfid angreifen (bei 50 μl, 100 μl, 200 μl und 300 μl Geräten) • für Flüssigkeiten mit sehr hohem Dampfdruck • für Flüssigkeiten, die Polycarbonat angreifen • für Flüssigkeiten, die Polyvinylidenfluorid und Silikon angreifen •...
  • Seite 9: Funktions- Und Bedienelemente

    3 Funktions- und Bedienelemente Pipettierknopf Volumeneinstellrad Easy Calibration-Funktion Fingerbügel Pipettiereinheit Spitzenaufnahmekonus Griffteil Volumenanzeige Volumenverstellschutz Spitzenabwurftaste Transferpette® S-8/-12 997208 Gebrauchsanleitung...
  • Seite 10 3 Funktions- und Bedienelemente Beschriftungsfenster Das Gerät kann am Fingerbügel individu- ell markiert werden: Beschriftungsfenster am Fingerbügel entfernen. Beschriftungsfolie beschriften. Beschriftungsfolie mit Fenster wieder einsetzen. Gebrauchsanleitung Transferpette® S-8/-12 997208...
  • Seite 11: Pipettieren

    4 Pipettieren 1. Spitze aufstecken HINWEIS Einwandfreie Analysenergebnisse sind nur mit Qualitäts-Spitzen zu errei- chen. Wir empfehlen Pipettenspitzen von BRAND. Weitere Hinweise siehe Genauigkeitstabelle Genauigkeitstabelle, S. 16 . Pipettenspitzen sind Einmalartikel! Spitze senkrecht aufstecken: Richtige Spitze entsprechend dem Volumenbereich bzw. Color-Code ver-...
  • Seite 12: Pipettiereinheit Ausrichten

    4 Pipettieren 3. Pipettiereinheit ausrichten Die Pipettiereinheit lässt sich in beide Richtungen frei drehen. 4. Probe aufnehmen HINWEIS Die ISO 8655 schreibt vor, die Pipettenspitze vor dem eigentlichen Pipet- tiervorgang einmal mit der Probenflüssigkeit vorzuspülen. Pipettierknopf bis zum ersten An- schlag drücken.
  • Seite 13: Spitze Abwerfen

    5. Probe abgeben Pipettenspitze an Gefäßwand anle- gen. Pipette im Winkel von 30-45° zur Gefäßwand halten. Pipettierknopf mit gleichmäßiger Ge- schwindigkeit bis zum ersten An- schlag drücken und festhalten. Bei Seren, hochviskosen oder entspann- ten Medien entsprechende Wartezeit einhalten, um Genauigkeit zu verbes- sern.
  • Seite 14: Volumen Kontrollieren

    5 Volumen kontrollieren 5 Volumen kontrollieren Wir empfehlen, je nach Einsatz, alle 3-12 Monate eine Prüfung des Gerä- tes. Der Zyklus kann aber den individuellen Anforderungen angepasst werden. Die gravimetrische Volumenprüfung der Pipette erfolgt durch nachfolgende Schritte und entspricht der DIN EN ISO 8655, Teil 6. 1.
  • Seite 15: Berechnung (Für Nennvolumen)

    Mittelwert: Mittleres Volumen: Richtigkeit*: Variationskoeffizient*: Standardabweichung*: *) = Berechnung von Richtigkeit (R%) und Variationskoeffizient (VK%): R% und VK% werden nach den Formeln der statistischen Qualitätskontrolle berechnet. HINWEIS Prüfanweisungen (SOPs) stehen unter www.brand.de als Download zur Verfügung. Transferpette® S-8/-12 997208 Gebrauchsanleitung...
  • Seite 16: Genauigkeitstabelle

    6 Genauigkeitstabelle 6 Genauigkeitstabelle Volumen Teil- R* ≤ ± VK* ≤ % Teil- Empfohlener bereich volumen schritte Spitzentyp [μl] [μl] [μl] [μl] 0,5 - 10   10 0,01 0,5 - 20     5     1 5 - 50   50 0,05 2 - 200   25     5 10 - 100...
  • Seite 17: Justieren - Easy Calibration

    7 Justieren – Easy Calibration Das Gerät ist permanent justiert für wässerige Lösungen. Sollte einwand- frei feststehen, dass die Pipette ungenau arbeitet oder, um das Gerät auf Lösungen unterschiedlicher Dichte und Viskosität oder speziell geformte Pipettenspitzen einzustellen, kann es mit Easy Calibration-Technik jus- tiert werden.
  • Seite 18 7 Justieren – Easy Calibration Justagewert einstellen: Transferpette® S, Typ Variabel: den zu- vor ermittelten Ist-Wert mit dem Vo- lumeneinstellrad im Zustand UN- LOCK einstellen. Transferpette® S, Typ Fix: durch Dre- hen in +/– Richtung das Volumen ein- stellen. Es wird eine Volumenkontrolle nach jeder Justage empfohlen.
  • Seite 19: Desinfektion/Autoklavieren

    8 Desinfektion/Autoklavieren 8.1 Autoklavieren Die Pipette ist komplett autoklavierbar bei 121 °C (250 °F), 2 bar und einer Haltezeit von mindestens 15 Minuten nach DIN EN 285. Pipettenspitze abwerfen. Ohne weitere Demontage die komplette Pipette autoklavieren. Die Pipette vollständig abkühlen und trocknen lassen. HINWEIS Die Wirksamkeit des Autoklavierens ist vom Anwender selbst zu prüfen. Höchste Sicherheit wird durch Vakuumsterilisation erreicht.
  • Seite 20: Wartung

    9 Wartung 9 Wartung 9.1 Pipettiereinheit vom Griffteil trennen Pipettenspitzen abwerfen. Zur Entkoppelung die Pipettierein- heit so weit wie möglich nach unten drücken, erst danach im Uhrzeiger- sinn drehen. Nach einer Umdrehung muss beim Drehen nicht mehr nach unten gezogen werden. HINWEIS >...
  • Seite 21: Hauptkomponenten Der Pipettiereinheit

    Dichtheit des Geräts prüfen. Wir empfehlen das BRAND Dichtheits- prüfgerät BRAND PLT unit zu verwenden. Alternativ dazu Probe auf- saugen, Gerät ca. 10 s senkrecht halten. Falls sich an den Pipettenspit- zen Tropfen bilden, siehe Störungen – Was tun? Störung – Was tun?, S. 26 .
  • Seite 22: Entfernen Von Schäften Und Dichtungen Zur Reinigung Oder Zum Austausch

    9 Wartung Hinweise zur Reinigung Einzelschäfte und Kolben (nur diese Teile) mit Seifenlösung oder Iso- propanol reinigen, anschließend mit destilliertem Wasser spülen. Teile vollständig trocknen und abkühlen lassen. Flüssigkeitsreste in den Schäften führen zu Genauigkeitsabweichungen. Kolben hauchdünn mit dem mitgelieferten Fett nachfetten. Für die zentrale Führungsachse (Z) nur das vorgeschriebene Fluorstaticfett verwenden! Entfernen von Schäften und Dichtungen zur Reinigung oder...
  • Seite 23 Kolbeneinheit ganz nach unten schie- ben. Die Dichtung befindet sich nach dem Entfernen des Schaftes entwe- der im Schaft oder auf dem Kolben. Dichtung entfernen, überprüfen und ggf. reinigen oder auswechseln. Bei Bedarf, Kolben mit dem mitgeliefer- ten Silikonfett leicht nachfetten. (Zum Reinigen der Transferpette®...
  • Seite 24: Entfernen Von Kolben Zur Reinigung Oder Zum Austausch

    9 Wartung Entfernen von Kolben zur Reinigung oder zum Austausch Pipettiereinheit vom Griffteil trennen. Beide Verschlüsse der Pipettierge- häuseabdeckung um 90° drehen (z. B. mit einer Münze) und Pipettiergehäu- se abziehen. Die beiden äußeren Kreuzschlitz- Schrauben an der Schafteinheit ent- fernen.
  • Seite 25 Montageschlüssel auf Kolbenmutter stecken und Kolbenmutter abschrau- ben. Kolbenmutter entfernen und Kolben mit Kolbenfeder herausziehen. Kolbenfeder (a) und gereinigten oder neuen Kolben einsetzen. Kolbenmut- ter mit dem Montageschlüssel wieder festschrauben. Hubfedern (b) einset- zen. Transferpette® S-8/-12 997208 Gebrauchsanleitung...
  • Seite 26: Pipettiereinheit Wieder Zusammen

    10 Störung – Was tun? Pipettiereinheit wieder zusammen- bauen. Gerät auf Dichtheit prüfen, siehe Wartung, S. 20 . HINWEIS Die Pipettiereinheit muss gegen den Uhrzeigersinn so auf das Griffteil ge- schraubt werden, dass sie hörbar einras- tet. Die Pipettiereinheit dabei nicht nach unten ziehen! 10 Störung –...
  • Seite 27: Kennzeichnung Auf Dem Produkt

    Rechteck, sowie die beiden letzten Ziffern des Jahres, in dem die Kennzeichnung angebracht wurde. Bis zur dargestellten Temperatur autoklavierbar 121 °C Data Matrix Die Data Matrix verweist auf die BRAND MyProduct Website. www.brand.de/ip Hyperlink zur BRAND Patentseite Transferpette® S-8/-12 997208 Gebrauchsanleitung...
  • Seite 28: Bestellinformationen

    12 Bestellinformationen 12 Bestellinformationen 12.1 Bestelldaten/Zubehör Transferpette® S -8 Volumen Bezeichnung Best.-Nr.   0,5 - 10 μl M8-10 7059 00   5 - 50 μl M8-50 7059 06 10 - 100 μl M8-100 7059 08 20 - 200 μl M8-200 7059 10 30 - 300 μl M8-300 7059 12...
  • Seite 29: Ersatzteile

    Wandhalter Beschreibung Best. Nr. Wandhalter für 704812 1 Transferpette® S bzw. 1 Transferpette® S -8/-12 Regalhalter Beschreibung Best. Nr. Regalhalter für 704811 1 Transferpette® S bzw. 1 Transferpette® S -8/-12 12.2 Ersatzteile 12.2.1 Transferpette® S -8/-12 Aussehen und Abmessungen der Ersatzteile entsprechen dem jeweiligen Nennvolumen Transferpette®...
  • Seite 30: Weiteres Zubehör

    12 Bestellinformationen Dichtung O-Ring Kolben Schaft Volumen   0,5 - 10 μl 7056 59 7056 77 7033 80 7033 40   5 - 50 μl 7056 66 7056 20 7056 18 7033 43 10 - 100 μl 7056 62 7056 21 7056 18 7033 44 20 - 200 μl 7056 63...
  • Seite 31: Reparatur

    Gerät an Hersteller oder Händler senden. Vordrucke können beim Händler oder Hersteller angefordert werden, bzw. stehen unter www.brand.de zum Download bereit. Innerhalb der USA und Kanada Bitte klären Sie mit BrandTech Scientific, Inc. die Voraussetzungen für die Rücksendung bevor Sie das Gerät zum Service einschicken.
  • Seite 32 13 Reparatur Kontaktadressen Deutschland: USA und Kanada: ® BRAND GMBH + CO KG BrandTech Scientific, Inc. Otto-Schott-Straße 25 11 Bokum Road 97877 Wertheim (Germany) Essex, CT 06426-1506 (USA) T +49 9342 808 0 T +1-860-767 2562 F +49 9342 808 98000 F +1-860-767 2563 info@brand.de...
  • Seite 33: Kalibrierservice

    Die ausführliche Prüfanweisung steht unter www.brand.de bzw. www.brandtech.com zum Download bereit. BRAND bietet Ihnen darüber hinaus die Möglichkeit, Ihre Geräte durch un- seren Werks-Kalibrierservice oder durch das BRAND-DAkkS-Labor kali- brieren zu lassen. Schicken Sie uns einfach die zu kalibrierenden Geräte mit der Angabe, welche Art der Kalibrierung Sie wünschen.
  • Seite 34: Entsorgung

    16 Entsorgung 16 Entsorgung Beachten Sie vor Entsorgung die entsprechenden nationalen Entsor- gungsvorschriften und führen Sie das Produkt einer fachgerechten Ent- sorgung zu. Gebrauchsanleitung Transferpette® S-8/-12 997208...
  • Seite 35 Table of contents 1 Introduction................37 Scope of supply ................37 Terms of use ................. 37 2 Safety regulations ..............38 Safety regulations ................ 38 Purpose..................39 Limitations of use................. 39 Application restrictions..............39 Operating exclusions ..............39 3 Functions and controls............. 41 4 Pipetting.................
  • Seite 36 Table of contents 13 Repairs ................... 63 13.1 Sending for repair ................ 63 14 Calibration service..............64 15 Warranty ................65 16 Disposal.................. 65 Operating manual Transferpette® S-8/-12 997208...
  • Seite 37: Introduction

    • Be sure to include the operating manual if you transfer possession of this device to a third party. • You can find up-do-date versions of the operating manual on our website: www.brand.de. 1.2.1 Hazard levels The following signal words identify possible hazards:...
  • Seite 38: Safety Regulations

    2 Safety regulations 2 Safety regulations 2.1 Safety regulations Please read carefully! The instrument can be used in combination with hazardous materials, work processes and equipment. However, the operating manual cannot cover all of the safety issues that may occur in doing so. It is the user’s re- sponsibility to ensure compliance with the safety and health regulations and to specify the corresponding restrictions before use.
  • Seite 39: Purpose

    leaks), stop pipetting immediately and refer to the section “Trou- bleshooting”; see Troubleshooting, p. 58 . Contact the manufac- turer, if necessary. 2.2 Purpose This is an air displacement pipette for pipetting aqueous solutions of medium density and low to medium viscosity. 2.3 Limitations of use This instrument is intended for pipetting samples, within the following limitations:...
  • Seite 40 2 Safety regulations • for liquids that corrode polyvinylidene fluoride and silicone • for liquids that corrode polyphenylsulphide (on 50 μl, 100 μl, 200 μl and 300 μl instruments) • for liquids with very high steam pressure • for liquids that corrode polycarbonate • for liquids that corrode polyvinylidene fluoride and silicone •...
  • Seite 41: Functions And Controls

    3 Functions and controls Pipetting button Volume-setting wheel Easy Calibration function Finger rest Pipetting unit Tip cone Handle Volume display Volume-change protection Tip ejection key Transferpette® S-8/-12 997208 Operating manual...
  • Seite 42 3 Functions and controls Label window The instrument can be individually la- beled on the finger rest: Remove the label window on the fin- ger rest. Mark the labeling film. Reinsert the labeling film with win- dow. Operating manual Transferpette® S-8/-12 997208...
  • Seite 43: Pipetting

    4 Pipetting 1. Inserting a tip NOTICE Perfect analysis results can only be achieved by using quality tips. We recommend pipette tips from For additional information, refer to the Ac- curacy table, p. 48 . Pipette tips are disposable products! Insert tip vertically: Use the correct tips, in accordance with the volume range or color code! Make sure that the tips are firmly in...
  • Seite 44 4 Pipetting 3. Align pipetting unit The pipetting unit can turn freely in both directions. 4. Aspirating a sample NOTICE The ISO 8655 standard requires that pipette tips are pre-wetted once be- fore the actual pipetting procedure. Press the pipetting button as far as it will go.
  • Seite 45 5. Dispensing a sample Place the pipette tip against the ves- sel wall. Hold the pipette at an angle of 30-45° to the vessel wall. Press the pipetting knob at a steady speed until it stops and hold it down. To improve accuracy, comply with the corresponding wait time for serums, highly-viscous or low-density...
  • Seite 46: Checking The Volume

    5 Checking the volume 5 Checking the volume We recommend testing the device every 3 to 12 months, depending on the level of use. However, the testing cycle can be adapted to meet indi- vidual requirements. Gravimetric volume testing of the pipette is carried out according to the following steps and complies with DIN EN ISO 8655, Part 6.
  • Seite 47 Standard deviation*: *) = Calculation for accuracy (A%) coefficient of variation (CV%): A% and CV% are calculated using the formulas of statistical quality control. NOTICE Test instructions (SOPs) are available for download at www.brand.de . Transferpette® S-8/-12 997208 Operating manual...
  • Seite 48: Accuracy Table

    6 Accuracy table 6 Accuracy table Volume Partial A* ≤ ± CV* ≤ % Recommended range volume steps tip type [μl] [μl] [μl] [μl] 0.5–10   10 0.01 0.5–20     5     1 5–50   50 0.05 2–200   25     5 10–100 2–200   50   10 20–200 2–200   20...
  • Seite 49: Adjustment - Easy Calibration

    7 Adjustment – Easy Calibration The instrument is permanently calibrated for aqueous solutions. If it is de- termined that the pipette is operating inaccurately or to adjust the instru- ment to work with solutions of varying density and viscosity or with spe- cially-shaped pipette tips, it can be calibrated using the Easy Calibration Technique.
  • Seite 50 7 Adjustment – Easy Calibration Set the adjustment value: Transferpette® S, adjustable: with the volume-setting wheel in the UNLOCK position, set to the previously deter- mined actual value. Transferpette® S, fixed-volume: set the volume by rotating in the +/- direc- tion.
  • Seite 51: Disinfection/Autoclaving

    8 Disinfection/autoclaving 8.1 Autoclaving The Pipette is completely autoclavable at 121 °C (250 °F), 2 bar and a hold- ing time of at least 15 minutes, in accordance with DIN EN 285. Eject the pipette tip. Autoclave the complete pipette without any further disassembling. Allow the pipette to completely cool and dry.
  • Seite 52: Maintenance

    9 Maintenance 9 Maintenance 9.1 Separate the pipetting unit from the handle Eject the pipette tips. To separate, pull the pipetting unit downward as far as possible. Only then, turn it clockwise. After one rev- olution, the unit no longer needs to be pulled downward while turning.
  • Seite 53 Check the device for leaks. We recommend using BRAND’s leak detec- tor, the BRAND PLT unit. As an alternative to this, aspirate a sample and hold the device vertically for approx. 10 s. If drops form on the pipette tips, refer to “Troubleshooting” Troubleshooting, p. 58 .
  • Seite 54: Cleaning Instructions

    9 Maintenance Cleaning instructions Clean individual shafts and pistons (only these parts) with soap solu- tion or isopropanol. Then rinse with distilled water. Allow the parts to completely dry and cool. Liquid residues in the shafts result in deviations in accuracy. Re-grease pistons with a very thin coat of the grease supplied.
  • Seite 55 Push the piston unit all the way down. After removing the shaft, the seal is located either in the shaft or on the piston. Remove and inspect the seal and clean or change as nec- essary. If required, re-grease the pis- ton with the silicone grease supplied.
  • Seite 56 9 Maintenance Removing pistons for cleaning or replacement Separate the pipetting unit from the handle. Rotate both closures of the pipette housing cover by 90° (e.g. using a coin) and pull off the pipette housing. Remove both outer Phillips-head screws on the shaft unit. NOTICE The central guide axis (Z) must not be re- moved!
  • Seite 57 Place the installation tool onto the piston nut and unscrew it. Remove the piston nut and pull off the piston with piston spring. Insert piston spring (a) and cleaned or new piston. Re-tighten the piston nut using the installation tool. Insert stroke springs (b).
  • Seite 58: Troubleshooting

    10 Troubleshooting Reassemble the pipetting unit. Check the instrument for leaks, see Mainte- nance, p. 52 . NOTICE The pipetting unit must be screwed onto the handle in a counter-clockwise direc- tion until it clicks into place. Do not pull the pipetting unit downwards! 10 Troubleshooting Fault Possible causes...
  • Seite 59: Product Markings

    Autoclavable up to the temperature shown 121 °C Data matrix The data matrix refers to the BRAND MyProduct website. www.brand.de/ip Hyperlink to BRAND patent site Transferpette® S-8/-12 997208...
  • Seite 60: Order Information

    12 Order Information 12 Order Information 12.1 Order info/accessories Transferpette® S -8 Volume Designation Order no.   0.5–10 μl M8-10 7059 00   5–50 μl M8-50 7059 06 10–100 μl M8-100 7059 08 20–200 μl M8-200 7059 10 30–300 μl M8-300 7059 12 Transferpette®...
  • Seite 61: Wall Mount

    Wall mount Description Order No. Wall mount for 704812 1 Transferpette® S 1 Transferpette® S -8/-12 Shelf/rack mount Description Order No. Shelf mount for 704811 1 Transferpette® S 1 Transferpette® S -8/-12 12.2 Spares 12.2.1 Transferpette® S -8/-12 The appearance and dimensions of the spare parts correspond to the re- spective nominal volume Transferpette®...
  • Seite 62: Additional Accessories

    12 Order Information Seal O-ring Piston Shaft Volume   0.5 - 10 μl 7056 59 7056 77 7033 80 7033 40   5 - 50 μl 7056 66 7056 20 7056 18 7033 43 10 - 100 μl 7056 62 7056 21 7056 18 7033 44 20 - 200 μl...
  • Seite 63: Repairs

    Complete the “Declaration on Absence of Health Hazards” and send the instrument to the manufacturer or supplier. Ask your supplier or manu- facturer for the form. The form can also be downloaded from www.brand.de. Within USA and Canada Please clarify the requirements for the return delivery with BrandTech Sci- entific, Inc before sending the instrument in for service.
  • Seite 64: Contact Addresses

    The detailed testing instructions are available for download on www.brand.de or www.brandtech.com. BRAND also offers the possibility to have your devices calibrated by our factory calibration service or by the BRAND DAkkS laboratory. Simply send us the device to be calibrated, accompanied by details about which type of calibration you would like.
  • Seite 65: Warranty

    More information can be obtained from your dealer or directly from BRAND. The order document is available for download on www.brand.de (see Technical Documents). 15 Warranty We shall not be liable for the consequences of improper handling, use,...
  • Seite 66 Mode d'emploi Transferpette® S-8/-12 997208...
  • Seite 67 Sommaire Sommaire 1 Introduction................69 Étendue de la livraison ..............69 Conditions d'utilisation ............... 69 2 Règles de sécurité..............70 Règles de sécurité générales ............70 Utilisation ..................71 Limites d'utilisation ..............71 Restrictions d’utilisation.............. 71 Exclusions d'utilisation..............71 3 Éléments fonctionnels et de commande ........73 4 Pipetage .................
  • Seite 68 Sommaire 13.1 Retour pour réparation..............95 14 Service de calibrage..............97 15 Responsabilité pour défauts ............. 98 16 Évacuation................98 Mode d'emploi Transferpette® S-8/-12 997208...
  • Seite 69: Introduction

    • Veuillez joindre le mode d'emploi lorsque vous remettez cet appareil à des tiers. • Vous trouverez des versions mises à jour du mode d'emploi sur notre site www.brand.de. 1.2.1 Classes de danger Les mots de signalisation suivants caractérisent des dangers potentiels :...
  • Seite 70: Règles De Sécurité

    2 Règles de sécurité 2 Règles de sécurité 2.1 Règles de sécurité générales À lire attentivement ! L’appareil de laboratoire peut être utilisé avec des matériaux, des procé- dés et des appareillages dangereux. Le mode d'emploi n'a pas pour but d'exposer tous les problèmes de sécurité susceptibles de se présenter. Il relève donc de la responsabilité...
  • Seite 71: Utilisation

    9. Avant l'utilisation, toujours vérifier l'état correct de l'appareil. Si des dérangements de l’appareil se manifestent (par ex. piston grippé, fuite), arrêter immédiatement le pipetage et tenir compte du cha- pitre Dérangement — Que faire ?, voir Dérangement - Que faire ?, p. 90 .
  • Seite 72 2 Règles de sécurité • pour les liquides qui attaquent le fluorure de polyvinylidène et le sili- cone • pour les liquides qui attaquent le polysulfure de phénylène (pour les appareils de 50 μl, 100 μl, 200 μl et 300 μl) • pour les liquides à pression de vapeur très élevée •...
  • Seite 73: Éléments Fonctionnels Et De Commande

    3 Éléments fonctionnels et de commande Bouton de pipetage Molette de réglage du volume Fonction Easy Calibration Anse de maintien Unité de pipetage Cône de logement de la pointe Poignée Affichage du volume Protection du réglage de volume Touche d’éjection de la pointe Transferpette®...
  • Seite 74 3 Éléments fonctionnels et de commande Fenêtre d’inscription L’appareil peut être marqué individuelle- ment sur l’anse de maintien : Retirer la fenêtre d’inscription sur l’anse de maintien. Marquer le film d’inscription. Remettre le film d’inscription et la fe- nêtre en place. Mode d'emploi Transferpette®...
  • Seite 75: Pipetage

    AVIS Des résultats d'analyse exacts ne peuvent être obtenus qu'avec des pointes de qualité. Nous conseillons les pointes de pipettes de BRAND. Pour plus d’informations, voir Tableau des précisions, p. 80 . Les pointes de pipettes sont des articles à usage unique ! Fixez la pointe verticalement.
  • Seite 76 4 Pipetage 3. Ajustage de l’unité de pipetage L’unité de pipetage peut être tournée librement dans les deux sens. 4. Prélèvement d’échantillon AVIS La ISO 8655 prescrit de prérincer une fois la pointe de la pipette avec le li- quide de l’échantillon avant le pipetage proprement dit. Enfoncer le bouton de pipetage jus- qu’à...
  • Seite 77 5. Éjection de l’échantillon Appliquer la pointe de la pipette sur la paroi du récipient. Tenir la pipette en angle de 30 -45° par rapport à la paroi du récipient. Appuyer sur le bouton de pipetage avec une vitesse régulière jusqu’à la première butée et le maintenir enfon- cé.
  • Seite 78: Contrôle Du Volume

    5 Contrôle du volume 5 Contrôle du volume Nous conseillons de contrôler l’appareil tous les 3 à 12 mois selon l’utili- sation. Le cycle peut cependant être adapté aux exigences individuelles. L'essai volumétrique gravimétrique des pipettes s’effectue de la manière suivante et satisfait aux exigences de la norme DIN EN ISO 8655, partie 6.
  • Seite 79 *) = Calcul de l’exactitude (R %) et du coefficient de variation (CV %) : E % et CV % seront calculés selon les formules utilisées pour le contrôle statis- tique de la qualité. AVIS Des instructions de contrôle (SOP) son disponibles sous www.brand.de pour leur téléchargement. Transferpette® S-8/-12 997208 Mode d'emploi...
  • Seite 80: Tableau Des Précisions

    6 Tableau des précisions 6 Tableau des précisions Plage de Volume R* ≤ ± CV* ≤ % Type de pointes volume de la fraction intermé- recommandé diaires [μl] [μl] [μl] [μl] 0,5 - 10   10 0,01 0,5 - 20     5     1 5 - 50   50...
  • Seite 81: Ajustage - Easy Calibration

    7 Ajustage – Easy Calibration L’appareil est ajusté en permanence pour les solutions aqueuses. S’il est constaté avec certitude que la pipette ne fonctionne pas précisément ou s’il faut ajuster l’appareil pour des solutions à densité et viscosité diffé- rentes ou pour des pointes de pipettes de forme spéciale, les réglages peuvent être effectués à...
  • Seite 82 7 Ajustage – Easy Calibration Réglage de la valeur d’ajustage : Transferpette® S, Type Variable : ré- gler la valeur réelle réglée précédem- ment avec la molette de réglage du volume dans l’état UNLOCK. Transferpette® S, Type Fixe : régler le volume en tournant dans le sens +/–.
  • Seite 83: Désinfection / Autoclavage

    8 Désinfection / autoclavage 8.1 Autoclavage La pipette est complètement autoclavable à 121 °C (250 °F), 2 bar et une durée de maintien d’au moins 15 minutes selon DIN EN 285. Éjecter la pointe de la pipette. Autoclaver la pipette complète sans aucun autre démontage. Laisser la pipette entièrement refroidir et sécher.
  • Seite 84: Entretien

    9 Entretien 9 Entretien 9.1 Séparer l’unité de pipetage de la poignée Éjection de la pointe de la pipette. Pour le désaccouplement, presser le plus possible l’unité à pipette vers le bas puis la tourner dans le sens des aiguilles d’une montre. Après un tour, il n’est plus nécessaire de tirer vers le bas lors de la rotation.
  • Seite 85 Contrôler l’étanchéité de l’appareil. Nous conseillons d’utiliser le contrôleur d’étanchéité pour pipettes PLT de BRAND. En alternative à cela, aspirer l’échantillon, tenir l’appareil à la verticale pendant env. 10 s. Si des gouttes se forment sur les pointes des pipettes, voir Déran- gements –...
  • Seite 86 9 Entretien Remarques sur le nettoyage Nettoyer les tiges individuelles et les pistons (uniquement ces pièces) avec une solution savonneuse ou de l'isopropanol, puis les rincer à l'eau distillée. Laisser sécher complètement et refroidir les composants. Des restes de liquide dans les corps conduisent à des divergences de précision. Regraisser le piston en fine couche avec la graisse fournie.
  • Seite 87 Pousser l’unité à pistons complète- ment vers le bas. Après avoir retiré la tige, le joint d’étanchéité se trouve soit dans la tige ou sur le piston. Reti- rer le joint d’étanchéité, le contrôler et, le cas échéant, le nettoyer ou le remplacer.
  • Seite 88 9 Entretien Enlèvement du piston pour le nettoyage ou pour le remplacement Séparer l’unité de pipetage de la poi- gnée. Tourner les deux fermetures du cou- vercle du boîtier de pipetage de 90° (par ex. avec une pièce de monnaie) et retirer le boîtier de pipetage.
  • Seite 89 Placer la clé de montage sur l’écrou du piston et dévisser l’écrou du pis- ton. Retirer l’écrou du piston et dégager le piston avec le ressort. Remettre en place le ressort du pis- ton (a) et le piston nettoyé ou le pis- ton neuf.
  • Seite 90: Dérangement - Que Faire

    10 Dérangement - Que faire ? Remonter l’unité de pipetage. Contrôler l’étanchéité de l’appareil, voir Entretien, p. 84 . AVIS L’unité de pipetage doit être vissée de manière audible dans le sens contraire des aiguilles d’une montre sur la poi- gnée. Ne pas tirer l'unité de pipetage vers le bas ! 10 Dérangement - Que faire ? Dérangement...
  • Seite 91: Marquage Sur Le Produit

    été apposé. Autoclavable jusqu’à la température représentée 121 °C Data Matrix La Data Matrix renvoie au site web BRAND MyProduct. www.brand.de/ip Lien hypertexte vers la page des brevets BRAND Transferpette® S-8/-12 997208 Mode d'emploi...
  • Seite 92: Informations Pour La Commande

    12 Informations pour la commande 12 Informations pour la commande 12.1 Données de commande/Accessoires Transferpette® S -8 Volume Désignation Réf. de commande   0,5 - 10 μl M8-10 7059 00   5 - 50 μl M8-50 7059 06 10 - 100 μl M8-100 7059 08 20 - 200 μl...
  • Seite 93: Support Mural

    Support mural Description Réf. de commande Support mural pour 704812 1 Transferpette® S 1 Transferpette® S -8/-12 Support pour étagère Description Réf. de commande Support pour étagère pour 704811 1 Transferpette® S 1 Transferpette® S -8/-12 12.2 Pièces détachées 12.2.1 Transferpette® S -8/-12 L’aspect et les dimensions des pièces détachées correspondent au vo- lume nominal respectif Transferpette®...
  • Seite 94: Autres Accessoires

    12 Informations pour la commande Joint d’étanchéité Joint torique Piston Tige Volume   0,5 - 10 μl 7056 59 7056 77 7033 80 7033 40   5 - 50 μl 7056 66 7056 20 7056 18 7033 43 10 - 100 μl 7056 62 7056 21 7056 18...
  • Seite 95: Réparation

    Remplir « l’Attestation de Décontamination » et la retourner avec l’appa- reil au fabricant ou au revendeur. Demander le formulaire au fournisseur ou au fabricant ou bien en téléchargement gratuit sous www.brand.de. Aux États-Unis et au Canada : Merci de contacter BrandTech Scientific, Inc. pour demander les condi- tions de retour de l’appareil avant de le renvoyer au service après-vente.
  • Seite 96: Adresses De Contact

    13 Réparation Adresses de contact Allemagne : États-Unis et Canada : ® BRAND GMBH + CO KG BrandTech Scientific, Inc. Otto-Schott-Straße 25 11 Bokum Road 97877 Wertheim (Germany) Essex, CT 06426-1506 (USA) T +49 9342 808 0 T +1- 860- 767 2562...
  • Seite 97: Service De Calibrage

    Les instructions de contrôle détaillées peuvent être téléchargées sur www.brand.de ou www.brandtech.com. BRAND vous offre également la possibilité de faire calibrer vos instru- ments par notre service de calibration ou par le laboratoire de calibration BRAND-DAkkS. Envoyez-nous simplement les appareils à calibrer et indi- quez quelle sorte de calibration vous désirez.
  • Seite 98: Responsabilité Pour Défauts

    15 Responsabilité pour défauts 15 Responsabilité pour défauts Nous déclinons toute responsabilité en cas de conséquences d'un traite- ment, d'une utilisation, d'un entretien et d'une manipulation incorrects, d'une réparation non autorisée de l'appareil ou d'une usure normale, no- tamment des pièces d'usure, telles que les pistons, les joints d'étanchéité, les soupapes, et de rupture de pièces en verre.
  • Seite 99 Índice 1 Introducción ................101 Contenido de la entrega .............. 101 Información general sobre las instrucciones de uso....101 2 Disposiciones de seguridad ............102 Disposiciones generales de seguridad........102 Aplicación ..................103 Limitaciones de empleo .............. 103 Limitaciones de uso ..............103 Excepciones de uso..............
  • Seite 100 Índice 13 Reparación ................127 13.1 Envíos para reparación ..............127 14 Servicio de calibración ............. 128 15 Responsabilidad por defectos........... 129 16 Eliminación ................129 Instrucciones de manejo Transferpette® S-8/-12 997208...
  • Seite 101: Introducción

    • Adjuntar el manual de instrucciones cuando se entregue este equipo a un tercero. • En nuestro sitio web https://www.brand.de/es/, encontrará versio- nes actualizadas del manual de instrucciones. 1.2.1 Niveles de riesgo Las siguientes palabras de advertencia hacen referencia a posibles ries-...
  • Seite 102: Disposiciones De Seguridad

    2 Disposiciones de seguridad 2 Disposiciones de seguridad 2.1 Disposiciones generales de seguridad ¡Leer todo el manual con atención por favor! El equipo de laboratorio puede utilizarse en combinación con materiales, procesos de trabajo y aparatos riesgosos. No obstante, el manual de ins- trucciones no puede hacer referencia a todas las cuestiones que, even- tualmente, podrían afectar la seguridad.
  • Seite 103: Aplicación

    8. Utilizar solo piezas de repuesto originales. No realizar modificacio- nes técnicas. ¡No desmontar el aparato más allá de lo descrito en el manual de instrucciones! 9. Comprobar siempre que el equipo esté en buenas condiciones antes de utilizarlo. Si el dispositivo empieza a fallar (p. ej., el émbolo se mueve con dificultad, fugas), dejar de pipetear de inmediato y con- sultar el capítulo Qué...
  • Seite 104: Excepciones De Uso

    2 Disposiciones de seguridad 2.5 Excepciones de uso El usuario mismo debe verificar que el equipo sea adecuado para el fin previsto. El equipo no puede utilizarse: • con líquidos que atacan al polipropileno y FKM • con líquidos que atacan al policarbonato •...
  • Seite 105: Elementos De Mando Y Ejecución De Funciones

    3 Elementos de mando y ejecución de funciones Pulsador de pipeteado Ajuste del volumen Función Easy Calibration Estribo para el dedo Unidad de pipeteado Cono de acoplamiento de puntas Mango Indicación del volumen Protección contra el cambio de volumen Tecla de expulsión Transferpette®...
  • Seite 106 3 Elementos de mando y ejecución de funciones Campo de etiquetado El dispositivo se puede etiquetar de for- ma individual en el estribo para el dedo: Retirar el campo de etiquetado en el estribo para el dedo. Rotular la lámina. Volver a colocar la lámina junto con el campo.
  • Seite 107: Pipeteo

    1. Insertar la punta AVISO Utilice solo puntas de calidad para obtener buenos resultados. Le reco- mendamos usar las puntas para pipetas de BRAND. Encontrará más ins- trucciones en la Tabla de precisión, p. 112 ¡Las puntas de las pipetas no son reutilizables! Fije la punta verticalmente.
  • Seite 108 4 Pipeteo 3. Orientar la unidad de pipeteado La unidad de pipeteado puede girar en ambos sentidos. 4. Tomar una prueba AVISO La ISO 8655 estipula que se debe enjuagar la punta de la pipeta con el lí- quido de muestra antes del propio pipeteo. Presione el pulsador de pipeteado hasta el primer tope.
  • Seite 109 5. Depositar la muestra Coloque la punta de la pipeta sobre la pared del recipiente. Mantenga la pipeta en un ángulo entre 30° y 45° contra la pared del recipiente. Presione el pulsador de pipeteado a una velocidad uniforme hasta el pri- mer tope y mantenga.
  • Seite 110: Controlar El Volumen

    5 Controlar el volumen 5 Controlar el volumen En función del uso, recomendamos comprobar el equipo cada 3-12 me- ses. El ciclo puede adaptarse a los requisitos individuales. El control de volumen gravimétrico de la pipeta se realiza con los pasos siguientes y sa- tisface la norma DIN EN ISO 8655, parte 6.
  • Seite 111 *) = cálculo de la exactitud (R%) y el coeficiente de variación (VK%): E % y CV % se calculan según las fórmulas del control estadístico de calidad. AVISO Las instrucciones de inspección (SOP) pueden descargarse en www.brand.de. Transferpette® S-8/-12 997208 Instrucciones de manejo...
  • Seite 112: Tabla De Precisión

    6 Tabla de precisión 6 Tabla de precisión Rango de Volumen R* ≤ ± CV* ≤ % Paso Tipo de punta volumen parcial parcial recomendado [μl] [μl] [μl] [μl] 0,5 - 10   10 0,01 0,5 - 20     5     1 5 - 50   50 0,05 2 - 200...
  • Seite 113: Ajuste - Easy Calibration

    7 Ajuste – Easy Calibration El dispositivo está ajustado de forma permanente para soluciones acuo- sas. El sistema Easy Calibration permite ajustar con facilidad la pipeta si se constata que funciona de forma poco precisa o para configurar el dis- positivo para soluciones de distinta densidad y viscosidad o puntas de pi- petas con formas especiales.
  • Seite 114 7 Ajuste – Easy Calibration Regular el valor de ajuste: Transferpette® S, Tipo variable: ajuste el valor real calculado previamente con el ajuste de volumen en estado UNLOCK. Transferpette® S, Tipo fijo: ajuste el volumen girando en sentido +/–. Se recomienda realizar un control de volumen después de cada ajuste.
  • Seite 115: Desinfección / Autoclave

    8 Desinfección / autoclave 8.1 Autoclave La pipeta puede esterilizarse en autoclave a 121 °C (250 °F), 2 bares y du- rante, al menos, 15 minutos, de conformidad con la norma DIN EN 285. Expulse la punta de la pipeta. Autoclave la pipeta entera sin desmontar nada más. Deje enfriar y secar la pipeta por completo.
  • Seite 116: Mantenimiento

    9 Mantenimiento 9 Mantenimiento 9.1 Separe la unidad de pipeteado del mango Expulse las puntas de la pipeta. Para desacoplarla, empújela todo lo posible hacia abajo y, solo después, gírela en sentido de las agujas del re- loj. Después de un giro deja de ser ne- cesario tirar hacia abajo al girar.
  • Seite 117 Vástagos de la pipeta, émbolos y juntas en busca de daños y suciedad. Compruebe la estanqueidad del dispositivo. Le recomendamos utili- zar el comprobador de estanqueidad BRAND PLT. De forma alternati- va, aspire la muestra y mantenga el dispositivo unos 10 segundos en posición vertical.
  • Seite 118 9 Mantenimiento Observaciones acerca de la limpieza Limpie los vástagos individuales y el émbolo (solo estas piezas) con una solución jabonosa o isopropanol y aclárelas luego con agua desti- lada. Deje secar y enfriar por completo las piezas. Los restos de líquido en los vástagos causan imprecisiones en las mediciones.
  • Seite 119 Desplace la unidad del émbolo com- pletamente hacia abajo. Después de retirar el vástago, la junta se encuen- tra dentro de este o bien sobre el ém- bolo. Retire la junta, examínela y, en caso necesario, límpiela o sustitúya- la. En caso necesario, engrase ligera- mente los émbolos con la grasa sili- conada suministrada.
  • Seite 120 9 Mantenimiento Retirar el émbolo para limpiarlo o sustituirlo Separe la unidad de pipeteado del mango. Gire 90° los dos cierres de la cubierta de la carcasa de pipeteado (p. ej., con una moneda) y retire la carcasa. Quite los dos tornillos Allen exterio- res en la unidad del vástago.
  • Seite 121 Retire la tuerca del émbolo y saque el émbolo con el muelle del émbolo. Coloque el muelle del émbolo (a) y el émbolo limpio o nuevo. Vuelva a apretar la tuerca del émbolo con la llave de montaje. Coloque los mue- lles (b).
  • Seite 122: Avería - ¿Qué Hacer En Caso De Errores

    Limpieza en autoclave hasta la temperatura mostrada 121 °C Matriz de datos La matriz de datos hace referencia al sitio web de BRAND MyPro- duct. Instrucciones de manejo Transferpette® S-8/-12 997208...
  • Seite 123 Símbolo o número Significado www.brand.de/ip Hipervínculo al sitio de la patente de BRAND Transferpette® S-8/-12 997208 Instrucciones de manejo...
  • Seite 124: Información Para Pedidos

    12 Información para pedidos 12 Información para pedidos 12.1 Datos de referencia/accesorios Transferpette® S -8 Volumen Denominación N.° de ref.   0,5 - 10 μl M8-10 7059 00   5 - 50 μl M8-50 7059 06 10 - 100 μl M8-100 7059 08 20 - 200 μl M8-200 7059 10 30 - 300 μl...
  • Seite 125: Soporte De Pared

    Soporte de pared Descripción N.° de pedido Soporte de pared para 704812 1 Transferpette® S 1 Transferpette® S -8/-12 Estante Descripción N.° de pedido Estante para 704811 1 Transferpette® S 1 Transferpette® S -8/-12 12.2 Piezas de repuesto 12.2.1 Transferpette® S -8/-12 El aspecto y las dimensiones de las piezas de repuesto se corresponden con el volumen nominal correspondiente Transferpette®...
  • Seite 126: Otros Accesorios

    12 Información para pedidos Junta Junta tórica Émbolo Vástago Volumen   0,5 - 10 μl 7056 59 7056 77 7033 80 7033 40   5 - 50 μl 7056 66 7056 20 7056 18 7033 43 10 - 100 μl 7056 62 7056 21 7056 18 7033 44...
  • Seite 127: Reparación

    El formulario se puede pedir al proveedor o al fabricante, o bien, se puede descargar en el sitio web www.brand.de/es. Dentro de EE. UU. y Canadá Contactar con BrandTech Scientific, Inc. para aclarar las condiciones de devolución del equipo antes de enviarlo al servicio técnico.
  • Seite 128: Direcciones De Contacto

    Asimismo, BRAND ofrece la posibilidad de solicitar el calibrado de los equipos al servicio técnico de calibrado en fábrica o al laboratorio de BRAND acreditado por el organismo DAkkS de Alemania. A tal fin, alcanza tan solo con enviar los equipos que se desea calibrar con la indicación de Instrucciones de manejo Transferpette®...
  • Seite 129: Responsabilidad Por Defectos

    (calibrado en fábri- ca)o un certificado de calibrado de DAkkS. Para más información, consul- tar con el distribuidor especializado o directamente con BRAND. La docu- mentación para realizar el pedido se puede descargar en www.brand.de/ es/ (véase la documentación técnica).
  • Seite 130 Transferpette® S-8/-12 997208 操作手册...
  • Seite 131 目录 目录 1 引言 ............ 133 供货范围 ...........133 使用规定 ...........133 2 安全规定 ..........134 一般安全规定 ........134 预期用途 ...........134 使用限制条件 ........135 使用限制 ...........135 使用排除范围 ........135 3 功能元件和操作元件 ........136 4 吸移 ............ 138 5 检查体积 ..........141 6 精度表 ..........143 7 调整...
  • Seite 132 目录 15 缺陷责任 ..........159 16 废弃处理 ..........159 操作手册 Transferpette® S-8/-12 997208...
  • Seite 133: 供货范围

    1 引言 1.1 供货范围 Transferpette ® S -8 或 -12,带质量证书、搁架、试剂容器、安装钥 匙、硅脂和1 套 FKM/硅胶密封件和本使用说明。 1.2 使用规定 • 在第一次使用前请认真阅读本使用说明书。 • 该使用说明书是此设备所包含的部分,必须妥善保存并且易于取 阅。 • 如果将本设备交予第三方,须随附本使用说明书。 • 在我方官网中可查阅更新版的使用说明书:www.brand.de。 1.2.1 危险等级 下列信号词提示可能存在的危险: 信号词 含义 危险 将导致重伤或死亡。 警告 可能导致重伤或死亡。 小心 可能导致轻伤或中度伤害。 提示 可能导致损失财物。 1.2.2 图示 图示...
  • Seite 134: 安全规定

    2 安全规定 2 安全规定 2.1 一般安全规定 务必请仔细通读! 实验室设备 可与危险材料、工作过程和配件结合使用。本使用说明书 未展示可能出现的安全问题。用户有责任确保遵守安全法规和健康法 规,并在使用前确定存在的限制条件。 1. 所有使用者在使用本设备之前必须阅读和注意本使用说明书。 2. 遵守一般危险提示和安全法规,例如穿戴防护服、护目镜和防护 手套。在使用传染性或危险试样进行工作时,必须遵守标准实验 室规定和标准预防规定。 3. 请注意试剂供应商提供的所有说明。 4. 仅将设备用于液体吸移,在规定的使用极限和使用限制范围内使 用。注意使用排除范围,参见使用排除范围, 页 135 。如有疑 问,请联系制造商或者经销商。 5. 工作时请始终确保不得危及用户或者其他人员。避免飞溅。仅使 用合适的容器。 6. 使用腐蚀性介质时,应避免接触尖端开口。 7. 切勿使用暴力。 8. 仅使用原装备件。不得进行任何技术更改。未按照使用说明书的 说明进一步拆解设备! 9. 使用前请务必检查设备的状态是否正常。如果设备出现故障预兆 (例如:活塞不灵活,不密封),立即停止吸移,并注意章节故 障——如何处理?,参见 故障——如何处理?, 页 153 。必要 时请联系制造商。...
  • Seite 135: 使用限制条件

    2.3 使用限制条件 仪器用于在注意以下极限条件的情况下吸移试样: • 仪器和试剂的使用温度介于 +15 °C 至 +40 °C(59 °F 至 104 °F)之间(可根据要求提供其他温度) • 蒸汽压力最大 500 mbar • 粘度:260 mPa s 如果是粘性介质,则可能需要调整速度。 2.4 使用限制 粘稠和润湿的液体可能对体积精度产生不良影响。也包括其温度与室 温偏差超过 ± 1 °C/± 1.8 °F 的液体。 2.5 使用排除范围 用户必须自行检查仪器是否适合预期用途。不得使用仪器: • 适用于对聚丙烯和 FKM 有侵蚀性的流体 •...
  • Seite 136: 功能元件和操作元件

    3 功能元件和操作元件 3 功能元件和操作元件 移液按钮 体积调节轮 Easy Calibration(易校准)功能 指托 移液单元 移液器吸头支撑锥体 抓手 体积显示 体积调整保护装置 移液器吸头排放按键 操作手册 Transferpette® S-8/-12 997208...
  • Seite 137 标记窗口 设备指托上可进行个性化标记: 移除指托上的标记窗口。 在标记膜上贴标签。 重新放入带窗口的标记膜。 Transferpette® S-8/-12 997208 操作手册...
  • Seite 138 4 吸移 4 吸移 1.插上移液器吸头 注意 只有使用高品质移液器吸头才能得到没有缺陷的分析结果。我们建议 使用 BRAND 的移液器吸头。其他提示参见精度表精度表, 页 143 。 移液器吸头为一次性产品! 竖直地连接尖端 : 根据容量范围或颜色代码,使用正 确的提示! 确保提示牢固到位,并且不漏水。 2.调节体积 将体积调整保护装置向上推 (UNLOCK)。 转动用于选择所需体积的体积调节 轮。这时均匀地转动,避免突然的 旋转运动。 将体积调整保护装置向下推 (LOCK)。体积调节轮明显不灵活, 但未完全卡住! 3.对齐吸移单元 使吸移单元在两个方向上都能自由转动。 操作手册 Transferpette® S-8/-12 997208...
  • Seite 139 4.提取样品 注意 ISO 8655 规定实际移液过程开始前必须用样品溶液预冲洗移液器吸 头。 将移液按钮压至第一个止挡位置。 垂直稳住设备,将移液器吸头浸入 液体中。 使移液按钮均匀向后滑。 将移液器吸头再浸入数秒,以完全提取 所设体积。 这对于粘性介质和大体积 的移液器尤其重要。 体积范围 浸入深度 等待时间 0,5 – 100 µl 2 – 3 mm 100 µl – 300 µl 2 – 4 mm > 1000 µl 3 – 6 mm 注意...
  • Seite 140 4 吸移 5.提交样品 将移液器吸头靠在容器壁上。将吸 管与血管壁成30-45°角。 以稳定的速度按压移液器按钮到第 一个停止点并保持。对于血清、高 粘性或松弛的介质,观察适当的等 待时间以提高准确性。 通过超行程完全排空移液器吸头: 将移液按钮压至第二个止挡位置。 将移液器的尖端擦拭在容器的壁 上。 将移液器吸头从容器壁上拿回来, 让移液按钮向后滑动。 6.弹出尖端 注意 始终将设备直立存放在所提供的架子支架或桌子支架上,不要有任何 倾斜。 将移液器轴放在一个合适的处理容 器上,将吸头弹出按钮向下按,按 到最大限度。 操作手册 Transferpette® S-8/-12 997208...
  • Seite 141: 检查体积

    5 检查体积 我们建议根据具体使用情况每 3-12 个月检查一次仪器。但具体周期 可根据个性化要求进行调整。通过以下步骤按重量进行移液器体积检 测,依据 DIN EN ISO 8655 第 6 部分的要求。 1.调节额定体积 调节注明的最高仪器体积(操作方法参见吸移, 页 138 )。 2.对移液器进行温度调节 检测前,使用移液器吸头提取和分配五次检测液 (蒸馏水),对 移液器进行温度调节。 3.进行检测 注意 依据 DIN EN ISO 8655-2,建议每次单独测量之后更换移液器吸头。 DAkkS 准则 DKD-R8-1 可能与该规定有偏差。 提取检测液,吸移到称重容器中。 注意 必须单独检测每条通道。 使用分析天平称量吸移量的重量。(注意天平生产商的使用说明 书。) 计算吸移体积。这时要考虑检测液的温度。 建议至少在 3 个体积范围内 (100 %, 50 %, 10 %) 进行 10 次吸移和称重。...
  • Seite 142 5 检查体积 Z = 校正系数(如 20 °C 时为 1.0029 µl/mg, 1013 hPA)   平均值: 平均体积: 准确度*: 变化系数*: 标准偏差*: *) = 计算参考值 (R%) 和变量系数 (VK%):按照统计质量检查公式计 算 R% 和 VK%。 注意 可以前往 www.brand.de 下载测试规范 (SOP)。 操作手册 Transferpette® S-8/-12 997208...
  • Seite 143: 精度表

    6 精度表 体积 分量 R* ≤ VK* ≤ % 子 推荐的 范围 体积 ± 步骤 移液器吸头型号 [μl] [μl] [μl] [μl] 0.5 - 10   10 0.01 0.5-20     5     1 5-50   50 0.05 2-200   25     5 10-100 2-200   50   10 20-200 2-200   20 30-300 5-300...
  • Seite 144: 调整 - Easy Calibration(易校准

    7 调整 – Easy Calibration(易校准) 7 调整 – Easy Calibration(易校准) 持续按水溶液调整设备。如果确定移液器不能精确工作,或者要按不 同密度和粘度的溶液或者特殊形状的移液器吸头调整设备,可使用 Easy Calibration(易校准)技术进行调整。 进行体积检查,确定实际值,参见 检查体积。 移除标记窗口 (1) 和标记膜 (2): 轻轻抬起拉钩,并向上取下。 用回形针或不用的移液器吸头将保 护膜 (3) 去除(不再需要保护 膜)。 将红色的调整滑阀完全向后推,提 升体积调节轮(脱开),松开调整 滑阀。 设置调整值: Transferpette® S ,可变型 :使用体积 调节轮在 UNLOCK 状态下调整之前 确定的实际值。 Transferpette® S ,固定型 :通过向 +/–...
  • Seite 145 重新将调整滑阀完全向后推,将体 积调节轮下压,并松开调整滑阀。 贴上标记膜,重新安装标记窗口。 注意 然后,通过标记区内红色的调整滑阀显示出厂设置的变化。 Transferpette® S-8/-12 997208 操作手册...
  • Seite 146: 消毒/高压消毒处理

    8 消毒/高压消毒处理 8 消毒/高压消毒处理 8.1 高压消毒处理 移液器可完全在 121 °C (250 °F),2 bar 下高压消毒处理,依据 DIN EN 285,保持时间至少为 15 分钟。 顶出移液器吸头。 在不继续拆卸的情况下,对整个移液器进行高压消毒处理。 让移液器完全冷却并干燥。 注意 用户应自行对高压消毒处理的有效性进行仔细检查。通过真空蒸馏实 现最高安全性。我们建议使用蒸馏袋。 注意 高压消毒处理之前,必须将体积设置设为带有字符的数值(比如设为 11.25 或 11.26,但不能设为它们之间),这时必须完全解锁体积调 整保护装置 (UNLOCK)。 如果频繁进行高压消毒处理,使用随供的硅脂涂抹活塞和密封件,使 其更加灵活。必要时在高压消毒处理之后拧紧抓手和移液器杆之间的 螺栓连接。 8.2 紫外线消毒 该仪器耐受紫外线杀菌灯的常用功率。照射紫外线后颜色可能会变 化。 操作手册 Transferpette® S-8/-12 997208...
  • Seite 147: 将移液单元与抓手分开

    9 维护 9.1 将移液单元与抓手分开 顶出移液器吸头。 脱开时,将移液单元尽可能向下 压,之后再顺时针旋转。一圈之 后,旋转时不得再向下拉。 注意 > 在安装时必须逆时针将移液单元拧到抓手上,并要确保听到其卡入 的声音。 > 在安装时请勿将移液单元向下拉! 错误处理可能导致损坏! > 9.2 拆卸/清洁 在维护、清洁或更换零件时,将移液单元的三个主要组件轻轻分离并 拆解。在以下页面上直观地说明操作方法。 在附在备件中的说明书内详细说明更换单个移液器杆上 O 形圈的方 法。 Transferpette® S-8/-12 997208 操作手册...
  • Seite 148 独拧下它们。 移液器杆,包括移液器杆轴承架 [ II ] 和固定在上面的中心导向轴 (Z),以及在清洁或更换时可单独拧下 的移液器杆和密封件。 移液外壳,通过两个旋转扣环与活塞单 元的移液器壳盖 [ III ] 相连。 维护 为保证正常发挥作用,应定期维护并在必要时清洁 Transferpette® S -8/-12。 需要检查什么? 检查移液器杆、活塞和密封件是否损坏和脏污。 检查设备的密封性。我们建议使用 BRAND 密封性检测仪 BRAND PLT unit。为此,抽吸样品,使设备保持垂直约 10 s。如果在移 液器吸头上形成液滴,参见故障——如何处理?故障——如何处 理?, 页 153 . 有关清洁的提示 使用皂液或异丙醇清洁单个移液器杆和活塞(仅这些零件),之后 使用蒸馏水冲洗。 操作手册 Transferpette® S-8/-12 997208...
  • Seite 149 使零件完全干燥和冷却。移液器杆内的液体残留物会导致精度偏 差。 使用随供的润滑脂重新润滑活塞。对于中心导向轴 (Z),仅使用规 定的 Fluorstatic 润滑脂! 清洁或更换时移除移液器杆和密封件 将移液单元与抓手分开。 将移液器壳盖的两个闭锁装置旋转 90°(比如使用一枚硬币),拔出 移液外壳。 将安装用扳手 (M) 插入到单个移液 器杆上,旋下移液器杆。 将活塞单元完全向下推。移除移液 器杆之后,密封件或者在移液器杆 内,或者在活塞上。移除密封件, 检查,并在必要时清洁或更换。如 有必要,请使用随附的硅脂润滑活 塞。(清洁 Transferpette® S -8/-12 30 - 300 μl 时,从活塞上拔下 额外的压环。) Transferpette® S-8/-12 997208 操作手册...
  • Seite 150 9 维护 将密封件平坦的一侧朝上推到活塞 上。(如果是 Transferpette® S -8/-12 30 - 300 μl,首先重新 放入额外的压环!)使用安装用扳 手拧紧清洁过的或新的移液器杆。 重新组装移液单元。检查设备是否 密封,参见维护, 页 147 。 注意 必须逆时针将移液单元拧到抓手上,并 要确保听到其卡入的声音。期间请勿将 移液单元向下拉! 清洁或更换时移除活塞 将移液单元与抓手分开。 将移液器壳盖的两个闭锁装置旋转 90°(比如使用一枚硬币),拔出 移液外壳。 移除移液器杆单元上的两只外侧十 字槽螺栓。 注意 不允许松开中心导向轴 (Z)! 操作手册 Transferpette® S-8/-12 997208...
  • Seite 151 拉开并分开活塞和移液器杆单元。 拔出起升弹簧。 将安装用扳手插入到活塞螺母上, 旋下活塞螺母。 Transferpette® S-8/-12 997208 操作手册...
  • Seite 152 9 维护 移除活塞螺母,拔出活塞和活塞弹 簧。 插入活塞弹簧 (a) 和清洁过的或新 的活塞。使用安装用扳手重新拧紧 活塞螺母。插入起升弹簧 (b)。 重新组装移液单元。检查设备是否 密封,参见维护, 页 147 。 注意 必须逆时针将移液单元拧到抓手上,并 要确保听到其卡入的声音。期间请勿将 移液单元向下拉! 操作手册 Transferpette® S-8/-12 997208...
  • Seite 153: 故障--如何处理

    抽吸极慢 移液器杆堵塞 清洁移液器杆 输出的体积过大 抽吸前将移液按钮过大幅度地 注意正确操作。 压入,甚至是以超行程压入 活塞不灵活 活塞脏污或没有润滑脂 清洁并为活塞涂润滑脂 11 产品上的标识 标志或编号 含义 阅读使用说明书。 XXZXXXXX 序列号 本仪器依照德国《测量和校准法》以及《测量和校准条例》进行 DE-M 21 标识。 带一个矩形框的字符串 DE-M(DE 表示德国),以及年份的后两 个数字。 在所示温度以下均可高压消毒处理 121 °C 数据矩阵 该数据矩阵指向 BRAND MyProduct 网站。 www.brand.de/ip BRAND 专利页面的超链接 Transferpette® S-8/-12 997208 操作手册...
  • Seite 154: 订购信息

    12 订购信息 12 订购信息 12.1 订购信息/配件 Transferpette® S -8 体积 名称 订购号   0.5 - 10 μl M8-10 7059 00   5 - 50 μl M8-50 7059 06 10 - 100 μl M8-100 7059 08 20 - 200 μl M8-200 7059 10 30 - 300 μl M8-300 7059 12...
  • Seite 155 壁挂架 产品描述 订购号 用于 704812 1 个 Transferpette® S 或 1 个 Transferpette® S -8/-12 的壁挂架 搁架 产品描述 订购号 用于 704811 1 个 Transferpette® S 或 1 个 Transferpette® S -8/-12 的搁架 12.2 备件 12.2.1 Transferpette® S -8/-12 备件的外观和尺寸符合相应的额定体积 Transferpette® S-8/-12 997208 操作手册...
  • Seite 156: 其他配件

    12 订购信息 密封 O 形圈 活塞 移液器杆 体积 0.5 - 10 μl 7056 59 7056 77 7033 80 7033 40 5 - 50 μl 7056 66 7056 20 7056 18 7033 43 10 - 100 μl 7056 62 7056 21 7056 18 7033 44 20 - 200 μl...
  • Seite 157 13 维修 13.1 送修 注意 法律明确禁止在未经许可的情况下运输有害材料。 彻底清洁仪器并清除污染物! • 寄回产品时,原则上须附上故障类型与所使用介质的准确描述。 如果缺失所使用介质的相关信息,仪器将不能得到维修。 • 仅发送不含蓄电池的仪器。 • 寄回仪器的风险和费用由寄件人承担。 在美国和加拿大之外 将“无健康危害声明”填写完整,并和仪器一同发送给您的经销商或 制造商。可以向经销商或制造商索要表格,也可以从 www.brand.de 主页下载。 在美国和加拿大以内 在返修仪器之前,请联系 BrandTech Scientific, Inc. 确认寄回仪 器需满足的各项前提。 只接受已清洁并已去除污染物的仪器,将和返修授权码一同告知您地 址。将返修授权码标在包装外侧的显眼位置。 Transferpette® S-8/-12 997208 操作手册...
  • Seite 158: 校准服务

    14 校准服务 联系地址 德国: 美国和加拿大: BRAND GMBH + CO KG BrandTech ® Scientific, Inc. Otto-Schott-Straße 25 11 Bokum Road 97877 Wertheim (Germany) Essex, CT 06426-1506 (USA) 电话 +49 9342 808 0 电话 +1-860-767 2562 传真 +49 9342 808 98000 传真 +1-860-767 2563 info@brand.de...
  • Seite 159 15 缺陷责任 我们不承担由于不当拿取,使用,服务,操作或未授权的仪器维修产 生的 结果,我们同样不承担由于正常易损件如活塞,密封垫圈,阀门 的磨损或 者玻璃破损而产生的结果。我们也不承担由于不按照操作手 册/使用说明指 导的操作而产生的结果。我们不承担由于进行任何操 作手册未描述的拆卸 或由于非原装配件的使用而产生的结果。 美国和加拿大: 有关保修责任的 信息 请参见 www.brandtech.com。 16 废弃处理 废弃处理前,请注意国内相应的处理法规,对产品进行专业地废弃处 理。 Transferpette® S-8/-12 997208 操作手册...
  • Seite 160 997208 | Printed in Germany | 5-0122-1...

Diese Anleitung auch für:

Transferpette s-12

Inhaltsverzeichnis