Inhaltsverzeichnis
Werbung
Verfügbare Sprachen
Verfügbare Sprachen
Quicklinks
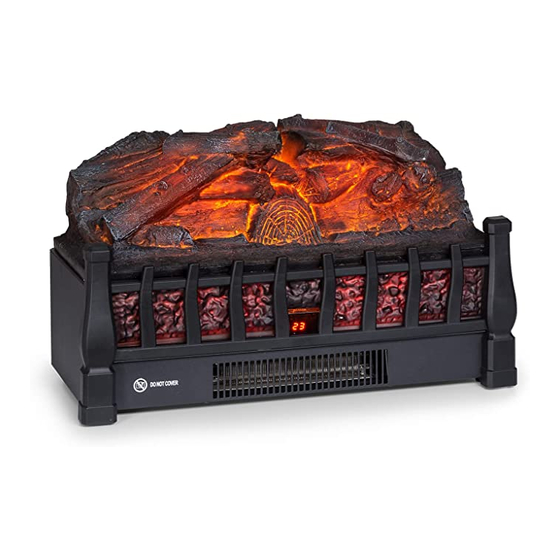
KAMINI FXL 2G
Elektrischer Kamin
Electric fireplace
Cheminée électrique
Chimenea eléctrica
Camino elettrico
10038365 10038366 10038367
www.klarstein.com
Hinweis: Das Gerät eignet sich nicht zur Nutzung als
primäre Heizquelle.
Note: The device is not suitable for use as a primary
heating source.
Remarque : l'appareil ne convient pas en tant que
source principale de chauffage.
Advertencia: el aparato no es apto para utilizar como
fuente de calefacción primaria.
Nota: il dispositivo non è idoneo ad essere utilizzato
come fonte di riscaldamento primaria.
Werbung
Kapitel
Inhaltsverzeichnis
Fehlerbehebung

Verwandte Anleitungen für Klarstein KAMINI FXL 2G


Inhaltszusammenfassung für Klarstein KAMINI FXL 2G
- Seite 1 KAMINI FXL 2G Elektrischer Kamin Electric fireplace Cheminée électrique Chimenea eléctrica Camino elettrico 10038365 10038366 10038367 www.klarstein.com Hinweis: Das Gerät eignet sich nicht zur Nutzung als primäre Heizquelle. Note: The device is not suitable for use as a primary heating source.
-
Seite 3: Inhaltsverzeichnis
Sehr geehrter Kunde, wir gratulieren Ihnen zum Erwerb Ihres Gerätes. Lesen Sie die folgenden Hinweise sorgfältig durch und befolgen Sie diese, um möglichen Schäden vorzubeugen. Für Schäden, die durch Missachtung der Hinweise und unsachgemäßen Gebrauch entstehen, übernehmen wir keine Haftung. Scannen Sie den folgenden QR-Code, um Zugriff auf die aktuellste Bedienungsanleitung und weitere Informationen rund um das Produkt zu erhalten. -
Seite 4: Sicherheitshinweise
SICHERHEITSHINWEISE • Prüfen Sie vor der Benutzung die Angabe zur Spannung auf dem Typenschild und schließen Sie das Gerät nur an Steckdosen an, die der Nennspannung des Geräts entsprechen. • Falls das Netzkabel beschädigt ist, lassen Sie es von einer ausgebildeten Fachkraft ersetzen. -
Seite 5: Geräteübersicht
GERÄTEÜBERSICHT Luftauslass Netzschalter Empfangsfenster Bedienfeld... -
Seite 6: Bedienfeld
BEDIENFELD Heiz-Taste: Ein-/Ausschalten der Heizfunktion Timer-Taste: Einstellen des Timer-Modus Flammen-Taste: Einstellen der Flammen- helligkeit Netzschalter: Aus Netzschalter: Ein... -
Seite 7: Fernbedienung
FERNBEDIENUNG Ein/Aus-Taste: Schaltet das Gerät ein/aus. Timer-Taste: Einstellen des Timer-Modus Heiz-Taste: Ein-/Ausschalten der Heizfunktion Flammen-Taste: Einstellen der Flammen helligkeit Temperatur- einstellung Vor der ersten Inbetriebnahme Ziehen Sie den Schutzfilm aus der Batterieabdeckung heraus, bevor Sie die Fernbedienung verwenden. -
Seite 8: Bedienung
BEDIENUNG Schalten Sie den Netzschalter an der rechten Seite des Heizgeräts in die Position „Ein“. Sobald das Gerät mit Strom versorgt wird, ist ein Piepen zu hören. Durch den Netzschalter werden alle Funktionen des Geräts mit Strom versorgt. Der Schalter muss sich in der Position „I“ befinden, damit alle Funktionen, inklusive der Fernbedienung, verwendet werden können. -
Seite 9: Temperatureinstellung
Wenn Sie auf der Fernbedienung die Heiz-Taste drücken, wird die Heizfunktion auf hoher Stufe gestartet. Im Anzeigefenster wird „OH“ angezeigt. Wenn Sie die Heiz-Taste erneut drücken, wechselt das Gerät auf die niedrige Heizstufe. Auf dem Bildschirm wird „OL“ angezeigt. Wenn Sie die Heiz-Taste nochmals drücken, wird die Heizfunktion ausgeschaltet. -
Seite 10: Reinigung Und Pflege
REINIGUNG UND PFLEGE Hinweis: Schalten Sie das Gerät aus, indem Sie den Netzschalter in die Position „0“ stellen, und ziehen Sie den Stecker aus der Steckdose. Warten Sie, bis das Gerät vollständig abgekühlt ist, bevor Sie es reinigen. • Benutzen Sie zur Reinigung der Lüftungsschlitze und Gitter einen Staubsauger. -
Seite 11: Fehlersuche Und Fehlerbehebung
FEHLERSUCHE UND FEHLERBEHEBUNG Hinweis: Sollten Probleme auftreten, lesen Sie sich zunächst die Hinweise in der nachfolgenden Tabelle durch, bevor Sie sich an den Hersteller oder den Kundendienst wenden. Problem Mögliche Ursache Lösung Das Gerät gibt keine Der Überhitzungsschutz warme Luft ab. des Geräts wurde ausgelöst. -
Seite 12: Hinweise Zur Entsorgung
HINWEISE ZUR ENTSORGUNG Wenn es in Ihrem Land eine gesetzliche Regelung zur Entsorgung von elektrischen und elektronischen Geräten gibt, weist dieses Symbol auf dem Produkt oder auf der Verpackung darauf hin, dass dieses Produkt nicht im Hausmüll entsorgt werden darf. Stattdessen muss es zu einer Sammelstelle für das Recycling von elektrischen und elektronischen Geräten gebracht werden. -
Seite 13: Produktdatenblatt
PRODUKTDATENBLATT Modellkennung(en) 10038365, 10038366, 10038367 Angabe Symbol Wert Einheit Angabe Einheit Wärmeleistung Nur bei elektrischen Speicher-Einzelraumheizgeräten: Art der Regelung der Wärmezufuhr Nennwärmeleistung Manuelle Regelung der Wärmezufuhr mit k.A. integriertem Thermostat Mindestwärmeleistung Manuelle Regelung der Wärmezufuhr k.A. (Richtwert) mit Rückmeldung der Raum- und/oder Außentemperatur Maximale kontinuierliche Elektronische Regelung der Wärmezufuhr... - Seite 15 Dear Customer, Congratulations on purchasing this device. Please read the following instructions carefully and follow them to prevent possible damages. We assume no liability for damage caused by disregard of the instructions and improper use. Scan the QR code to get access to the latest user manual and more product information.
-
Seite 16: Safety Instructions
SAFETY INSTRUCTIONS • Before use, check the voltage information on the rating plate and only connect the device to sockets that correspond to the nominal voltage of the device. • If the power cord is damaged, have it replaced by a trained professional. •... -
Seite 17: Device Overview
DEVICE OVERVIEW Air outlet Power switch Receiving window Control panel... -
Seite 18: Control Panel
CONTROL PANEL Heating button: Switching the heating function on/off Timer button: Setting the Timer Mode Flame button: Adjusting the flame brightness Power switch: off Power switch: on... -
Seite 19: Remote Control
REMOTE CONTROL Power button: Turns the device on/off. Timer button: Setting the Timer Mode Heat button: Switching the heating function on/off Flame button: Adjusting the flame brightness Temperature setting Before first use Remove the protective film from the battery cover before using the remote control. -
Seite 20: Operation
OPERATION Turn the power switch on the right side of the heater to the 'On' position. As soon as power is supplied to the unit, a beeping sound will be heard. The power switch supplies power to all functions of the unit. The switch must be in the 'I' position in order to use all functions, including the remote control. - Seite 21 When you press the heating button on the remote control, the heating function will start at a high level. “0H” is displayed in the display window. If you press the heat button again, the appliance will switch to the low heat level. “OL” is displayed on the screen. If you press the heating button again, the heating function will be switched off.
-
Seite 22: Cleaning And Care
CLEANING AND CARE Note: Turn off the power by setting the power switch to the '0' position and unplug the unit from the wall outlet. Wait until the appliance has cooled down completely before cleaning it. • Use a vacuum cleaner to clean the ventilation slots and grilles. •... -
Seite 23: Troubleshooting
TROUBLESHOOTING Note: If problems occur, first read the instructions in the table below before contacting the manufacturer or customer service. Problem Potential cause Solution The unit does not emit The overheating warm air. protection of the device has been triggered. The device switches off The overheating Switch off the device... -
Seite 24: Disposal Instructions
DISPOSAL INSTRUCTIONS If there is a legal regulation for the disposal of electrical and electronic devices in your country, this symbol on the product or on the packaging indicates that this product must not be disposed of with household waste. Instead, it must be taken to a collection point for the recycling of electrical and electronic equipment. -
Seite 25: Product Data Sheet
PRODUCT DATA SHEET Model identifier(s): 10038365, 10038366, 10038367 Item Symbol Value Unit Item Unit Heat output Type of heat input, for electric storage local space heaters only Nominal heat output manual heat charge control, with integrated thermostat Minimum heat output manual heat charge control with room and/or (indicative) outdoor temperature feedback... -
Seite 27: Fiche Technique
Cher client, chère cliente, Toutes nos félicitations pour l’acquisition de ce nouvel appareil. Lisez attentivement les indications suivantes et suivez-les pour éviter d'éventuels dommages. Nous ne saurions être tenus pour responsables des dommages dus au non-respect des consignes et à la mauvaise utilisation de l’appareil. -
Seite 28: Consignes De Sécurité
CONSIGNES DE SÉCURITÉ • Avant utilisation, vérifi ez la tension sur l'étiquette de l'appareil et connectez l'appareil uniquement à des prises qui correspondent à sa tension. • Si le cordon d'alimentation est endommagé, faites-le remplacer par un spécialiste qualifi é. •... -
Seite 29: Aperçu De L'appareil
APERÇU DE L'APPAREIL Sortie d'air Interrupteur principal Fenêtre de réception Panneau de commande... -
Seite 30: Panneau De Commande
PANNEAU DE COMMANDE Touche de chauffage : Activer/désactiver la fonction de chauffage Touche minuterie : Réglage du mode minuterie Touche flammes : Réglage de la luminosité des flammes Interrupteur principal : arrêt Interrupteur principal : marche... -
Seite 31: Télécommande
TÉLÉCOMMANDE Touche marche/ arrêt : allume/éteint l'appareil. Touche minuterie Réglage du mode minuterie Touche de chauffage Activer/désactiver la fonction de chauffage Touche flammes Réglage de la luminosité des flammes Réglage de la température Avant la première mise en marche Retirez le film protecteur du couvercle des piles avant d'utiliser la télécommande. -
Seite 32: Fonctionnement
FONCTIONNEMENT Tournez l'interrupteur d'alimentation sur le côté droit du radiateur en position "marche". Dès que l'appareil est alimenté, il émet un bip. L'interrupteur d'alimentation alimente toutes les fonctions de l'appareil. L'interrupteur doit être en position "I" pour que toutes les fonctions, y compris la télécommande, puissent être utilisées. - Seite 33 Si vous appuyez sur la touche de chauffage de la télécommande, la fonction de chauffage démarre au niveau élevé. La fenêtre d'affichage indique "OH". Appuyez à nouveau sur la touche de chauffage pour que l'appareil passe au niveau de chauffage bas. La fenêtre d'affichage indique "OL".
-
Seite 34: Nettoyage Et Entretien
NETTOYAGE ET ENTRETIEN Remarque : Éteignez l'appareil en réglant l'interrupteur d'alimentation sur la position "0" et retirez la fi che de la prise. Attendez que l'appareil refroidisse complètement avant de le nettoyer. • Utilisez un aspirateur pour nettoyer les fentes d'aération et la grille. •... -
Seite 35: Identification Et Résolution Des Problèmes
IDENTIFICATION ET RÉSOLUTION DES PROBLÈMES Remarque : Si des problèmes surviennent, lisez d'abord les informations du tableau ci-dessous avant de contacter le fabricant ou le service client. Problème Cause possible Solution L'appareil ne produit pas La protection contre la d'air chaud. surchauffe de l'appareil s'est déclenchée. -
Seite 36: Informations Sur Le Recyclage
INFORMATIONS SUR LE RECYCLAGE Si l'élimination des appareils électriques et électroniques est réglementée dans votre pays, ce symbole sur le produit ou sur l'emballage indique qu'il ne doit pas être mis au rebut avec les ordures ménagères. Vous devez l'acheminer vers un point de collecte pour le recyclage des dispositifs électriques et électroniques. -
Seite 37: Fiche De Données Produit
FICHE DE DONNÉES PRODUIT Référence (s) du produit 10038365, 10038366, 10038367 Donnée Symbole Valeur Unité Donnée Unité Puissance calorifique Uniquement pour les radiateurs électriques à accumulation : Type de régulation de l'apport de chaleur Puissance calorifique Régulation manuelle de l'apport de chaleur n.c. -
Seite 39: Datos Técnicos
Estimado cliente: Le felicitamos por la adquisición de este producto. Lea atentamente el siguiente manual y siga cuidadosamente las instrucciones de uso con el fin de evitar posibles daños. La empresa no se responsabiliza de los daños ocasionados por un uso indebido del producto o por haber desatendido las indicaciones de seguridad. -
Seite 40: Indicaciones De Seguridad
INDICACIONES DE SEGURIDAD • Antes de su utilización, compruebe la tensión indicada en la placa técnica del aparato y conéctelo solamente a tomas de corriente con la misma tensión. • Si el cable de alimentación está dañado, contacte con un servicio técnico cualifi cado para su sustitución. -
Seite 41: Descripción Del Aparato
DESCRIPCIÓN DEL APARATO Salida de aire Interruptor principal Ventana de recepción Panel de control... -
Seite 42: Panel De Control
PANEL DE CONTROL Botón de calefacción: encender/apagar la función de calefacción Botón del temporizador: Ajustar el modo temporizador Botón de llamas: Ajustar el brillo de las llamas Interruptor principal: desactivado Interruptor principal: activado... -
Seite 43: Mando A Distancia
MANDO A DISTANCIA Botón on/off: el aparato se enciende/apaga. Botón del temporizador: Ajustar el modo temporizador Botón de calefacción: encender/apagar la función de calefacción Botón de llama: Ajustar el brillo de las llamas Ajuste de temperatura Antes de la primera puesta en marcha Despegue la película protectora de la tapa de la batería antes de utilizar el... -
Seite 44: Puesta En Marcha
PUESTA EN MARCHA Active el interruptor principal en la parte derecha del calefactor a la posición "encendido". En cuanto el aparato cuente con electricidad, se escuchará un pitido. Mediante el interruptor principal todas las funciones del aparato estarán abastecidas de electricidad. El interruptor debe situarse en la posición "I" para que todas las funciones, incluida la del mando a distancia, se puedan utilizar. - Seite 45 Si pulsa el botón de la calefacción en el mando a distancia, la función de calefacción se inicia al máximo nivel. En la pantalla aparecerá "OH" primero. Si se pulsa de nuevo el botón de la calefacción, el aparato pasa al nivel más bajo. En pantalla aparece "OL". Si pulsa una vez más el botón, se desactiva la función de calefacción.
-
Seite 46: Limpieza Y Cuidado
LIMPIEZA Y CUIDADO Nota: apague el aparato colocando el interruptor principal en la posición "0" y desconectando el enchufe de la toma de corriente. Espere a que el aparato se haya enfriado por completo antes de limpiarlo. • Para la limpieza de las ranuras de ventilación y rejillas, utilice una aspiradora. •... -
Seite 47: Detección Y Reparación De Anomalías
DETECCIÓN Y REPARACIÓN DE ANOMALÍAS Nota: si tiene problemas, lea primero las indicaciones de la siguiente tabla antes de contactar con el servicio de atención al cliente o con el fabricante. Problema Posible causa Solución El aparato no genera aire La protección contra caliente. -
Seite 48: Indicaciones Sobre La Retirada Del Aparato
INDICACIONES SOBRE LA RETIRADA DEL APARATO Si en su país existe una disposición legal relativa a la eliminación de aparatos eléctricos y electrónicos, este símbolo estampado en el producto o en el embalaje advierte que no debe eliminarse como residuo doméstico. Debe depositarse en un punto de recogida de reciclaje de aparatos eléctricos y electrónicos. -
Seite 49: Hoja De Datos Del Producto
HOJA DE DATOS DEL PRODUCTO Denominación del modelo 10038365, 10038366, 10038367 Dato Símbolo Valor Unidad Dato Unidad Potencia térmica Solo con disposítivos de acumulación de calor eléctricos para abastecimiento local: Tipo de regulación del abastecimiento de calor Potencia térmica nominal Regulación manual del abastecimiento de calor con termostato integrado: Potencia térmica mínima... -
Seite 51: Dati Tecnici
Gentile cliente, La ringraziamo per aver acquistato il dispositivo. La preghiamo di leggere attentamente le seguenti istruzioni per l’uso e di seguirle per evitare possibili danni. Non ci assumiamo alcuna responsabilità per danni scaturiti da una mancata osservanza delle avvertenze di sicurezza e da un uso improprio del dispositivo. -
Seite 52: Avvertenze Di Sicurezza
AVVERTENZE DI SICUREZZA • Prima dell'utilizzo verifi care la tensione sulla targhetta del dispositivo e collegarlo solo a prese che abbiano la stessa tensione. • Se il cavo d'alimentazione è danneggiato, farlo sostituire da un tecnico qualifi cato. • Non posizionare il camino direttamente sotto alla presa elettrica. •... -
Seite 53: Descrizione Del Dispositivo
DESCRIZIONE DEL DISPOSITIVO Uscita dell'aria Interruttore generale Finestra di ricezione Pannello di controllo... -
Seite 54: Pannello Di Controllo
PANNELLO DI CONTROLLO Tasto riscaldamento: per accendere/spegnere il riscaldamento Tasto timer: per impostare il timer Tasto fiamma: per impostare la luminosità delle fiamme Interruttore generale: off Interruttore generale: on... -
Seite 55: Telecomando
TELECOMANDO Tasto on/off: per accendere/ spegnere il dispositivo. Tasto timer: per impostare il timer Tasto riscaldamento: per accendere/ spegnere il riscaldamento Tasto fiamma: per impostare la luminosità delle fiamme Impostazione della temperatura Prima della messa in funzione Prima di usare il telecomando togliere la pellicola protettiva dalla copertura delle pile. -
Seite 56: Utilizzo
UTILIZZO Regolare l'interruttore generale sul lato destro del camino in posizione "on". Non appena arriva corrente al dispositivo, questo emette un suono. Tramite l'interruttore generale tutte le funzioni vengono alimentate con l'elettricità. L'interruttore deve trovarsi in posizione "I" per utilizzare tutte le funzioni, telecomando incluso. - Seite 57 Quando si preme il tasto del riscaldamento sul telecomando, il riscaldamento si avvia al massimo livello. Sulla schermata appare "OH". Quando si preme nuovamente il tasto del riscaldamento, il dispositivo passa al livello minimo. Sullo schermo appare "OL". Premendo ancora il tasto del riscaldamento, questo si spegne. La ventola funziona per altri 60 secondi per distribuire il calore rimasto nel dispositivo.
-
Seite 58: Pulizia E Manutenzione
PULIZIA E MANUTENZIONE Nota: spegnere il dispositivo regolando l'interruttore generale in posizione "0" e staccare la spina dalla presa. Attendere che si sia completamente raff reddato prima di pulirlo. • Usare un aspirapolvere per pulire le feritoie di aerazione e la griglia. •... -
Seite 59: Ricerca E Correzione Degli Errori
RICERCA E CORREZIONE DEGLI ERRORI Nota: se dovessero esserci problemi leggere innanzitutto le indicazioni riportate nella tabella seguente prima di rivolgersi al produttore o al servizio clienti. Problema Possibile causa Soluzione Il dispositivo non rilascia È scattata la aria calda. protezione contro il surriscaldamento. -
Seite 60: Avviso Di Smaltimento
AVVISO DI SMALTIMENTO Se nel vostro Paese sono vigenti regolamenti legislativi relativi allo smaltimento di dispositivi elettrici ed elettronici, questo simbolo sul prodotto o sull'imballaggio indica che non è consentito smaltire questo prodotto nei rifiuti casalinghi. Il dispositivo deve invece essere portato in un centro di raccolta per il riciclaggio di dispositivi elettrici ed elettronici. -
Seite 61: Scheda Informativa Del Prodotto
SCHEDA INFORMATIVA DEL PRODOTTO Identificazione del modello (i) 10038365, 10038366, 10038367 Indicazione Simbolo Valore Unità Indicazione Unità Potenza termica Solo per gli apparecchi per il riscaldamento d'ambiente locale elettrici ad accumulo: Tipo di controllo dell´apporto termico Potenza termica nominale Controllo manuale del carico termico con n.d.