Klarstein 10032527 Bedienungsanleitung
Inhaltsverzeichnis
Verfügbare Sprachen
Verfügbare Sprachen
Quicklinks
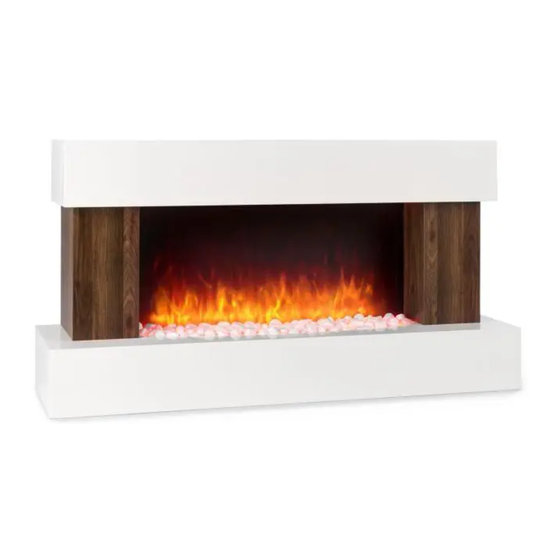
Elektrischer Kamin
Electric Fireplace
10032527 10032528
Hinweis: Dieses Produkt ist nur für gut isolierte Räume
oder für den gelegentlichen Gebrauch geeignet.
Note: This product is only suitable for well insulated
spaces or occasional use.
Nota: Este producto está indicado únicamente en
lugares abrigados o para una utilización punctual.
Remarque : Ce produit ne peut être utilisé que dans des
locaux bien isolés ou de manière occasionnelle.
Advertencia: Questo prodotto è adatto solo per spazi
ben isolati o uso occasionale.
Kapitel
Inhaltsverzeichnis

Verwandte Anleitungen für Klarstein 10032527


Inhaltszusammenfassung für Klarstein 10032527
- Seite 1 Remarque : Ce produit ne peut être utilisé que dans des locaux bien isolés ou de manière occasionnelle. Advertencia: Questo prodotto è adatto solo per spazi ben isolati o uso occasionale. 10032527 10032528...
-
Seite 3: Inhaltsverzeichnis
Tastenfunktionen 6 Displayanzeigen 7 Inbetriebnahme und Bedienung 8 Reinigung und Wartung 12 Hinweise zur Entsorgung 13 Rahmeninstallation 14 TECHNISCHE DATEN Artikelnummer 10032527, 10032528 Stromversorgung 220-240 V ~ 50-60 Hz KONFORMITÄTSERKLÄRUNG Hersteller: Chal-Tec GmbH, Wallstraße 16, 10179 Berlin, Deutschland. Dieses Produkt entspricht den folgenden Europäischen Richtlinien:... -
Seite 4: Produktdatenblatt
PRODUKTDATENBLATT Modellkennung(en) 10032527, 10032528 Angabe Symbol Wert Einheit Angabe Einheit Wärmeleistung Nur bei elektrischen Speicher-Einzelraumheizgeräten: Art der Regelung der Wärmezufuhr Nennwärmeleistung Pnom Manuelle Regelung der Wärmezufuhr mit k.A. integriertem Thermostat Mindestwärmeleistung Pmin Manuelle Regelung der Wärmezufuhr k.A. (Richtwert) mit Rückmeldung der Raum- und/oder Außentemperatur... -
Seite 5: Sicherheitshinweise
SICHERHEITSHINWEISE • Prüfen Sie vor der Benutzung die Spannung auf der Geräteplakette und schließen Sie das Gerät nur an Steckdosen an, die der Spannung des Geräts entsprechen. • Falls das Netzkabel beschädigt ist, lassen Sie es von einer ausgebildeten Fachkraft ersetzen. •... -
Seite 6: Bedienfeld Und Fernbedienung
BEDIENFELD UND FERNBEDIENUNG 1 Ein/ Aus 5 Kindersicherung 2 Heizung 6 Plus 3 Timer 7 Minus 4 Helligkeit TASTENFUNKTIONEN Ein/Aus-Taste Über diese Taste schalten Sie den Kamin und den Flammeneffekt ein. Im Ein-Zustand können durch Drücken dieser Taste alle Funktionen gleichzeitig ausgeschaltet werden. -
Seite 7: Helligkeit
Timer Wenn Sie diese Taste wiederholt drücken, können Sie zwischen den folgenden Timereinstellungen auswählen: 30 Minuten, 1 h, 2 h, 3 h, 4 h, 5 h, 6 h, 7 h, 8 h und Timer aus. Wenn der Timer bis auf 0 heruntergezählt hat, schaltet sich das Gerät automatisch aus. -
Seite 8: Inbetriebnahme Und Bedienung
INBETRIEBNAHME UND BEDIENUNG Hinweise zum Einstellen des Timers Mit der TIMER-Taste schalten Sie den täglichen oder wöchentliche Timer ein. Hinweis: Über das Bedienfeld des Geräts können Sie ausschließlich den täglichen Timer einstellen. Sie können zwischen den folgenden Timereinstellungen auswählen: 30 Minuten, 1 h, 2 h, 3 h, 4 h, 5 h, 6 h, 7 h, 8 h und Timer aus. Der Bildschirm zeigt zunächst die von Ihnen eingestellten Stunden an und später die noch verbleibende Zeit bis zum Ausschalten. - Seite 9 Täglichen Timer einstellen Wenn Sie auf der Fernbedienung die TIMER-Taste drücken, können Sie den täglichen Timer einstellen. Drücken Sie die Tasten [+] und [-], um die tägliche Zeit einzustellen. Drücken Sie die Taste [+], um eine Zeit zwischen 30 min, 1 h, 2 h, 3 h … bis 8 h einzustellen.
-
Seite 10: Kindersicherung
Deaktivieren des Timers an einem bestimmten Wochentag Wenn Sie den Timer an einem bestimmten Wochentag nicht aktivieren möchten, drücken Sie beim Erreichen dieses Tages vier Mal die TIMER-Taste, um diesen Tag zu überspringen. Beispiel: Sie möchten den Timer für Dienstag nicht einstellen. Wenn Sie die Timereinstellung für Montag beendet haben, könnten Sie die Einstellung für Dienstag vornehmen. - Seite 11 Offenes-Fenster-Funktion (zusätzliche versteckte Funktionen) Wenn der Heizmodus aktiv ist, piept das Gerät dreimal und der Bildschirm zeigt [E8] an, wenn die Raumtemperatur innerhalb von 10 Minuten um über 5 °C sinkt. Das bedeutet, dass irgendwo ein Fenster geöffnet sein könnte, über welches Kälte eindringt oder dass ein Kühlgerät im selben Raum aktiv sein könnte.
-
Seite 12: Sicherheitsabschaltung
Sicherheitsabschaltung Das Gerät verfügt über einen Überhitzungsschutz, welcher aktiviert wird, wenn die Luftein- und auslässe des Geräts blockiert werden. Aus Sicherheitsgründen schaltet das Gerät sich nicht automatisch wieder ein, sondern muss durch folgendes Verfahren wieder aktiviert werden: Schalten Sie das Gerät aus und ziehen Sie den Netzstecker aus der Steckdose. Lassen Sie das Gerät für mindestens 10 Minuten ausgeschaltet und stellen Sie sicher, dass alle Blockaden entfernt werden. -
Seite 13: Hinweise Zur Entsorgung
Wichtige Hinweise zu Wartung und Reparaturen • Das Gerät verfügt über eine spezielle Sicherung. Sollte die Sicherung ersetzt werden müssen, lassen Sie diese von einem Fachbetrieb durch eine Sicherung des selben Typs ersetzen. • Das Gerät enthält Teile, die dem Benutzer nicht zugänglich sind. Reparaturen dürfen nur von qualifizierten Fachkräften durchgeführt werden! HINWEISE ZUR ENTSORGUNG Befindet sich die linke Abbildung (durchgestrichene Mülltonne... -
Seite 14: Rahmeninstallation
RAHMENINSTALLATION FÜR 10032527... -
Seite 26: Frame Installation
FRAME INSTALLATION FOR 10032527... -
Seite 38: Montaje Del Marco
MONTAJE DEL MARCO POR 10032527... -
Seite 50: Installation Du Cadre
INSTALLATION DU CADRE POUR 10032527... -
Seite 62: Installazione Telaio
INSTALLAZIONE TELAIO PER 10032527...