Klarstein 10032596 Bedienungsanleitung
Inhaltsverzeichnis
Verfügbare Sprachen
Verfügbare Sprachen
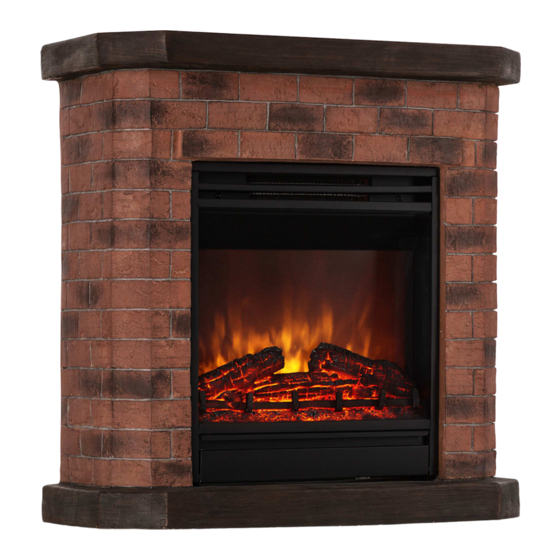
Elektrischer Kamin
Electric Fireplace
Chimenea eléctrica
Cheminée électrique
Camino elettrico
10032595 10032596
Hinweis: Das Gerät eignet sich nicht zur
Nutzung als primäre Heizquelle.
Note: The device is not suitable for use as a
primary heat source.
Remarque : l'appareil ne convient pas en tant
que source principale de chauffage.
Nota: il dispositivo non è idoneo ad essere
utilizzato come fonte di riscaldamento primaria.
Advertencia: el aparato no es apto para utilizar
como fuente de calefacción primaria.
Kapitel
Inhaltsverzeichnis

Verwandte Anleitungen für Klarstein 10032596


Inhaltszusammenfassung für Klarstein 10032596
- Seite 1 Remarque : l‘appareil ne convient pas en tant Cheminée électrique que source principale de chauffage. Camino elettrico Nota: il dispositivo non è idoneo ad essere utilizzato come fonte di riscaldamento primaria. Advertencia: el aparato no es apto para utilizar 10032595 10032596 como fuente de calefacción primaria.
-
Seite 3: Inhaltsverzeichnis
Betriebsmodi 1 1 Wochen-Timer programmieren 13 Gerät auf Werkseinstellung zurücksetzen 16 Reinigung und Pflege 16 Hinweise zur Entsorgung 17 TECHNISCHE DATEN Artikelnummer 10032595, 10032596 Stromversorgung 220-240 V ~ 50/60 Hz Leistung 900 W / 1800 W KONFORMITÄTSERKLÄRUNG Hersteller: Chal-Tec GmbH, Wallstraße 16, 10179 Berlin, Deutschland. -
Seite 4: Sicherheitshinweise
SICHERHEITSHINWEISE • Prüfen Sie vor der Benutzung die Spannung auf der Geräteplakette und schließen Sie das Gerät nur an Steckdosen an, die der Spannung des Geräts entsprechen. • Falls das Netzkabel beschädigt ist, lassen Sie es von einer ausgebildeten Fachkraft ersetzen. •... -
Seite 5: Produktdatenblatt
PRODUKTDATENBLATT Modellkennung(en) 10032595, 10032596 Angabe Symbol Wert Einheit Angabe Einheit Wärmeleistung Nur bei elektrischen Speicher-Einzelraumheizgeräten: Art der Regelung der Wärmezufuhr Nennwärmeleistung Manuelle Regelung der Wärmezufuhr mit k.A. integriertem Thermostat Mindestwärmeleistung Manuelle Regelung der Wärmezufuhr k.A. (Richtwert) mit Rückmeldung der Raum- und/oder Außentemperatur... -
Seite 6: Abmessungen
ABMESSUNGEN... -
Seite 7: Bedienfeld Und Fernbedienung
BEDIENFELD UND FERNBEDIENUNG Bedienfeld (A) Hauptschalter (B) Ein-/Aus-Taste (C) Tastensperre/ Eingabe bestätigen (D) MENÜ (E) Wert erhöhen (F) Wert verringern Fernbedienung Batterie Wenn Sie die Fernbedienung das erste Mal benutzen, entfernen Sie die Kunststofflasche an der Batterie. Hinweis: Diese Heizung wird mit einer Fernbedienung geliefert. Um das Gerät mit der Fernbedienung bedienen zu können, muss sich der Hauptschalter (A) in der Stellung ON befinden. -
Seite 8: Funktionen Und Einstellungen
FUNKTIONEN UND EINSTELLUNGEN Hauptschalter (A) Öffnen Sie die Abdeckung unten am Gerät und drücken Sie den Knopf A nach unten auf die Position ON. Ein-/Aus-Taste (B) Drücken Sie die Ein-/Aus-Taste, um den Flammeneffekt zu starten. Auf dem Display erscheint die folgende Anzeige: •... - Seite 9 Heizung ein- und ausschalten / Schnellstart Drücken Sie die Taste (+) oder (-), um die Wärmeeinstellung direkt zu starten (auch wenn ein Wochenprogramm eingestellt ist). • Drücken Sie entweder die Taste (+) oder (-), um die aktuelle Temperatur auf dem Bildschirm zu sehen. •...
- Seite 10 Niedrige Heizleistung einstellen Drücken Sie zweimal auf die Taste MENU, das Display zeigt L und das blinkende Heizsymbol an. Drücken Sie die OK-Taste, um die Temperatur einzustellen. Die voreingestellte Temperatur beträgt 10°C (50°F). Auf dem Display erscheint die linke Anzeige. Drücken Sie die Taste (+) oder (-), um die Temperatur einzustellen.
-
Seite 11: Betriebsmodi
Dimmer einstellen (nur bestimmte Modelle) Drücken Sie mehrmals auf die Taste MENU, um in die Dimmereinstellung zu gelangen. Das Display zeigt [doLi] an. Drücken Sie die OK-Taste, um die Dimmereinstellung zu starten. Drücken Sie die Taste (+) oder (-), um die gewünschte Dimm-Level (D1/D2/D3/D4/OFF) auszuwählen. - Seite 12 Offenes-Fenster-Modus Drücken Sie mehrmals auf die Taste MENU, um in die Betriebsmodi [ModE] zu gelangen. Drücken Sie auf OK, um die Moduseinstellung zu öffnen und benutzen Sie die Taste (+) oder (-), um den Offenes-Fenster-Modus auszuwählen. Das Display zeigt [OPEN] an. Drücken Sie zur Bestätigung auf OK und benutzen Sie die Taste (+) oder (-), um ON (ein) oder OFF (aus) auszuwählen: Nach dem Aktivieren der Offenes-Fenster-Erkennung schaltet das Gerät die Heizung...
-
Seite 13: Wochen-Timer Programmieren
Hinweis: Sie können die Timereinstellung jederzeit verlassen, indem Sie auf MENU drücken. Im Falle eines Stromausfalls blink das Timer-Symbol (Uhr) permanent und signalisiert damit, dass kein Timer eingestellt wurde. In diesem Fall müssen Sie den Timer erneut programmieren. WOCHEN-TIMER PROGRAMMIEREN Hinweis: Bevor Sie den Wochen-Timer programmieren können, müssen Sie zuerst den aktuellen Wochentaf und die aktuelle Uhrzeit einstellen (siehe Aktuellen Wochentag und Uhrzeit einstellen). - Seite 14 Voreingestelltes Programm auswählen Drücken Sie mehrmals auf die Taste MENU, um in die Betriebsmodi [ModE] zu gelangen. Drücken Sie auf OK, um die Moduseinstellung zu öffnen und benutzen Sie die Taste (+) oder (-), um den Programm-Modus auszuwählen. Das Display zeigt [ProG] an.
- Seite 15 Beispiel für einen manuell eingestellten Wochen-Timer Im linken Beispiel ist Montag (d1) der erste Tag für die Hinweis: Mehrere Programmierung und am Sonntag (d7) der letzte Tag für die programmierte Programmierung. Heiz-Zeiträume können für einen Tag genutzt werden. Ein Drücken Sie die Taste (+) oder (-), um die Heizstufe zu wählen: programmierter Heiz- Zeitraum kann abenso H = hohe Heizleistung,...
-
Seite 16: Gerät Auf Werkseinstellung Zurücksetzen
Hinweis: Damit vorgenommene Einstellungen gespeichert werden, müssen Sie immer auf die Taste OK drücken. Es können maximal 8 Heiz-Zeiträume für ein Programm programmiert werden. Nachdem die manuellen Einstellung für den Wochen-Timer abgeschlossen ist, überschreibt das ausgewählte Programm die voreingestellten Standardwerte. GERÄT AUF WERKSEINSTELLUNG ZURÜCKSETZEN Trennen Sie das Gerät für mindestens 5 Sekunden vom Stromnetz und schließen Sie es... -
Seite 17: Hinweise Zur Entsorgung
HINWEISE ZUR ENTSORGUNG Befindet sich die linke Abbildung (durchgestrichene Mülltonne auf Rädern) auf dem Produkt, gilt die Europäische Richtlinie 2012/19/EU. Diese Produkte dürfen nicht mit dem normalen Hausmüll entsorgt werden. Informieren Sie sich über die örtlichen Regelungen zur getrennten Sammlung elektrischer und elektronischer Gerätschaften.