Inhaltsverzeichnis
Werbung
Verfügbare Sprachen
Verfügbare Sprachen
Werbung
Kapitel
Inhaltsverzeichnis

Verwandte Anleitungen für Skandika Styrke II


Inhaltszusammenfassung für Skandika Styrke II
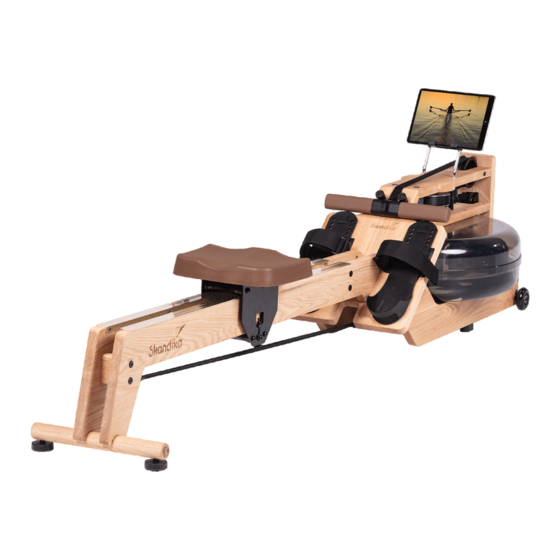
- Seite 1 Styrke II Designed by TUKiENDORF DESIGN / GERMANY Art.Nr. SF-2472...
-
Seite 2: Inhaltsverzeichnis
Importeur MAX Trader GmbH Rudergerät Adresse Wilhelm-Beckmann-Str. 19, D-45307 Essen Die Videos zum Auf- und Artikelnummer SF-2472 Skandika Rower Styrke II Klasse Abbau sowie FAQ und die Standard EN ISO 20957 Anleitungen zum Down- Warnhinweis: Bitte lesen Sie loaden findest Du auf... -
Seite 3: Wichtige Sicherheitshinweise
Ihnen eine geeignete, Getränken. rutschfeste Unterlage unter das Gerät zu legen (z. B. die SKANDIKA Bodenmatte für Rudergeräte). 16. Dieses Gerät ist nicht für therapeutische Zwecke geeignet und darf nur in der in dieser Anleitung beschriebenen Art Bevor Sie mit einem Trainingsprogramm beginnen, und Weise benutzt werden. -
Seite 4: Explosionszeichnung
EXPLOSIONSZEICHNUNG... - Seite 5 EXPLOSIONSZEICHNUNG...
-
Seite 6: Teileliste
TEILELISTE Teil Nr. Beschreibung Menge Teil Nr. Beschreibung Menge Tankeinheit Nylongurtband L1800 Rolle Schraube M6 × 8 Fußstütze Verschlussring Linke Schiene Tankstopfen Rechte Schiene Wassertank Massivholzfuß Zylinderschraube M8 Verstellfuß Zylinderschraube M6 Sitzeinheit Sensorclip iPad Halterung Sensor mit Kabel iPad Stütze Schraube ST4,2 ×... -
Seite 7: Checkliste
CHECKLISTE (8) Sitzeinheit x1 (1) Tankeinheit x1 (12) Verbindungsblock 1 x2 (9) iPad Halterung x1 (13) Verbindungsblock 2 x1 (2) Rolle x2 (10) iPad Stütze x1 (14) Zugseil x1 (3) Fußstütze x2 (11) Fußstütze x2 (15) Bluetooth-Modul x1 (4) Linke Schiene x1 (25) Siphonpumpe x1 (26) Elektrische Pumpe x1 (5) Rechte Schiene x1... -
Seite 8: Aufbauanleitung
AUFBAUANLEITUNG SCHRITT 1 Befestigen Sie die beiden Fußstützen (3) mit 4 Schrauben (16) an der Tankeinheit (1). Die Rollen (2) und die Abstandsstücke (18) müssen anschließend mit 2 Schrauben (17) an der Tankeinheit (1) montiert werden. - Seite 9 AUFBAUANLEITUNG SCHRITT 2 Befestigen Sie die Stopper (19) mit jeweils 2 Schrauben (16) an die linke (4) und rechte (5) Schiene. Anschließend müssen die Mutter (21) und die Schraube (20) an jeder Schiene wie dargestellt ange- bracht werden.
- Seite 10 AUFBAUANLEITUNG SCHRITT 3 Montieren Sie die Schrauben (22) und Muttern (23) wie abgebildet und verbinden Sie so die Verbindungsblöcke 1 und 2 (12 & 13) und die beiden Schienen (4 & 5).
- Seite 11 AUFBAUANLEITUNG SCHRITT 4 Befestigen Sie die Verstellfüße (7) und den Massivholzfuß (6) wie ab- gebildet an der linken und rech- ten Schiene (4 & 5) mittels zweier Schrauben (24). SCHRITT 5 Befestigen Sie die Schienen (4 & 5) mit 4 Schrauben (20) und Muttern (23) wie abgebildet an der Tankeinheit (1).
- Seite 12 AUFBAUANLEITUNG SCHRITT 6 Nun wird die Sitzeinheit (8) angebracht. Die dafür notwendigen Teile [Mutter M8 (27), Schrau- be M6 (28), Walze (29), Schraube M8×135 (30), Schraube M8×15 (31), Begrenzungsplatte (32)] müssen zunächst aus der Einheit gelöst werden, um sie dann damit an den Schienen (4 & 5) anzubringen.
-
Seite 13: Fussstützen Halterung
AUFBAUANLEITUNG SCHRITT 7 Bringen Sie die iPad-Halterung (9) und die iPad-Stütze (10) an der Tankeinheit (1) an. Anschließend werden die Fußstützen (11) wie abgebildet an den Fußstützen-Halterungen montiert. Die Stützen sind 8-fach verstellbar und damit an die jeweilige Größe des Benut- zers anpassbar. -
Seite 14: Wassertank Befüllen / Entleeren
WASSERTANK BEFÜLLEN / ENTLEEREN BEFÜLLEN UND ENTLEEREN DES WASSERTANKS 1. Entfernen Sie den Verschlussstopfen des Tanks. 2. Abb. A zeigt, wie der Tank mit Wasser befüllt wird. Setzen Sie den Schlauch in den Tank und benut- zen Sie entweder die mitgelieferte Siphonpumpe oder die USB-Pumpe, sowie einen Eimer mit Was- ser, um den Tank zu befüllen. -
Seite 15: Übungsanleitung
ÜBUNGSANLEITUNG ÜBUNGSANLEITUNG Rudern ist eine sehr e ektive Art des Trainings. Es stärkt das Herz und den Kreislauf sowie alle großen Muskelgruppen: Den Rücken, den Bauch, die Arme, Schultern, Gesäß und Beine. Rudergrundzüge: 1. Setzen Sie sich auf den Sitz und legen Sie Ihre Füße auf die Fußstützen und xieren Sie diese mit dem Klettverschluss. -
Seite 16: Auf Und Abwärmen
AUF UND ABWÄRMEN Ein erfolgreiches Trainingsprogramm besteht aus einer Aufwärmphase, einer Trainingsphase und dem Abkühlen. Die Trainingshäu gkeit sollte für Anfänger bei 2- bis 3-mal die Woche angesetzt werden, immer mit mindestens einem Tag Pause zwischen den Trainingseinheiten. Nach einigen Monaten kann die Häu gkeit auf 4- bis 5-mal wöchentlich gesteigert werden. -
Seite 17: Das Gerät Transportieren
TRANSPORT UND LAGERUNG DAS GERÄT TRANSPORTIEREN Um das Gerät zu bewegen, heben Sie es vom Massiv- holzfuß (6) her an, bis die Rollen (2) den Boden berüh- ren. So können Sie das Gerät einfach von Ort zu Ort rollen. LAGERUNG 1. -
Seite 18: Verwendung Von Apps
VERWENDUNG VON APPS FITSHOW Aktivieren Sie Bluetooth auf ihrem Mobilgerät, laden Sie die App herunter und installieren ® Sie diese auf Ihrem iOS- oder Android-Gerät. Sie können diese über die App-Suchfunktion Ihres Gerätes nden oder den nebenstehenden QR-Code scannen. Nach erfolgreicher Installation können Sie die App auf Ihrem Mobilgerät starten. Um Trainingsdaten aufzeichnen zu können, müssen Sie sich in der App registrieren. - Seite 19 Tippen Sie nun auf OK und kehren Sie zum Hauptmenü zurück. Sie können nun einen Kurs auswählen (je nach Art Ihres KinoMap-Kontos). Drücken Sie auf Start und beginnen Sie mit dem Training! Styrke II 4. Skandika auswählen 5. Das Gerät auswählen...
-
Seite 20: Garantiebedingungen
Bitte prüfen Sie Möglichkeiten, eine Batterie anstatt der Entsorgung einer Wiederverwendung zuzuführen, beispielsweise durch die Rekonditionierung oder die Instandsetzung der Batterie. Im Zuge ständiger Für Ersatzteile kontaktieren Sie bitte folgende E-Mail-Adresse: service@skandika.de Produktverbesse- Der Service erfolgt durch: MAX Trader GmbH, Wilhelm-Beckmann-Straße 19, 45307 Essen,... - Seite 21 NOTIZEN ________________________________________________________________________________ ________________________________________________________________________________ ________________________________________________________________________________ ________________________________________________________________________________ ________________________________________________________________________________ ________________________________________________________________________________ ________________________________________________________________________________ ________________________________________________________________________________ ________________________________________________________________________________ ________________________________________________________________________________ ________________________________________________________________________________ ________________________________________________________________________________ ________________________________________________________________________________ ________________________________________________________________________________ ________________________________________________________________________________ ________________________________________________________________________________ ________________________________________________________________________________...
- Seite 22 Importeur MAX Trader GmbH Rudergerät Adresse Wilhelm-Beckmann-Str. 19, D-45307 Essen Please visit the Skandika Artikelnummer SF-2472 Skandika Rower Styrke II Klasse Service portal on our Standard EN ISO 20957 website for setup & help Warnhinweis: Bitte lesen Sie videos, FAQs and downloa- vor Gebrauch die Bedienungsanleitung dable instructions.
-
Seite 23: Safety Precautions
Only have repairs carried out by authorised service SKANDIKA mat under the device (e.g. the oor mat for centres. It is recommended to lightly lubricate all moving rowing machines). - Seite 24 EXPLOSIONS DRAWING...
-
Seite 25: Explosion Drawing
EXPLOSION DRAWING... -
Seite 26: Parts List
PARTS LIST Part No. Description Q´ty Part No. Description Q´ty Tank assembly Nylon webbing L1800 Trolley wheel M6 × 8 bolt Cushion foot pad Locking ring Left rail Tank plug Right rail Water tank Solid wood support foot Cylindrical bolt M8 Adjustable foot pad Cylindrical bolt M6 Seat cushion assembly... -
Seite 27: Checklist
CHECK LIST (9) iPad holder x1 (15) Bluetooth module x1 (25) Siphon pump x1 (7) adjustable foot pad x2... - Seite 28 SET UP INSTRUCTIONS STEP 1 Attach the two foot pads (3) to the tank assembly (1) by xing it with 4 screws (16). The wheels (2) and the spacers (18) must then be mounted to the tank assembly (1) with 2 screws (17).
-
Seite 29: Set Up Instructions
SET UP INSTRUCTIONS STEP 2 Attach the stoppers (19) to the left (4) and right (5) rails with 2 screws (16) each. Then attach the nut (21) and the bolt (20) to each rail as shown. - Seite 30 SET UP INSTRUCTIONS STEP 3 Fit the bolts (22) and nuts (23) as shown, thus joining the connecting blocks 1 and 2 (12 & 13) and the two rails (4 & 5).
- Seite 31 SET UP INSTRUCTIONS STEP 4 Attach the adjustable foot pads (7) and the solid wood foot (6) to the left and right rail (4 & 5) using two screws (24) as shown. STEP 5 Secure the rails (4 & 5) to the tank assembly (1) with 4 bolts (20) and nuts (23) as shown.
- Seite 32 SET UP INSTRUCTIONS STEP 6 Now the seat assembly (8) is attached. The necessary parts [nut M8 (27), screw M6 (28), roller (29), screw M8×135 (30), Socket bolt M8×15 (31), Stop plate assembly (32)] must rst be remo- ved from the unit in order to attach it to the rails (4 & 5). After assembly, the seat unit should be able to slide on the rails so that the rowing movement can be carried out correctly later.
-
Seite 33: Set-Up Instructions
SET UP INSTRUCTIONS STEP 7 Attach the iPad holder (9) and the iPad support (10) to the tank assembly (1). Then t the foot pedals (11) to the footrest holders as shown. The holders are 8-way adjus- table and can thus be adapted to the respective size of the user. FOOT REST HOLDERS STEP 8 Hang the hooks on both sides of the of... -
Seite 34: Filling And Emptying The Water Tank
FILLING / EMPTYING THE WATER TANK FILLING AND EMPTYING THE WATER TANK 1. Remove the plug of the tank. 2. Fig. A shows how to ll the tank with water. Place the hose in the tank and use either the supplied siphon pump or the USB pump and a bucket of water to ll the tank. -
Seite 35: Exercise Instructions
EXERCISE INSTRUCTIONS EXERCISE INSTRUCTIONS Rowing is a very e ective form of exercise. It strengthens the heart and circulation as well as all the major muscle groups: The back, abdomen, arms, shoulders, buttocks and legs. Rowing basics: 1. Sit on the seat and put your feet on the footrests and x them with the Velcro. Grasp the handles. 2. -
Seite 36: Warm-Up And Cool-Down
WARM UP AND COOL DOWN WARM-UP and COOL-DOWN A successful exercise program consists of a warm-up, aerobic exercise and a cool-down. Exercise for at least two or preferably three times a week, resting for a day between workouts. After several months, you may increase the frequency to four or five times per week. -
Seite 37: Transporting The Unit
TRANSPORTATION AND STORAGE TRANSPORTING THE UNIT To move the unit, lift it from the solid wood base (6) until the wheels (2) touch the oor. This way you can easily roll the unit from place to place. STORAGE 1. When the unit is not in use, it can be stored vertically to save space. -
Seite 38: Using Apps
USING APPS FITSHOW Activate Bluetooth on your mobile device, download the app and install it on your iOS or ® Android device. You can nd it via the app search function on your device or you may scan the QR code. After successful installation, you can start the app on your mobile device. - Seite 39 Now tap on OK and return to main menu. You can now choose a course for your exercise (depending on your type of KinoMap account maybe only some free courses). Press Start and begin to exercise! Styrke II 4. Select Skandika 5. Tap on the device...
-
Seite 40: Guarantee Conditions
In accordance with our policy of continual product impro- For spare parts please contact: service@skandika.de vement, we reserve the right Service centre: MAX Trader GmbH, Wilhelm-Beckmann-Straße 19, 45307 Essen, to make technical and visual Germany changes without notice. - Seite 41 NOTES ________________________________________________________________________________ ________________________________________________________________________________ ________________________________________________________________________________ ________________________________________________________________________________ ________________________________________________________________________________ ________________________________________________________________________________ ________________________________________________________________________________ ________________________________________________________________________________ ________________________________________________________________________________ ________________________________________________________________________________ ________________________________________________________________________________ ________________________________________________________________________________ ________________________________________________________________________________ ________________________________________________________________________________ ________________________________________________________________________________ ________________________________________________________________________________ ________________________________________________________________________________...
- Seite 42 MAX Trader GmbH Rudergerät Vous pouvez trouver les Adresse Wilhelm-Beckmann-Str. 19, D-45307 Essen vidéos de montage et de Artikelnummer SF-2472 Skandika Rower Styrke II Klasse démontage ainsi que la Standard EN ISO 20957 FAQ et les instructions de Warnhinweis: Bitte lesen Sie téléchargement sur notre...
-
Seite 43: Informations De Sécurité
16. L’appareil n’est pas conçu pour une utilisation profession- placer un tapis antidérapant adapté sous l‘appareil (par nelle ou médicale. Utilisez l’appareil conformément à sa SKANDIKA exemple, le tapis de sol pour les rameurs). destination telle que dé nie dans la notice d’utilisation. -
Seite 44: Vue Éclatée
VUE ÉCLATÉE... - Seite 45 VUE ÉCLATÉE...
-
Seite 46: Liste Des Pièces
LISTE DES PIÈCES Pièce Pièce Description Qté Description Qté Réservoir Sangle en nylon L1800 Roulettes Boulon M6 × 8 Repose-pieds Bague de verrouillage Rail gauche Bouchon du réservoir Rail droit Réservoir d'eau Base en bois massif Vis à tête cylindrique M8 Pieds réglables Vis à... -
Seite 47: Liste De Contrôle
LISTE DE CONTRÔLE (8) Unité de siège x1 (1) Réservoir x1 (12) Bloc de connexion 1 x2 (9) Support pour iPad x1 (13) Bloc de connexion 2 x1 (2) Roulettes x2 (10) Support de xation (14) Cordon élastique x1 pour iPad x1 (3) Repose-pieds x2 (15) Module Bluetooth x1 (11) Pédale x2... -
Seite 48: Instructions De Montage
INSTRUCTIONS DE MONTAGE ÉTAPE 1 Fixez les deux repose-pieds (3) à l‘unité de réservoir (1) avec 4 vis (16). Les roulettes (2) et les entretoises (18) doivent ensuite être montées sur l‘unité de réservoir (1) avec 2 vis (17). - Seite 49 INSTRUCTIONS DE MONTAGE ÉTAPE 2 Fixez les butées (19) aux rails gauche (4) et droit (5) avec 2 vis (16) chacune. Fixez ensuite l‘écrou (21) et le boulon (20) à chaque rail comme indiqué...
- Seite 50 INSTRUCTIONS DE MONTAGE ÉTAPE 3 Montez les boulons (22) et les écrous (23) comme indiqué, en joignant ainsi les blocs de conne- xion 1 et 2 (12 et 13) et les deux rails (4 et 5).
- Seite 51 INSTRUCTIONS DE MONTAGE ÉTAPE 4 Fixez les pieds réglables (7) et le pied en bois massif (6) aux rails gauche et droit (4 & 5) à l‘aide de deux vis (24) comme indiqué. ÉTAPE 5 Fixez les rails (4 & 5) à l‘unité de réservoir (1) avec 4 boulons (20) et écrous (23) comme indiqué.
- Seite 52 INSTRUCTIONS DE MONTAGE ÉTAPE 6 L‘unité de siège (8) est maintenant xée. Les pièces nécessaires [écrou M8 (27), vis M6 (28), rouleau (29), vis M8×135 (30), vis M8×15 (31), Plaque de délimitation (32)] doivent d‘abord être retirées de l‘unité a n de la xer aux rails (4 & 5). Après le montage, l‘unité de siège doit pouvoir glisser sur les rails a n que le mouvement du gouvernail puisse être e ectué...
- Seite 53 INSTRUCTIONS DE MONTAGE ÉTAPE 7 Fixer le support pour iPad (9) et le support de xation pour iPad (10) à l‘unité de réservoir (1). Montez ensuite les repose-pieds (11) sur les supports de repose-pieds comme indiqué. Les supports sont réglables sur 8 niveaux et peuvent donc être adaptés à la taille de l‘utilisateur. SUPPORT DE REPOSE PIEDS ÉTAPE 8 Accrochez les crochets des deux côtés du...
-
Seite 54: Remplir / Vider Le Réservoir D'eau
REMPLIR / VIDER LE RÉSERVOIR D‘EAU REMPLIR / VIDER LE RÉSERVOIR D‘EAU 1. Retirez le bouchon de fermeture du réservoir. 2. La gure A montre comment remplir le réservoir d‘eau. Placez le tuyau dans le réservoir et utili- sez soit la pompe à siphon fournie, soit la pom- pe USB et un seau d‘eau pour remplir le réservoir. -
Seite 55: Instructions D'exercice
INSTRUCTIONS D‘EXERCICE INSTRUCTIONS D‘EXERCICE L‘aviron est une forme d‘exercice très e cace. Il renforce le cœur et la circulation ainsi que tous les principaux groupes de muscles : Le dos, l‘abdomen, les bras, les épaules, les fesses et les jambes. Les bases de l‘aviron : 1. -
Seite 56: Échauffement Et Récupération
ÉCHAUFFEMENT ET RÉCUPÉRATION ÉCHAUFFEMENT et RÉCUPÉRATION Un programme d‘exercices réussi consiste en un échauffement, un exercice aérobique et une récupéra- tion Entraînez-vous de préférence au moins deux ou trois fois par semaine, avec une pause d’un jour entre les séances d‘entraînement. Après plusieurs mois, vous pouvez augmenter la fréquence à quatre ou cinq fois par semaine. -
Seite 57: Transport Et Stockage
TRANSPORT ET STOCKAGE TRANSPORT DE L‘UNITÉ Pour déplacer l‘appareil, soulevez-le de la base en bois massif (6) jusqu‘à ce que les roulettes (2) touchent le sol. De cette façon, vous pouvez facilement faire rou- ler l‘unité d‘un endroit à l‘autre. STOCKAGE 1. -
Seite 58: Utilisation Des Applications
UTILISATION DES APPLICATIONS FITSHOW Activez le Bluetooth sur votre appareil mobile, téléchargez l‘application et installez- ® la sur votre appareil iOS ou Android. Vous pouvez la trouver via la fonction de recherche d‘applications sur votre appareil ou scanner le code QR ci-contre. Après une installation réussie, vous pouvez lancer l‘application sur votre appareil mobile. - Seite 59 Vous pouvez main- tenant sélectionner une distance pour votre entraînement (en fonction du type de compte, le cas échéant, uniquement certains itinéraires gratuits). Appuyez sur « START » (Démarrer) ! Styrke II 4. Sélectionnez 5. Sélectionnez l‘appareil Skandika...
-
Seite 60: Conditions De Garantie
Pour d’accessoires ou de pièces de rechange, veuillez contacter : produits, nous nous réser- service@skandika.de vons le droit de procéder à Centre de service clients : MAX Trader GmbH, Wilhelm-Beckmann-Str. 19, 45307 Essen, des modi cations tech- Allemagne niques et de design. - Seite 61 NOTES ________________________________________________________________________________ ________________________________________________________________________________ ________________________________________________________________________________ ________________________________________________________________________________ ________________________________________________________________________________ ________________________________________________________________________________ ________________________________________________________________________________ ________________________________________________________________________________ ________________________________________________________________________________ ________________________________________________________________________________ ________________________________________________________________________________ ________________________________________________________________________________ ________________________________________________________________________________ ________________________________________________________________________________ ________________________________________________________________________________ ________________________________________________________________________________ ________________________________________________________________________________...
- Seite 62 NOTES ________________________________________________________________________________ ________________________________________________________________________________ ________________________________________________________________________________ ________________________________________________________________________________ ________________________________________________________________________________ ________________________________________________________________________________ ________________________________________________________________________________ ________________________________________________________________________________ ________________________________________________________________________________ ________________________________________________________________________________ ________________________________________________________________________________ ________________________________________________________________________________ ________________________________________________________________________________ ________________________________________________________________________________ ________________________________________________________________________________ ________________________________________________________________________________ ________________________________________________________________________________...
- Seite 63 NOTES ________________________________________________________________________________ ________________________________________________________________________________ ________________________________________________________________________________ ________________________________________________________________________________ ________________________________________________________________________________ ________________________________________________________________________________ ________________________________________________________________________________ ________________________________________________________________________________ ________________________________________________________________________________ ________________________________________________________________________________ ________________________________________________________________________________ ________________________________________________________________________________ ________________________________________________________________________________ ________________________________________________________________________________ ________________________________________________________________________________ ________________________________________________________________________________ ________________________________________________________________________________...
- Seite 64 Vertrieb & Service durch / Sales & Service by Ventes et services par MAX Trader GmbH Wilhelm-Beckmann-Straße 19 45307 Essen Germany SF-2472 DE_GB_FR Ver. 1.3...