Inhaltsverzeichnis
Werbung
Verfügbare Sprachen
Verfügbare Sprachen
Quicklinks
Werbung
Inhaltsverzeichnis

Verwandte Anleitungen für Skandika Foldaway X-2000


Inhaltszusammenfassung für Skandika Foldaway X-2000
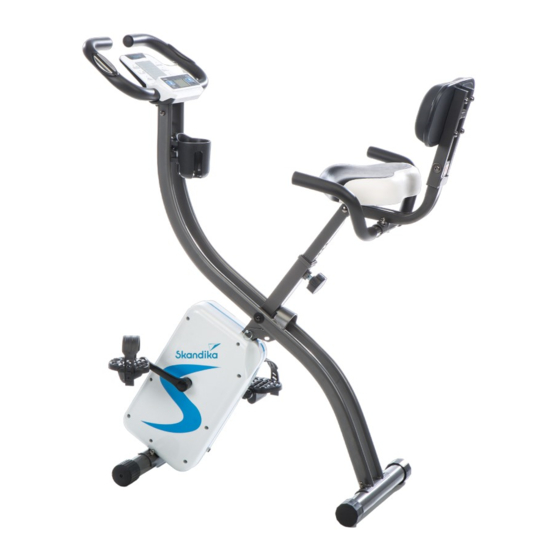
- Seite 1 Foldaway X-2000 Art.Nr. SF-1880...
-
Seite 2: Inhaltsverzeichnis
Importeur MAX Trader GmbH Die Videos zum Auf- und Hometrainer Adresse Wilhelm-Beckmann-Str. 19, D-45307 Essen Artikelnummer | Name SF-1880 | Foldaway X-2000 Abbau sowie FAQ und die Klasse Anleitungen zum Down- Standard EN ISO 20957 loaden findest Du auf unserer Skandika Service WARNUNG: Lesen Sie vor Gebrauch die Bedienungsanleitung. -
Seite 3: Wichtige Sicherheitshinweise
SICHERHEITSHINWEISE WARNUNG Um die Verletzungsgefahr zu reduzieren, muss diese Anleitung vor dem Gebrauch vollständig gelesen und verstanden werden! Dieses Gerät ist ausschließlich für den Heimgebrauch in Übereinstimmung mit den Anweisungen in dieser Anleitung vorgesehen. Lesen Sie die Gebrauchsanleitung sorgfältig durch, bevor Sie das Gerät einsetzen und bewahren Sie die Gebrauchsanleitung für die weitere Nutzung auf. -
Seite 4: Sicherheitshinweise
SICHERHEITSHINWEISE / CHECKLISTE 23. Beachten Sie bei der Einstellung von verstellbaren Teilen die richtige Position bzw. die markierte, maximale Einstellposition und beachten Sie die Warnhinweise am Gerät. 24. Trainieren Sie nie unmittelbar nach Mahlzeiten. 25. Vor dem Training mit dem Gerät sollten Sie sich immer sorgfältig aufwärmen, z. B. mit 2 Meter 2 Meter Dehnungsübungen. -
Seite 5: Schraubenbeutel-Inhalt
SCHRAUBENBEUTEL-INHALT SCHRAUBENBEUTEL-INHALT Teil Nr. Bezeichnung Menge Zeichnung Mutter M8 Unterlegscheibe ø6.5xø13x1.5t Federscheibe 6mm Schraube M6 x 12L Mutter M8 Wellscheibe ø8.3 x ø22 x 1.5t Wellscheibe ø6.5 x ø13 x 1.5t Schnellversteller Schraube M8x50L Federscheibe 8mm Schraube M8x45L Unterlegscheibe ø8.3xø25x2.0t Schraube M8x60L Maulschlüssel Innensechskantschlüssel... -
Seite 6: Teileliste
TEILELISTE TEILELISTE Teil Nr. Bezeichnung Menge Teil Nr. Bezeichnung Menge Hauptrahmen (vorderer Teil) Platte Hauptrahmen (hinterer Teil) Magnetsystem Sattelstütze Unterlegscheibe ø6.3 x ø13 x ø0.5t Lenkergriff Vorderer Standfuß Unterlegscheibe ø10.3 x ø14 x ø1t Hinterer Standfuß Mutter M8 Achse Sensorkabel C-Clip Wellscheibe Unterlegscheibe... - Seite 7 TEILELISTE / EXPLOSIONSZEICHNUNG Teil Nr. Bezeichnung Menge Teil Nr. Bezeichnung Menge EVA-Polster Sensor Heckdekorationsstreifen Sensorkabel Schraube M5 x 8L Rolle Mutter M10x7tx1.25P Schwungradsystem Schraube ST4.2x20L Quadratische Endkappe Motor Schaumstoffgriff für hinteren Handlauf Schraube M5x15L Mutter M6x5.0t Schraube M5x10L Mutter M12x1P Endkappe für hinteren Standfuß...
-
Seite 8: Explosionszeichnung
EXPLOSIONSZEICHNUNG EXPLOSIONSZEICHNUNG B... -
Seite 9: Aufbauanleitung
AUFBAUANLEITUNG SCHRITT 1 Ziehen Sie den Sicherheitsstift (19) aus dem Hauptrahmen heraus und sichern Sie den Hauptrahmen in der ausgeklappten Position durch Einstecken in die andere Bohrung. Befestigen Sie dann den vorderen Standfuß (05) am Vorderteil des Hauptrahmens (01) mit 2 Schrau- ben (34), 2 Wellscheiben (17) und 2 Muttern (16). - Seite 10 AUFBAUANLEITUNG SCHRITT 3 Befestigen Sie das rechte Pedal (14) am rechten Pedalarm durch Aufschrauben im Uhrzeigersinn, das linke Pedal (13) wird entsprechend am linken Pedalarm befestigt (Schraubrichtung entgegen dem Uhrzeigersinn). Die Pedale sind zur besseren Zuordnung mit „R“ für rechts und „L“...
- Seite 11 AUFBAUANLEITUNG SCHRITT 5 Befestigen Sie die Rückenpolster-Stütze (31) mit je 2 Schrauben (25), Unterlegscheiben (28) und Muttern (07) an der Sattelstütze (03). Montieren Sie dann das Rückenpolster (30) mit 4 Schrauben (27) und 4 Federscheiben (26) am Rückenpolster-Halter (23). SCHRITT 6 Befestigen Sie den hinteren Handlauf (22) mit je 2 Schrauben (27), Wellscheiben (17) und Muttern (16) an der Rückenpolster- Stütze (31).
- Seite 12 AUFBAUANLEITUNG SCHRITT 7 Befestigen Sie Lenkergriff (04) am hinteren Teil des Haupt- rahmens (02) seitlich mit 2 Schrauben (12), 2 Federscheiben (11) und 2 Unterlegscheiben (09) und von der Vorderseite mit 2 Schrauben (12), 2 Wellscheiben (18) und 2 Feder- scheiben (11).
-
Seite 13: Computer-Bedienungsanleitung
COMPUTER-BEDIENUNGSANLEITUNG COMPUTER-BEDIENUNGSANLEITUNG Stromanschluss Der Computer erhält seinen Strom über den mitgelieferten Adapter (33), welcher an eine normale Steckdose angeschlossen wird (weitere Spezifikationen siehe weiter hinten in dieser Anleitung) und an die kleine Buchse an der Abdeckung des Gerätes, siehe Darstellung auf der vorherigen Seite. Programmauswahl und Einstellung von Zielwerten Drücken Sie “UP/DOWN”, um einen Trainingsmodus auszuwählen und dann “ENTER”... -
Seite 14: Fehlermeldungen
COMPUTER-BEDIENUNGSANLEITUNG Die Herzerholungsrate (Pulse Recovery) Mit dieser Spezialfunktion ist es möglich, die Herzerholungsrate nach einem Training zu ermitteln, welche ein Indikator für die sportliche und körperliche Verfassung des Trainierenden ist. Nachdem Sie das Training abgeschlossen haben, behalten Sie bitte die Hände auf den Handpulssensoren (umfassen Sie diese, um einen möglichst guten Kontakt herzustellen). -
Seite 15: Die Tastenfunktionen
COMPUTER-BEDIENUNGSANLEITUNG Die Tastenfunktionen Der Computer besitzt 6 Tasten mit unterschiedlichen Funktionen: 1. START/STOP a. Schnellstart – sofort loslegen ohne vorher ein Programm zu wählen (manueller Modus wird gestartet). Die Trainingszeit beginnt von 0:00 aufwärts zu laufen. b. Drücken Sie diese Taste, um das Training zu pausieren / zu beenden. c. - Seite 16 COMPUTER-BEDIENUNGSANLEITUNG P2 bis P6: Programm-Modi P2 bis P6 sind vorgegebene Programme. Mit diesen Trainingsmodi können Sie nach vorgegebenen Pro- grammprofilen trainieren (Berg- u. Talfahrten – „Steps” (Schritte), „Hill“ (Hügel), „Rolling“ (Intervall), „Valley“ (Tal) und „Fat Burn“ (Fettverbrennung)). Wählen Sie mit Hilfe von „UP“ und „DOWN“ das Programm von P2 (Programm 2) bis P6 (Programm 6) aus und bestätigen Sie mit ENTER.
-
Seite 17: Verwendung Von Apps
VERWENDUNG VON APPS Verwendung von Apps Der Computer kann über Bluetooth (Frequenz: 2,4 GHz) verbunden werden, um mit den Apps DelighTech oder KinoMap zu kommunizieren. DELIGHTECH Kompatibilität a. Android 4.4 oder neuer, Bluetooth dual mode / BLE (Bluetooth Low Energy) ®... -
Seite 18: Inhalte Der Delightech-App
VERWENDUNG VON APPS Inhalte der DelighTech-App Quick start (Schnellstart) Manuell starten ohne weitere Eingaben. Tippen Sie auf “Resistance” (Widerstand), um den Tretwiderstand anzupassen. Der Schieberegler erscheint für ca. 3 Sekunden. Tippen Sie auf das Herzsymbol, um die grafische Darstellung der Pulsfrequenz aufzurufen. Tippen Sie auf den Zurück-Pfeil, um auf den Hauptbildschirm zu gelangen. -
Seite 19: Skandika Auswählen
Tippen Sie nun auf OK und kehren Sie zum Hauptmenü zurück. Sie können nun einen Kurs auswählen (je nach Art Ihres KinoMap-Kontos). Drücken Sie auf Start und beginnen Sie mit dem Training! X-2000 4. Skandika auswählen 5. Das Gerät auswählen... -
Seite 20: Auf- Und Abwärmen / Übungsanleitung
AUF- UND ABWÄRMEN / ÜBUNGSANLEITUNG Übungsanleitung Die Benutzung Ihres klappbaren Heimtrainers birgt verschiedene Vorteile. Ihre physische Fitness wird ver- bessert, Ihre Muskulatur wird geformt und – in Zusammenhang mit einer kalorienkontrollierten Diät – trägt das Training zu einem kontrollierten Gewichtsverlust bei. 1. -
Seite 21: Die Abkühlphase (Cool Down)
AUF- UND ABWÄRMEN / ÜBUNGSANLEITUNG / REINIGUNG & PFLEGE 3. Die Abkühlphase (Cool Down) Diese Phase dient dazu, Ihr kardiovaskuläres System und Ihre Muskeln wieder zu entspannen. Sie können z. B. das Tempo reduzieren und für 5 weitere Minuten trainieren. Wiederholen Sie dann die Dehnungsübun- gen aus der Aufwärmphase –... -
Seite 22: Garantiebedingungen
Verwertung oder anderen Formen der Verwertung von Altgeräten leisten Sie einen wichtigen Beitrag zum Schutze unserer Umwelt. Bitte erfragen Sie bei der Gemeindeverwaltung die zuständige Entsorgungsstelle. Im Zuge ständiger Für Ersatzteile kontaktieren Sie bitte folgende E-Mail-Adresse: service@skandika.de Produktverbesse- Der Service erfolgt durch: MAX Trader GmbH, Wilhelm-Beckmann-Straße 19, 45307 Essen,... - Seite 23 Notizen _____________________________________________________ _____________________________________________________ _____________________________________________________ _____________________________________________________ _____________________________________________________ _____________________________________________________ _____________________________________________________ _____________________________________________________ _____________________________________________________ _____________________________________________________ _____________________________________________________ _____________________________________________________ _____________________________________________________ _____________________________________________________...
- Seite 24 Importeur MAX Trader GmbH Please visit the Skandika Hometrainer Adresse Wilhelm-Beckmann-Str. 19, D-45307 Essen Artikelnummer | Name SF-1880 | Foldaway X-2000 Service portal on our Klasse website for setup & help Standard EN ISO 20957 videos, FAQs and downloa- dable instructions.
-
Seite 25: Safety Precautions
SAFETY PRECAUTIONS WARNING To reduce risk of injury, read and understand this instruction manual before using the device! This machine is intended for home use only in accordance with the instructions provided in this manual. Read the instruction manual carefully before using this device and keep the instruction manual for future use. SAFETY PRECAUTIONS 13. -
Seite 26: Pre-Assembly Check List
SAFETY PRECAUTIONS / PRE-ASSEMBLY CHECK LIST 23. When adjusting the adjustable parts, make sure they are adjusted properly and note the marked, maximum adjusting position, for example of the saddle support, respectively. Pay attention to the warnings on the device. 24. -
Seite 27: Hardware Pack / Parts List
HARDWARE PACK / PARTS LIST HARDWARE PACK / PARTS LIST Part No. Description Q‘ty Drawing Nut M8 Flat washer ø6.5xø13x1.5t Spring washer 6mm Allen bolt M6 x 12L Nut M8 Curved washer ø8.3 x ø22 x 1.5t Curved washer ø6.5 x ø13 x 1.5t Quick release knob Carriage bolt M8x50L Spring washer 8mm... -
Seite 28: Parts List
PARTS LIST PARTS LIST Part No. Description Q‘ty Part No. Description Q‘ty Main frame (front support tube) Plate Main frame (rear support tube) Magnetic assembly Seat Post Plastic washer ø6.3 x ø13 x ø0.5t Handlebars Front stabilizer Plastic washer ø10.3 x ø14 x ø1t Rear stabilizer Nut M8 Axle for belt pulley... - Seite 29 PARTS LIST / EXPLODED DIAGRAM Part No. Description Q‘ty Part No. Description Q‘ty EVA pad Sensor Rear decoration strip Sensor wire Screw M5 x 8L Pulley Nut M10x7tx1.25P Flywheel assembly set Screw ST4.2x20L Square end cap Motor Foam grip for rear handlebar tube Screw M5x15L Hex head nut M6x5.0t...
-
Seite 30: Exploded Diagram
EXPLODED DIAGRAM EXPLODED DIAGRAM B... -
Seite 31: Assembly Instructions
ASSEMBLY INSTRUCTIONS STEP 1 Pull out the lock pin (19) from main frame and reinsert it to the drilling for extended position. Attach the front stabilizer (05) to the front part of the main frame (01) with 2 curved washers (17), 2 carriage bolts (34) and 2 nuts (16). - Seite 32 ASSEMBLY INSTRUCTIONS STEP 3 Attach the left pedal (13) onto the left crank arm and tighten it by turning it anticlockwise. Then attach the right pedal (14) onto the right crank arm and tighten it by turning it clockwise. The pedals are marked with “R” (right) and “L” (left). STEP 4 Fix the seat (10) on top of the seat post (03) with 3 nuts (07) and washers (21).
- Seite 33 ASSEMBLY INSTRUCTIONS STEP 5 Fix the backrest tube (31) to seat post (03) with 2 carriage bolts (25), flat washers (28) and nuts (07). Fix the backrest (30) to backrest holder (23) with 4 allen bolts (27) and spring washers (26). STEP 6 Fix the rear handlebars (22) on the backrest tube (31) with 2 allen bolts (27), curved washers (17) and domed nuts (16).
- Seite 34 ASSEMBLY INSTRUCTIONS STEP 7 Fix the handlebars (04) at rear part of main frame (02) with 2 allen bolts (12), spring washers (11) and flat washers (09) from lateral side and with 2 allen bolts (12), curved washers (18) and spring washers (11) from front side. Connect sensor wire (08) to back of computer (29).
-
Seite 35: Computer Operation Manual
COMPUTER OPERATION MANUAL COMPUTER OPERATION MANUAL Mains connection The computer gets its power supply by the included adaptor (33). The adaptor will be connected to a normal mains plug (European standard, please check the specifications resp. please use a fitting mains adaptor for your power system) and to the little plug in the cover of the device as it can be seen on the previous page. -
Seite 36: Error Messages
COMPUTER OPERATION MANUAL PULSE RECOVERY With this special function, you can check your hearts recovery rate after a training session. This is a very important indication for the physical condition of your body. To check your recovery rate, you need to keep your hands onto the hand pulse-sensors after your exercise. -
Seite 37: Button Functions
COMPUTER OPERATION MANUAL Button functions There are 6 buttons with different functions: 1. START/STOP a. Quick Start - start the computer without selecting a program (manual workout only). Time automati- cally begins to count up from zero. b. During exercise, press the button to STOP exercise. c. - Seite 38 COMPUTER OPERATION MANUAL P2 to P6: Program modes The modes P2 to P6 enable you to exercise with a program profile (preset). Mountain- and valley courses: Steps, Hill, Rolling, Valley, Fat Burn. Select one of the modes with “UP” and “DOWN” and “ENTER”. Press “START/STOP to start the exercise. You may change the tension level at any time during exercise with “UP”...
-
Seite 39: Using Apps
USING APPS Using apps The computer can be connected via Bluetooth (frequency: 2.4 GHz) to communicate with the apps De- lighTech or KinoMap. DELIGHTECH Compatibility a. Android 4.4 oder neu, Bluetooth dual mode / BLE (Bluetooth Low Energy) ® b. APPLE iOS Geräte mit Bluetooth Version 4.0. - Seite 40 USING APPS DelighTech app contents Quick start Start manually without any settings. Tap “Resistance” to change resistance level. The slider bar appears for 3 seconds. Tap the “Heart” symbol to show theheartrate chart. Tap the return arrow to exit to main screen. Programs Here you may select pre-defined programs for your exercise.
- Seite 41 Now tap on OK and return to main menu. You can now choose a course for your exercise (depending on your type of KinoMap account maybe only some free courses). Press Start and begin to exercise! X-2000 4. Select Skandika 5. Tap on the device...
-
Seite 42: Warm-Up And Cool Down / Exercise Instructions
WARM UP AND COOL DOWN / EXERCISE INSTRUCTIONS Exercise instructions Using your foldable exercise bike will provide you with several benefits, e.g. it will improve your physical fitness, tone your muscles and - in conjunction with a calorie-controlled diet - help you to reduce weight. 1. -
Seite 43: The Cool-Down Phase
WARM-UP AND COOL DOWN / EXERCISE INSTRUCTIONS / CLEANING AND CARE 3. The cool-down phase This stage helps to soothe your muscles and your cardiovascular system after your workout. At the end of your workout, reduce the speed and exercise for approximately 5 minutes at this lower speed level. -
Seite 44: Guarantee Conditions
In accordance with our policy of continual product impro- vement, we reserve the right For spare parts please contact: service@skandika.de to make technical and visual Service centre: MAX Trader GmbH, Wilhelm-Beckmann-Straße 19, 45307 Essen, changes without notice. Germany... - Seite 45 Notes _____________________________________________________ _____________________________________________________ _____________________________________________________ _____________________________________________________ _____________________________________________________ _____________________________________________________ _____________________________________________________ _____________________________________________________ _____________________________________________________ _____________________________________________________ _____________________________________________________ _____________________________________________________ _____________________________________________________ _____________________________________________________...
- Seite 46 Importeur MAX Trader GmbH vidéos de montage et de Hometrainer Adresse Wilhelm-Beckmann-Str. 19, D-45307 Essen Artikelnummer | Name SF-1880 | Foldaway X-2000 démontage ainsi que la Klasse FAQ et les instructions de Standard EN ISO 20957 téléchargement sur notre page de service Skandika.
-
Seite 47: Informations De Sécurité
INFORMATIONS DE SÉCURITÉ AVERTISSEMENT Pour réduire les risques de blessures, veuillez lire attentivement ce mode d’emploi avant d‘utiliser la plate- forme vibrante ! Cet appareil est uniquement destiné à une utilisation domes-tique conformément aux inst- ructions contenues dans ce mode d’emploi. Lisez attentivement le mode d’emploi avant d’utiliser l’appareil et conservez bien ce mode d’emploi. -
Seite 48: Liste De Contrôle
INFORMATIONS DE SÉCURITÉ / LISTE DE CONTRÔLE 22. Il est impératif de ne jamais introduire la moindre partie du corps dans les zones des pièces en mouvement. 23. Veillez à bien placer les pièces réglables dans la bonne position ou dans la position de réglage maximale et observez les avertissements sur l‘appareil. -
Seite 49: Contenu Du Sac De Petites Pièces
CONTENU DU SAC DE PETITES PIÈCES CONTENU DU SAC DE PETITES PIÈCES N° pièce Dénomination Qté Illustration Boulon de fixation M8 Rondelle plate ø6.5xø13x1.5t Bague à ressort 6mm Boulon Allen M6 x 12L Boulon de fixation M8 Rondelle courbée ø8.3 x ø22 x 1.5t Rondelle courbée ø6.5 x ø13 x 1.5t Bouton de déverrouillage rapide Boulon de carrosserie M8x50L... -
Seite 50: Liste Des Pièces
LISTE DES PIÈCES LISTE DES PIÈCES N° pièce Dénomination Qté N° pièce Dénomination Qté Châssis principal Boulon de carrosserie M8x60L (tube de support avant) Porte-bouteille Châssis principal (tube de support arrière) Support du Porte-bouteille Tige de selle Bague à ressort Guidon Fil de connexion Stabilisateur avant... - Seite 51 LISTE DES PIÈCES / VUE EXPLOSÉE N° pièce Dénomination Qté N° pièce Dénomination Qté Vis ST4.2x20L Capot de protection de la chaîne (g) Poignée en mousse pour le guidon Capot de protection de la chaîne (d) arrière Couvercle décoré, avant Écrou M6x5.0t Vis M4x10L Embout pour stabilisateur arrière...
-
Seite 52: Vue Explosée
VUE EXPLOSÉE VUE EXPLOSÉE B... -
Seite 53: Instructions De Montage
INSTRUCTIONS DE MONTAGE ÉTAPE 1 Retirez la goupille de verrouillage (19) du châssis et réinsérerez-la dans le trou pour une position plus étendue. Assemblez le stabilisateur avant (05) à l’avant de la châssis principal avant (01) et fixez avec 2 ensembles de boulons (34), rondelles cour- bées (17) et écrous (16). - Seite 54 INSTRUCTIONS DE MONTAGE ÉTAPE 3 Vissez la pédale droite (14) sur le côté droit dans le sens de marche du bras de pédale (Attention : sens de rotation dans le sens horaire!). La pédale gauche (13) est vissée de la même manière sur le côté gauche (Attention : sens de rotation dans le sens antihoraire!).
- Seite 55 INSTRUCTIONS DE MONTAGE ÉTAPE 5 Fixez le tube de support du dossier (31) à la tige de selle (03) avec 2 boulons de carrosserie (25), les rondelles plates (28) et les écrous (07). Fixez le dossier (30) sur le support de dossier (23) avec 4 boulons Allen (27) et les bagues à...
- Seite 56 INSTRUCTIONS DE MONTAGE ÉTAPE 7 Fixez le guidon (04) à la partie arrière du châssis (02) avec 2 boulons Allen (12), les bagues à ressort (11) et les rondel- les plates (09) du côté latéral et avec 2 boulons Allen (12), rondelles courbées (18) et les bagues à...
-
Seite 57: Mode D'emploi De L'ordinateur
MODE D‘EMPLOI DE L‘ORDINATEUR MODE D‘EMPLOI DE L‘ORDINATEUR Raccordement au réseau L’ordinateur est alimenté en courant par un adaptateur (33) livré qui est branché à une prise de courant ordi- naire. Puis il peut être raccordé à la petite douille située à la couverture de l‘appareil (voir la page précédente). Sélection du programme et préréglage d’une valeur Appuyez sur les touches «... -
Seite 58: Messages D'erreur
MODE D‘EMPLOI DE L‘ORDINATEUR Fonction spéciale (PULSE RECOVERY) A l’aide ce cette fonction spéciale vous pouvez mesurer le pouls après l’entraînement qui sert d’indicateur de votre structure sportive et physique. Après l’entraînement gardez vos doigts bien en contact avec les capteurs. Maintenant enfoncez la touche «... - Seite 59 MODE D‘EMPLOI DE L‘ORDINATEUR Boutons de fonctions Il existe 6 boutons avec différentes fonctions : 1. START/STOP a. Démarrage rapide - démarre l’ordinateur sans sélection de programme (entraînement manuel unique- ment). Le temps commence automatiquement à partir de zéro. b. Durant l’entraînement, appuyez sur le bouton STOP pour arrêter l’exercice. c.
- Seite 60 MODE D‘EMPLOI DE L‘ORDINATEUR P2 à P6 : Programmes préréglés Ces modes d‘entraînements vous permet de vous entraîner selon les profils de programme réglés (montées et descentes). Appuyez sur « UP » ou « DOWN » pour sélectionner un des 5 programmes (P2 à P6) et ensuite sur « ENTER »...
-
Seite 61: Utilisation Des Apps
UTILISATION DES APPS Utilisation des apps L‘ordinateur peut être connecté via Bluetooth (fréquence : 2,4 GHz) pour communiquer avec les applications DelighTech ou KinoMap. DELIGHTECH Compatibilité a. Android 4.4 ou ultérieur, Bluetooth dual mode / BLE (Bluetooth Low Energy) ® b. - Seite 62 UTILISATION DES APPS Contenu de l‘application DelighTech Quick start (Démarrage rapide) Démarrez manuellement sans paramètres. Appuyez sur « Résistance » pour modifier le niveau de résistance. La barre de défilement apparaît pendant 3 secondes. Appuyez sur le symbole du « Cœur » pour afficher le diagramme de fréquence cardiaque. Appuyez sur la flèche de retour pour revenir à...
- Seite 63 Puis appuyez sur OK et retournez au menu principal. Vous pouvez main- tenant sélectionner une distance pour votre entraînement (en fonction du type de compte, le cas échéant, uniquement certains itinéraires gratuits). Appuyez sur « START » (Démarrer) ! X-2000 4. Sélectionnez 5. Sélectionnez l‘appareil Skandika...
-
Seite 64: Echauffement Et Récupération / Consignes D'entraînement
ÉCHAUFFEMENT ET RÉCUPÉRATION / CONSIGNES D’ENTRAÎNEMENT Consignes d’entraînement Utilisez votre vélo d’appartement pliable détient plusieurs avantages. Votre condition physique est amé- liorée, vos muscles sera formé et – en relation avec un régime – l‘exercice aide à la réduction de la masse corporelle. -
Seite 65: Nettoyage Et Entretien
ÉCHAUFFEMENT ET RÉCUPÉRATION / CONSIGNES D’ENTRAÎNEMENT / NETTOYAGE ET ENTRETIEN 3. Phase de refroidissement (Cool Down) Afin d’assister le métabolisme après la phase d’entraînement et d’éviter l’apparition de courbatures ou de claquages musculaires, une « phase de refroidissement » doit être observée après la « phase d’entraînement ». -
Seite 66: Conditions De Garantie
Dans le cadre du travail Pour d’accessoires ou de pièces de rechange, veuillez contacter : continu d’amélioration des service@skandika.de produits, nous nous réser- Centre de service clients : MAX Trader GmbH, Wilhelm-Beckmann-Str. 19, 45307 Essen, vons le droit de procéder à... - Seite 67 Notizen / Notes _____________________________________________________ _____________________________________________________ _____________________________________________________ _____________________________________________________ _____________________________________________________ _____________________________________________________ _____________________________________________________ _____________________________________________________ _____________________________________________________ _____________________________________________________ _____________________________________________________ _____________________________________________________ _____________________________________________________ _____________________________________________________...
- Seite 68 Vertrieb & Service durch / Sales & Service by Ventes et services par MAX Trader GmbH Wilhelm-Beckmann-Straße 19 45307 Essen Germany SF-1880 X-2000 DE_GB_FR Ver. 2.1...