Product disposal at end of product life ViewSonic respects the environment and is committed to working and living green. Thank you for being part of Smarter, Greener Computing. Please visit ViewSonic website to learn more.
Seite 3
Caution IC Caution: This device complies with Industry Canada licence-exempt RSS standard(s). Operation is subject to the following two conditions: (1) This device may not cause interference, and (2) This device must accept any interference, including interference that may cause undesired operation of the device. CAN ICES-003(B) / NMB-003(B) FCC Caution: This device complies with part 15 of the FCC Rules.
Elimination du produit en fin de vie ViewSonic respecte l’environnement et fait des efforts allant dans le sens d’un environnement de travail et de vie écologiques. Merci d’oeuvrer aussi pour une informatique plus intelligente et plus écologique. Pour en savoir plus, veuillez visiter le site web de ViewSonic.
Seite 5
Attention IC Attention: Cet appareil est conforme aux normes RSS exemptes de licence d'Industrie Canada. L'exploitation est soumise aux deux conditions suivantes : (1) Cet appareil ne doit pas provoquer d'interférences, et (2) Cet appareil doit accepter toute interférence, y compris les interférences susceptibles de provoquer un fonctionnement indésirable de l'appareil. CAN ICES-003(B) / NMB-003(B) FCC Caution: Cet appareil est conforme à...
Desecho del producto al final de su vida útil ViewSonic es respetuoso con el medioambiente y está comprometido a trabajar y vivir de una manera que sea respetuosa con el medioambiente. Gracias por ser parte de una forma de Computación más Inteligente y más Verde. Visite el sitio web de ViewSonic para saber más.
Seite 7
Precaución IC Precaución: Este dispositivo cumple con los estándares RSS exentos de licencia de Industry Canada. El funcionamiento está sujeto a las dos condiciones siguientes: (1) Este dispositivo no puede causar interferencias y (2) Este dispositivo debe aceptar cualquier interferencia, incluidas las interferencias que pueden provocar un funcionamiento no deseado del dispositivo.
Kondensatoren, z. B. piezoelektronischen Geräten, oder in Glas- oder Keramik-Matrix-Verbundwerkstoffen. Entsorgung zum Ende der Einsatzzeit ViewSonic nimmt den Umweltschutz sehr ernst, verpflichtet sich daher zu umweltfreundlichen Lebens- und Arbeitsweisen. Vielen Dank für Ihre Mitwirkung an einem intelligenteren, umweltfreundlicheren Einsatz moderner Computertechnik. Mehr dazu erfahren Sie auf den ViewSonic-Internetseiten.
Seite 9
Vorsicht IC-Warnhinweis: Dieses Gerät stimmt mit dem/den lizenzfreien RSS-Standard(s) von Industry Canada überein. Der Betrieb unterliegt den folgenden beiden Voraussetzungen: (1) Dieses Gerät darf keine Funkstörungen verursachen, und (2) dieses Gerät muss jegliche empfangenen Störungen hinnehmen, einschließlich Störungen, die zu unbeabsichtigtem Betrieb führen können. CAN ICES-003(B) / NMB-003(B) FCC-Warnhinweis: Dieses Gerät erfüllt Teil 15 der FCC-Regularien.
Seite 10
керамики в конденсаторах), например пьезоэлектрические устройства, либо в стекле керамической матрицы. Утилизация продукта после завершения срока использования ViewSonic заботится об окружающей среде и сохраняет приверженность работе и жизни в экологически безопасной среде. Благодарим вас за участие в программе Smarter, Greener Computing (Интеллектуальные экологичные...
Seite 11
Осторожно! Предупреждение IC: Данное устройство соответствует промышленным RSS-стандартам Канады на нелицензионное оборудование. При использовании устройства должны соблюдаться два следующих условия: (1) данное устройство не должно являться источником помех и (2) данное устройство должно принимать любые помехи, включая те, которые могут вызвать нарушения в его работе. CAN ICES-003(B)/NMB-003(B) Предупреждение...
Introduction Thank you for purchasing this VSD243. This Start-up Guide describes how to operate and use this product safely. Before operating, please read this guide carefully for important safety information. Please also keep this guide handy as a quick reference should you encounter any difficulties when using this product.
B. Product Overview Basic Operations and Front View Built-in Webcam (5.0MP) Built-in Microphone Display with touch panel function About LCD display: This product uses a TFT LCD display. Note that some pixels may always appear off (black) while some are always on (orange, green, or blue).
C. Installation precautions Installation Environment Health precautions Viewing computer monitor displays for extended periods of time may result in tiredness, numbness in the hands and feet, blurry vision,etc. Please see the picture below as a guide for extended use conditions. Safety precautions •...
D. Installation and Connection 1) Open the stand in the direction of the arrow. 2) Connect the power Place face down on a clean, flat surface and avoid Connect one end of the supplied AC adapter to any objects that could damage the display. the DC-in jack at the back of the unit.
Seite 16
E. Start-up and initial setting Turn on the Power 1) Make sure the power cable and AC adapter are connected. 2) Press and hold the power switch until the status LED turns blue.
While the power LED is orange, briefly press the power button to return from power saving mode G. Basic Operation Home Screen After powering on the VSD243, the main display window is shown below. The launcher page contains a main page with default apps which include the most commonly use apps.
H. Network Setting Connecting to Wireless LAN 1) Tap “All applications” – “Settings”. 2) Turn “Wi-Fi” to ON by dragging “OFF” to the right. 3) When Wi-Fi is turned on, a list of all available wireless LAN access points will be shown on the right side of the screen.
Seite 19
K. Troubleshooting and Q&A Q. Power does not turn on. A. ● Check if the AC adapter and power cord are properly connected. ● Reconnect the AC adapter and power cord, and turn the power on. ● Press and hold the power button for 8 seconds, and turn the power on again. Q.
Introduction Nous vous remercions d'avoir acheté ce VSD243. Ce guide de démarrage explique comment opérer et utiliser ce produit en toute sécurité. Avant de procéder, veuillez lire attentivement cette notice pour les informations importantes relatives à la sécurité. Veuillez également conserver ce guide à portée de main pour une consultation rapide si vous rencontrez des difficultés lors de l'utilisation de ce...
B. Présentation du produit Opérations de base et Vue de face Webcam intégrée (5,0MP) Microphone intégré Affichage avec fonction écran tactile À propos de l'affichage à cristaux liquides: Ce produit utilise un écran TFT LCD. Notez que certains pixels apparaissent toujours désactivés (en noir ) alors que certains sont toujours actifs (orange, vert ou bleu).
C. Précautions d'installation Environnement Installation Précautions sanitaires Le fait de regarder l'affichage d'un moniteur d'ordinateur pendant des périodes de temps prolongées peut entraîner de la fatigue, un engourdissement au niveau des mains et des pieds, une vision floue, etc. Veuillez consulter l'image ci-dessous en tant que guide pour les conditions d'utilisation prolongée. Consignes de sécurité...
D. Installation et Connexion 1) Ouvrir le support dans le sens de la flèche. 2) Branchez l'alimentation Placer face vers le bas sur une surface plane Branchez une extrémité de l'adaptateur secteur et propre en évitant tous objets qui pourraient fourni à...
Seite 24
E. Mise en service et réglage initial Allumez l'alimentation 1) Assurez-vous que le câble d'alimentation et l'adaptateur secteur sont connectés. 2) Maintenez enfoncé sur le bouton d'alimentation jusqu'à ce que la DEL devienne bleue.
G. Fonctionnement de base Écran Accueil Après avoir allumé le VSD243, la fenêtre principale d’affichage est illustrée ci-dessous. La page du lanceur contient une page principale avec les applications par défaut, qui comprennent les applications les plus utilisées.
H. Configuration réseau Connexion à réseau local sans fil 1) Appuyez sur "All applications (Toutes les applications)" - "Settings (Paramètres)". 2) Tourner "Wi-Fi " sur ON en faisant glisser "OFF" vers la droite. 3) Lorsque Wi-Fi est activé, une liste de tous les points d'accès LAN sans fil disponibles sera affichée sur le côté...
Seite 27
K. Dépannage et Q&R Q. L'appareil ne s'allume pas. R. ● Vérifiez si l'adaptateur secteur et le cordon d'alimentation sont correctement connectés. ● Reconnectez l'adaptateur secteur et le cordon d' alimentation, puis mettez l'appareil sous tension. ● Appuyez et maintenez le bouton d'alimentation enfoncé pendant 8 secondes, puis remettez -le sous tension.
Introducción Gracias por comprar este VSD243. Esta Guía de inicio describe cómo operar y usar este producto de manera segura. Antes de ponerlo a funcionar, lea esta guía atentamente para conocer la información importante de seguridad. Igualmente, conserve esta guía a mano por si tiene cualquier inconveniente al usar este producto.
B. Descripción del producto Operaciones básicas y vista frontal Cámara Web integrada (5,0 MP) Micrófono integrado Pantalla con función de panel táctil Acerca de la pantalla LCD: Este producto usa una pantalla LCD TFT. Tome en cuenta que algunos píxeles podrían aparecer siempre apagados (negros), mientras otros siempre estar encendidos (Naranja, verdes o azules).
C. Precauciones sobre la instalación Ambiente de instalación Precauciones de salud Ver pantallas de PC durante prolongados períodos de tiempo puede provocar cansancio, sensación de manos y pies dormidos, visión borrosa, etc. Consulte la imagen siguiente como referencia para condiciones de uso prolongado.
D. Instalación y conexión 1) Abra la base en la dirección de la flecha 2) Conecte la alimentación Coloque la pantalla boca abajo sobre una superficie Conecte un extremo del adaptador de CA suministrado a la toma de entrada de CC de la parte posterior de la limpia y plana, y evite cualquier objeto que pueda unidad.
Seite 32
E. Inicio y configuración inicial Encienda la unidad 1) Asegúrese de que el cable de alimentación y el adaptador de CC estén conectados. 2) Presione sin soltar el conmutador de alimentación hasta que el LED de estado se ilumine en azul.
G. Funcionamiento básico Pantalla de inicio Después de encender la pantalla VSD243, la ventana de visualización principal se mostrará como a continuación. La página de inicio de aplicaciones contiene una página principal con aplicaciones predeterminadas que incluyen las aplicaciones que se usan con más frecuencia.
H. Configuración de la red Cómo conectarse al LAN inalámbrico 1) Toque "All applications (Todas las aplicaciones)" – "Settings (Configuración)". 2) Active el "Wi-Fi" al arrastrar "OFF (Desactivado)" hacia la derecha. 3) Cuando se active el Wi-Fi, aparecerá una lista de todos los puntos de acceso LAN inalámbricos a la derecha de la pantalla.
Seite 35
K. Resolución de problemas y Preguntas y Respuestas P. La unidad no enciende. R. ● Compruebe que el adaptador de CA y el cable de alimentación estén conectados correctamente. ● Vuelva a conectar el adaptador de CA y el cable de alimentación, y encienda la unidad. ●...
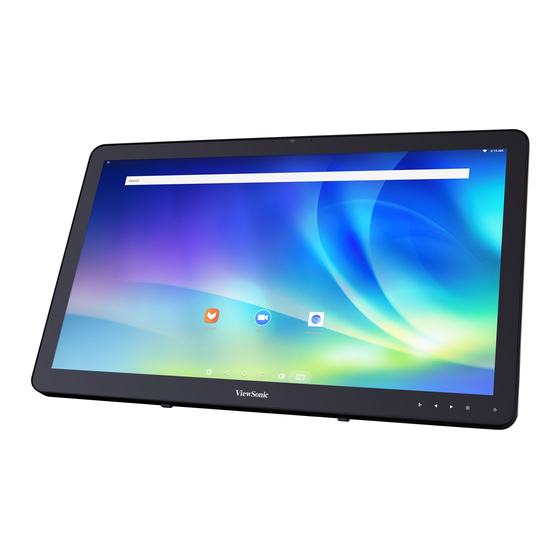
Einleitung Vielen Dank für den Kauf des VSD243. Diese Schnellanleitung verrät Ihnen, wie Sie Ihr neues Gerät problemlos und sicher bedienen können. Bitte lesen Sie diese Anleitung vor dem ersten Einschalten gründlich durch. Sie enthält wichtige Sicherheitshinweise. Bewahren Sie diese Anleitung am besten auf, damit Sie darin nachlesen können, falls einmal Schwierigkeiten bei der...
Seite 37
B. Übersicht Grundbedienung und Vorderansicht Integrierte Webcam (5,0 MP) Integriertes Mikrofon Display mit Touchpanel Das LC-Display: Ihr Gerät ist mit einem TFT-LC-Display ausgestattet. Bitte beachten Sie, dass es vorkommen kann, dass einige wenige Pixel nicht oder ständig leuchten (orange, grün, blau oder weiß).
C. Warnhinweise zur Installation Arbeitsumgebung Wichtige Gesundheitshinweise Längere Arbeit mit Computern kann zu Ermüdung, Taubheitsgefühl in Händen und Füßen, Sehstörungen und anderen Problemen führen. Bitte beherzigen Sie bei längerer Arbeit die Abbildung unten. Sicherheitshinweise • Stellen Sie das Gerät an einem gut belüfteten Ort auf, meiden Sie Feuchtigkeit, die sich am oder im Gerät niederschlagen kann.
D. Installation und Anschluss 1) Ständer in Pfeilrichtung öffnen 2) Stromversorgung herstellen Legen Sie das Gerät mit der Bildseite nach unten auf Schließen Sie den kleinen Netzteilstecker an den eine flache Unterlage, achten Sie darauf, dass das Netzteilanschluss an der Rückseite des Gerätes an. Gerät nicht durch andere Gegenstände beschädigt Schließen Sie das Netzkabel an den Netzeingang werden kann.
E. Starten und Grundeinstellungen Gerät einschalten 1) Vergewissern Sie sich, dass Netzkabel und Netzteil angeschlossen sind. 2) Halten Sie die Ein-/Austaste gedrückt, bis die Status-LED blau wird.
Seite 41
Wenn die Status-LED orange leuchtet, können Sie das Gerät durch kurzes Drücken der Ein-/Austaste wieder aus dem Energiesparmodus aufwecken. G. Grundbedienung Startbildschirm Nach Einschaltung des VSD243 erscheint die nachstehende Hauptanzeige. Die Seite des Startprogrammes enthält eine Hauptseite mit Standard-Apps, zu denen die am häufigsten verwendeten Apps zählen. Aptoide: App Store Zoom: Cloud-Plattform für Video- und Audiokonferenzen...
H. Netzwerkeinstellungen Mit einem WLAN verbinden 1) Tippen Sie auf „Alle Anwendungen“ – „Einstellungen“. 2) Schalten Sie das „WLAN“ ein, indem Sie „Aus“ nach rechts ziehen. 3) Wenn die WLAN-Funktion eingeschaltet ist, erscheint eine Liste mit sämtlichen erreichbaren WLAN-Zugangspunkten auf der rechten Seite des Bildschirms. Tippen Sie zum Verbinden auf den gewünschten WLAN-Zugangspunkt.
K. Problemlösung und Fragen & Antworten F. Das Gerät lässt sich nicht einschalten. A: • Vergewissern Sie sich, dass Netzteil und Netzkabel richtig angeschlossen wurden. • Schließen Sie Netzteil und Netzkabel noch einmal an, schalten Sie das Gerät anschließend ein. •...
Введение Благодарим вас за приобретение VSD243! В настоящем кратком руководстве приведен порядок безопасного использования и эксплуатации данного устройства. Внимательно прочитайте инструкции по безопасной эксплуатации монитора перед началом его использования. Храните это руководство под рукой на тот случай, если в будущем у вас...
В. Описание изделия Основные операции и вид спереди Встроенная веб-камера (5,0 Мп) Встроенный микрофон Монитор с сенсорной панелью О ЖК-мониторе: В этом мониторе используется дисплей на жидких кристаллах TFT. Следует учитывать, что некоторые пиксели всегда выключены (черного цвета), а некоторые постоянно...
С. Меры предосторожности при установке Условия установки Мероприятия по охране здоровья Просмотр компьютерного монитора в течение длительного времени может вызвать утомление, онемение рук и ног, нарушение четкости зрения и др. Правильное положение при продолжительной работе за монитором показано на следующем рисунке. Меры...
D. Установка и подключение 1). Откройте подставку в направлении стрелки. 2). Подключите питание. Положите монитор экраном вниз на чистую Подключите один конец поставляемого сетевого ровную поверхность, без каких-либо предметов, блока питания к входу питания постоянного тока которые могли бы повредить экран. монитора.
Seite 48
E. Запуск и первоначальная настройка Включение питания 1) Убедитесь, что кабель питания и сетевой блок питания подключены. 2) Нажмите и удерживайте кнопку питания до тех пор, пока индикатор состояния не станет синим.
Когда горит оранжевый индикатор, нажмите и отпустите кнопку питания, чтобы выйти из режима энергосбережения. G. Основные операции Главный экран После включения питания VSD243 отображается показанное ниже окно основного дисплея. На странице запуска находится главная страница с приложениями по умолчанию, к которым относятся наиболее часто используемые приложения. Aptoide: App store Zoom (Увеличение): Облачная...
Seite 50
H. Настройка сети Подключение к беспроводной ЛВС 1) Нажмите «Все приложения» — «Настройки». 2) Установите параметр Wi-Fi на «ВКЛ.», перетащив «ВЫКЛ.» вправо. 3) При включенной сети Wi-Fi в правой части экрана отображается список всех доступных точек доступа беспроводной ЛВС. Чтобы подключиться, нажмите необходимую точку доступа беспроводной...
Seite 51
K. Поиск и устранение неисправностей, вопросы и ответы В. Питание не включается. A. ● Проверьте правильность подключения сетевого блока питания и кабеля питания. ● Заново подключите сетевой блок питания и кабель питания, а затем включите питание. ● Нажмите и удерживайте кнопку питания в течение 8 секунд, а затем снова включите питание.
Seite 52
ViewSonic_Parts Logistic Center Dept. 3F, No 38, Lane 148, Li-De St., Jhonghe Dist., New Taipei City 235, Taiwan. R.O.C. Please write “source for VSD243” in the memo line of your payment. You may also find a copy of the source at http://www.viewsonic.com/support/downloads/drivers/VSD243_Source_Code.zip...
For technical support or product service, see the table below or contact your reseller. NOTE: You will need the product’s serial number. Country/ Region Website Country/ Region Website Asia Pacific & Africa Australia www.viewsonic.com/au/ Bangladesh www.viewsonic.com/bd/ 中国 (China) www.viewsonic.com.cn 香港 (繁體中文) www.viewsonic.com/hk/ Hong Kong (English) www.viewsonic.com/hk-en/ India www.viewsonic.com/in/...