Herunterladen Inhalt Inhalt Diese Seite drucken
Inhaltsverzeichnis

Werbung

Verfügbare Sprachen
  • DE

Verfügbare Sprachen

  • DEUTSCH, seite 3
All manuals and user guides at all-guides.com
97153
Bedienungs-
anleitung
DE
Bedienungsanleitung
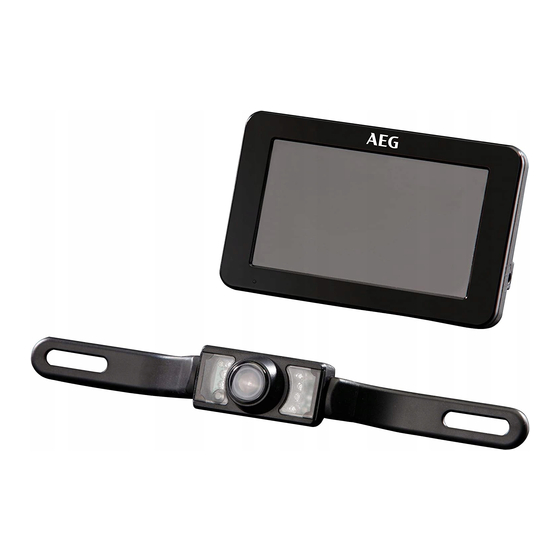
Rückfahrkamera RV 4.3
GB
Instructions for use
Backup camera system RV 4.3
FR
Mode d'emploi
Système de caméra de recul RV 4.3
IT
Manuale d'istruzioni
Sistema video per retromarcia RV 4.3
CZ
Návod k obsluze
Bezdrátový couvací systém RV 4.3
SK
Návod na obsluhu
Cúvací kamerový systém RV 4.3

Werbung

Inhaltsverzeichnis

Fehlerbehebung

loading

Inhaltszusammenfassung für AEG RV 4.3

  • Seite 1 Bedienungsanleitung Rückfahrkamera RV 4.3 Instructions for use Backup camera system RV 4.3 Mode d’emploi Système de caméra de recul RV 4.3 Manuale d’istruzioni Sistema video per retromarcia RV 4.3 Návod k obsluze Bezdrátový couvací systém RV 4.3 Návod na obsluhu Cúvací...
  • Seite 2 All manuals and user guides at all-guides.com DE - Seite 3 Vor jeder Benutzung unbedingt lesen. Anleitung und Ratschläge befolgen. GB - Page 19 Read these instructions before using the charger. Follow all instructions and recommendations. FR - Page 35 Veuillez lire les présentes instructions avant toute utilisation de l’appareil et suivre les conseils mentionnés ici.
  • Seite 3: Inhaltsverzeichnis

    All manuals and user guides at all-guides.com INhALT Einleitung ................... . 4 Symbole.
  • Seite 4: Einleitung

    EINLEITuNG Sehr geehrte Kundin, sehr geehrter Kunde, wir gratulieren Ihnen zu Ihrem neuen Rückfahrka- mera-System RV 4.3 '' und danken für Ihr Vertrauen. um optimale Funktion, Leistungsbereitschaft und Sicherheit Ihres Rückfahrkamera-Systems zu gewährleisten, bitten wir Sie, vor der ersten Inbetriebnahme die Bedienungsanleitung zu lesen.
  • Seite 5: Funktionsweise Des Rückfahrkamera-Systems

    Funktionsweise des Rückfahrkamera-Systems Dieses Gerät ist nicht dafür bestimmt, durch Kinder und Personen mit eingeschränkten geistigen/kör- Das Rückfahrkamera-System RV 4.3 dient zur perlicher Fähigkeiten oder mangels Erfahrung und/ unterstützung der Sichtverhältnisse bei kurzzeiti- oder mangels Wissen benutzt zu werden. Kinder gem Rückwärtsfahren, z.
  • Seite 6: Sicherheit

    All manuals and user guides at all-guides.com www.aeg-automotive.com Technische Daten Gerätebezeichnung Rückfahrkamera- Sender: System RV 4.3 Übertragung 2,4 Ghz (Gigaherz; Artikelnummer 97153 Schwingungen pro Sekunde) Betriebs- und C bis +50 º º Arbeitstemperatur Reichweite max. 10 m (Meter) Rückfahrgeschwin- max. 3 km/h...
  • Seite 7 All manuals and user guides at all-guides.com Deutsch • • Dieses Gerät ist nicht dazu bestimmt, von Perso- Verwenden Sie das Kabel nicht, um die Kamera nen (einschließlich Kindern) mit eingeschränk- oder den Transmitter (Sendegerät) zu tragen ten physischen, sensorischen oder geistigen oder daran zu ziehen.
  • Seite 8 All manuals and user guides at all-guides.com www.aeg-automotive.com • Achtung - Verletzungsgefahr und Gefahr der Stellen Sie sicher, dass die Zündung und alle Sachbeschädigung! Immer die Handbremse Verbraucher im Fahrzeug ausgeschaltet sind, ziehen und einen Gang einlegen! Bei einem bevor Sie mit der Montage des Rückfahrkamera- Automatikgetriebe muss die “Park-Position”...
  • Seite 9: Produktbeschreibung

    All manuals and user guides at all-guides.com Deutsch PRODuKT- Produktübersicht BESChREIBuNG Lieferumfang • 1 LCD-Monitor 4,3 TFT (10,9 cm) • 1 Monitorarm mit Saugfuß • 1 Monitorkabel mit 12 V Stecker • 1 Kamera mit Anschlusskabel • 2 Montagehalterungen für die Kamera •...
  • Seite 10: Montage / Bedienung

    All manuals and user guides at all-guides.com www.aeg-automotive.com Achtung! Bezeichnung Achten Sie darauf, dass sich an dieser Bohrstelle kei- Funktransmitter (Sendegerät) mit Anschluss- ne elektrischen Kabel oder sonstige Bauteile des kabel und Steckerbuchse zur Kamera, inklusive Fahrzeugs befinden, welche durch die Bohrung Anschlusskabel mit einem roten und schwarzen beschädigt werden können!
  • Seite 11 All manuals and user guides at all-guides.com Deutsch 11 Schritt 4: Befestigung der Kamera Führen Sie den Stecker des Kamerakabels (1) durch den Dichtring (8) in den Innenraum des Fahrzeugs bzw. Kofferraumdeckels. Montieren Sie die Kamera (1) mit einem gleichmäßigen Seitenabstand auf die Kamerahalterungen (9) (siehe Bild 4).
  • Seite 12 All manuals and user guides at all-guides.com www.aeg-automotive.com + 12 V DC Transmitter Rückfahrleuchte (Sendegerät) Bild 10 Kabel- klemme 12 V Versor- Schließen Sie den Sicherungsdeckel der Kabelklem- gungskabel me (7). Schwarz Kamerakabel Rückfahr- Erde leuchte Kamera Bild 11 Bild 7 Verbinden Sie mit der zweiten Kabelklemme (7) nun Verwenden Sie für das Anklemmen der Kabel an die...
  • Seite 13: Montage Des Monitors

    All manuals and user guides at all-guides.com Deutsch 13 • Schritt 9: Stromversorgung des Transmitters Verbinden Sie nun das Monitorkabel (2) mit dem überprüfen Zigarettenanzünder (12 V) des Fahrzeugs. Verle- gen Sie das Monitorkabel so, dass die Sicherheit Ziehen Sie zuerst die handbremse an und achten des Fahrzeugs und der Fahrzeuginsassen nicht Sie darauf, dass kein Gang eingelegt ist.
  • Seite 14: Bedienung Des Monitors

    All manuals and user guides at all-guides.com www.aeg-automotive.com • Bedienung des Monitors Drücken Sie die Ein / Aus Taste (12), damit das Symbol auf der taste blau aufleuchtet. 13 15 • Zur Aktivierung des Menümodus drücken Sie die Taste (13) . Im Display erscheinen die Menüein- stellungen für ca.
  • Seite 15: Fehlersuche

    All manuals and user guides at all-guides.com Deutsch 15 Fehlersuche Fehler/Störung Mögliche Ursachen Lösungen, Abhilfe Die Zündung des Der 12 V Stecker des Monitorkabels Stecken Sie den 12 V Stecker des Fahrzeugs und der Mo- wurde nicht in den Zigarettenan- Monitorkabels in den Zigarettenan- nitor sind eingeschaltet, zünder oder eine 12 V Buchse des...
  • Seite 16: Wartung Und Pflege

    Kamera zu erreichen. hierzu müssen Sie die Kamera ausbauen. Konformitätserklärung hiermit erklärt MTS MarkenTechnikService Gmbh & Co.KG, dass der Funkanlagentyp Rückfahrkamera- System RV 4.3 der Richtlinie 2014/53/Eu entspricht. Der vollständige Text der Eu-Konformitätserklärung ist unter der folgenden Internetadresse verfügbar: www.iuqr.de/97153_Konformitaetserklaerung...
  • Seite 17 All manuals and user guides at all-guides.com Deutsch 17...
  • Seite 18 All manuals and user guides at all-guides.com...
  • Seite 19 All manuals and user guides at all-guides.com TABLE OF CONTENTS Introduction ..................20 What are these symbols? .
  • Seite 20: Introduction

    All manuals and user guides at all-guides.com www.aeg-automotive.com INTRODuCTION Dear customer, Congratulations, you have purchased a new RV 4.3 backup camera system. Thank you for your trust. To ensure optimal function, performance and safety of your backup camera system please read the instruc- tions for use prior to initial use.
  • Seite 21: Functionality Of The Backup Camera System

    Features of the backup camera system Intended use • Better view behind the vehicle for more safety The RV 4.3 backup camera system is solely intended • Wireless, encoded 2.4 Ghz radio transmission to further assist with visibility whilst briefly revers- •...
  • Seite 22: Safety Instructions

    All manuals and user guides at all-guides.com www.aeg-automotive.com Technical specifications Device designation Backup camera system Transmitter: RV 4.3 Transmission 2.4 Ghz (Gigahertz; Item number 97153 cycles per second) Service and operat- C to +50 C (Celsius) º º Range: max. 10 m (meter)
  • Seite 23 All manuals and user guides at all-guides.com English 23 • • Do not use the backup camera system to power The backup camera system may interfere with auxiliary automotive equipment or other external other cordless equipment (e.g. mobile phones, devices. Bluetooth equipment) during use or receive in- •...
  • Seite 24 All manuals and user guides at all-guides.com www.aeg-automotive.com • • Do not run or start the vehicle while installing the If you are unsure how to install the backup cam- backup camera system! era system consult a qualified specialist or have •...
  • Seite 25: Product Description

    All manuals and user guides at all-guides.com English 25 PRODuCT Product overview DESCRIPTION Contents • 1 LCD screen 4.3 TFT (10.9 cm) • 1 Monitor arm with suction cup base • 1 Monitor cable with 12 V plug • 1 Camera with connector cable •...
  • Seite 26: Installation / Operation

    All manuals and user guides at all-guides.com www.aeg-automotive.com Description To protect the borehole in the metal panel from corrosion the metal edges should be coated with Radio transmitter with connector cable and a suitable paint coating (e.g. automaker‘s touchup socket to the camera, including connector cable pen) and allow to dry adequately.
  • Seite 27 All manuals and user guides at all-guides.com English 27 Step 7: Connecting the transmitter supply cable Remove the cover of the reversing light. Remove the bulb holder from the reversing light housing. Find the vehicle supply cables to the reversing light. Please refer to the automaker‘s manual.
  • Seite 28 All manuals and user guides at all-guides.com www.aeg-automotive.com Caution! If you are unfamiliar with the I installation and the connections or are unsure with one of these steps, please consult a specialist regarding the installation! There is a risk of property damage or personal...
  • Seite 29: Installing The Monitor

    All manuals and user guides at all-guides.com English 29 Installing the monitor Monitor operation • Insert the square monitor socket on the monitor 13 15 arm (10) into the designated notch at the back of the monitor. Now slide the monitor bracket upward until it catches (see image 12).
  • Seite 30: Monitor Menu Settings

    All manuals and user guides at all-guides.com www.aeg-automotive.com Monitor menu settings Replacing fuses halteschraube Sicherung 1 A (Ampere) Brightness Contrast Colour Stecker 12 V Kontaktklappe Feder Guidelines On / Off Kfz-Anschluss Language English / German Image 15 1. unscrew the retaining screw.
  • Seite 31: Troubleshooting

    All manuals and user guides at all-guides.com English 31 Troubleshooting Error / malfunction Possible causes Solutions, repair The vehicle ignition and The 12 V monitor cable plug Plug the 12 V monitor cable the monitor are switched is not plugged into the vehicle‘s plug into the cigarette lighter on and the car is in cigarette lighter or a 12 V outlet.
  • Seite 32: Maintenance And Care

    Declaration of Conformity MTS MarkenTechnikService Gmbh & Co.KG hereby declares the radio equipment model Reversing Cam- era System RV 4.3 complies with Directive 2014/53/ Eu. The full text of the Eu declaration of conformity can be found at the following Internet address:...
  • Seite 33 All manuals and user guides at all-guides.com English 33...
  • Seite 34 All manuals and user guides at all-guides.com...
  • Seite 35 All manuals and user guides at all-guides.com TABLE DES MATIèRES Introduction ..................36 Que signifient les symboles ? .
  • Seite 36: Introduction

    INTRODuCTION Chère cliente, Cher client, Nous vous félicitons pour l‘achat de votre nouvelle caméra de recul RV 4.3 et vous remercions pour votre confiance. Pour garantir le fonctionnement optimal, les performances et la sécurité de votre appareil, veuillez lire la notice d‘utilisation avant la première mise en service.
  • Seite 37: Fonctionnement Du Système De Caméra De Recul

    Cet appareil n’est pas conçu pour être utilisé par des enfants ou des personnes à capacités mentales Le système de caméra de recul RV 4.3 sert à une réduites ou manquant d’expérience et/ou de meilleure visibilité lorsque l‘on roule en marche connaissances.
  • Seite 38: Consignes De Sécurité

    All manuals and user guides at all-guides.com www.aeg-automotive.com Caractéristiques techniques Désignation de Système de caméra de Émetteur l‘article recul RV 4.3 Transmission 2,4 Ghz (gigahertz; Référence 97153 oscillations par seconde) Température de C à +50 Portée max. 10 m (mètres) º...
  • Seite 39 All manuals and user guides at all-guides.com Français 39 • • N‘utilisez pas le système pour alimenter en cou- La caméra est protégée contre la pluie mais n‘est rant des appareils automobiles supplémentaires pas étanche ! Ne la plongez pas dans l‘eau ni dans ou autres appareils externes.
  • Seite 40 All manuals and user guides at all-guides.com www.aeg-automotive.com • • Respectez les consignes de sécurité lorsque le Même si le fusible intégré à la prise 12 V se véhicule est sur cales, sur une plate-forme ou en déclenche, la caméra et l‘émetteur radio du sys- position similaire ! tème restent fonctionnels !
  • Seite 41: Description Du Produit

    All manuals and user guides at all-guides.com Français 41 DESCRIPTION Du Détail du produit PRODuIT Contenu de l‘emballage • 1 moniteur CL 4,3 TFT (10,9 cm) • 1 bras d‘écran avec un pied à ventouse • 1 câble d‘écran avec prise 12 V •...
  • Seite 42: Montage / Utilisation

    All manuals and user guides at all-guides.com www.aeg-automotive.com Pour protéger la tôle du véhicule de la corrosion Dénomination au point de perçage, appliquez sur les bords percés Emetteur radio avec câble d‘alimentation et une couche de peinture adaptée (par ex. stylo de prise femelle pour la caméra, incluant un câble...
  • Seite 43 All manuals and user guides at all-guides.com Français 43 Étape 7 : Connecter le câble d‘alimentation avec l‘émetteur Retirez le cache des feux de recul. Retirez le support de l‘ampoule du carter. Recherchez les câblesdu véhicule menant aux feux de recul. Pour cela, consultez le manuel du fabricant du véhicule.
  • Seite 44 All manuals and user guides at all-guides.com www.aeg-automotive.com Étape 8 : Fixer l‘émetteur Fixez l‘émetteur avec du matériel de fixation approprié, p. ex. deux attache-câbles. Veillez à ce qu‘aucun consommateur électrique ne se trouve à proximité immédiate de l‘émetteur afin que la puissance d‘émission ne soit pas gênée.
  • Seite 45: Montage De L'écran

    All manuals and user guides at all-guides.com Français 45 Montage de l‘écran Utilisation de l‘écran • Insérez le logement rectangulaire du bras de 13 15 l‘écran (10) dans l‘ouverture située à l‘arrière de l‘écran. Faites glisser le support de l‘écran de l‘écran.
  • Seite 46: Paramètres Des Menus De L'écran

    All manuals and user guides at all-guides.com www.aeg-automotive.com Paramètres des menus de l‘écran Changer le fusible Vis de maintien Fusible 1 A (ampère) Brightness Contrast Colour Prise mâle 12 V Bouchon du Ressort Guidelines On / Off Prise automobile contact...
  • Seite 47: Recherche D'erreurs

    All manuals and user guides at all-guides.com Français 47 Recherche d‘erreurs Erreur / Causes possibles Solutions, aide Dysfonctionnement Le véhicule est démarré La prise 12 V du câble de l‘écran n‘a Branchez la prise 12 V du câble de et l‘écran est allumé, pas été...
  • Seite 48: Maintenance Et Entretien

    MTS MarkenTechnikService Gmbh & Co.KG déclare par la présente que le type d‘installation radio Dispositif de caméra de recul RV 4.3 correspond à la directive 2014/53/uE. Le texte complet de la décla- ration de conformité uE est disponible à l‘adresse Internet suivante : www.iuqr.de/97153_Konformitaetserklaerung...
  • Seite 49 All manuals and user guides at all-guides.com Français 49...
  • Seite 50 All manuals and user guides at all-guides.com...
  • Seite 51 All manuals and user guides at all-guides.com SOMMARIO Introduzione ..................52 Significato dei simboli? .
  • Seite 52: Introduzione

    INTRODuZIONE Gentile Signora, Gentile Signore, congratulazioni per l‘acquisto del Suo nuovo sistema video per retromarcia RV 4.3' e grazie per la fiducia accordataci. Per far si che il funzionamento del prodotto sia sempre ottimale e venga garantita la sicurezza del Suo sistema video per retromarcia, La preghiamo, prima della messa in funzione, di leggere le istruzioni.
  • Seite 53: Funzionamento Del Sistema Video Per Retromarcia

    Questo prodotto non è concepito per essere usato da persone (compresi bambini) con limitate capacità Il sistema video per retromarcia RV 4.3 serve per fisiche, sensoriali o mentali o senza sufficiente favorire le condizioni di visibilità in caso di breve esperienza e/o che non hanno le nozioni necessarie.
  • Seite 54: Avvertenze Di Sicurezza

    All manuals and user guides at all-guides.com www.aeg-automotive.com DATI TECNICI Denominazione Sistema video per Angolo d‘inclinazio- variabile fino a ca. 30 º retromarcia RV 4.3 ne della Numero articolo 97153 Alimentazione corrente continua 12 V (Volt) Temperatura d‘uso e da -10 C a +50 º...
  • Seite 55 All manuals and user guides at all-guides.com Italiano 55 • Durante il ciclo di vita del prodotto conservare le quando non lo si utilizza. Per separarla non tirare istruzioni. mai il cavo di collegamento. • • Questo apparecchio non è adatto all‘uso da parte Evitare l‘infiltrazione di liquidi nel monitor.
  • Seite 56 All manuals and user guides at all-guides.com www.aeg-automotive.com • • Attenersi alle norme di sicurezza quando il veicolo Se non si dovesse essere sicuri su come installare è sollevato con un cric, si trova su un ponte solle- il sistema video per retromarcia, rivolgersi al...
  • Seite 57: Descrizione Del Prodotto

    All manuals and user guides at all-guides.com Italiano 57 DESCRIZIONE DEL Sintesi del prodotto PRODOTTO Lieferumfang • 1 monitor LCD 4,3 TFT (10,9 cm) • 1 braccio per monitor con ventosa • 1 cavo per monitor con spina da 12 V •...
  • Seite 58: Montaggio / Uso

    All manuals and user guides at all-guides.com www.aeg-automotive.com Attenzione! Denominazione Accertarsi che nel punto in cui è stato fatto il foro Trasmettitore radio (emittente) con cavo di non siano presenti cavi elettrici o particolari com- collegamento e presa per la videocamera, incluso...
  • Seite 59 All manuals and user guides at all-guides.com Italiano 59 Assicurarsi che l‘uscita cavo sulla parte posteriore Passo 7: collegare il cavo di alimentazione del trasmettitore della videocamera sia sempre rivolta verso l‘alto, in modo che venga mantenuta l‘oscillazione massima. Staccare la copertura della luce per retromarcia. Rimuovere il portalampada dalla cassa della luce posteriore.
  • Seite 60 All manuals and user guides at all-guides.com www.aeg-automotive.com Applicare il cavo da 12 V + (positivo) della luce di Attenzione! retromarcia in posizione laterale nel raccordo a Se non si ha dimestichezza con le installazioni morsetto (7) (vedi immagine 8).
  • Seite 61: Montaggio Del Monitor

    All manuals and user guides at all-guides.com Italiano 61 Montaggio del monitor Uso del monitor • Inserire l‘ingresso monitor quadrato del braccio 13 15 del monitor (10) nella fessura prevista sulla parte posteriore del monitor. Spingere ora il supporto per monitor verso l‘alto, fino a quando si incastra (vedi imm.12).
  • Seite 62: Impostazioni Menù Del Monitor

    All manuals and user guides at all-guides.com www.aeg-automotive.com Impostazioni menù del monitor Cambiare il fusibile Vite di supporto Fusibile 1 A (Ampere) Brightness Contrast Colour Spina 12 V Collega- Calotta di Molla Guidelines On / Off mento per auto contatto...
  • Seite 63: Ricerca Guasti

    All manuals and user guides at all-guides.com Italiano 63 Ricerca guasti Errore / Disturbo Possibili cause Soluzioni, rimedi L‘auto e il monitor sono La spina da 12 V del cavo per il moni- Inserire la spina da 12 V del cavo per accesi, inoltre è...
  • Seite 64: Manutenzione Eriparazioni

    Dichiarazione di conformità Con il presente documento la MTS MarkenTech- nikService Gmbh & Co.KG dichiara che la telecamera per retromarcia RV 4.3 con collegamento a impianto radio è conforme alla Direttiva 2014/53/uE. Il testo completo della Dichiarazione di conformità uE è...
  • Seite 65 All manuals and user guides at all-guides.com Italiano 65...
  • Seite 66 All manuals and user guides at all-guides.com...
  • Seite 67 All manuals and user guides at all-guides.com OBSAh Úvod ....................68 Co znamenají...
  • Seite 68: Úvod

    ÚVOD Vážená zákaznice, vážený zákazníku, blahopřejeme Vám k Vašemu novému Couvacímu kamerovému systému RV 4.3'' a děkujeme za důvě- ru. V zájmu zajištění optimální funkce, výkonnosti a bezpečnosti Vaší couvací kamery Vás prosíme, abyste si před uvedením do provozu přečetli tento návod k obsluze.
  • Seite 69: Funkce Couvacího Kamerového Systému

    Funkce couvacího kamerového systému tento přístroj nesmí používat děti, osoby s omeze- nými duševními schopnostmi anebo osoby, které Couvací kamerový systém RV 4.3 slouží ke zlepšení nemají schopnosti, zkušenosti anebo vědomosti o viditelnosti při krátkém couvání, např. při parkování. jeho používání. Děti musí zůstat pod dohledem, aby Stisknutím tlačítka zap / vyp (Ein / Aus) se zapíná...
  • Seite 70: Bezpečnostní Pokyny

    All manuals and user guides at all-guides.com www.aeg-automotive.com Technické údaje Název přístroje Bezdrátový couvací Vysílač systém RV 4.3 Přenos 2,4 Ghz (Gigaherz; kmitů Číslo artiklu 97153 za vteřinu) Provozní teplota C až +50 Dosah maximálně 10 m (metry) º º...
  • Seite 71 All manuals and user guides at all-guides.com Česky 71 • • Uchovejte si návod po celou dobu používání Je nutné zabránit vniknutí kapalin do monitoru! výrobku. neponořujte monitor do kapalin! Do provozu jen • suchý monitor. tento přístroj se nehodí k používání osobami •...
  • Seite 72 All manuals and user guides at all-guides.com www.aeg-automotive.com • Dbejte na bezpečnostní pokyny a údaje v příručce Výrobce neponese žádnou odpovědnost za škody výrobce vozidla! způsobené: • • Provádějte montáž couvacího kamerového sys- nesprávným připojením a / nebo použitím. •...
  • Seite 73: Popis Výrobku

    All manuals and user guides at all-guides.com Česky 73 POPIS VýROBKu Přehled výrobku Obsah dodávky • 1 LCD monitor 4,3 TFT (10,9 cm) • 1 Rameno monitoru s přísavkou • 1 Kabel monitoru se zástrčkou na 12 V • 1 Kamera s připojovacím kabelem •...
  • Seite 74: Montáž / Obsluha

    All manuals and user guides at all-guides.com www.aeg-automotive.com Potom nasadit průchodku (8) zvenčí do otvoru a Č. Název namontovat. Vysílač s připojovacím kabelem a zdířkou ke Krok 3: Připevnění držáků kamery kameře, včetně připojovacího kabelu s jedním červeným a černým kabelem pro připojení...
  • Seite 75 All manuals and user guides at all-guides.com Česky 75 Krok 7: Připojení proudu pro vysílač Sejměte kryt couvacího světla. Odstraňte objímku žárovky z tělesa světla. najděte přívodní kabel vedoucí z vozidla k couvacímu světlu. Dbejte přitom na údaje a popis v příručce výrobce vozidla. Pozor! Před prací...
  • Seite 76 All manuals and user guides at all-guides.com www.aeg-automotive.com Pozor! Jestliže nevíte jak máte provést instalaci nebo jednotlivá připojení, informujte se u příslušných od- borníků! V opačné případě hrozí nebezpečí ohrožení osob a věcné škody! Krok 8: Připevnění vysílače Připevněte vysílač vhodným připevňovacím materiá- Obrázek 8...
  • Seite 77: Montáž Monitoru

    All manuals and user guides at all-guides.com Česky 77 Montáž monitoru Obsluha monitoru • nastrčte hranatý prvek na rameni monitoru (10) 13 15 ido příslušného vybrání na zadní straně monitoru. nyní zasuňte rameno monitoru nahoru až znatel- ně zaskočí (viz obrázek 12). •...
  • Seite 78: Nastavení Monitoru Pomocí Menu

    All manuals and user guides at all-guides.com www.aeg-automotive.com Nastavení monitoru pomocí menu Výměna pojistky Přídržný šroub Pojistka 1 A (Ampér) Brightness Contrast Colour zástrčka na 12 V, pří- Čepička kontaktu Pružina Guidelines On / Off pojka motorového vozidla Language English / German Exit brázek 15...
  • Seite 79: Hledání Příčiny Poruchy

    All manuals and user guides at all-guides.com Česky 79 Hledání příčiny poruchy Chyba / Porucha Možné příčiny Řešení, pomoc Zapalování vozidla a zástrčka napájecího kabelu pro mo- zastrčte zástrčku na 12 V napájecího monitor jsou zapnuté, nitor na 12 V není zastrčená do zdířky kabelu pro monitor do zdířky cigare- přídavně...
  • Seite 80: Údržba Aošetřování

    K tomu je nutné demontovat kameru. Prohlášení o konformitě tímto prohlašuje firma MtS MarkentechnikService GmbH & Co.KG, že typ rádiového zařízení couvací kamera RV 4.3 odpovídá směrnici 2014/53/EU. Úplný text EU prohlášení o konformitě je k dispozici na webové stránce: www.iuqr.de/97153_Konformitaetserklaerung...
  • Seite 81 All manuals and user guides at all-guides.com OBSAh Úvod ....................82 Čo znamenajú...
  • Seite 82: Úvod

    ÚVOD Vážená zákazníčka, vážený zákazník, blahoželáme Vám k Vášmu novému cúvaciemu kamerovému systému RV 4.3'' a ďakujeme za Vašu dôveru. Pre zaručenie optimálnej funkčnosti, výkon- nosti a bezpečnosti Vášho cúvacieho kamerového systému si pred prvým uvedením do prevádzky pro- sím prečítajte návod na obsluhu.
  • Seite 83: Spôsob Činnosti Cúvacieho Kamerového Systému

    Spôsob činnosti cúvacieho kamerového systému tento prístroj by nemali používať deti a osoby s obmedzenými duševnými schopnosťami alebo s ne- Cúvací kamerový systém RV 4.3 slúži ako podpora dostatočnými skúsenosťami a/alebo znalosťami. na viditeľnosti pri krátkodobom cúvaní, napr. pri par- deti dozerajte a nedovoľte im, hrať...
  • Seite 84: Bezpečnostné Pokyny

    All manuals and user guides at all-guides.com www.aeg-automotive.com BEzPEČnOStné Monitor POKyNy Diagonála obrazovky 4,3 '' / 10,9 cm Rozlíšenie 480 x 271 pixelov Rozmery ca. 123 x 77 x 21 mm Všeobecné bezpečnostné pokyny (D x Š x V mm)
  • Seite 85 All manuals and user guides at all-guides.com Slovenčina 85 • • závisle od okolitých podmienok je možné, že Ak dopadá priamo na šošovku kamery silné svet- kamera a monitor nestvárnia osoby alebo objekty lo, môžu byť objekty presvietené alebo zobrazené vždy správne.
  • Seite 86 All manuals and user guides at all-guides.com www.aeg-automotive.com • Nebezpečenstvo skratu! Pri zapájaní kábla Výrobca neponesie žiadnu zodpovednosť za škody kamery na palubnú sieť vozidla dbajte na správnu spôsobené: • polaritu. Dodržiavajte pritom pokyny v príručke nesprávnym pripojením a / alebo použitím.
  • Seite 87: Popis Produktu

    All manuals and user guides at all-guides.com Slovenčina 87 POPIS PRODuKTu Prehľad produktu Obsah dodávky • 1 LCD monitor 4,3 TFT (10,9 cm) • 1 rameno monitora s prísavnou nohou • 1 kábel monitora s 12 V zástrčkou • 1 kamera s pripojovacím káblom •...
  • Seite 88: Montáž / Ovládanie

    All manuals and user guides at all-guides.com www.aeg-automotive.com Aby ste na mieste vrtu chránili plech auta pred Č. Označenia koróziou, natrite hrany plechu vrtu vhodnou vrstvou transmiter (vysielač) so zásobovacím káblom laku (napr. lakovacia ceruzka od automobilového a zástrčkou do kamery, vrátane zásobovacieho výrobcu) a nechajte ju dostatočne vyschnúť.
  • Seite 89 All manuals and user guides at all-guides.com Slovenčina 89 Krok 7: Zapojenie zásobovacieho kábla trans- mitra Odstráňte objímku žiarovky zo schránky spätného svetlometu. Nájdite káblový prívod vozidla k spätné- mu svetlometu. Vychádzajte pritom z príručky od výrobcu automobilu. Pozor! Pred prácou na elektrickom obvode vozidla musíte najskôr odpojiť...
  • Seite 90: Montáž Monitora

    All manuals and user guides at all-guides.com www.aeg-automotive.com Krok 8: Upevnenie transmitra transmiter upevnite vhodným upevňovacím materi- álom napr. dvomi viazačmi kábla. Uistite sa, či sa v bezprostrednej blízkosti transmitra nenachádzajú elektrické spotrebiče, aby sa nezhoršil vysielací účinok. Uložené kamerové káble teraz zafixujte a pomocou káblových viazačov (4).
  • Seite 91: Ovládanie Monitora

    All manuals and user guides at all-guides.com Slovenčina 91 • Ovládanie monitora Teraz spojte kábel monitora (2) s cigaretovým zapaľovačom (12 V) vozidla. Veďte kábel monitora 13 15 tak, aby nebola ovplyvnená alebo ohrozená bez- pečnosť vozidla alebo osôb vo vozidle. Monitor otáčavý...
  • Seite 92: Menu-Nastavenia Monitora

    All manuals and user guides at all-guides.com www.aeg-automotive.com Menu-nastavenia monitora Výmena poistky Pridržovacia Brightness skrutka Poistka 1 A (ampér) Contrast Colour Guidelines On / Off zástrčka 12 V Kontaktný Pružina Automobilová uzáver Language English / German prípojka Exit Obrázok 15 1.
  • Seite 93: Hľadanie Chýb

    All manuals and user guides at all-guides.com Slovenčina 93 Hľadanie chýb Chyba / porucha Možné príčiny Riešenia, pomoc zapaľovanie vozidla a mo- 12 V zástrčka kábla monitora nie je zasuňte 12 V zástrčku kábla monitora nitor sú zapnuté, k tomu zastrčená...
  • Seite 94: Údržba A Starostlivosť

    Konformitačné vyhlásenie Spoločnosť MtS MarkentechnikService GmbH & Co. KG týmto vyhlasuje, že typ bezdrôtového zariadenia systém spätnej kamery RV 4.3 zodpovedá smernici 2014/53/EÚ. Kompletný text konformitačného vyhlá- senia EÚ je k dispozícii na tejto internetovej adrese: www.iuqr.de/97153_Konformitaetserklaerung...
  • Seite 95 All manuals and user guides at all-guides.com AEG is a registered trademark used under license from AB Electrolux (publ).
  • Seite 96 MTS MarkenTechnikService Gmbh & Co. KG Benzstr. 1 D-76185 Karlsruhe ▪ SPA SystemPartner Gmbh & Co. Industriestr. 31 CH-8112 Otelfingen ▪ SPA Systems s.r.o. Pod Višňovkou 1661/37 140 00 Praha 4 - Krč, Cz ▪ www.aeg-automotive.com Stand der Informationen: 05/ 2017 EAN: XXXXXXXXXXXXX...

Diese Anleitung auch für:

97153

Inhaltsverzeichnis