Herunterladen Inhalt Inhalt Diese Seite drucken
Silvercrest SMWC 700 A3 Bedienungs- Und Sicherheitshinweise

Silvercrest SMWC 700 A3 Bedienungs- Und Sicherheitshinweise

Vorschau ausblenden Andere Handbücher für SMWC 700 A3:
Inhaltsverzeichnis

Werbung

Verfügbare Sprachen

Verfügbare Sprachen

MICROONDE SMWC 700 A3
MICROONDE
Indicazioni per l'uso e per la sicurezza
MICROWAVE
Operation and safety notes
MIKROWELLE
Bedienungs- und Sicherheitshinweise
IAN 333395_1907
IAN 344054_1907

Werbung

Inhaltsverzeichnis
loading

Inhaltszusammenfassung für Silvercrest SMWC 700 A3

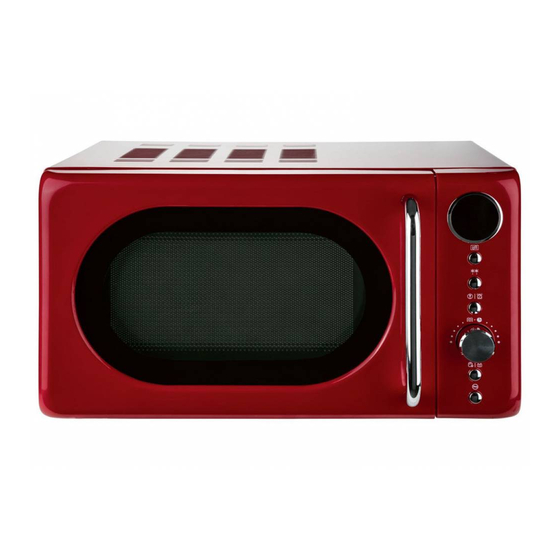
  • Seite 1 MICROONDE SMWC 700 A3 MICROONDE Indicazioni per l’uso e per la sicurezza MICROWAVE Operation and safety notes MIKROWELLE Bedienungs- und Sicherheitshinweise IAN 333395_1907 IAN 344054_1907...
  • Seite 2 IT/MT Indicazioni per l’uso e per la sicurezza Pagina GB/MT Operation and safety notes Page DE/AT/CH Bedienungs- und Sicherheitshinweise Seite...
  • Seite 3 A-01 A-02 A-03 A-04 A-05 A-06 A-07 Drinks Potatoes Reheat Fish Popcorn Meat Vegetables...
  • Seite 5: Inhaltsverzeichnis

    Avvertenze e simboli utilizzati . . . . . . . . . . . . . . . . . . . . . . . . . . . . . . . . . . . . . . . Pagina Introduzione .
  • Seite 6: Avvertenze E Simboli Utilizzati

    Avvertenze e simboli utilizzati Nel presente manuale e sull’imballaggio sono utilizzate le seguenti avvertenze: Tensione (corrente alternata) PERICOLO! Questo simbolo con il termine “Pericolo” indica una minaccia Hertz (frequenza di rete) ad alto rischio che, se non evitata, può causare gravi lesioni o un esito letale . Watt Questo prodotto è...
  • Seite 7: Contenuto Della Confezione

    ˜ Contenuto della confezione Frequenza delle microonde: 2450 MHz Dopo avere disimballato il prodotto, verificare che la confezione sia integra e che tutti i componenti Emissione di rumore: circa 58 dB(A) non presentino danni . Rimuovere tutti i materiali Volume camera di dell’imballaggio prima dell’uso .
  • Seite 8 In caso di danni dovuti al mancato La pulizia e la manutenzione rispetto di questo manuale, la utente non possono essere garanzia è invalidata! La Società eseguite da bambini senza declina qualsiasi responsabilità per supervisione . danni consequenziali! In caso di mAVVERTENZA! Se lo sportello danni a cose o persone dovuti a un o le relative guarnizioni sono...
  • Seite 9 Il prodotto è progettato per l’uso Il prodotto è destinato al     in ambienti domestici e similari, riscaldamento di alimenti quali: e bevande . L'asciugatura –cucine per dipendenti di di alimenti o indumenti e il negozi, uffici e altre attività riscaldamento di cuscini, commerciali;...
  • Seite 10 mPERICOLO! Pericolo di Le uova con gusci o le uova   ustioni! Il prodotto si surriscal- sode intere non devono essere riscaldate nei forni a microonde, da durante l'uso . Non toccare il poiché possono esplodere anche prodotto durante o immediata- se il riscaldamento a microonde mente dopo l'uso .
  • Seite 11 Proteggere il cavo di Non appoggiare il prodotto su     alimentazione da eventuali superfici calde (fornello a gas, danni . Non appenderlo a fornello elettrico, forno, ecc .) . spigoli taglienti, non schiacciarlo Utilizzare il prodotto su una né piegarlo . Tenere il cavo superficie piana, stabile, pulita, di alimentazione lontano da resistente al calore e asciutta .
  • Seite 12 Non rimuovere la piastra Inserire il prodotto in un'altra     di copertura in mica presa di corrente . Il prodotto grigio chiaro che si trova e il ricevitore devono utilizzare nella camera di cottura un ramo diverso del circuito per proteggere i tubi del elettrico .
  • Seite 13 ˜ Principi di base della cottura a Grasso e olio: Non scongelare il grasso   o l'olio congelati nel prodotto . Non friggere microonde nel prodotto . Grasso o olio possono prendere Tempo di cottura: Prestare attenzione   fuoco . ai tempi di cottura .
  • Seite 14: Installare Il Prodotto

    Collocare il prodotto su una superficie piana   Stoviglie Microonde che lasci spazio sufficiente per la ventilazione: Vetro termoresistente Sì Mantenere uno spazio libero di almeno   Vetro non resistente al calore 10 cm tra il prodotto e le pareti adiacenti . Lo Ceramica termoresistente Sì...
  • Seite 15: Impostare Il Timer

    Impostare la visualizzazione dell'ora desiderata NOTA: Se si desidera controllare il tempo   con la manopola 8 : rimanente del timer: Premere   7 . Il tempo viene visualizzato brevemente . Posizione della Visualizzazione Allo scadere del timer, viene emesso un segnale manopola dell'ora  ...
  • Seite 16: Scegliere La Potenza

    ˜ Scegliere la potenza ˜ Avvio rapido 1 Premere 5 . Sul display  4 viene In modalità standby: Premere la manopola  8     visualizzato 700 (700 watt di potenza) . in senso orario (senso di rotazione  Impostare la potenza desiderata con la Impostare il tempo di cottura desiderato .
  • Seite 17: Scongelamento A Tempo

    Scongelamento a tempo Scongelamento a peso Premere   6 . Sul display  4 vengono Premere 2 volte 6 . Il display  4 mostra     visualizzati 00:00 e 100 g (100 grammi) e  . Impostare il tempo desiderato con la Impostare il peso dell'alimento da scongelare  ...
  • Seite 18: Ritardo

    ˜ Ritardo Tutte le altre funzioni sono disattivate finché la   funzione di ritardo è attiva . Il prodotto dispone di una funzione di ritardo . Con questa funzione è possibile impostare l'ora in cui il ˜ Menu automatico prodotto deve iniziare la cottura con un processo Per le pietanze da preparare con i menu automatici, preimpostato .
  • Seite 19: Pulizia E Cura

    Display Alimento Quantità / peso Durata (minuti: secondi) 200 g 01:30 300 g 02:00 400 g 02:30 A-03 Riscaldamento 500 g 03:00 600 g 03:30 700 g 04:00 800 g 04:30 200 g 03:00 300 g 04:20 A-04 Pesce 400 g 05:40 500 g 07:00...
  • Seite 20 Piatto rotante: Sciacquare regolarmente il NOTE:   piatto rotante  2 in acqua tiepida e sapone . Il Pulire il prodotto subito dopo che si è   piatto rotante è lavabile in lavastoviglie . raffreddato . Una volta essiccati, i residui di cibo non sono facili da rimuovere .
  • Seite 21: Smaltimento

    Problema Possibile causa Soluzioni possibili Inserire correttamente il piatto Il piatto rotante  2 emette forti Il piatto rotante  2 non poggia rotante  2 nella camera di rumori durante la rotazione . correttamente sul dispositivo di cottura 14 . bloccaggio  2 . Pulire l'anello di L'anello di scorrimento ...
  • Seite 22: Gestione Dei Casi In Garanzia

    Gestione dei casi in garanzia Per garantire un rapido disbrigo delle proprie pratiche, seguire le istruzioni seguenti: Per ogni richiesta si prega di conservare lo scontrino e il codice dell’articolo (ad es . IAN 123456_7890) come prova d’acquisto . Il numero d’articolo può essere dedotto dalla targhetta, da un’incisione, dal frontespizio delle istruzioni (in basso a sinistra) oppure dall’adesivo applicato sul retro o sul lato inferiore .
  • Seite 23 Warnings and symbols used . . . . . . . . . . . . . . . . . . . . . . . . . . . . . . . . . . . . . . . . . Page Introduction .
  • Seite 24: Warnings And Symbols Used

    Warnings and symbols used The following warnings are used in this user manual and on the packaging: Voltage (alternating current) DANGER! This symbol in combination with the signal word “Danger” marks Hertz (supply frequency) a high-risk hazard that if not prevented could result in death or serious injury .
  • Seite 25: Scope Of Delivery

    ˜ Scope of delivery Microwave frequency: 2450 MHz After unpacking the product, check if the delivery is complete and if all parts are in good condition . Noise emission: approx . 58 dB(A) Remove all packing materials before use . Cooking chamber 1 x Microwave volume:...
  • Seite 26 In the case of damage resulting Cleaning and user maintenance from non-compliance with these shall not be made by children operating instructions the warranty without supervision . claim becomes invalid! No liability mWARNING! If the door or door is accepted for consequential seals are damaged, the product damage! In the case of material must not be operated until it has...
  • Seite 27 The product is intended to be The product is intended for     used in household and similar heating food and beverages . applications such as: Drying of food or clothing –staff kitchen areas in shops, and heating of warming pads, offices and other working slippers, sponges, damp cloth environments;...
  • Seite 28: Additional Safety Advice

    mDANGER! Risk of burns! Eggs in their shell and whole   hard-boiled eggs should not be During use the product gets hot . heated in microwave ovens since Do not touch the product while in they may explode, even after use nor immediately after use . microwave heating has ended .
  • Seite 29: Positioning The Product

    Protect the power cord against Do not place the product on     damages . Do not let it hang over hot plates (gas, electric, coal sharp edges, do not squeeze or cooking range etc .) . Operate the bend it . Keep the power cord product on a level, stable, clean, away from hot surfaces and heat-resistant and dry surface .
  • Seite 30 Do not remove the light Plug the product into another     grey mica cover plate, wall socket . The product and the which is mounted inside receiver should be connected to the cooking chamber to different circuits . protect the magnetron . SAFETY PRECAUTIONS FOR THE PREVENTION OF If the luminary inside the product...
  • Seite 31 ˜ Basic principles of microwave Fat or oil: Do not thaw frozen fat or oil in the   product . Do not fry foods in the product . The fat cookery or oil could ignite . Cooking time: Pay attention to the cooking  ...
  • Seite 32: Standby Mode

    Place the product on a flat surface that leaves   Cookware Microwave enough space for ventilation: Heatproof glass A minimum of 10 cm of free space must remain   Non-heatproof glass between the product and the adjacent walls . It Heatproof ceramic must remain possible to fully open the door 13 .
  • Seite 33: Setting The Timer

    NOTE: If you wish to check the progress of the Use the dial 8 to set the desired time display:   timer: Press 7 . The time is displayed for Position of control Time display a short time . 12 H 12 hour mode As soon as the time has elapsed, a beep...
  • Seite 34: Selecting The Power Level

    ˜ Selecting the power level ˜ Quick start 1 5 . 700 (700 Watt power level) is Press In standby mode, turn the dial 8 towards the     shown in the display 4 . right (turning direction ) .
  • Seite 35: Defrosting By Time

    Defrosting by time Defrosting by weight 6 . 00:00 and 6 twice . 100 g (100 gram) and Press are shown in the Press     display 4 . are shown in the display 4 . Use the dial 8 to set the desired time: Use the dial 8 to set the weight of the food  ...
  • Seite 36: Preset Time Function

    ˜ Preset time function All other functions are deactivated, as long as   the preset function is active . The product has a preset function . You can use this function to set a time at which the product should ˜...
  • Seite 37: Application Example

    Display Food Amount/Weight Duration (Minutes : Seconds) 200 g 1:30 300 g 2:00 400 g 2:30 A-03 Reheat 500 g 3:00 600 g 3:30 700 g 4:00 800 g 4:30 200 g 3:00 300 g 4:20 A-04 Fish 400 g 5:40 500 g 7:00...
  • Seite 38: Troubleshooting

    NOTES: Turntable: Clean the turntable 2 regularly   Clean the product right after it has cooled . with warm, soapy water . The turntable is   Once the food residues have dried, they are not suitable for dishwashers . easy to remove . Splashes and soiling: Use a damp cloth  ...
  • Seite 39: Disposal

    Problem Possible cause Possible solution The turntable 2 makes a loud The turntable 2 is not correctly Place the turntable 2 correctly noise when turning . positioned on the catch 2 . in the cooking chamber 14 . The rollers 2 and/or the floor Clean the rollers 2 and the of the cooking chamber 14 are floor of the cooking chamber 14 .
  • Seite 40: Warranty Claim Procedure

    Warranty claim procedure To ensure quick processing of your case, please observe the following instructions: Please have the till receipt and the item number (e .g . IAN 123456_7890) available as proof of purchase . You will find the item number on the type plate, an engraving on the front page of the instructions (bottom left), or as a sticker on the rear or bottom of the appliance .
  • Seite 41 Verwendete Warnhinweise und Symbole . . . . . . . . . . . . . . . . . . . . . . . . . . Seite Einleitung .
  • Seite 42: Verwendete Warnhinweise Und Symbole

    Verwendete Warnhinweise und Symbole In dieser Bedienungsanleitung und auf der Verpackung werden die folgenden Warnhinweise verwendet: Spannung (Wechselstrom) GEFAHR! Dieses Symbol mit dem Signalwort „Gefahr“ bezeichnet eine Gefährdung mit einem hohen Risikograd, Hertz (Netzfrequenz) die, wenn sie nicht vermieden wird, eine schwere Verletzung oder den Tod zur Folge hat .
  • Seite 43: Lieferumfang

    ˜ Lieferumfang Mikrowellenfrequenz: 2450 MHz Geräuschemission: ca . 58 dB(A) Überprüfen Sie nach dem Auspacken des Produkts, ob die Lieferung vollständig ist und alle Teile in Garraumvolumen: ca . 17 Liter ordnungsgemäßem Zustand sind . Entfernen Sie vor Gewicht: ca . 10,5 kg der Verwendung sämtliche Verpackungsmaterialien .
  • Seite 44 Im Falle von Schäden aufgrund Reinigung und Benutzer-Wartung der Nichteinhaltung dieser dürfen nicht von Kindern ohne Bedienungsanleitung erlischt Beaufsichtigung durchgeführt Ihr Garantieanspruch! Für werden . Folgeschäden wird keine Haftung mWARNUNG! Wenn die übernommen! Im Falle von Tür oder die Türdichtungen Sach- oder Personenschäden beschädigt sind, darf das Produkt aufgrund einer unsachgemäßen...
  • Seite 45 Dieses Produkt ist dazu bestimmt, Das Produkt ist für die     im Haushalt und in ähnlichen Erwärmung von Speisen und Anwendungen verwendet zu Getränken bestimmt . Trocknen werden wie beispielsweise: von Speisen oder Kleidung und –in Küchen für Mitarbeiter in Erwärmung von Heizkissen, Läden, Büros und anderen Hausschuhen, Schwämmen,...
  • Seite 46: Zusätzliche Sicherheitshinweise

    Eier mit Schale oder ganze, mGEFAHR! Verbrennungs­   gefahr! Das Produkt wird hart gekochte Eier dürfen nicht in Mikrowellenkochgeräten während der Verwendung heiß . erwärmt werden, da sie Berühren Sie das Produkt nicht explodieren können, selbst während oder unmittelbar nach wenn die Erwärmung durch der Verwendung .
  • Seite 47: Aufstellhinweise

    Schützen Sie die Stellen Sie das Produkt nicht auf     Anschlussleitung vor Schäden . heißen Oberflächen (Gasherd, Lassen Sie sie nicht über scharfe Elektroherd, Ofen usw .) ab . Kanten hängen und quetschen Bedienen Sie das Produkt auf oder biegen Sie sie nicht . Halten einer flachen, stabilen, sauberen, Sie die Anschlussleitung von hitzebeständigen und trockenen...
  • Seite 48: Funkstörungen Bei Anderen Geräten

    Entfernen Sie nicht die hell- Stecken Sie das Produkt in     graue Glimmer-Abdeck- eine andere Steckdose ein . platte, die zum Schutz Produkt und Empfänger sollten der Magnet feld röhre im einen unterschiedlichen Zweig Garraum angebracht ist . des Stromkreises in Anspruch nehmen .
  • Seite 49: Nahrungsmittel Mit Haut/Schale

    ˜ Grundprinzipien beim Garen in Fett und Öl: Tauen Sie kein gefrorenes Fett   oder Öl im Produkt auf . Frittieren Sie nicht im der Mikrowelle Produkt . Fett oder Öl kann sich entzünden . Garzeit: Achten Sie auf die Garzeit . Wählen  ...
  • Seite 50: Zusammenbau

    Stellen Sie das Produkt auf eine ebene Fläche,   Kochgeschirr Mikrowelle die genug Abstand für die Be- und Entlüftung Hitzebeständiges Glas lässt: Nicht hitzebeständiges Glas Nein Halten Sie zwischen dem Produkt und den   Hitzebeständige Keramik angrenzenden Wänden einen Freiraum von Kunststoffgeschirr (geeignet für mindestens 10 cm ein .
  • Seite 51: Timer Einstellen

    HINWEIS: Falls Sie die verbleibende Zeit Stellen Sie mit dem Drehregler 8 die   des Timers kontrollieren möchten: Drücken Sie gewünschte Uhrzeit-Anzeige ein: 7 . Die Zeit wird kurz angezeigt . Drehregler­Position Uhrzeit­Anzeige Wenn der Timer abgelaufen ist, ertönt ein  ...
  • Seite 52: Leistung Auswählen

    ˜ Leistung auswählen ˜ Schnellstart 1 Drücken Sie 5 . Im Display 4 leuchtet Im Standby-Modus: Drücken Sie den Drehregler     700 (700 Watt Leistung) . 8 nach rechts (Drehrichtung ) . Stellen Sie Stellen Sie die gewünschte Leistung mit dem die gewünschte Gardauer ein .
  • Seite 53: Auftauen Nach Zeit

    Auftauen nach Zeit Auftauen nach Gewicht 6 . 00:00 und Drücken Sie leuchten im Drücken Sie 2 x 6 . Im Display 4 leuchten     100 g (100 Gramm) und Display 4 . Stellen Sie mit dem Drehregler 8 die Stellen Sie mit dem Drehregler 8 das Gewicht  ...
  • Seite 54: Zeitverzögerung

    ˜ Zeitverzögerung Alle anderen Funktionen sind deaktiviert,   solange die Zeitverzögerungs-Funktion aktiv ist . Das Produkt verfügt über eine Zeitverzögerungs- Funktion . Mit dieser Funktion können Sie eine ˜ Automatik­Menü Uhrzeit voreinstellen, zu der das Produkt mit einem Für Nahrungsmittel, die mit den Automatik-Menüs voreingestellten Garvorgang beginnen soll .
  • Seite 55 Display Nahrungsmittel Menge/Gewicht Dauer (Minuten : Sekunden) 200 g 1:30 300 g 2:00 400 g 2:30 A­03 Erwärmen 500 g 3:00 600 g 3:30 700 g 4:00 800 g 4:30 200 g 3:00 300 g 4:20 A­04 Fisch 400 g 5:40 500 g 7:00...
  • Seite 56: Fehlerbehebung

    HINWEISE: Drehteller: Spülen Sie den Drehteller 2   Reinigen Sie das Produkt unmittelbar, nachdem regelmäßig in warmer Seifenlauge . Der   es abgekühlt ist . Sobald Nahrungsmittelreste Drehteller ist spülmaschinengeeignet . angetrocknet sind, sind diese nicht einfach zu Spritzer und Verunreinigungen:  ...
  • Seite 57: Entsorgung

    Problem Mögliche Ursache Mögliche Lösungen Der Drehteller 2 erzeugt beim Der Drehteller 2 liegt nicht Legen Sie den Drehteller 2 Drehen laute Geräusche . richtig auf der Arretierung 2 . korrekt in den Garraum 14 ein . Der Laufring 2 und / oder der Reinigen Sie den Laufring 2 Boden des Garraums 14 sind und den Boden des Garraums...
  • Seite 58: Abwicklung Im Garantiefall

    Abwicklung im Garantiefall Um eine schnelle Bearbeitung Ihres Anliegens zu gewährleisten, folgen Sie bitte den folgenden Hinweisen: Bitte halten Sie für alle Anfragen den Kassenbon und die Artikelnummer (z . B . IAN 123456_7890) als Nachweis für den Kauf bereit . Die Artikelnummer entnehmen Sie bitte dem Typenschild, einer Gravur, auf dem Titelblatt Ihrer Anleitung (unten links) oder als Aufkleber auf der...
  • Seite 59 OWIM GmbH & Co. KG Stiftsbergstraße 1 74167 Neckarsulm GERMANY Model-Nr.: HG06189 / HG06190 Version: 03/2020 IAN 333395_1907 IAN 344054_1907...

Inhaltsverzeichnis