LG RESU 16h Rrime Bedienungsanleitung
Inhaltsverzeichnis
Verfügbare Sprachen
Verfügbare Sprachen
Quicklinks
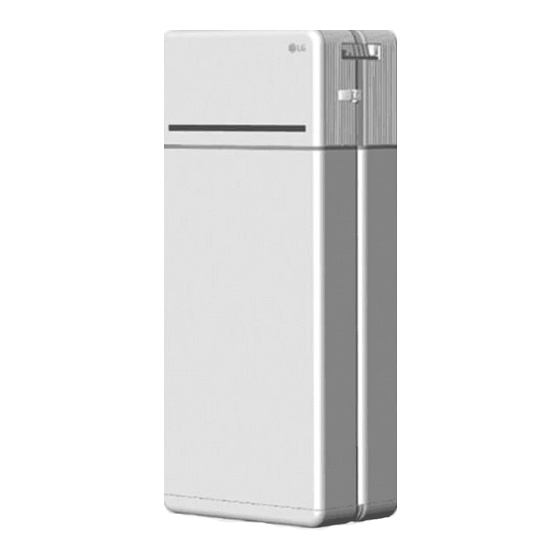
Installation Manual for RESU16H Prime
LG Energy Solution strongly advises users to exercise due care in following LG Energy
Solution's product installation manual. Warranty claims are invalid if damage is caused
by human error in a manner inconsistent with the installation manual's instructions.
Scan QR code to view
Scan QR code to view
[Installation Manual PDF File]
[Installation Video Guide]
Version 1.2
Kapitel
Inhaltsverzeichnis
Fehlerbehebung

Verwandte Anleitungen für LG RESU 16h Rrime


Inhaltszusammenfassung für LG RESU 16h Rrime
- Seite 24 Die in dieser Anleitung enthaltenen Informationen sind zum Zeitpunkt der Veröffentlichung zutreffend. Allerdings kann diese Anleitung jederzeit auch ohne Ankündigung geändert werden. Außerdem dienen die Zeichnungen und Bilder in der Anleitung nur dazu, die Konfiguration des Systems zu erklären und die Installation zu verdeutlichen. Die Bilder dienen nur der Illustration.
-
Seite 25: Sicherheit
Beschädigung des Akkus kommen. • Das Produkt nur mit einem von LGES zugelassenen Wechselrichter benutzen. Recyclingfähig Eine Liste kompatibler Wechselrichter finden Sie auf der LG ESS Battery-Website unter der unten angegebenen URL. Überprüfen Sie das Menü “Home Battery”> “Produkt Info”. -
Seite 26: Warnhinweise Aufkleber
: Von Staat oder Bundesland verlangte Befähigung zur Installation von Akkus und Emissionen elektrischen Systemen Klassifi zierung Gefahrstoff e Klasse 9 • Eine Reparatur durch Zerlegen ist nur im LG Service Center oder durch eine Transport UN38.3 Person möglich, die hierzu gesondert befähigt ist. Die Installationsberechtigung Schutzklassenbewertung IP55 allein reicht nicht aus. -
Seite 27: Merkmale
2.3 Wartung 1. Kurzschlussstrom / Dauer Kurzschlussstrom 1,616 kA Der RESU16H Prime-Speicher muss während des Normalbetriebs nicht gewartet werden, Dauer 0,44 ms wenn er gemäß Installationshandbuch ordnungsgemäß installiert wurde. Wenden Sie sich im Fehlerfall an das regionale Servicecenter. 2. Stromüberschlag - Schutzberechnungen 2.4 Angaben zur Verpackung Um das Personal vor Verletzungen durch Stromüberschlag zu schützen, wurde die Gefahr des Stromüberschlags für das Akkusystem unter Verwendung der Berechnungen für... -
Seite 28: Grundsätzliches Zum Anheben
3.1.2 Grundsätzliches zum Anheben 4. Entnehmen Sie die gebündelten Teile, Für das Anheben und Tragen der Akku-Steuereinheit und der Akkumodule während der auch die Leiterplatte zum Anschluss Installation befolgen Sie bitte die nachstehende Anleitung. des Moduls Handhabungsposition Handling position Handling position Handling position Handling position Handling position... -
Seite 29: Abstände
3.1.5 Abstände 3.1.8 Abstand des Systems • Die empfohlenen Abstände links, rechts Für Installation, Verkabelung und Belüftung benötigt der Akku ausreichenden Abstand. Decke Die Mindestabstände in der Systemkonfi guration sind wie folgt. Das Kabel, das Akkupack und oberhalb des Produktes sind in der und Wechselrichter verbindet, muss so beschaff en sein wie in der Installationsanleitung des Zeichnung dargestellt. - Seite 30 3. Entfernen Sie die Bohrschablone. 7. Entfernen Sie die Luftpolsterfolie Akku-Steuereinheit Ziehen Sie dann die von den Anschlüssen der Befestigungselemente an der Batteriesteuereinheit (BCU) und dem Stehhalterung 1 etwas an. Warnlabel der Batteriemodule Halterung zur stehenden_ * Die Befestigungselemente Standing bracket_1 Montage_1 werden zu einem späteren Schritt vollständig angezogen.
- Seite 31 11. Prüfen Sie, ob der Speicher korrekt 15. Lösen Sie 4 Schrauben und entfernen funktioniert. Befolgen Sie dazu die Sie die obere Abdeckung. Schritte unten. M5 x L65 Flanschbolzen 1) Fassen Sie den Handgriff und drehen Sie ihn gegen den Uhrzeigersinn.
- Seite 32 20. Abdeckung vorn öff nen. 24. Schließen Sie die Kabel entsprechend der Anwendung an. * Fassen Sie den Handgriff und drehen Sie ihn gegen den * Siehe hierzu 3.3 Kabelverbindung Uhrzeigersinn. Handgriff Abdeckung vorn 25. Richten Sie die Strom-und Kommunikationskabel separat mit Hilfe der Kabelbinder aus.
-
Seite 33: Installationsvorgang Für Die Fernbedienbare Überwachungseinrichtung (Rmd)
Vorbereitung der Installation mithilfe von RMD Zeichen, Zahlen und Sonderzeichen enthalten (!, #, $, %, ^, &, +, =) 3.2.1.1 Registrierung des Installateurs 6. Geben Sie Ihre LG ESS-Batterie- Website-ID ein. (Wenn Sie kein Konto 3.2.1.1.1 Website zum Anschluss: https://resumonitor.lgensol.com haben, klicken Sie unten.) 7. -
Seite 34: Installation Mithilfe Des Rmd
3.2.1.3 nutzer-Registrierung 9. Schaltfl äche „Besitzer“ klicken. 10. ID und Passwort eingeben. 3.2.1.3.1 Website zum Anschluss: https://resumonitor.lgensol.com 11. Klicken Sie die Schaltfl äche „Anmelden“. 3.2.2 Installation mithilfe des RMD Klicken Sie den Link auf der RESU Monitor Website, um die APK-Datei der „RESU Installateur-App“... -
Seite 35: Qr Code Scannen
3.2.2.3 Benutzervereinbarung 3.2.2.5 QR Code scannen Die Methode mit QR Code Scanning funktioniert wie folgt. 1. Suchen Sie das Produkt, das Sie installieren möchten. 2. Holen Sie sich die Vereinbarung der Datenschutzrichtlinie für den Kunden. 3. Wenn der Kunde der Datenschutzrichtlinie zustimmt, halten Sie bitte die Select persönlichen Daten des Kunden bereit Prime: Fixed at 2... -
Seite 36: Wlan-Anschluss
3.2.2.6.2 WLAN-Anschluss 3.2.2.8 Überprüfung der Serververbindung und des Batteriestatus (Wenn Sie Ethernet-Verbindung haben und WLAN nicht benutzen wollen, einfach die Schaltfl äche „Weiter“ betätigen.) IoT Hub-Verbindungszeichenfolge: Geben Sie die eindeutige Zeichenfolge ein, die Sie für den Zugriff auf den Azure IoT Hub (Cloud-Server) erhalten haben. Das Zeichenfolgenformat lautet wie folgt: Scan AP(1): „WLAN-Netzwerk derzeit für Verbindung verfügbar“... -
Seite 37: Kabelverbindung
3.3 Kabelverbindung 3. Abschnitt C: DIP-Schalter zum Einstellen Primär/Sekundärpack Wenn Sie dies als Primärpack benutzen wollen, stellen Sie alle DIP- Schalter in die Stellung nach oben. Wenn Sie dies als Sekundärpack benutzen wollen, stellen Sie den Schalter nur auf der rechten Seite (von vorn gesehen) ab 4. -
Seite 38: Inbetriebnahme
Update Arbeitet ein Akkupack nicht ordnungsgemäß und bleibt der Fehler bestehen, dann kontaktieren fehlgeschlagen Sie qualifiziertes Personal, den Installateur oder die regional zuständige LG ENERGY SOLUTION Niederlassung. Auf der Vorderseite der Akkus befinden sich vier LED-Anzeigen, die den Betriebsstatus anzeigen. -
Seite 39: Anleitung Zur Fehlersuche
M5 PH Schrauben 6 Stück 5. Ist der Akku richtig eingerichtet, aber er funktioniert immer noch nicht, dann den wieder an. Trennschalter abschalten 6. Kontaktieren Sie den Service von LG Energy Solution, der für Service zuständig ist. LED-Status Aktion... -
Seite 40: Kontaktinformation
Gefahr darstellen. Scheint der Akkupack beschädigt zu sein, dann kontaktieren Sie Ihren * Ziehen Sie nicht zu stark regional zuständigen LG Energy Solution Kontakt oder Ihren Vertriebsbeauftragten. Für an der Akku-Steuereinheit. technischen Beistand die Kontakte unten hinzuziehen. Diese Telefonnummern sind nur an Die Kabel dürfen nicht straff... -
Seite 41: Anhang
7. Anhang 7.1 Anschluss zum parallelen Akkusystem RESU16H Prime Wechselrichter Inverter ENABLE 12V ENABLE 12V ENABLE 12V ENABLE 12V ENABLE GND ENABLE GND ENABLE GND ENABLE GND RS485 A+ RS485 A+ RS485 A+ RS485 A+ ACHTUNG RS485 B- RS485 B- RS485 B- RS485 B- CAN Hi... -
Seite 42: Rmd Anwendungen
7.2 RMD Anwendungen Benötigte Fehler Name Fehlercode Unterstützungsmaßnahme Bringen Sie den Akku zu LG 7.2.1. Überprüfung des Batteriestatus über RMD Überspannung Fehler 2 DiagResultFault2 0x0001 Energy Solution zurück. Überprüfen des Batteriestatus Unterspannung Fehler 2 DiagResultFault2 0x0002 Bei eingeschaltetem Akkupack prüfen Sie auf zusätzliche Fehler. -
Seite 43: Bms, Dc/Dc Und Rmd Aktualisierung Über Rmd
7.2.2 BMS, DC/DC und RMD Aktualisierung über RMD Bitte laden Sie zuerst die Firmware herunter, bevor Sie mit dem Update beginnen. Besuchen Sie die LG ESS Battery-Website und überprüfen Sie das Menü “Heimspeicher Partner”> „Technischer Support” 1) RMD WLAn Direktverbindung Stellen Sie zunächst die RMD WLAN-Direktverbindung her wie unten gezeigt. -
Seite 44: Installation Über Rmd Für Webbenutzer
7.2.3 Installation über RMD für Webbenutzer 7.2.3.2 Batterieinstallation (RMD-Setup) 7.2.3.1 Benutzervereinbarung Rufen Sie https://resumonitor.lgensol.com auf wählen Sie sich ein. Klicken Sie auf Installation → Batterieinstallation und wählen Sie das Gerät aus, das in der Liste der vorbereiteten Geräte aufgeführt ist. Suchen und greifen Sie auf die SSID des RMD-AP von einem Gerät (im Folgenden als Gerät bezeichnet) zu, das WLAN-Stationsfunktionen wie ein Smartphone unterstützt. -
Seite 45: Server Verbindung (Wi-Fi Einstellung)
7.2.3.3 RMD Web Log-in 7.2.3.5 Server Verbindung (Wi-Fi Einstellung) (Wenn Sie eine Ethernet-Verbindung haben und kein WLAN verwenden möchten, überspringen Sie diesen Teil.) Rufen Sie die Registerkarte Netzwerk → Wi-Fi auf. 1. Klicken Sie oben rechts auf der Web- Benutzeroberfl äche auf die Schaltfl äche Scan AP.