Inhaltsverzeichnis
Werbung
Verfügbare Sprachen
Verfügbare Sprachen
Werbung
Inhaltsverzeichnis

Verwandte Anleitungen für Märklin 74492


Inhaltszusammenfassung für Märklin 74492
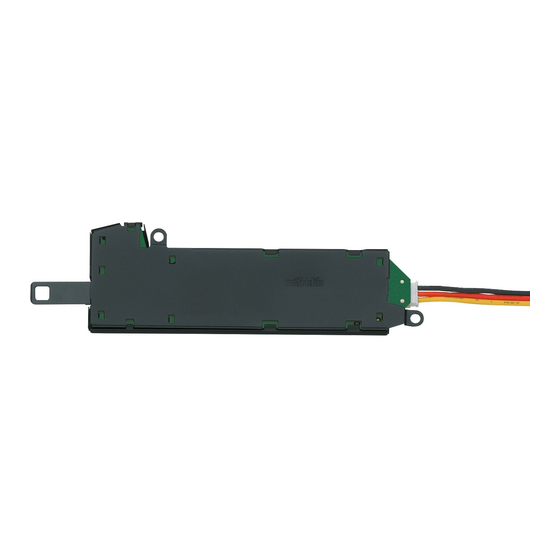
- Seite 1 All manuals and user guides at all-guides.com Elektrischer Weichen-Antrieb Electric Turnout Mechanism Moteur d’aiguillage électrique Elektrische wisselaandrijving Motor para desvíos Azionamento elettromagnetico per deiatoi Elektrisk växeldrivning Elektrisk sporskiftedrev 74492...
-
Seite 2: Inhaltsverzeichnis
All manuals and user guides at all-guides.com 1. Bestimmungsgemäße Verwendung 1. Utilisation conforme à sa destination 2. Sicherheitshinweise 2. Remarques sur la sécurité 3. Wichtige Hinweise 3. Information importante 4. Lieferumfang 4. Matériel fourni 5. Symbole und Bedeutung 5. Symboles et signifi cation 6. - Seite 3 All manuals and user guides at all-guides.com 1. Uso correcto 1. Användning av produkten 2. Aviso de seguridad 2. Säkerhetsanvisningar 3. Notas importantes 3. Viktig information 4. Alcance de suministro 4. Innehåll 5. Símbolos y su signifi cado 5. Symboler och vad de betyder 6.
-
Seite 4: Bestimmungsgemäße Verwendung
All manuals and user guides at all-guides.com 1. Bestimmungsgemäße Verwendung 3. Wichtige Hinweise Der Weichenantrieb ist zum Einbau in die Weichen 20611, • Die Bedienungsanleitung ist Bestandteil des Produktes 20612, 20671, 20672, den Weichen aus den Sets 24902, 24903, und muss deshalb aufbewahrt sowie bei Weitergabe des 24904, 24905 (nicht für die Doppelkreuzungsweiche) und den Produktes mitgegeben werden. -
Seite 5: Vorbereitungen
All manuals and user guides at all-guides.com 6. Vorbereitungen Abdeckung der Mechanik nicht abnehmen! Es kann die Weichenmechanik beschädigt werden. Der Aufbau darf nur unter Aufsicht Erwachsener erfolgen. Um Beschädigungen während des Aufbaus zu vermeiden, das Schaltnetzteil vom Haushaltsstromnetz trennen. Erst nach Fertigstellung aller Verkabelungen das Schaltnetzteil wieder in die Steckdose stecken. - Seite 6 All manuals and user guides at all-guides.com Zugstange des Antriebs einhängen. Antrieb einsetzen und anschrauben.
-
Seite 7: Ergänzendes Zubehör
All manuals and user guides at all-guides.com 7. Ergänzendes Zubehör • ist die Zugstange des Weichenantriebes richtig einge- hängt? Gegebenenfalls korrigieren. Weichenhebel tauschen gegen Weichenmotorattrappe bzw. Weichenabdeckung 9. Entsorgung Hinweise zum Umweltschutz: Produkte, die mit Nach dem Entfernen des Stellhebels kann die Weiche dem durchgestrichenen Mülleimer gekenn- nur über das Weichenstellpult 72752 umgestellt werden. -
Seite 8: Using The Product As Intended
All manuals and user guides at all-guides.com 1. Using the Product as Intended 3. Important Notes This turnout mechanism is designed for installation in the • The operating instructions are a component part of the 20611, 20612, 20671, and 20672 turnouts, the turnouts from product and must therefore be kept in a safe place as the 24902, 24903, 24904, and 24905 track extension sets (not well as included with the product, if the latter is given to for the double slip switch) and the turnouts from the starter... -
Seite 9: Preparations
All manuals and user guides at all-guides.com 6. Preparations Do not remove the cover for the turnout linkage! The turnout mechanism may be damaged. Setup may be done only under the supervision of adults. Unplug the switched mode power pack from the household current in order to prevent damage during setup. - Seite 10 All manuals and user guides at all-guides.com Connect the throwbar for the turnout mechanism. Install the turnout mechanism and screw it down.
-
Seite 11: Installation Of Clip-On Parts
All manuals and user guides at all-guides.com 7. Installation of clip-on parts • iIs the bar on the turnout mechanism correctly hung on the turnout linkage? Check and correct if necessary. Replace the turnout lever (1) with the turnout motor detail part (3) or the turnout cover (2). 9. Disposing: Notes about environmental protection: Products After the turnout lever has been removed, the turnout can that are identified with a garbage container with... -
Seite 12: Utilisation Conforme À Sa Destination
All manuals and user guides at all-guides.com 1. Utilisation conforme à sa destination 3. Information importante Ce moteur est conçu être monté dans les aiguilles réf. 20611, • La notice d‘utilisation fait partie intégrante du produit ; 20612, 20671, 20672, les aiguilles des coffrets réf. 24902, elle doit donc être conservée et, le cas échéant, trans- 24903, 24904, 24905 (sauf la traversée jonction double) et les mise avec le produit. -
Seite 13: Préparatifs
All manuals and user guides at all-guides.com 6. Préparatifs Ne pas enlever le cache de la partie mécanique !Le méca- nisme de l’aiguille peut être endommagé. L’installation doit se faire impérativement sous la surveil- lance d’un adulte. Afin d’éviter toute détérioration durant l’installation, débranchez le convertisseur du secteur. - Seite 14 All manuals and user guides at all-guides.com Enclencher la barre de trac- tion de l’entraînement. Insérer l’entraînement et le fixer en le vissant.
-
Seite 15: Accessoires Complémentaires
All manuals and user guides at all-guides.com 7. Accessoires complémentaires • vérifiez que la barre du moteur d’aiguille est bien accro- chée. Le cas échéant, raccrochez la. Echanger le levier de manoeuvre de l’aiguille (1) contre le moteur factice (3) ou la plaque de recouvrement (2). 9. Elimination Une fois le levier de manoeuvre retiré, seul le poste Indications relatives à... -
Seite 16: Verantwoord Gebruiken
All manuals and user guides at all-guides.com 1. Verantwoord gebruiken 3. Belangrijke aanwijzing De wisselaandrijving is geschikt voor de inbouw in de wis- • De gebruiksaanwijzing maakt deel uit van het product en sels 20611, 20612, 20671, 20672, de wissels uit de set 24902, moet daarom bewaard worden en bij doorgave van het 24903, 24904, 24905 (niet voor de dubbele kruiswissel) en de product worden meegegeven. -
Seite 17: Voorbereidingen
All manuals and user guides at all-guides.com 6. Voorbereidingen Afdekking van het mechaniek a.u.b. niet afnemen! Het wisselmechaniek kan beschadigd raken. De montage mag uitsluitend gebeuren onder toezicht van een volwassene. Om beschadigingen tijdens de montage te vermijden moet u de schakelvoeding loskoppelen van het huishoudelijk circuit. - Seite 18 All manuals and user guides at all-guides.com Trekstang van de aandrijving ophangen. Aandrijving plaatsen en vastschroeven.
-
Seite 19: Aanvullende Toebehoren
All manuals and user guides at all-guides.com 7. Aanvullende toebehoren • controleer of trekstang van de wisselaandrijving goed ingehaakt is. Dit eventueel verhelpen. Wisselhendel (1) vervangen door imitatie wisselmotor (3) resp. wisselafdekking (2). 9. Afdanken Milieu-informatie: producten, die met de Na het verwijderen van de wisselhendel kan de wissel doorgestreepte afvalcontainer zijn gemarkeerd, alleen met de wissel seinplaat 72752 omgezet worden. -
Seite 20: Uso Correcto
All manuals and user guides at all-guides.com 1. Uso correcto 3. Notas importantes El accionamiento de desvío está destinado para su montaje • Las instrucciones de empleo forman parte íntegra del en los desvíos 20611, 20612, 20671, 20672, los desvíos de los producto y, por este motivo, deben conservarse y deben sets 24902, 24903, 24904, 24905 (no para la travesía de unión entregarse junto con el producto en el caso de reventa del doble) y de los sets de iniciación del surtido Start up de... -
Seite 21: Preparativos
All manuals and user guides at all-guides.com 6. Preparativos ¡No retirar la tapadera de la mecánica! Puede dañarse la mecánica del desvío. El montaje debe ser realizado exclusivamente bajo la ins- pección de un adulto. Para evitar daños durante el montaje, aislar la fuente de alimentación conmutada de la red eléctrica doméstica. - Seite 22 All manuals and user guides at all-guides.com Ancajar el tirante del motor. Fijar el motor y atornillario.
-
Seite 23: Accesorios Complementarios
All manuals and user guides at all-guides.com 7. Accesorios complementarios • ¿Está dañado un cable de interconexión? Sustituir el cable dañado. Sustituir la palanca de mando del desvío (1) por un simula- cro de motor de desvío (3) o bien por una tapa de desvío (2). • ¿está correctamente enganchado el tirante del acciona- miento de desvío? Corregir, si procede. -
Seite 24: Impiego Commisurato Alla Destinazione
All manuals and user guides at all-guides.com 1. Impiego commisurato alla destinazione 3. Avvertenze importanti Tale azionamento per deviatoi è destinato al montaggio nei • Le istruzioni di impiego sono un elemento costitutivo del deviatoi 20611, 20612, 20671, 20672, nei deviatoi proveni- prodotto e devono pertanto venire conservate nonché enti dalle confezioni 24902, 24903, 24904, 24905 (non per consegnate in dotazione in caso di ulteriore cessione del il deviatoio inglese doppio) e dalle confezioni di avvio... -
Seite 25: Preparativi
All manuals and user guides at all-guides.com 6. Preparativi Si prega di non smontare il coperchio del meccanismo! È possibile che il meccanismo del deviatoio venga danneg- Tale montaggio deve avvenire soltanto sotto sorveglianza di giato. un adulto. Per impedire danneggiamenti durante il montag- gio, separare l’alimentatore “switching”... - Seite 26 All manuals and user guides at all-guides.com Imperniare l’asta di trazione del dispositivo motore. Installare il dispositivo motore ed avvitarlo.
-
Seite 27: Accessori Complementari
All manuals and user guides at all-guides.com 7. Accessori complementari • È danneggiato un cavetto di collegamento? Sostituire il cavetto danneggiato. Sostituire la levetta del deviatoio (1) con l’apparato motore • l’asta di trazione dell’azionamento del deviatoio è cor- per deviatoi (3) o risp. il coperchio per deviatoi (2). rettamente agganciata? Correggere se necessario. Dopo la rimozione della levetta di posizionamento il 9. -
Seite 28: Användning Av Produkten
All manuals and user guides at all-guides.com 1. Användning av produkten 3. Viktig information Växelmotorn är avsedd att användas till växlarna 20611, • Bruksanvisningen tillhör produkten och måste därför 20612, 20671, 20672 samt till växlarna i utbyggnadssatserna sparas och medfölja produkten vid eventuellt avyttrande. 24902, 24903, 24904, 24905 (dock inte för dubbelkorsväxeln) • Denna produkt får endast användas tillsammans med samt för startsatserna i Märklins Start up-program. -
Seite 29: Förberedelser
All manuals and user guides at all-guides.com 6. Förberedelser Tag inte av höljet över mekaniken! Växelmotorns mekanik kan skadas. Uppbyggnad av anläggningen får endast ske under någon vuxen persons uppsikt. För att undvika skador under upp- byggnaden skall nätenheten ej vara inkopplad till hushålls- strömmen. - Seite 30 All manuals and user guides at all-guides.com Häng på dragstången till motorn. Sätt in motorn och skruva fast den.
-
Seite 31: Ytterligare Tillbehör
All manuals and user guides at all-guides.com 7. Ytterligare tillbehör • Är växelmotorns ögelförsedda dragstång inte rätt påha- kad? Rätta i så fall till detta. Spaken för växelomställning (1) byts ut mot växelmotor- atrappen (3) samt resp. växels imiterade täckplåt (2). 9. Hantering som avfall Information beträffande miljöskydd: Produkter märkta med den korsade soptunnan får efter ! Efter att spaken för växelomställning avlägsnats kan växeln avslutad användning aldrig kastas bort i det... -
Seite 32: Hensigtsmæssig Anvendelse
All manuals and user guides at all-guides.com 1. Hensigtsmæssig anvendelse 3. Vigtige bemærkninger • Betjeningsvejledningen er en del af produktet og skal Sporskiftedrevet er beregnet til indbygning i skiftesporene derfor opbevares og følge med, hvis produktet gives 20611, 20612, 20671, 20672, skiftesporene fra sættene 24902, videre. 24903, 24904, 24905 (ikke til dobbelt krydsningssporskifte) og til startsættene fra Start up-sortimentet fra Märklin. -
Seite 33: Forberedelser
All manuals and user guides at all-guides.com 6. Forberedelser Tag ikke mekanikkens afdækning af! Es kann die Weichen- mechanik beschädigt werden. Opbygningen må kun ske under opsyn af en voksen. For at undgå beskadigelser under opbygningen, skal kon- taktstrømforsyningen adskilles fra strømnettet. Først efter færdiggørelsen af alle kabelforbindelser må... - Seite 34 All manuals and user guides at all-guides.com Drevets trækstang sættes i. Drevet sættes i og skrues fast.
-
Seite 35: Ekstra Tilbehør
All manuals and user guides at all-guides.com 7. Ekstra tilbehør 9. Bortskafning Henvisninger til miljøbeskyttelse: Produkter, Udskift sporskiftegrebet (1) med sporskiftemotoratrappen (3) der er mærket med en affaldsbeholder med eller sporskifteafdækningen (2). kryds over, må ikke bortskaffes med den Når indstillingsgrebet er blevet fjernet, kan sporskiftet kun normale husholdningsaffald efter endt levetid, skiftes via sporskiftekontrolpulten 72752. - Seite 36 All manuals and user guides at all-guides.com Gebr. Märklin & Cie. GmbH Stuttgarter Str. 55 - 57 248304/0514/Ha1Pw 73033 Göppingen Germany Änderungen vorbehalten www.maerklin.com/en/imprint.html www.maerklin.com © Gebr. Märklin & Cie. GmbH...