JVC GC-PX100BE Benutzerhandbuch
Inhaltsverzeichnis
Verfügbare Sprachen
Verfügbare Sprachen
Quicklinks
Basic User Guide
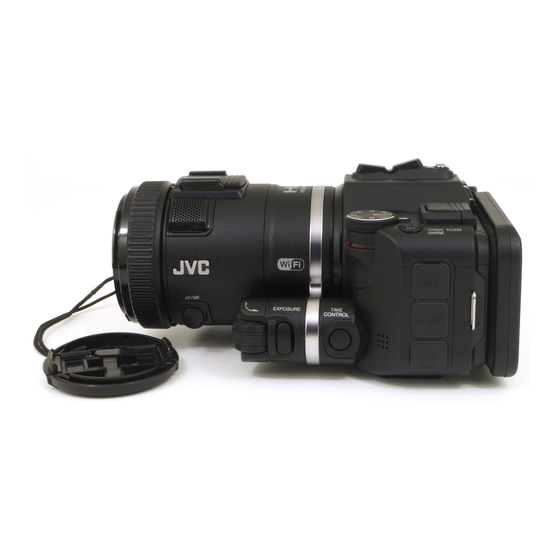
CAMCORDER
GC-PX100BE
Detailed User Guide
For more details on operating this
product, please refer to the "Detailed
User Guide" at the following website.
http://manual3.jvckenwood.com/
o
index.html/
Verifying the Accessories
AC Adapter
Power Cord
AP-V20M
(x2)
Viewfinder
Lens Hood
Please consult your JVC dealer or the nearest JVC service center when purchasing
a new AV cable.
Dear Customers
Thank you for purchasing this JVC product.
Before use, please read the Safety Precautions
and Cautions on p. 2 and p. 10 to ensure
safe use of this product.
All manuals and user guides at all-guides.com
When you are outside, refer to the
"Mobile User Guide". Mobile User Guide
can be viewed with standard browser for
Android tablet and iPhone.
o
Battery Pack
HDMI Mini
BN-VF815U
Cable
Shoulder Strap
Monitor Hood
LYT2593-001B-M
Mobile User Guide
.
http://manual3.jvckenwood.com/mobile/
eu/
USB Cable
(Type A - Mini Type B)
Lens Cap
CD-ROM
EN
AV Cable
QAM1322-001
Core Filter
Inhaltsverzeichnis

Verwandte Anleitungen für JVC GC-PX100BE


Inhaltszusammenfassung für JVC GC-PX100BE
-
Seite 13: Überprüfen Der Zubehörteile
Schulterriemen Bildschirmabdeckung Objektivdeckel CD-ROM Core Filter Bitte wenden Sie sich beim Kauf eines neuen AV-Kabels an Ihren JVC-Händler oder ein JVC-Servicecenter in Ihrer Nähe. Liebe Kundin/lieber Kunde Vielen Dank, dass Sie sich für dieses Produkt von JVC entschieden haben. Bitte lesen Sie vor der Benutzung die Sicherheits- und Warnhinweise auf S. -
Seite 14: Sicherheitshinweise
Sicherheitshinweise All manuals and user guides at all-guides.com ACHTUNG: SCHÜTZEN SIE DIESES GERÄT Wird dieses Gerät in ein Gehäuse oder ein Regal VOR NÄSSE UND FEUCHTIGKEIT, DAMIT eingebaut, genügend Platz (jeweils 10 cm seitlich ES NICHT IN BRAND GERÄT UND KEIN sowie hinter und über dem Gerät) lassen, um KURZSCHLUSS ENTSTEHT. - Seite 15 In dieser Bedienungsanleitung wurden Zeichen wie ™ und ® nicht mitgedruckt. Sichern Sie wichtige Aufnahmedaten JVC haftet nicht für verlorengegangene Daten. Es wird empfohlen, wichtige Aufnahmedaten zur Aufbewahrung alle drei Monate auf einer Disk oder einem anderen Aufnahmemedium zu sichern.
-
Seite 16: Einstellung Des Haltegriffs
Inhalt All manuals and user guides at all-guides.com Sicherheitshinweise ....... 2 Aufnahme Einstellung des Haltegriffs ...... 4 Videoaufnahme ........8 Anbringen der Zubehörteile ....4 Wiedergabe Erste Schritte Wiedergabe/Löschen von Dateien mit diesem Gerät ..9 Laden des Akkus ........6 Weitere Informationen Einsetzen einer SD-Karte ....... - Seite 17 All manuals and user guides at all-guides.com Anbringen des Objektivdeckels Setzen Sie den Objektivdeckel auf, wenn Sie das Gerät gerade nicht verwenden oder es transportieren. Bringen Sie den Objektivdeckel während des Aufnehmens am Haltegriff an. Anbringen der Objektivhaube Wir empfehlen Ihnen die Verwendung der Objektivhaube bei Aufnahmen im Freien mit direktem Sonnenlicht.
-
Seite 18: Laden Des Akkus
(R). VORSICHT Achten Sie darauf, nur JVC Akkus zu verwenden. Bei der Benutzung von Akkus, die nicht von JVC hergestellt wurden, kann die Sicherheit und Leistung des Geräts nicht gewährleistet werden. Wenn Fehlfunktionen auftreten (Überlastung, Überspannung, Übertragungsfehler usw.) oder falls ein Akku aufgeladen werden soll, der nicht von JVC hergestellt wurde, wird der Ladevorgang abgebrochen. -
Seite 19: Einsetzen Einer Sd-Karte
Einsetzen einer SD-Karte All manuals and user guides at all-guides.com Setzen Sie vor der Aufnahme eine handelsübliche SD-Karte ein. Schalten Sie das Gerät aus, bevor Sie Label eine SD-Karte einsetzen oder Öffnen Sie die Akkuabdeckung, nachdem entnehmen. Sie den LCD-Bildschirm Entnehmen der SD-Karte geöffnet haben. -
Seite 20: Videoaufnahme
Videoaufnahme All manuals and user guides at all-guides.com Mithilfe des Intelligent Auto Modus können Sie Videos aufnehmen, ohne sich um Einstellungen kümmern zu müssen. Einstellungen wie Belichtung und Fokus werden automatisch angepasst, um den Aufnahmebedingungen gerecht zu werden. Im Fall von bestimmten Aufnahmeszenen wie z. B. Personen usw., wird das entsprechende Symbol auf dem Bildschirm angezeigt. -
Seite 21: Wiedergabe/Löschen Von Dateien Mit Diesem Gerät
Wiedergabe/Löschen von Dateien mit diesem Gerät All manuals and user guides at all-guides.com Wählen Sie die aufgenommenen Videos oder Standbilder aus dem Inhaltsverzeichnis (Minibild-Anzeige) aus und geben Sie sie wieder. Anpassen der Lautstärke während der Wiedergabe Drücken Sie auf A/B (Standbild/Video), Höhere Lautstärke um zwischen Foto- und Videomodus hin- und herzuwechseln. - Seite 22 3. Sollte die oben beschriebene Maßnahme keine Abhilfe • Lassen Sie kein Wasser an das schaffen, wenden Sie sich bitte an Ihren nächstgelegenen Aufnahmemedium gelangen. JVC-Händler oder ein JVC Service Center. • Bewahren Sie das Aufnahmemedium nicht an Orten auf, die starken elektrostatischen oder Akkus elektrischen Störungen ausgesetzt sind, und...
- Seite 23 0700 0700 • Zum Schutz des Geräts vermeiden Sie Hiermit erklärt JVC, dass dieses Gerät GC-PX100 den Nässe am Gerät. wesentlichen Voraussetzungen und den sonstigen Fallenlassen oder Kollisionen mit harten Gegenständen. einschlägigen Bestimmungen der Richtlinie 1999/5/EG Stöße oder starke Vibrationen beim Transport.
-
Seite 24: Aufnahmezeit/Technische Daten
Ca. 585 g (inkl. mitgeliefertem Akku) Änderung der technischen Daten und des Designs im Rahmen von Produktverbesserungen vorbehalten. Weitere Informationen finden Sie im Erweiterten Benutzerhandbuch. http://manual3.jvckenwood.com/index.html/ JVC KENWOOD Corporation 3-12, Moriyacho, Kanagawa-ku, Yokohama-shi, Kanagawa, 221-0022, Japan *LYT2593-001B-M* ©2014 JVC KENWOOD Corporation 0814TOH-SW-VM...