Hama Add-On Bedienungsanleitung
Wifi heating control
Vorschau ausblenden
Andere Handbücher für Add-On:
- Bedienungsanleitung (50 Seiten) ,
- Bedienungsanleitung (33 Seiten) ,
- Bedienungsanleitung (38 Seiten)

Verwandte Anleitungen für Hama Add-On


Inhaltszusammenfassung für Hama Add-On
-
Seite 17: Bedienungselemente Und Anzeigen
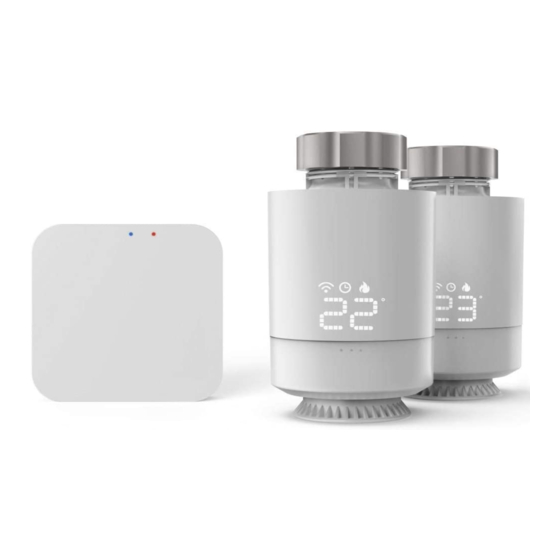
D Bedienungsanleitung Bedienungselemente und Anzeigen Vielen Dank, dass Sie sich für ein Hama Produkt entschieden haben! 1. Drehregler / Ein/Aus-Taste Nehmen Sie sich Zeit und lesen Sie die folgenden 2. LED-Display Anweisungen und Hinweise zunächst ganz 3. WLAN-Verbindung durch. Bewahren Sie diese Bedienungsanleitung 4. - Seite 18 2. Packungsinhalt 00176592 1x Heizkörper Thermostat 2x AA Batterien 1x Adapter-Set 00000000 WIFI HEATING CONTROL “Add-On” “Starter-Kit” (00176592), (00176593) 00176593 2x Heizkörper Thermostate 1x Zentrale 4x AA Batterien 2x Adapter-Set 1x USB-Netzteil 00000000 WIFI HEATING CONTROL “Add-On” “Starter-Kit” (00176592), (00176593)
-
Seite 19: Sicherheitshinweise
3. Sicherheitshinweise • Das Produkt ist für den privaten, nicht-gewerblichen Haushaltsgebrauch vorgesehen. • Verwenden Sie das Produkt ausschließlich für den dazu vorgesehenen Zweck. • Schützen Sie das Produkt vor Schmutz, Feuchtigkeit und Überhitzung und verwenden Sie es nur in trockenen Räumen. -
Seite 20: Batterien Einlegen/Wechseln
4. Inbetriebnahme 4.1 Batterien einlegen/wechseln Warnung – Batterien • Beachten Sie unbedingt die korrekte Polarität • Schließen Sie die Batterien nicht kurz. (Beschriftung + und -) der Batterien und legen • Laden Sie Batterien nicht. Sie diese entsprechend ein. Bei Nichtbeachtung •... -
Seite 21: Montage Des Adapters
4.2 Montage des Adapters • Mittels der Überwurfmutter kann das Thermostat an allen Ventilen mit dem Gewindemaß M30 x 1,5 mm der gängigsten Hersteller wie z. B. Heimeier, MNG, Junkers, Landis+Gyr (Duodyr), Honeywell-Braukmann, Oventrop, Schlösser, Comap, Valf Sanayii, Mertik Maxitrol, Watts, Wingenroth (Wiroflex), R.B.M, Tiemme, Jaga, Siemens und Idmar montiert werden. -
Seite 22: Montage Am Heizkörperventil
Giacomini • Für die Montage des Giacomini-Adapters bitte erst den Aufsatz befestigen, dann die Stößelverlängerung auf den Ventilstift setzen und abschließend den Kolben am Thermostat befestigen. 4.3 Montage am Heizkörperventil Warnung – Montage • Wenden Sie bei der Montage keine Gewalt oder hohe Kräfte an. Dies kann Ihr Gerät beschädigen. •... -
Seite 23: Installation Der App
• Verbinden Sie das Netzteil mit einer ordnungsmäß installierten und leicht zugänglichen Netzsteckdose. • Die LEDs beginnen zu blinken. 4.5 Installation der App • Laden Sie die App „Hama Smart Solution“ mithilfe des QR-Codes herunter und installieren Sie diese. https://de.hama.com/ smarthome#smart-solution... -
Seite 24: Einbinden Von Geräten In Die Hama Smart Solution App
4.6 Einbinden von Geräten in die Hama Smart Solution App Pairing Zentrale • Um das Heizkörper-Thermostat mit der Hama Smart Solution App zu verbinden, müssen Sie zuerst die Zentrale in die Hama Smart Solution App einbinden. • Achten Sie darauf, dass die Zentrale an das Stromnetz angeschlossen ist und die LEDs blinken. - Seite 25 • Verbinden Sie nun die Heizkörper-Thermostate mit der Zentrale. • Wählen Sie hierfür in der App aus der Liste der gefundenen Geräte Ihre Zentrale. • Es wird folgender Bildschirm angezeigt: Pairing Heizkörper Thermostat • Drehen Sie den Drehregler des Heizkörper-Thermostats solange nach links, bis das Display dauerhaft „OF“...
- Seite 26 • Drücken und halten Sie den Drehregler für ca. 5 Sekunden bis die Anzeige „OF“ erlischt und „- -„ sichtbar wird. 5 sec. • Drücken Sie in der App auf „Untergerät hinzufügen“. • Bestätigen Sie mit „LED blinkt bereits“. • Im folgenden „Gerät suchen“-Bildschirm in der APP werden Ihnen nun alle Thermostate angezeigt, die die Zentrale finden konnte.
-
Seite 27: Konfiguration Der Thermostate
• Sie haben nun die Möglichkeit, Ihre Thermostate umzubenennen, wenn Sie auf das Stift-Symbol neben dem Gerätenamen drücken. • Drücken Sie auf „Fertigstellung“, um den Einbindungsprozess zu beenden. • Schieben Sie den "Aktivieren"-Button am unteren Bildschirmrand von rechts nach links, um die Steuerung des Heizthermostats freizuschalten. - Seite 28 • Drücken und halten Sie beim Heizkörper-Thermostat für ca. 5 Sekunden den Drehregler bis „- -„ auf der LED-Anzeige dargestellt wird. Achten Sie darauf, dass das Thermostat vorher "OF" angezeigt hat. • Sie können nun - wie in Kapitel 4.6 Einbinden von Geräten in die Hama Smart Solution App beschrieben - einen weiteren Pairing-Versuch starten.
-
Seite 29: Steuerung Über Sprachassistenten
5.1 Steuerung über Sprachassistenten Es stehen folgende Sprachbefehle zur Verfügung: • An-/Ausschalten „Alexa/OK Google, schalte die Heizung an“ • Temperatur einstellen „Alexa/OK Google, stelle die Heizung auf 25 Grad“ „Alexa/OK Google, stelle die Heizung fünf Grad wärmer“... -
Seite 30: Technische Daten
6. Technische Daten Stromversorgung Zentraleinheit 5V 1A Stromversorgung Heizkörper-Thermostat 2x AA Batterien Anschluss Heizkörper-Thermostat M30 x 1,5... -
Seite 31: Haftungsausschluss
Reinigen Sie dieses Produkt nur mit einem fusselfreien, leicht feuchten Tuch und verwenden Sie keine aggressiven Reiniger. 8. Haftungsausschluss Die Hama GmbH & Co KG übernimmt keinerlei Haftung oder Gewährleistung für Schäden, die aus unsachgemäßer Installation, Montage und unsachgemäßem Gebrauch des Produktes oder einer Nichtbeachtung der Bedienungsanleitung und/oder der Sicherheitshinweise resultieren.