Inhaltsverzeichnis
Werbung
Verfügbare Sprachen
Verfügbare Sprachen
Quicklinks
Werbung
Kapitel
Inhaltsverzeichnis
Fehlerbehebung

Inhaltszusammenfassung für Audiotec Fischer CONDUCTOR
- Seite 1 CONDUCTOR ACO Remote Control Benutzerhandbuch User manual Status: March 2021...
-
Seite 2: Inhaltsverzeichnis
4.1.4 LED brightness (LED-Helligkeit) ......................12 4.1.5 LED Dimming (LED-Dimmung) ......................12 4.1.6 Installation orientation (Anpassung an die Einbauposition) ..............12 4.2 Volume Control Configuration (Konfiguration der Lautstärkeregelungen) ..........13 4.2.1 Lautstärkenauswahl ..........................13 4.2.2 Assigned Volume control (Lautstärkezuweisung) ................13 4.2.3 Assigned color (Farbzuweisung) ......................13 4.2.4 Volume control range (Lautstärkeregelbereich) ...................13 4.2.5 Startup Volume (Einschalt-Lautstärke) ....................13 4.3 CONDUCTOR Status ............................14 4.4 CONDUCTOR Einstellungen speichern und laden ..................14 5. Standard-Konfiguration ......................15 6. Problembehandlung ........................16 7. Technische Daten ........................18... - Seite 3 Sehr geehrter Kunde, Wir gratulieren Ihnen zum Kauf dieser hochwertigen Bedieneinheit mit RGB-LED Feedback. Der CONDUCTOR wurde von uns nach neuesten technischen Erkenntnissen entwickelt und zeichnet sich durch eine hervorragende Verarbeitung und eine überzeugende Anwendung ausgereifter Technologien aus. Viel Freude an diesem Produkt wünscht Ihnen das...
-
Seite 4: Allgemeine Hinweise
Wir empfehlen, die Installation von einem Einbauspezialisten vornehmen zu lassen, da der Nachweis eines fachge- rechten Einbaus und Anschlusses des Gerätes Voraussetzung für die Garantieleistungen sind. Installieren Sie Ihren CONDUCTOR an einer trockenen Stelle im Auto. Montieren Sie das Gerät nicht in der Nähe von wärmeabstrahlenden Teilen oder elektronischen Steuerungen des Fahrzeuges. -
Seite 5: Einbauhinweise & Installation
Aluminium Knopf in der Mitte am CONDUCTORs, sondern aus- schließlich auf dessen umliegendes Kunststoff-Gehäuse. Um den CONDUCTOR auszurichten, orientieren Sie sich an der 12 Uhr Mar- kierung auf dem Gehäuse (siehe vierte Abbildung links). Sollte es aufgrund der Einbausituation nicht möglich sein den CONDUCTOR in der 12-Uhr Position einzubauen, kann dieser auch in 30°-Schritten ge-... -
Seite 6: Anschluss Des Conductors An Einen Dsp / Dsp-Verstärker
2. Einbauhinweise & Installation 2.2 Anschluss des CONDUCTORs an einen DSP / DSP-Verstärker 1. Stecken Sie den Rundstecker des CONDUCTOR Verbindungskabels in den Multifunktionsanschluß (Control Input) des DSPs / DSP-Verstärkers. Sollte Ihr DSP / DSP-Verstärker schon mit dem neuen Smart Control Port (SCP) ausgestattet sein, verwenden Sie bitte den NanoFit Adapter, welcher dem DSP / DSP-Verstärker mit SCP-Anschluss beiliegt. -
Seite 7: Bedienung Des Conductors
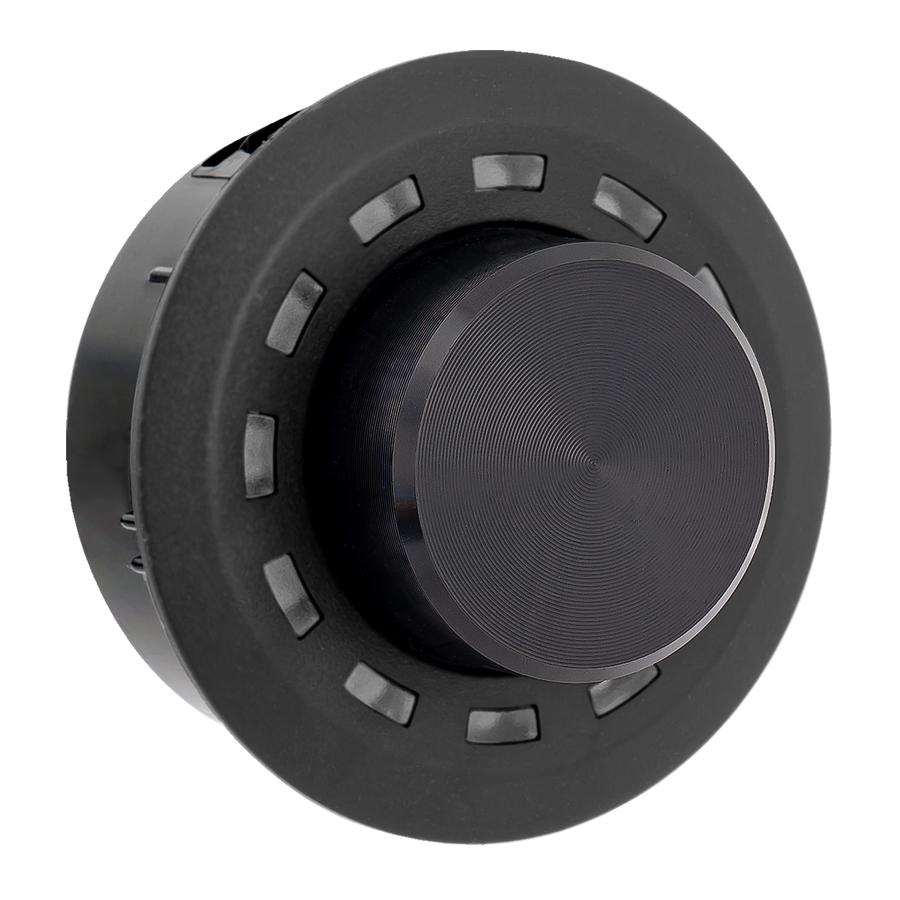
3. Bedienung des CONDUCTORs Die Bedienung des CONDUCTORs erfolgt durch Drehen und Drücken des Drehreglers. Die LED-Beleuchtung gibt da- bei Feedback zum ausgewählten Menü und der durchgeführten Aktion. RGB-LED Drehregler Die verschiedenen Menüs können durch einen kurzen Tastendruck gewechselt werden. Die Regelung der jeweiligen Lautstärke, bzw. - Seite 8 3. Bedienung des CONDUCTORs Volume 1 Drehen: Lautstärke regeln Lang drücken: Mute / Demute 2 x kurz drücken: Nächster Titel* 3 x kurz drücken: Vorheriger Titel* Extra lang drücken (5 Sek.): Bluetooth Pairing starten* 1 x kurz drücken Volume 2 Drehen: Lautstärke regeln Lang drücken: Mute / Demute 2 x kurz drücken: Nächster Titel*...
-
Seite 9: Volume Control Configuration (Lautstärkemenü 1 - 4)
Digital Input HEC1 HEC2 Hinweis: Der CONDUCTOR erkennt die Signaleingänge des angeschlossenen DSP / DSP-Verstärkers automatisch. Es können ausschließlich die vorhandenen Signaleingänge angewählt werden. Alle anderen Eingänge werden nicht per LED-Feedback angezeigt und sind auch nicht anwählbar. * Nur bei Geräten mit optional verbauter Extension Card BT... -
Seite 10: Sound Setup Selection Menu (Sound Setup-Auswahlmenü)
Sound Setup Speicherplatz belegt, Setup inaktiv Rot: Sound Setup Speicherplatz leer, kann nicht ausgewählt werden Mit dem CONDUCTOR können die 10 Sound Setup Speicherplätze des DSPs angewählt und aktiviert werden. Die Speicherplätze werden wie folgt angezeigt: Beispiele für das LED-Feedback im „Sound Setup selection“ Menü: Sound Setup Nr. -
Seite 11: Konfiguration In Der Dsp Pc-Tool Software
Übersicht Konfigurationsmenü Das Konfigurationsmenü befindet sich im „Device Configuration Menu“ (DCM) der DSP PC-Tool Software im Reiter „Erweiterte Funktionen“. Das Menü ist jedoch nur sichtbar, wenn Sie den CONDUCTOR wie auf Seite 6 beschrieben angewählt haben. Im Konfigurationsmenü werden sämtliche Einstellungen des CONDUCTORs vorgenommen. -
Seite 12: General Configuration (Allgemeine Konfiguration)
Control-Menü. 4.1.2 Automatic switch back to Main menu (Automatische Umschaltung zum Hauptmenü) Ist die Funktion aktiviert (Enabled after 5 seconds inactivity) schaltet der CONDUCTOR nach ca. 5 Sekunden auf das eingestellte „Main menu“ zurück, sofern zuvor ein anderes Menü angewählt wurde. Ist die Funktion aus- geschaltet (Disabled) bleibt das derzeit angewählte Menü so lange ausgewählt, bis dieses durch einen kurzen Tastendruck manuell gewechselt wird. -
Seite 13: Volume Control Configuration (Konfiguration Der Lautstärkeregelungen)
4.2 Volume Control Configuration (Konfiguration der Lautstärkeregelungen) In diesem Bereich können bis zu vier auswählbare Lautstärken individuell konfiguriert werden. Wird eine Lautstärke nicht benötigt, kann diese auch deaktivert werden. Hinweis: Werden alle vier Lautstärken ausgeschaltet (Disabled) ist das gesamte „Volume Control“-Menü deaktiviert. 4.2.1 Lautstärkenauswahl Hier kann die Lautstärke ausgewählt werden, welche konfiguriert werden soll. Das rote Kreuz zeigt an, welche der vier Lautstärken konfiguriert wird. -
Seite 14: Conductor Status
Hier können alle wichtigen Status-Informationen des CONDUCTORs abgelesen werden. CONDUCTOR communication protocol version: Zeigt die aktuelle Version des Kommunikationsprotokolls an. CONDUCTOR firmware version: Zeigt die aktuelle Firmware-Version des CONDUCTORs an. Die Firmware wird auto- matisch beim Öffnen der DSP PC-Tool Software auf den aktuellsten Stand gebracht. -
Seite 15: Standard-Konfiguration
5. Standard-Konfiguration Im Auslieferungszustand sind folgende Optionen konfiguriert: • Main menu: Volume Control → Der CONDUCTOR startet immer mit ausgewählter Master Volume. • Automatic switch back to Main menu: Enabled → Der CONDCUTOR schaltet nach 5 Sekunden Inaktivität automa- tisch wieder auf das Master Volume Menü zurück. -
Seite 16: Problembehandlung
DSP PC-Tool Software. Das ACO Update wird anschließend automatisch gestartet. Fehlercode 4: Ursache: Der CONDUCTOR ist im DSP / DSP-Verstärker nicht aktiviert. Problemlösung: Aktivieren Sie den CONDUCTOR wie auf Seite 6 im Kapitel 2.2 „Anschluss des CONDUCTORs an einen DSP / DSP Verstärker“ beschrieben. -
Seite 17: Problem: Led-Beleuchtung Geht Aus
6. Problembehandlung Fehlercode 5: Ursache: Es sind vermehrt Übertragungsfehler zwischen dem CONDUCTOR und der ACO-Plattform des DSP / DSP-Verstärkers aufgetreten. Problemlösung: Überprüfen Sie das Kabel auf Beschädigungen und die Steckverbinder auf einen festen Sitz. Fehlercode 8: Ursache: Ein unbekannter Fehler ist aufgetreten. -
Seite 18: Technische Daten
CE-Kennzeichnung versehen. Damit ist das Gerät für den Betrieb in Fahrzeugen innerhalb der Europäischen Union (EU) zertifiziert. Hinweis „Die Bluetooth Wortmarke und die Logos sind eingetragene Warenzeichen der Bluetooth SIG, Inc. und jegliche Nutzung dieser Marken durch die ® Audiotec Fischer GmbH geschieht unter Lizenz. Andere Handelsmarken und Handelsnamen gehören den jeweiligen Inhabern.“... - Seite 19 Table of contents 1. General information ........................21 2. Installation instructions......................22 2.1 Assembling the CONDUCTOR .........................22 2.2 Connecting the CONDUCTOR to a DSP / DSP amplifier ................23 3. Operating the CONDUCTOR ......................24 3.1 Volume Control configuration (Volume menu 1 - 4) ..................26 3.2 Signal Input selection menu ..........................26 3.3 Sound Setup selection menu ...........................27 3.4 Bluetooth Playback Control menu ........................27 4. Configuration in the DSP PC-Tool software ................28 4.1 General configuration ............................29 4.1.1 Main menu..............................29 4.1.2 Automatic switch back to main menu ....................29...
- Seite 20 Dear Customer, Congratulations on purchasing this high-quality control unit with RGB-LED feedback. We developed the CONDUCTOR based on state-of-the-art engineering and this is reflected in its exceptional quality and the impressive use of sophisticated technologies. We hope you enjoy using this product...
-
Seite 21: General Information
We recommend appointing a specialist to install the product, as the verification of professional installation and connec- tion of the device is a prerequisite for the warranty services. Install your CONDUCTOR in a dry place in the car. Do not fit the device near parts that radiate heat or near the vehicle’s electronic control units. -
Seite 22: Installation Instructions
To ensure a safe and professional assembly, the cutout must not be more than 40 mm in size. Please make sure that the space between the CONDUCTOR and other parts, such as switches, control elements, etc., is adequate with a sufficient installation depth. -
Seite 23: Connecting The Conductor To A Dsp / Dsp Amplifier
4. You can now change other CONDUCTOR settings. More information on the configuration is provided on page 28 et seq., “Configuration in the DSP PC-Tool software”. 5. To complete the process, save the settings and the activation of the CONDUCTOR in the DSP / DSP amplifier by clicking on the “Save” button in the DSP PC-Tool. -
Seite 24: Operating The Conductor
3. Operating the CONDUCTOR The CONDUCTOR is operated by turning and pushing the knob. The LED lighting provides feedback on the selected menu and the action performed. RGB LED Knob You can switch between the various menus by briefly pressing the button. The volume and the available menu options are selected by turning the knob. - Seite 25 Volume 1 Turn: Adjust volume Long press: Mute / demute Double-press: Next track* Triple-press: Previous track* Extra-long press (5 sec.): Start Bluetooth pairing* Short press 1x Volume 2 Turn: Adjust volume Long press: Mute / demute Double-press: Next track* Triple-press: Previous track* Extra-long press (5 sec.): Start Bluetooth pairing* Short press 1x Volume 3...
-
Seite 26: Volume Control Configuration (Volume Menu 1 - 4)
HEC2 Note: The CONDUCTOR automatically detects the signal inputs of the connected DSP / DSP amplifier. Only the avail- able signal inputs can be selected. All other inputs are not displayed by LED feedback and can also not be selected. -
Seite 27: Sound Setup Selection Menu
Red: Sound Setup memory space empty, cannot be selected You can use the CONDUCTOR to select and enable the DSP’s 10 Sound Setup memory spaces. The memory spaces are displayed as follows: Examples of the LED feedback in the “Sound Setup selection” menu: Sound Setup no. -
Seite 28: Configuration In The Dsp Pc-Tool Software
The configuration menu is located in the “Device Configuration Menu” (DCM) of the DSP PC-Tool software in the “Ex- tended Features” tab. But the menu is only visible if you have selected the CONDUCTOR as described on page 23. All CONDUCTOR settings are changed in the configuration menu. -
Seite 29: General Configuration
4.1.2 Automatic switch back to main menu If the function is enabled, the CONDUCTOR switches back to the set “Main menu” after around 5 seconds, if an- other menu was previously selected. If the function is disabled, the currently selected menu remains selected until it is manually changed by briefly pressing the button. -
Seite 30: Volume Control Configuration
4. Configuration in the DSP PC Tool software 4.2 Volume Control Configuration This lets you individually configure up to four selectable volumes. Any volume that is not required can also be disabled. Note: If all four volumes are disabled, the entire “Volume Control” menu is disabled. 4.2.1 Volume selection This is where the volume to be configured can be selected. The red cross indicates which of the four volumes is being configured. -
Seite 31: Conductor Status
CONDUCTOR operation status: Shows the CONDUCTOR’s operation status. 4.4 Saving and loading CONDUCTOR settings This is where the entire configuration of the CONDUCTOR can be saved as a file on the hard disk, because the settings are not stored in the .afpx file of the DSP PC-Tool. -
Seite 32: Default Configuration
• LED dimming: 50 % of LED brightness → The brightness is reduced by 50 % after 8 seconds of inactivity. • Installation orientation: 0 ° rotation → The rotation is set to off by default, so the conductor’s locking notch is in the 12 o’clock position. -
Seite 33: Troubleshooting
Problem: CONDUCTOR is displaying an error code If a problem occurs when establishing a connection, the CONDUCTOR displays various error codes. Error code 1: Cause: The connected device is not supported. The CONDUCTOR is only compatible with devices that are equipped with the ACO platform. Error code 2: Cause: The CONDUCTOR software is not current and requires an update. -
Seite 34: Problem: No Sound
Problem: No connection with compatible device possible Possible cause: Transmission problem to the DSP; incompatible software versions. Solution: Check the tight fit of the CONDUCTOR plug connector; update the CONDUCTOR and ACO software with the current DSP PC-Tool. -
Seite 35: Technical Data
Note “The Bluetooth word mark and the logos are registered trademarks of Bluetooth SIG, Inc. and any use of these trademarks by Audiotec Fischer ® GmbH takes place under licence. Other trademarks and trade names are the property of the respective owners.”... - Seite 36 Audiotec Fischer GmbH Hünegräben 26 · 57392 Schmallenberg ·Germany Tel.: +49 2972 9788 0 · Fax: +49 2972 9788 88 E-mail: contact@audiotec-fischer.com · Internet: www.audiotec-fischer.com...