Viessmann Plasser & Theurer 09-3X Bedienungsanleitung
Vorschau ausblenden
Andere Handbücher für Plasser & Theurer 09-3X:
- Bedienungsanleitung (22 Seiten) ,
- Bedienungsanleitung (24 Seiten) ,
- Bedienungsanleitung (25 Seiten)
Inhaltsverzeichnis
Werbung
Quicklinks
Bedienungsanleitung
Operation Manual
Schienen-Stopfexpress
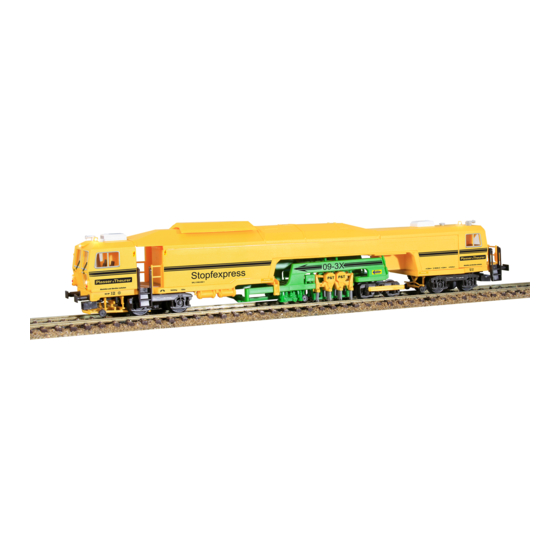
Plasser & Theurer 09-3X
Tamping machine
Plasser & Theurer 09-3X
1.
Wichtige Hinweise / Important information ................................................
2.
Transport und Verpackung / Transport and packaging ..............................
3.
Einleitung / Introduction .............................................................................
4.
Betrieb / Operation ....................................................................................
5.
Konfiguration des Decoders / Configuration of the decoder ......................
6.
Wartung / Maintenance ..............................................................................
7.
Vorbild / Prototype .....................................................................................
8.
Fehlersuche und Abhilfe / Trouble-shooting ..............................................
9.
Ersatzteile / Spare parts ............................................................................
10. Gewährleistung / Warranty ........................................................................
11. Technische Daten / Technical data ............................................................
RAIL
motion
2
3
5
5
12
17
20
21
21
22
22
DCC
MM
DC
=
◄►
Rail
Com
NEM
Innovation,
die bewegt!
Werbung
Inhaltsverzeichnis

Verwandte Anleitungen für Viessmann Plasser & Theurer 09-3X


Inhaltszusammenfassung für Viessmann Plasser & Theurer 09-3X
-
Seite 1: Inhaltsverzeichnis
Bedienungsanleitung Operation Manual Schienen-Stopfexpress RAIL Plasser & Theurer 09-3X motion Tamping machine Plasser & Theurer 09-3X Wichtige Hinweise / Important information ..........Transport und Verpackung / Transport and packaging ......Einleitung / Introduction ................Betrieb / Operation ..................Konfiguration des Decoders / Configuration of the decoder ...... Wartung / Maintenance ................ -
Seite 2: Wichtige Hinweise / Important Information
DCC and/or Märklin Motorola (MM) such as the Formate DCC und/oder Märklin Motorola (MM), Viessmann Commander, items 5300, 5320. z. B. dem Viessmann Commander, Art. 5300, - For operation in dry rooms only. 5320. Using the product for any other purpose is not ap- - Zum Betrieb in trockenen Räumen. -
Seite 3: Lieferumfang
1.3 Lieferumfang 1.3 Checking the package contents Kontrollieren Sie den Lieferumfang auf Vollstän- Check the contents of the package for completeness: digkeit: - Modell Stopfexpress - Model of the tamping machine - Beutel mit Zurüst- und Ersatzteilen - Bag containing accessories and spare parts Manual - Anleitung Abb. -
Seite 4: Fahrzeug In Originalverpackung Verpacken
2.2 Fahrzeug in Originalverpackung 2.2 Insert the vehicle in the original verpacken packaging Vorsicht: Caution: Zerstörungsrisiko! Risk of damage! Die Stopfeinheit am Aggregatrahmen muss sich In order to be able to insert the train into the in einer speziellen Parkposition befinden, damit styrofoam base of the packaging, the tamping der Zug korrekt in den Styroporeinleger der Ver- unit on the aggregate frame must be in a spe-... -
Seite 5: Fahrzeug Anheben/Tragen
2.3 Fahrzeug anheben/tragen 2.3 Lifting and carrying the vehicle Fassen Sie den Stopfexpress stets am Gehäuse Always hold the tamping machine at the housing an. Benutzen Sie stets beide Hände zum Anheben and use both hands for lifting and carrying the train. und Tragen des Zuges. -
Seite 6: Funktionstastenbelegung Die Zusatzfunktionen Sind Den Funktionstasten
4.1 Funktionsumfang 4.1 Available functions Sämtliche digital schaltbaren Funktionen des All digitally controlled functions of the tamping ma- Stopfexpress entnehmen Sie bitte der Tabelle chine are shown in the table at page 7. The tamp- auf Seite 7. Der Stopfexpress verfügt über ing machine is equipped with the following func- folgende Ausstattung: tions:... -
Seite 7: Aufgleisen
Analog Erläuterungen Taste Funktion Explanations Button Function Analogue Spitzenlicht/Schlusslicht / Spitzen- und Schlusslicht sind nur Front and rear lights can only be gemeinsam schaltbar. Front-/rear lights switched together. Soundmodul an/aus Im Stillstand sind bei Betätigen der When the tamping machine stops by Sound module on/off Taste Start- bzw. - Seite 8 Hinweis: Hint: Beim Start des Stopfexpresses bzw. beim Verlassen When starting or exiting the operation mode the des Arbeitsmodus fährt die Schlitteneinheit in ihre sliding carriage moves into its running mode Fahrmodus-Position. Dieser Vorgang dauert ca. 2 position. This process takes ca. 2 seconds. Dur- Sekunden.
-
Seite 9: Working Mode
4.7 Arbeitsmodus 4.7 Working mode Stopfbetrieb mit laufender Stopfeinheit ist aus- Tamping is only possible in direction of working. schließlich in Arbeitsrichtung möglich. Die Arbeits- Direction is shown accordingly by an arrow on the richtung ist mit einem Pfeil am Fahrzeug gekenn- vehicle. - Seite 10 4.9 Analogbetrieb 4.9 Analogue operation Achtung: Attention: Verwenden Sie für den Analogbetrieb ausschließ- Only use adjustable model train transformers lich regelbare Modelleisenbahntrafos. Der Betrieb (throttles) for analogue operation. Analogue throt- mit Analog-Fahrreglern mit Pulsweitenansteue- tles with pulse width modulation (PWM) are not rung (PWM) ist nicht möglich und kann zu Fehl- suitable and may lead to incorrect functionality.
- Seite 11 jedoch nicht die Fahrtrichtung. Beim erneuten direction of travel. When turning the throttle again Starten befindet er sich regulär im Fahrmodus the train will be in running mode until the working vorwärts, bis der Arbeitsmodus erneut aufgerufen mode is activated again (as described above). wird (s.
-
Seite 12: Konfiguration Des Decoders / Configuration Of The Decoder
5. Konfiguration des Decoders 5. Configuration of the decoder Die Konfiguration des Decoders erfolgt über Kon- The decoder is configured by means of the con- figurationsvariablen (CVs). Bei DCC ist die Haupt- figuration variables (CVs). In DCC mode program- gleisprogrammierung (POM) ebenfalls möglich. ming on the main (POM) is also possible. - Seite 13 1. Wählen Sie ein Register zum Programmieren 1. Select a register that you want to program by aus, indem Sie die Nummer des Registers als entering the number of the register as a Motorola Motorola-Lokadresse an Ihrer Zentrale eingeben. locomotive address on your command station. Beachten Sie, dass bei manchen Zentralen eine Please note that with some command stations führende 0 eingegeben werden muss.
-
Seite 14: Konfigurationsvariablen (Cv)
Der Decoder blinkt nun einmal lang, gefolgt von The decoder blinks only one time followed by a einer langen Pause. Auch dieser Rhythmus wieder- long pause. This rhythm is repeated continuous- holt sich kontinuierlich. Der Decoder erwartet jetzt ly. The decoder now requires the input for the unit die Einerstelle des Registers. - Seite 15 CV-Nr. Eingabewerte Erläuterungen Name der CV Explanations (Default) Name of CV CV-No. Value range Versionsnummer / Nur lesbar / Read only! / Motorola (erweiterte Programmierung). Version number Motorola (extended programming): Schreiben von Wert 8 ermöglicht erweiterte Writing of value 8 allows extended Programmierung unter Motorola.
- Seite 16 CV-Nr. Eingabewerte Erläuterungen Name der CV Explanations (Default) Name of CV CV-No. Value range Multiprotokoll / 0 ... 100 (50) Wenn der Stopfexpress nicht mehr unter If the tamping machine is no longer seinem bisherigen Protokoll adressiert Multi protocol addressed in its current digital protocol wird, dann versucht er das alternative for a time period, it tries the alternative, Protokoll.
-
Seite 17: Lautstärke Manuell Einstellen
5.5 Lautstärke manuell einstellen 5.5 Adjusting the volume manually Im Digitalbetrieb erfolgt die Lautstärkeeinstellung In digital mode the volume is adjusted by setting über die CV 63 (vgl. Tabelle oben). Im Analogbetrieb CV 63 (compare with table above). In analogue erfolgt die Lautstärkeeinstellung über ein Potenzio- mode the volume is adjusted with a potentiome- meter, welches im Dachbereich untergebracht ist. - Seite 18 1. Zug mit dem Dach nach unten auf eine weiche 1. Place the train with the roof down on a soft base. Unterlage legen. 2. Remove the black cover of the gear box by grab- 2. Schwarze Getriebekastenabdeckung mit spitzen bing it with your finger tips between the axles and Fingern zwischen den Achsen greifen und senk- pull it vertically upwards.
-
Seite 19: Mechanische Überprüfung
6.2 Mechanische Überprüfung 6.2 Mechanical check Kontrollieren Sie die Gängigkeit von Stopfeinrich- Check the free running of the tamping unit and the sled. tung und Schlitteneinheit. Alle Teile der Stopfme- All parts of the tamping mechanism (aggregate chanik (Aggregatrahmen und Stopfeinheit) müssen frame and tamping unit) must be able to freely freigängig seitlich pendeln können. -
Seite 20: Vorbild / Prototype
Abb. 6 Abb. 7 Fig. 6 Fig. 7 Ansicht von unten bottom view Abb. 8 Fig. 8 7. Vorbild 7. Prototype Der Schienenstopfexpress 09-3X des österrei- There are more than 600 units of the tamping chischen Bahntechnikunternehmens Plasser & machine “Schienenstopfexpress 09-3X“ by the Theurer ist weltweit mit mehr als 600 Exemplaren Austrian company Plasser &... -
Seite 21: Fehlersuche Und Abhilfe / Trouble-Shooting
Stopfexpress (im Suchfeld Artikelnummer einge- Please also use this list for ordering spare parts. ben). Bitte verwenden Sie diese Liste auch für Ihre Please order spare parts directly from Viessmann Ersatzteilbestellung. Modelltechnik GmbH or hand over the completed Ersatzteile bestellen Sie bitte direkt bei Viessmann spare parts list to your dealer. -
Seite 22: Gewährleistung / Warranty
(service@viessmann-modell.com). viessmann-modell.com). Senden Sie uns den Artikel Please send the item to the Viessmann service de- zur Kontrolle bzw. Reparatur bitte erst nach Rück- partment for check and repair only after consulta- sprache zu. Wird nach Überprüfung des Artikels ein tion. - Seite 23 Die aktuelle Version der Anleitung finden Sie auf You will find the latest version of the manual on the der Viessmann Homepage unter der Artikelnummer. Viessmann website using the item number. Modellbauartikel, kein Spielzeug! Nicht geeignet für...
- Seite 24 Notizen Notes...