Herunterladen Inhalt Inhalt Diese Seite drucken
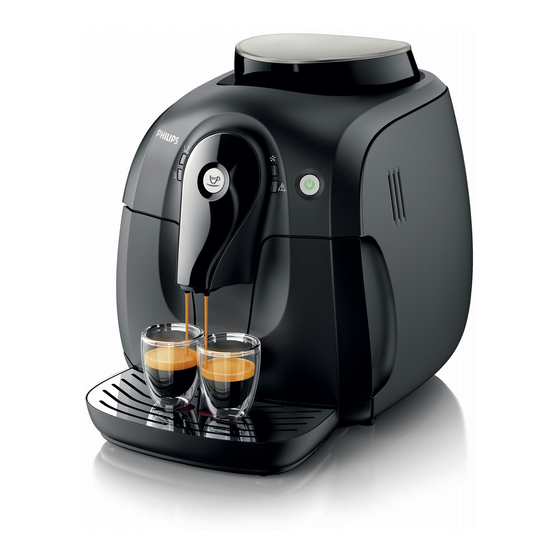
Philips HD8650 Benutzerhandbuch
Vorschau ausblenden Andere Handbücher für HD8650:
Inhaltsverzeichnis

Werbung

Verfügbare Sprachen

Verfügbare Sprachen

Always here to help you
Register your product and get support at
www.philips.com/welcome
HD8650

Werbung

Inhaltsverzeichnis
loading

Inhaltszusammenfassung für Philips HD8650

  • Seite 1 Always here to help you Register your product and get support at www.philips.com/welcome HD8650...
  • Seite 5 ENGLISH 6 DEUTSCH 28 ITALIANO 50...
  • Seite 6: Inhaltsverzeichnis

    Introduction Congratulations on buying this fully automatic Philips espresso machine! To fully beneit from the support that Philips offers, please register your product at www.philips.com/welcome. The machine is suitable for preparing espresso coffee using whole coffee beans. In this user manual you...
  • Seite 7: General Description

    Do not use the machine if the plug, the mains cord or the machine itself is damaged. If the mains cord is damaged, you must have it replaced by Philips, a service centre authorised by Philips or similarly qualiied persons in...
  • Seite 8: Caution

    ENGLISH Caution Always return the machine to a service centre authorised by Philips for examination or repair. Do not attempt to repair the machine yourself, otherwise your guarantee becomes invalid. Always put the machine on a lat and stable surface. Keep it in upright position, also during transport.
  • Seite 9: Preparing For Use

    ENGLISH Insert the plug into the wall socket. Remove the protective sticker from the drip tray and slide the drip tray into the guiding grooves in the front of the machine. Note: Make sure the drip tray is fully inserted. Preparing for use Filling the water tank Remove the water tank from the machine.
  • Seite 10: Heating Up The Machine

    ENGLISH Put the lid on the coffee bean container. Heating up the machine During the initial heat-up process, fresh water lows through the internal circuit to heat up the machine. This takes a few seconds. Place a bowl under the coffee spout. Press the on/off button.
  • Seite 11: Automatic Rinsing Cycle

    ENGLISH , The on/off button lashes slowly and the warning light goes out. After a few seconds hot water stops coming out of the coffee spout. The machine is heating up. Automatic rinsing cycle When the machine has heated up, it performs an automatic rinsing cycle to clean the internal circuit with fresh water.
  • Seite 12: Installing The Intenza+ Water Ilter

    ENGLISH Installing the Intenza+ water ilter We advise you to install the Intenza+ water ilter as this prevents scale build-up in your machine. You can buy the Intenza+ water ilter separately. For more details, see chapter ‘Guarantee and support’, section ‘Ordering maintenance products’.
  • Seite 13: Brewing Coffee

    ENGLISH Brewing coffee Make sure the on/off button lights up green continuously. Place 1 or 2 cups on the drip tray cover. Press the coffee button. Note: You can interrupt the brewing cycle at any time by pressing the coffee button.
  • Seite 14: Adjusting The Coffee Volume

    ENGLISH Press the grinding degree adjustment knob irmly (1) and then turn it one notch at a time (2). There are 5 different grinding degree settings you can choose from. The smaller the dot, the stronger the coffee. The difference becomes noticeable after you have brewed 2-3 cups of coffee at the new setting.
  • Seite 15: Cleaning And Maintenance

    ENGLISH Cleaning and maintenance Regular cleaning and descaling prolongs the lifetime of your machine and ensures optimum quality and taste of your coffee. Do not immerse the machine in water or any other liquid. Never use scouring pads, abrasive cleaning agents or aggressive liquids to clean the machine.
  • Seite 16 ENGLISH Clean the coffee exit duct thoroughly with a spoon handle or another round-tipped kitchen utensil. Rinse the outside of the brewing unit under a lukewarm tap and clean the upper ilter carefully. Never use any washing-up liquid or other cleaning agent to clean the brewing unit.
  • Seite 17 ENGLISH Note: You can ind the locking hook on the back of the brewing unit (the side without the word “push”), at the top of the horizontal edge. To position the hook correctly, push it upwards until it is in uppermost position.
  • Seite 18: Lubrication

    For optimal performance of the machine, lubricate the brewing unit after it has brewed 500 cups of coffee or once every 3 months. Contact the Philips Saeco hotline to buy lubricant. Switch off the machine and unplug it. Follow steps 2 to 4 in section ‘Cleaning the brewing unit’ to remove the brewing unit from the machine.
  • Seite 19: Preparation

    ENGLISH Preparation Switch off the machine. If you do not switch off the machine, you cannot enter the descaling cycle. Empty the drip tray and place it back. Empty the water tank and remove the Intenza+ water ilter (if present). Pour the entire bottle of descaling solution into the water tank.
  • Seite 20: Rinsing Cycle

    ENGLISH Rinsing cycle Remove the water tank from the machine and rinse it. Fill the water tank with fresh tap water up to the MAX indication and slide the water tank back into the machine. Empty the bowl and place it back under the coffee spout. Note: The orange descaling light lashes twice continuously.
  • Seite 21: If You Are Unable To Inish The Descaling Cycle

    ENGLISH When the on/off button light lights up continuously, remove the drip tray, rinse it and place it back. Remove the water tank and rinse it. Reinstall the Intenza+ water ilter (if present). Fill the water tank with fresh tap water up to the MAX indication and slide the water tank back into the machine.
  • Seite 22 ENGLISH The descaling light and the on/off button light up continuously. You have to descale the machine. Follow the instructions in chapter ‘Descaling the machine’. The descaling light lashes slowly. The machine is in the descaling cycle. The descaling light lashes twice continuously. The machine is performing the rinsing cycle of the descaling procedure.
  • Seite 23 ENGLISH The ‘water tank empty’ light lights up continuously. The water level is low. Fill the water tank with fresh water up to the MAX indication. The warning light lights up continuously and the on/off button goes out. The coffee grounds container is full. Empty the coffee grounds container while the machine is on.
  • Seite 24: Recycling

    The lights lash slowly and simultaneously. The machine is out of order. Switch off the machine for 30 seconds, then switch it back on. Try this two or three times. If the machine does not reset, contact the Philips Consumer Care Centre in your country.
  • Seite 25: Troubleshooting

    This chapter summarises the most common problems you could encounter with the machine. If you are unable to solve the problem with the information below, visit www.philips.com/support for a list of frequently asked questions or contact the Philips Consumer Care Centre in your country. Problem Solution Make sure the small plug is inserted into the socket.
  • Seite 26 ENGLISH Problem Solution Use a different type of coffee beans. This is normal. To guarantee the perfect cup of coffee, the machine uses Water ends up in the drip tray. water to rinse the internal circuit and brewing unit. Some of the water lows through the internal system directly into the drip tray.
  • Seite 27: Technical Speciications

    ENGLISH Technical speciications Feature Value / location Nominal voltage Inside of maintenance door Power rating Inside of maintenance door Size (w x h x d) 295mm x 325mm x 420mm 6.9 kg Weight Housing material Plastic 0.8m -1.2m Cord length Water tank capacity 1000ml Cup size...
  • Seite 28: Einführung

    Technische Daten Einführung Herzlichen Glückwunsch zum Kauf dieses Philips Kaffeevollautomaten! Um den Support von Philips optimal nutzen zu können, registrieren Sie Ihr Produkt unter www.philips.com/welcome. Die Maschine eignet sich für die Zubereitung von Espresso mit ganzen Kaffeebohnen. In dieser Bedienungsanleitung inden Sie alle Informationen, die Sie zur...
  • Seite 29: Allgemeine Beschreibung

    DEUTSCH Allgemeine Beschreibung (Abb. 1) Bedienfeld Kaffeetaste Entkalkungsanzeige Warnanzeige 2-Tassen-Anzeige Anzeige “Wassertank leer” Ein-/Ausschalter mit Anzeige Wasserbehälter Kaffeeauslauf 10 Abdeckung für Abtropfschale 11 Anzeiger “Abtropfschale voll” 12 Abtropfschale 13 Kaffeesatzbehälter 14 Brühgruppe 15 Servicetür 16 Mahlgradregler 17 Keramikmahlwerk 18 Kaffeebohnenbehälter 19 Mahlwerksschlüssel 20 Deckel des Kaffeebohnenbehälters 21 Netzkabel...
  • Seite 30: Achtung

    Achtung Geben Sie die Maschine zur Überprüfung bzw. Reparatur stets an ein Philips Service-Center. Versuchen Sie nicht, die Maschine selbst zu reparieren, da andernfalls Ihre Garantie erlischt. Stellen Sie die Maschine immer auf eine lache und stabile Oberläche.
  • Seite 31: Für Den Gebrauch Vorbereiten

    DEUTSCH Über, hinter und auf beiden Seiten der Maschine muss ein Abstand von mindestens 15 cm gewahrt werden. Stecken Sie den kleinen Stecker in die Buchse auf der Rückseite der Maschine. Stecken Sie den Netzstecker in die Steckdose. Entfernen Sie die Schutzfolie von der Auffangschale, und schieben Sie die Auffangschale in die Rillen an der Vorderseite der Maschine.
  • Seite 32: Füllen Des Kaffeebohnenbehälters

    DEUTSCH Füllen des Kaffeebohnenbehälters Füllen Sie den Kaffeebohnenbehälter mit Espressobohnen. Verwenden Sie nur Espressobohnen. Verwenden Sie niemals gemahlenen Kaffee, ungeröstete oder karamellisierten Bohnen, da dies zu Schäden an der Maschine führen kann. Setzen Sie den Deckel auf den Kaffeebohnenbehälter. Aufheizen der Maschine Während des ersten Aufheizens ließt frisches Wasser durch den internen Kreislauf und heizt die Maschine so auf.
  • Seite 33: Automatischer Spülzyklus

    DEUTSCH Drücken Sie die Kaffeetaste. Die Maschine gibt das heiße Wasser durch den Kaffeeauslauf aus. Der Ein-/Ausschalter blinkt langsam, und die Warnanzeige erlischt. Nach ein paar Sekunden kommt kein heißes Wasser mehr aus dem Kaffeeauslauf. Die Maschine heizt sich auf. Automatischer Spülzyklus Wenn die Maschine aufgeheizt ist, wird automatisch ein Spülzyklus zum Reinigen des internen Kreislaufs mit frischem Wasser durchgeführt.
  • Seite 34: Einsetzen Des Intenza+ Wasserilters

    DEUTSCH Wenn der Ein-/Ausschalter dauerhaft leuchtet, ist die Maschine betriebsbereit. Hinweis: Der automatische Spülvorgang erfolgt ebenfalls 15 Minuten nachdem die Maschine in den Standby-Modus gewechselt ist oder sich vollständig ausgeschaltet hat. Hinweis: Die ersten Tassen Kaffee sind möglicherweise etwas wässrig. Dies ist normal.
  • Seite 35: Die Maschine Verwenden

    DEUTSCH Die Maschine verwenden Für garantiert perfekten Kaffee spült die Maschine regelmäßig ihren internen Kreislauf mit Wasser. Dieser automatische Spülvorgang erfolgt 15 Minuten, nachdem die Maschine in den Standby-Modus gewechselt oder sich vollständig ausgeschaltet hat. Während des automatischen Spülzyklus ließt etwas Wasser durch den internen Kreislauf direkt in die Abtropfschale.
  • Seite 36: Anpassen Des Mahlgrads

    DEUTSCH Anpassen des Mahlgrads Sie können den Mahlgrad der Maschine anpassen. Das Mahlwerk aus Keramik garantiert gleichmäßiges und perfektes Mahlen für jede Tasse Kaffee. Das ganze Aroma wird bewahrt, sodass jede Tasse perfekt schmeckt. Drücken Sie den Mahlgradregler fest (1), und drehen Sie ihn dann schrittweise (2).
  • Seite 37: Reinigung Und Wartung

    DEUTSCH Reinigung und Wartung Regelmäßiges Reinigen und Entkalken verlängern die Lebensdauer Ihrer Maschine und garantieren eine optimale Qualität und optimalen Geschmack Ihres Kaffees. Tauchen Sie die Maschine nicht in Wasser oder andere Flüssigkeiten. Benutzen Sie zum Reinigen der Maschine keine Scheuerschwämme und -mittel oder aggressive Flüssigkeiten.
  • Seite 38 DEUTSCH Reinigen Sie den Kaffeeauswurfschacht gründlich mit einem Löffelgriff oder einem anderen runden Küchenutensil. Spülen Sie die Außenseite der Brüheinheit unter lauwarmem, ließendem Wasser ab, und reinigen Sie den oberen Filter sorgfältig. Verwenden Sie zum Reinigen der Brühgruppe keine Geschirrspülmittel oder andere Reinigungsmittel.
  • Seite 39 DEUTSCH Hinweis: Sie inden den Verriegelungshaken an der Rückseite der Brühgruppe (auf der Seite ohne das Wort “push“), oben am waagerechten Rand. Um den Haken in die richtige Position zu bringen, schieben Sie ihn so weit wie möglich nach oben. Hinweis: Der Haken ist nicht richtig positioniert, wenn er noch in der untersten Position ist.
  • Seite 40: Schmierung

    Schmieren Sie die Brühgruppe nach 500 Tassen gebrühtem Kaffee oder alle 3 Monate, um die optimale Leistung der Maschine zu erhalten. Wenden Sie sich an die Philips Saeco Hotline, um Schmiermittel zu erwerben. Schalten Sie die Maschine aus, und ziehen Sie den Netzstecker aus der Steckdose.
  • Seite 41: Vorbereitung

    DEUTSCH Vorbereitung Schalten Sie die Maschine aus. Wenn Sie die Kaffeemaschine nicht ausschalten, können Sie den Entkalkungsvorgang nicht starten. Entleeren Sie die Auffangschale, und setzen Sie sie wieder ein. Leeren Sie den Wasserbehälter, und entnehmen Sie den Intenza+ Wasserilter (falls vorhanden). Geben Sie die ganze Flasche Entkalkungslösung in den Wasserbehälter.
  • Seite 42: Durchspülzyklus

    DEUTSCH Durchspülzyklus Entnehmen Sie den Wasserbehälter aus der Maschine, und spülen Sie ihn aus. Füllen Sie den Wasserbehälter bis zur Markierung MAX mit frischem Leitungswasser, und schieben Sie den Wasserbehälter wieder in die Maschine. Leeren Sie die Schüssel, und setzen Sie sie erneut unter den Kaffeeauslauf.
  • Seite 43: Wenn Sie Den Entkalkungsvorgang Nicht Beenden Können

    DEUTSCH Wenn der Ein-/Ausschalter dauerhaft leuchtet, entfernen Sie die Abtropfschale, spülen Sie sie aus, und setzen Sie sie wieder ein. Entfernen Sie den Wasserbehälter, und spülen Sie ihn aus. Setzen Sie den Intenza+ Wasserilter wieder ein (falls vorhanden). Füllen Sie den Wasserbehälter bis zur Markierung MAX mit frischem Leitungswasser, und schieben Sie den Wasserbehälter wieder in die Maschine.
  • Seite 44 DEUTSCH Die Entkalkungsanzeige und der Ein-/Ausschalter leuchten kontinuierlich. Die Maschine muss entkalkt werden. Befolgen Sie die Anweisungen im Kapitel “Entkalken der Maschine”. Die Entkalkungsanzeige blinkt langsam. Die Maschine beindet sich im Entkalkungszyklus. Die Entkalkungsanzeige blinkt zweimal kontinuierlich. Die Maschine führt den Spülzyklus des Entkalkungsvorgangs durch. Die 2-Tassen-Anzeige und der Ein-/Ausschalter blinken langsam.
  • Seite 45 DEUTSCH Die Anzeige “Wassertank leer” leuchtet kontinuierlich. Der Wasserstand ist niedrig. Füllen Sie den Wasserbehälter bis zur Markierung MAX mit frischem Wasser. Die Warnanzeige leuchtet ununterbrochen, und der Ein-/Ausschalter erlischt. Der Satzbehälter ist voll. Leeren Sie den Satzbehälter, während die Maschine eingeschaltet ist. Stellen Sie sicher, dass die Warnanzeige blinkt, bevor Sie den Satzbehälter wieder einführen.
  • Seite 46: Recycling

    Für Unterstützung und weitere Informationen besuchen Sie die Philips Website unter www.philips.com/support, oder lesen Sie die internationale Garantieschrift. Um Ersatzteile zu kaufen, gehen Sie auf www.shop.philips.com/service oder zu Ihrem Philips Händler. Sie können auch ein Philips Service-Center in Ihrem Land kontaktieren. Bestellen von Wartungsprodukten Intenza+ Wasserilter (CA6702) Schmiermittel (HD5061) Entkalkungslösung (CA6700)
  • Seite 47: Fehlerbehebung

    Ihrer Maschine auftreten können. Sollten Sie ein Problem mithilfe der nachstehenden Informationen nicht beheben können, besuchen Sie unsere Website unter www.philips.com/support für eine Liste mit häuig gestellten Fragen, oder wenden Sie sich an das Philips Service-Center in Ihrem Land. Problem Lösung...
  • Seite 48 DEUTSCH Problem Lösung Der Kaffee ist zu Wählen Sie eine feinere Einstellung für das Mahlwerk aus Keramik (siehe schwach (siehe Kapitel “Verwenden der Maschine”, Abschnitt “Anpassen des Mahlgrads”). Hinweis). Brühen Sie einige Tassen Kaffee, damit die Maschine sich an die neuen Mahlgradeinstellungen anpassen kann.
  • Seite 49: Technische Daten

    DEUTSCH Technische Daten Funktion Wert/Standort Nennspannung Im Inneren der Servicetür Nennleistung Im Inneren der Servicetür Größe (B x H x T) 295 mm x 325 mm x 420 mm 6,9 kg Gewicht Gehäusematerial Kunststoff Kabellänge 0,8 m bis 1,2 m Fassungsvermögen des Wasserbehälters 1.000 ml Tassengröße...
  • Seite 50: Introduzione

    Congratulazioni per l’acquisto di questa macchina per caffè espresso completamente automatica Philips! Per trarre il massimo vantaggio dall’assistenza offerta da Philips, registrate il vostro prodotto su www.philips.com/welcome. La macchina consente di preparare caffè espresso utilizzando il caffè in grani interi. In questo manuale utente sono riportate tutte le informazioni necessarie per l’installazione, l’uso e la...
  • Seite 51: Descrizione Generale

    ITALIANO Descrizione generale (ig. 1) Pannello di controllo Pulsante del caffè Spia per la pulizia dal calcare Spia Spia per 2 tazze Spia “serbatoio dell’acqua vuoto” Pulsante on/off con spia Serbatoio acqua Erogatore caffè 10 Coperchio vassoio antigoccia 11 Indicatore “vassoio antigoccia pieno” 12 Vassoio antigoccia 13 Recipiente fondi di caffè...
  • Seite 52: Attenzione

    Attenzione Per eventuali controlli o riparazioni, rivolgetevi sempre a un centro autorizzato Philips. Non tentate di riparare la macchina da soli per evitare di invalidare la garanzia. Posizionate sempre la macchina su una supericie piana e stabile. Tenetela sempre in posizione verticale, anche durante il trasporto.
  • Seite 53: Predisposizione Dell'apparecchio

    ITALIANO Inserite lo spinotto nella presa situata sulla parte posteriore della macchina. Inserite la spina nella presa di corrente. Rimuovete il rivestimento adesivo protettivo dal vassoio antigoccia e fate scorrere quest’ultimo nelle scanalature guida posizionate sul lato anteriore della macchina. Nota: assicuratevi che il vassoio antigoccia sia inserito ino in fondo.
  • Seite 54: Riempimento Del Contenitore Caffè In Grani

    ITALIANO Riempimento del contenitore caffè in grani Riempite il contenitore caffè in grani per espresso. Utilizzate solo caffè in grani per espresso. Non utilizzate caffè macinato, caffè non tostato o caffè lioilizzato o solubile poiché potrebbero causare danni alla macchina. Mettete il coperchio sul contenitore caffè...
  • Seite 55: Ciclo Di Risciacquo Automatico

    ITALIANO Premete il pulsante del caffè. La macchina inizia a erogare acqua calda attraverso il beccuccio del caffè. Il pulsante on/off lampeggia lentamente e la spia si spegne. Dopo alcuni secondi, l’erogazione di acqua calda dal beccuccio del caffè si interrompe. La macchina si sta riscaldando.
  • Seite 56: Installazione Del Iltro Dell'acqua Intenza

    ITALIANO Se il pulsante on/off si accende a luce issa, la macchina è pronta per erogare il caffè. Nota: il ciclo di risciacquo automatico ha luogo anche 15 minuti dopo che l’apparecchio è entrato in modalità standby o si spegne. Nota: le prime tazze di caffè...
  • Seite 57: Modalità D'uso Della Macchina

    ITALIANO Modalità d’uso della macchina Per garantire il caffè perfetto, la macchina risciacqua il circuito interno con acqua a intervalli regolari. Questo ciclo di risciacquo automatico viene effettuato 15 minuti dopo che l’apparecchio è entrato in modalità standby o si spegne. Durante il ciclo di risciacquo automatico, una parte dell’acqua scorre dal circuito interno direttamente nel vassoio antigoccia.
  • Seite 58: Regolazione Del Grado Di Macinatura

    ITALIANO Regolazione del grado di macinatura Potete regolare il grado di macinatura della macchina. Ad ogni grado di macinatura selezionato, il macinacaffè in ceramica garantisce una macinatura perfetta e precisa per ogni tazza di caffè. L’aroma viene preservato e ogni tazza assicura un gusto perfetto.
  • Seite 59: Pulizia E Manutenzione

    ITALIANO Pulizia e manutenzione Una regolare pulizia e rimozione del calcare prolungano la vita utile della macchina e assicurano un caffè dal gusto e dalla qualità ottimale. Non immergete la macchina in acqua o altri liquidi. Non usate mai pagliette, detergenti abrasivi, o liquidi aggressivi per pulire la macchina.
  • Seite 60 ITALIANO Pulite il condotto di uscita del caffè a fondo con il manico di un cucchiaio o un altro utensile da cucina dalla punta arrotondata. Risciacquate la parte esterna del gruppo infusore sotto l’acqua tiepida e pulite accuratamente il iltro superiore. Non utilizzate mai detersivi per piatti o detergenti per pulire il gruppo infusore.
  • Seite 61 ITALIANO Nota: Il gancio di bloccaggio si trova sul retro del gruppo infusore, sul lato senza la parola “Push” (Spingere), nella parte superiore dell’estremità orizzontale. Per posizionare il gancio correttamente, spingetelo verso l’alto ino alla posizione più alta raggiungibile. Nota: se il gancio è ancora in posizione inferiore signiica che non è posizionato correttamente.
  • Seite 62: Lubriicazione

    Per ottimizzare le prestazioni della macchina, lubriicate il gruppo infusore dopo aver preparato 500 tazze di caffè o una volta ogni 3 mesi. Contattate il numero Philips Saeco per acquistare il lubriicante. Spegnete la macchina e staccate la spina. Seguite i passaggi da 2 a 4 della sezione “Pulizia del gruppo infusore”...
  • Seite 63: Preparazione

    ITALIANO Preparazione Spegnere la macchina. Se non spegnete la macchina non potete inserire il ciclo di pulizia anticalcare. Svuotare il vassoio antigoccia e reinserirlo. Svuotate il serbatoio dell’acqua e rimuovete il iltro dell’acqua Intenza+ (se presente). Versate l’intero contenuto della bottiglia con soluzione anticalcare nel serbatoio dell’acqua.
  • Seite 64: Ciclo Di Risciacquo

    ITALIANO Ciclo di risciacquo Estraete il serbatoio dell’acqua dalla macchina e risciacquatelo. Riempite il serbatoio dell’acqua con acqua dolce di rubinetto ino al segno MAX e reinserite il serbatoio dell’acqua sulla macchina. Svuotate il recipiente e posizionatelo sotto il beccuccio del caffè. Nota: La spia arancione per la pulizia dal calcare lampeggia due volte.
  • Seite 65: Se Non Riuscite A Terminare Il Ciclo Di Rimozione Del Calcare

    ITALIANO Quando la spia del pulsante on/off si accende issa, rimuovete, risciacquate e inserite nuovamente il vassoio antigoccia. Rimuovete il serbatoio dell’acqua e sciacquatelo. Reinstallate il iltro dell’acqua Intenza+ (se presente). Riempite il serbatoio dell’acqua con acqua dolce di rubinetto ino al segno MAX e reinserite il serbatoio dell’acqua sulla macchina.
  • Seite 66 ITALIANO La spia per la pulizia dal calcare e il pulsante on/off si accendono a luce issa. È necessario eseguire la pulizia. Seguite le istruzioni contenute nel capitolo “Procedura di rimozione del calcare”. La spia per la pulizia anticalcare lampeggia lentamente. La macchina sta eseguendo la rimozione del calcare.
  • Seite 67 ITALIANO La spia “serbatoio dell’acqua vuoto” si accende a luce issa. Il livello dell’acqua è basso. Riempite il serbatoio dell’acqua con acqua dolce ino al livello MAX. La spia si illumina issa e il pulsante on/off si spegne. Il recipiente dei fondi di caffè...
  • Seite 68: Riciclaggio

    è guasta. Spegnete la macchina per 30 secondi, quindi riaccendetela. Effettuate questa operazione due o tre volte. Se la macchina non si ripristina, contattate il centro assistenza clienti Philips del vostro paese. Riciclaggio Questo simbolo indica che il prodotto è conforme alla Direttiva Europea 2012/19/EU.
  • Seite 69: Risoluzione Dei Problemi

    Questo capitolo riassume i problemi più comuni che potreste riscontrare utilizzando la macchina. Se non riuscite a risolvere il problema con le informazioni riportate sotto, visitate il sito www.philips.com/support per un elenco di domande frequenti o contattate il centro assistenza clienti del vostro paese.
  • Seite 70: Speciiche Tecniche

    ITALIANO Problema Soluzione Utilizzate un diverso tipo di caffè in grani. L’acqua inisce nel Si tratta di un fenomeno del tutto normale. Per garantire una tazza di caffè vassoio antigoccia. perfetta, la macchina utilizza l’acqua per risciacquare il circuito interno e il gruppo infusore.
  • Seite 74 4219.460.2022.1...

Diese Anleitung auch für:

Hd8651/01

Inhaltsverzeichnis