Herunterladen Inhalt Inhalt Diese Seite drucken
Philips HD8651 Bedienungsanleitung
Vorschau ausblenden Andere Handbücher für HD8651:
Inhaltsverzeichnis

Werbung

Verfügbare Sprachen

Verfügbare Sprachen

Always here to help you
Register your product and get support at
www.philips.com/welcome
HD8651

Werbung

Inhaltsverzeichnis

Fehlerbehebung

loading

Inhaltszusammenfassung für Philips HD8651

  • Seite 1 Always here to help you Register your product and get support at www.philips.com/welcome HD8651...
  • Seite 5 ENGLISH 6 DEUTSCH 29 ITALIANO 53...
  • Seite 6: Inhaltsverzeichnis

    Introduction Congratulations on buying this fully automatic Philips Xsmall espresso machine! To fully benefit from the support that Philips offers, please register your product at www.philips.com/welcome. This user manual applies to HD8651. The machine is suitable for preparing espresso coffee using whole coffee beans.
  • Seite 7: General Description (Fig. 1)

    ENGLISH General description (Fig. 1) Control panel Steam icon Control dial Coffee bean icon Espresso button Regular coffee button Hot water icon Descaling light Warning light 10 2-cup light 11 ’Water tank empty’ light 12 On/off button with light 13 Hot water/steam wand 14 Protective handle 15 classic milk frother (specific types only) 16 Water tank...
  • Seite 8: Caution

    Do not use the machine if the plug, the mains cord or the machine itself is damaged. If the mains cord is damaged, you must have it replaced by Philips, a service centre authorised by Philips or similarly qualified persons in order to avoid a hazard.
  • Seite 9: Preparing For Use

    ENGLISH Leave at least 15cm of free space above, behind and on both sides of the machine. Insert the small plug into the socket located on the back of the machine. Insert the plug into the wall socket. Remove the protective sticker from the drip tray and slide the drip tray into the guiding grooves in the front of the machine.
  • Seite 10: Filling The Coffee Bean Container

    ENGLISH Fill the water tank with cold tap water up to the MAX indication. Never fill the water tank with warm, hot or sparkling water, as this may cause damage to the water tank and the machine. Slide the water tank back into the machine. Filling the coffee bean container Fill the coffee bean container with espresso beans.
  • Seite 11: Manual Rinsing Cycle

    ENGLISH When the warning light flashes quickly, turn the control dial to the hot water icon and wait a few seconds. The warning light goes out and some water comes out of the hot water/steam wand or classic milk frother. After a few seconds, when hot water stops coming out of the hot water/steam wand and the warning light flashes slowly, turn the control dial back to the coffee bean icon.
  • Seite 12: Installing The Intenza+ Water Filter

    ENGLISH Place a bowl under the hot water/steam wand or classic milk frother. Turn the control dial to the hot water icon. Let the water flow until the water tank is empty. The ‘water tank empty’ light lights up continuously. Turn the control dial back to the coffee bean icon.
  • Seite 13: Using The Machine

    ENGLISH Remove the filter from its packaging and immerse it in cold water with the opening pointing upwards. Press the sides of the filter gently to let out the air bubbles. Turn the knob of the filter to the setting that corresponds to the water hardness of the area you live in.
  • Seite 14: Frothing Milk

    ENGLISH Press the espresso button or regular coffee button. Note: You can interrupt the brewing cycle at any time. To do this, press the same button (for espresso or regular coffee) that you pressed to start brewing coffee. Press the espresso button or regular coffee button once to brew 1 cup of coffee.
  • Seite 15: Hot Water

    ENGLISH Fill a jug up to 1/3 with cold milk. Note: Use cold milk (at a temperature of approximately 5°C/41°F) with a protein content of at least 3% to ensure an optimal frothing result. You can use whole milk or semi-skimmed milk, depending on your preference. Immerse the hot water/steam wand or classic milk frother in the milk and turn the control dial to the steam icon.
  • Seite 16: Adjusting The Machine

    ENGLISH Turn the control dial back to the coffee bean icon when the cup contains the preferred amount of hot water. Adjusting the machine You can adjust the grinding degree and coffee volume to obtain coffee that is perfectly customised to your taste. Adjusting the grinding degree You can adjust the grinding degree of the machine.
  • Seite 17: Cleaning And Maintenance

    ENGLISH Cleaning and maintenance Regular cleaning and descaling prolongs the lifetime of your machine and ensures optimum quality and taste of your coffee. Do not immerse the machine in water or any other liquid. Never use scouring pads, abrasive cleaning agents or aggressive liquids to clean the machine.
  • Seite 18 ENGLISH Open the maintenance door. Press the PUSH button (1) and pull at the grip of the brewing unit (2) to remove it from the machine. Clean the coffee exit duct thoroughly with a spoon handle or another round-tipped kitchen utensil. Rinse the outside of the brewing unit under a lukewarm tap.
  • Seite 19 ENGLISH Make sure the lever is in contact with the base of the brewing unit. Make sure the locking hook of the brewing unit is in the correct position. To position the hook correctly, push it upwards until it is in uppermost position.
  • Seite 20: Lubrication

    Philips Saeco descaling solution to descale the machine. The Philips Saeco descaling solution is designed to ensure optimal performance of the machine. You can buy the Philips Saeco descaling solution in the online shop at www.shop.philips.com/service. Note: The use of other descaling products may cause damage to the machine and leave residues in the water.
  • Seite 21: Descaling Procedure

    ENGLISH Descaling procedure The descaling procedure lasts 30 minutes and consists of a descaling cycle and a rinsing cycle. Preparation Switch off the machine. If you do not switch off the machine, you cannot enter the descaling cycle. Empty the drip tray and place it back. Remove the classic milk frother (if present).
  • Seite 22: Rinsing Cycle

    ENGLISH Turn the control dial back to the coffee bean icon. Wait approximately 1 minute to let the descaling solution act. Press the espresso button to brew a cup of espresso. Wait approximately 1 minute to let the descaling solution act. Note: During the descaling process, the coffee grinding function does not work.
  • Seite 23: If You Are Unable To Finish The Descaling Procedure

    ENGLISH Remove the drip tray, rinse it and place it back. Reattach the classic milk frother. Remove the water tank and rinse it. Reinstall the Intenza+ water filter (if present). Fill the water tank with fresh tap water up to the MAX indication and slide the water tank back into the machine.
  • Seite 24 ENGLISH The on/off button flashes slowly. The machine is warming up or performing a procedure. The on/off button flashes quickly. The machine is overheated. Brew a cup of hot water to cool down the machine. The descaling light and the on/off button light up continuously. You have to descale the machine.
  • Seite 25 ENGLISH The ‘water tank empty’ light lights up continuously. The water level is low. Fill the water tank with fresh water up to the MAX indication. The warning light lights up continuously and the on/off button goes out. The coffee grounds container is full. Empty the coffee grounds container while the machine is on.
  • Seite 26: Recycling

    The lights flash slowly and simultaneously. The machine is out of order. Switch off the machine for 30 seconds, then switch it back on. Try this two or three times. If the machine does not reset, contact the Philips Consumer Care Centre in your country.
  • Seite 27 ENGLISH Problem Solution The machine does not Make sure the small plug is inserted into the socket. Plug in and switch on work. the machine. Make sure that the voltage indicated on the machine corresponds to the local mains voltage. The machine is stuck in the Press the on/off button.
  • Seite 28: Technical Specifications

    ENGLISH Problem Solution Brew a few cups of coffee to let the machine adjust itself to the new grinding settings. Use a different type of coffee beans. Water ends up in the drip This is normal. To guarantee the perfect cup of coffee, the machine uses tray.
  • Seite 29: Einführung

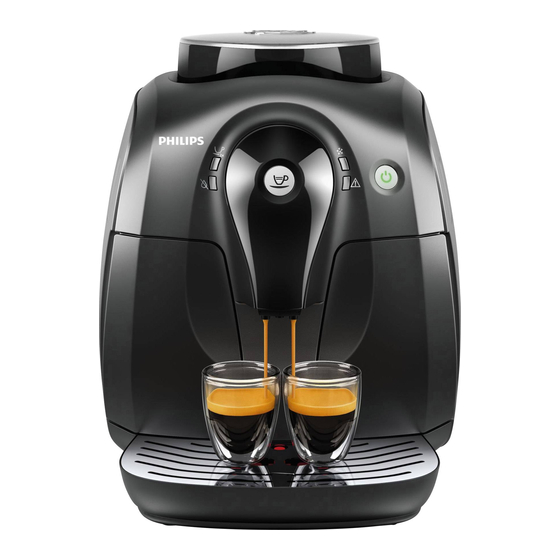
    Technische Daten Einführung Herzlichen Glückwunsch zum Kauf Ihres Philips Xsmall Kaffeevollautomaten! Um den Support von Philips optimal zu nutzen, registrieren Sie Ihr Produkt unter www.philips.com/welcome. Diese Bedienungsanleitung gilt für HD8651. Die Maschine eignet sich für die Zubereitung von Espresso mit ganzen Kaffeebohnen.
  • Seite 30: Allgemeine Beschreibung (Abb. 1)

    DEUTSCH Allgemeine Beschreibung (Abb. 1) Bedienfeld Dampfsymbol Drehschalter Kaffeebohnensymbol Taste für Espresso Taste für normalen Kaffee Heißwassersymbol Entkalkungsanzeige Warnanzeige 10 2-Tassen-Anzeige 11 Anzeige “Wassertank leer” 12 Ein-/Ausschalter mit Anzeige 13 Heißwasser-/Dampfdüse 14 Schutzgriff 15 Klassischer Milchaufschäumer (nur bestimmte Gerätetypen) 16 Wasserbehälter 17 Kaffeeauslauf 18 Abdeckung für Abtropfschale 19 Anzeige “Auffangschale voll”...
  • Seite 31: Achtung

    Achtung Geben Sie die Maschine zur Überprüfung bzw. Reparatur stets an ein Philips Service-Center. Versuchen Sie nicht, die Maschine selbst zu reparieren, da andernfalls Ihre Garantie erlischt. Stellen Sie die Maschine immer auf eine flache und stabile Oberfläche.
  • Seite 32: Vor Dem Ersten Gebrauch

    DEUTSCH Vor dem ersten Gebrauch Aufbau der Maschine Entfernen Sie das Verpackungsmaterial von der Maschine. Stellen Sie die Maschine auf einem Tisch oder einer Arbeitsfläche auf. Achten Sie darauf, dass sich weder Wasserhahn und Spülbecken noch Wärmequellen in der Nähe des Geräts befinden. Über, hinter und auf beiden Seiten der Maschine muss ein Abstand von mindestens 15 cm gewahrt werden.
  • Seite 33: Für Den Gebrauch Vorbereiten

    DEUTSCH Für den Gebrauch vorbereiten Den Wassertank füllen Nehmen Sie den Wasserbehälter von der Maschine. Spülen Sie den Wasserbehälter unter fließendem Wasser ab. Füllen Sie den Wasserbehälter bis zur Markierung MAX mit kaltem Wasser. Füllen Sie den Wasserbehälter nie mit warmem, heißem oder Mineralwasser, da dies zu Beschädigungen im Wasserbehälter und an der Maschine führen kann.
  • Seite 34: Aufheizen Der Maschine

    DEUTSCH Aufheizen der Maschine Während des ersten Aufheizens fließt frisches Wasser durch den internen Kreislauf und heizt die Maschine so auf. Dies dauert einige Sekunden. Stellen Sie eine Schüssel unter die Heißwasser-/Dampfdüse oder den klassischen Milchaufschäumer und den Kaffeeauslauf. Achten Sie darauf, dass der Drehschalter auf das Symbol für Kaffeebohnen zeigt.
  • Seite 35: Manueller Spülzyklus

    DEUTSCH Manueller Spülzyklus Während des manuellen Spülzyklus bereitet die Maschine eine Tasse Kaffee zur Vorbereitung des internen Kreislaufs für den Gebrauch zu. Stellen Sie eine Schüssel unter den Kaffeeauslauf. Stellen Sie sicher, dass der Ein-/Ausschalter konstant leuchtet. Drücken Sie die Taste für normalen Kaffee. Die Maschine beginnt mit der Zubereitung einer Tasse Kaffee zur Vorbereitung des internen Kreislaufs für den Gebrauch.
  • Seite 36: Einsetzen Des Intenza+ Wasserfilters

    DEUTSCH Füllen Sie den Wassertank bis zur Markierung MAX mit frischem Wasser. Die Maschine ist einsatzbereit. Hinweis: Die ersten Tassen Kaffee sind möglicherweise etwas wässrig. Dies ist normal. Die Maschine muss einige Brühzyklen vollständig durchlaufen, um ihre Einstellungen zu optimieren. Einsetzen des Intenza+ Wasserfilters Wir empfehlen Ihnen, den Intenza+ Wasserfilter einzusetzen, da dieser Kalkablagerungen in Ihrer Maschine verhindert.
  • Seite 37: Verwenden Der Maschine

    DEUTSCH Füllen Sie den Wasserbehälter erneut bis zur Markierung MAX mit frischem Wasser, und setzen Sie ihn in die Maschine ein. Der Ein-/Ausschalter leuchtet konstant. Die Maschine ist einsatzbereit. Verwenden der Maschine Für garantiert perfekten Espresso spült die Maschine regelmäßig ihren internen Kreislauf mit Wasser.
  • Seite 38: Aufschäumen Von Milch

    DEUTSCH Zum Einschalten der Maschine drücken Sie den Ein-/Ausschalter. Wenn Sie nur eine Tasse Kaffee gebrüht haben, spült die Maschine kurz den internen Kreislauf und schaltet sich dann aus. Hinweis: Wenn die Maschine sich im Standby-Modus befindet, schaltet sie sich nach 30 Minuten automatisch aus.
  • Seite 39: Heißes Wasser

    DEUTSCH Drücken Sie die Taste für Espresso oder normalen Kaffee. Der Ein-/Ausschalter blinkt schnell, um anzuzeigen, dass die Maschine überhitzt ist und keinen Kaffee zubereiten kann. Stellen Sie eine Schüssel unter die Heißwasser-/Dampfdüse oder den klassischen Milchaufschäumer, und drehen Sie den Drehschalter auf das Heißwassersymbol.
  • Seite 40: Anpassen Der Maschine

    DEUTSCH Anpassen der Maschine Sie können den Mahlgrad des Kaffees und die Kaffeemenge einstellen, um Ihren ganz persönlichen, perfekten Kaffee zu kochen. Anpassen des Mahlgrads Sie können den Mahlgrad der Maschine anpassen. Das Mahlwerk aus Keramik garantiert gleichmäßiges und perfektes Mahlen für jede Tasse Kaffee.
  • Seite 41: Reinigen Der Heißwasser-/Dampfdüse Oder Des Klassischen Milchaufschäumers

    DEUTSCH Reinigen der Heißwasser-/Dampfdüse oder des klassischen Milchaufschäumers Reinigen Sie die Heißwasser-/Dampfdüse oder den klassischen Milchaufschäumer nach jeder Verwendung mit einem feuchten Tuch. Reinigen Sie die Heißwasser-/Dampfdüse oder den klassischen Milchaufschäumer ein Mal pro Woche gründlich. Entfernen Sie den Schutzgriff von der Heißwasser-/Dampfdüse, indem Sie ihn nach unten abziehen.
  • Seite 42 DEUTSCH Drücken Sie die Taste PUSH (1), ziehen Sie am Griff der Brühgruppe (2), und entfernen Sie sie aus der Maschine. Reinigen Sie den Kaffeeauswurfschacht gründlich mit einem Löffelgriff oder einem anderen runden Küchenutensil. Spülen Sie die Außenseite der Brühgruppe unter lauwarmem fließendem Wasser ab.
  • Seite 43: Schmierung

    Schmieren Sie die Brühgruppe nach 500 Tassen gebrühtem Kaffee oder alle 3 Monate, um die optimale Leistung der Maschine zu erhalten. Wenden Sie sich an die Philips Saeco Hotline, um Schmiermittel zu erwerben. Schalten Sie die Maschine aus, und ziehen Sie den Netzstecker aus der Steckdose.
  • Seite 44: Entkalken Der Maschine

    Verwenden Sie zum Entkalken der Maschine nur die spezielle Saeco Entkalkungslösung. Die Saeco Entkalkungslösung wurde entwickelt, um die optimale Leistung der Maschine zu sichern. Kaufen können Sie Philips Saeco Entkalkungslösung im Online-Shop unter www.shop.philips.com/service. Hinweis: Der Gebrauch von anderen Entkalkern kann zu Schäden an der Kaffeemaschine führen und Rückstände im Wasser hinterlassen.
  • Seite 45: Entkalkungsvorgang

    DEUTSCH Achten Sie darauf, dass der Drehschalter sich auf dem Symbol für Kaffeebohnen befindet. Stellen Sie eine Schüssel unter die Heißwasser-/Dampfdüse. Entkalkungsvorgang Halten Sie die Tasten für Espresso und normalen Kaffee gleichzeitig etwa 5 Sekunden lang gedrückt. Die orangefarbene Entkalkungsanzeige blinkt während des gesamten Entkalkungsvorgangs langsam.
  • Seite 46: Wenn Sie Den Entkalkungsvorgang Nicht Beenden Können

    DEUTSCH Füllen Sie den Wasserbehälter bis zur Markierung MAX mit frischem Leitungswasser, und schieben Sie den Wasserbehälter wieder in die Maschine. Leeren Sie die Schüssel, und stellen Sie sie wieder auf die Auffangschale unter der Heißwasser-/Dampfdüse. Drücken Sie die Espresso-Taste, und bereiten Sie eine Tasse Espresso zu.
  • Seite 47: Bedeutung Der Anzeigen

    DEUTSCH Entfernen Sie die Auffangschale, spülen Sie sie aus, und setzen Sie sie wieder ein. Entfernen Sie den Wasserbehälter, und spülen Sie ihn aus. Füllen Sie den Wasserbehälter bis zur Markierung MAX mit frischem Leitungswasser, und schieben Sie den Wasserbehälter wieder in die Maschine.
  • Seite 48 DEUTSCH Der Ein-/Ausschalter blinkt schnell. Die Maschine ist überhitzt. Bereiten Sie eine Tasse heißes Wasser zu, um die Maschine abzukühlen. Die Entkalkungsanzeige und der Ein-/Ausschalter leuchten kontinuierlich. Die Maschine muss entkalkt werden. Befolgen Sie die Anweisungen im Kapitel “Entkalken der Maschine”. Die Entkalkungsanzeige blinkt langsam.
  • Seite 49 Schalten Sie die Maschine aus, und schalten Sie sie nach 30 Sekunden wieder ein. Probieren Sie dies zwei oder drei Mal. Wenn sich die Maschine nicht zurücksetzt, setzen Sie sich mit dem Philips Service- Center in Ihrem Land in Verbindung.
  • Seite 50: Recycling

    Für Unterstützung und weitere Informationen besuchen Sie die Philips Website unter www.philips.com/support, oder lesen Sie die internationale Garantieschrift. Um Ersatzteile zu kaufen, gehen Sie auf www.shop.philips.com/service oder zu Ihrem Philips Händler. Sie können auch ein Philips Service-Center in Ihrem Land kontaktieren. Bestellen von Wartungsprodukten Intenza+ Wasserfilter (CA6702) Schmiermittel (HD5061) Entkalkungslösung (CA6700)
  • Seite 51 DEUTSCH Problem Lösung Die Heißwasser- Überprüfen Sie, ob die Öffnung der Heißwasser-/Dampfdüse verstopft ist. /Dampfdüse produziert Wenn dies der Fall ist, reinigen Sie das Loch. kein heißes Wasser/ keinen Dampf mehr. Der klassische Milchaufschäumer ist möglicherweise verschmutzt. Reinigen Sie den klassischen Milchaufschäumer. Der Espresso hat nicht Verwenden Sie eine andere Sorte Kaffeebohnen, oder ändern Sie die ausreichend Crema.
  • Seite 52: Technische Daten

    DEUTSCH Problem Lösung Die Maschine scheint Die Auffangschale ist voll und ist während des Brüh- oder Entkalkungsvorgang undicht zu sein. übergelaufen. Prüfen Sie, ob der Wasserbehälter undicht ist. Die Brühgruppe oder die Leitungen hinter oder unter der Brühgruppe sind möglicherweise verstopft. Spülen Sie die Brühgruppe mit lauwarmem Wasser ab, und reinigen Sie den oberen Filter sorgfältig.
  • Seite 53: Introduzione

    Philips, registrate il vostro prodotto su www.philips.com/welcome. Il presente manuale utente riguarda il modello HD8651. La macchina consente di preparare caffè espresso utilizzando il caffè in grani interi. Eroga inoltre vapore e acqua calda. In questo manuale utente sono riportate tutte le informazioni necessarie...
  • Seite 54: Descrizione Generale (Fig. 1)

    ITALIANO Descrizione generale (fig. 1) Pannello di controllo Icona vapore Selettore Icona grani di caffè Pulsante espresso Pulsante caffè normale Icona acqua calda Spia per la pulizia dal calcare Spia 10 Spia per 2 tazze 11 Spia “serbatoio dell’acqua vuoto” 12 Pulsante on/off con spia 13 Erogatore di acqua calda/vapore 14 Impugnatura protettiva...
  • Seite 55: Attenzione

    Attenzione Per eventuali controlli o riparazioni, rivolgetevi sempre a un centro autorizzato Philips. Non tentate di riparare la macchina da soli per evitare di invalidare la garanzia. Posizionate sempre la macchina su una superficie piana e stabile. Tenetela sempre in posizione verticale, anche durante il trasporto.
  • Seite 56: Primo Utilizzo

    ITALIANO Primo utilizzo Installazione della macchina Rimuovete tutto il materiale da imballaggio dalla macchina. Posizionate la macchina su un tavolo o un piano di lavoro lontano dal rubinetto, dal lavello e da fonti di calore. Lasciate almeno 15 cm di spazio libero in alto, dietro e ai lati della macchina.
  • Seite 57: Predisposizione Dell'apparecchio

    ITALIANO Predisposizione dell’apparecchio Riempimento del serbatoio dell’acqua Estraete il serbatoio dell’acqua dalla macchina. Sciacquare il serbatoio sotto l’acqua corrente. Riempite il serbatoio con acqua fredda del rubinetto fino al livello massimo (MAX). Non riempite mai il serbatoio dell’acqua con acqua calda, bollente o frizzante, per evitare di danneggiare il serbatoio stesso e la macchina.
  • Seite 58: Riscaldamento Della Macchina

    ITALIANO Riscaldamento della macchina Durante l’iniziale processo di riscaldamento, l’acqua dolce scorre attraverso il circuito interno per riscaldare la macchina. Questa operazione richiede alcuni secondi. Posizionate un recipiente sotto l’erogatore di acqua calda/vapore, al pannarello classico e al beccuccio del caffè. Accertatevi che il selettore sia impostato sull’icona del caffè...
  • Seite 59: Ciclo Di Risciacquo Manuale

    ITALIANO Ciclo di risciacquo manuale Durante il ciclo di risciacquo manuale, la macchina eroga una tazza di caffè per preparare il circuito interno per l’uso. Posizionate un recipiente sotto il beccuccio del caffè. Verificate che il pulsante on/off si accenda a luce fissa. Premete il pulsante del caffè...
  • Seite 60: Installazione Del Filtro Dell'acqua Intenza

    ITALIANO Riempite il serbatoio con acqua dolce fino al livello massimo (MAX). La macchina è pronta all’uso. Nota: le prime tazze di caffè potrebbero essere un po’ acquose, si tratta di un fenomeno del tutto normale. La macchina ha bisogno di alcuni cicli di preparazione per ottimizzare le impostazioni.
  • Seite 61: Modalità D'uso Della Macchina

    ITALIANO Modalità d’uso della macchina Per garantire l’espresso perfetto, la macchina risciacqua il circuito interno con acqua a intervalli regolari. Questo ciclo di risciacquo automatico viene effettuato 15 minuti dopo che l’apparecchio è entrato in modalità standby o si spegne. Durante il ciclo di risciacquo automatico, una parte dell’acqua scorre dal circuito interno direttamente nel vassoio antigoccia.
  • Seite 62: Come Montare Il Latte

    ITALIANO Come montare il latte Se desiderate montare il latte dopo aver acceso la macchina, o dopo aver erogato una tazza di caffè, dovreste prima eliminare l’acqua residua presente all’interno del circuito interno. Posizionate una grande tazza sotto l’erogatore di acqua calda/vapore o pannarello classico.
  • Seite 63: Acqua Calda

    ITALIANO Acqua calda Assicuratevi che il pulsante on/off sia acceso a luce fissa. Se il pulsante on/off lampeggia lentamente, la macchina è in fase di riscaldamento. Posizionate una tazza sotto l’erogatore di acqua calda/vapore o pannarello classico. Ruotate il selettore sull’icona dell’acqua calda. L’acqua fuoriesce dall’erogatore di acqua calda/vapore o pannarello classico.
  • Seite 64: Regolazione Della Quantità Di Caffè

    ITALIANO Regolazione della quantità di caffè Potete regolare la quantità di caffè secondo il vostro gusto e le dimensioni delle tazze. Sia il pulsante del caffè normale sia quello del caffè espresso possono essere programmati. Posizionate una tazza sul coperchio del vassoio antigoccia. Tenete premuto il pulsante del tipo di caffè...
  • Seite 65: Pulizia Del Gruppo Infusore

    ITALIANO Se la macchina dispone di un pannarello classico, rimuovete il tubo e la parte superiore. Sciacquate il tubo e la parte superiore con abbondante acqua dolce e asciugateli con un panno asciutto. Pulire l’erogatore di acqua calda/vapore con un panno bagnato per rimuovere eventuali residui di latte.
  • Seite 66 ITALIANO Premete il pulsante PUSH (1) e tirate l’impugnatura del gruppo infusore (2) per rimuoverla dalla macchina. Pulite il condotto di uscita del caffè a fondo con il manico di un cucchiaio o un altro utensile da cucina dalla punta arrotondata. Risciacquate la parte esterna del gruppo infusore sotto un getto di acqua tiepida.
  • Seite 67: Lubrificazione

    Per ottimizzare le prestazioni della macchina, lubrificate il gruppo infusore dopo aver preparato 500 tazze di caffè o una volta ogni 3 mesi. Contattate il numero Philips Saeco per acquistare il lubrificante. Spegnete la macchina e staccate la spina. Seguite i passaggi da 2 a 4 della sezione “Pulizia del gruppo infusore”...
  • Seite 68: Procedura Di Rimozione Del Calcare

    Utilizzate solo le speciali soluzioni anticalcare Philips Saeco per rimuovere il calcare dalla macchina. La soluzione anticalcare Philips Saeco è stata progettata per garantire le prestazioni ottimali della macchina. Potete acquistare la soluzione anticalcare Philips Saeco nell’Online Shop all’indirizzo www.shop.philips.com/service.
  • Seite 69: Ciclo Di Decalcificazione

    ITALIANO Aggiungete l’acqua alla soluzione anticalcare nel serbatoio dell’acqua fino al livello MAX. Accertatevi che il selettore sia impostato sull’icona del caffè in grani. Posizionate un recipiente sotto l’erogatore di acqua calda/vapore. Ciclo di decalcificazione Premete il pulsante del caffè espresso e quello del caffè normale contemporaneamente per circa 5 secondi.
  • Seite 70: Se Non Riuscite A Terminare La Procedura Di Rimozione Del Calcare

    ITALIANO Riempite il serbatoio dell’acqua con acqua dolce di rubinetto fino al segno MAX e reinserite il serbatoio dell’acqua sulla macchina. Svuotate il recipiente e riposizionatelo sul vassoio antigoccia sotto l’erogatore di acqua calda/vapore. Premete il pulsante espresso e preparate una tazza di caffè espresso. Ripetete l’operazione due volte.
  • Seite 71: Significato Delle Spie Luminose

    ITALIANO Rimuovete il vassoio antigoccia, sciacquatelo e riposizionatelo. Rimuovete il serbatoio dell’acqua e sciacquatelo. Riempite il serbatoio dell’acqua con acqua dolce di rubinetto fino al segno MAX e reinserite il serbatoio dell’acqua sulla macchina. Premete il pulsante espresso e preparate una tazza di caffè espresso. Ripetete l’operazione due volte.
  • Seite 72 ITALIANO La spia per la pulizia dal calcare e il pulsante on/off si accendono a luce fissa. È necessario eseguire la pulizia. Seguite le istruzioni contenute nel capitolo “Procedura di rimozione del calcare”. La spia per la pulizia dal calcare lampeggia lentamente. La macchina sta rimuovendo il calcare.
  • Seite 73: Riciclaggio

    è guasta. Spegnete la macchina per 30 secondi, quindi riaccendetela. Effettuate questa operazione due o tre volte. Se la macchina non si ripristina, contattate il centro assistenza clienti Philips del vostro paese. Riciclaggio Questo simbolo indica che il prodotto è conforme alla Direttiva Europea 2012/19/EU.
  • Seite 74: Garanzia E Assistenza

    ITALIANO Garanzia e assistenza Per assistenza o informazioni, visitate il sito Web all’indirizzo www.philips.com/ support oppure leggete l’opuscolo della garanzia internazionale. Per acquistare le parti di ricambio, visitate il sito www.shop.philips.com/ service oppure recatevi presso il vostro rivenditore Philips. Inoltre, potete contattare il centro assistenza Philips del vostro paese.
  • Seite 75 ITALIANO Problema Soluzione Il gruppo infusore non Rimuovete il recipiente con i fondi di caffè prima di aprire lo sportello di può essere rimosso. manutenzione. Se dopo questa operazione non riuscite ancora a rimuovere il gruppo infusore, seguite i passaggi indicati di seguito. Reinserite il recipiente dei fondi di caffè, chiudete lo sportello di manutenzione, accendete la macchina.
  • Seite 76: Specifiche Tecniche

    ITALIANO Specifiche tecniche Funzionalità Valore / posizione Tensione nominale All’interno dello sportello di manutenzione Potenza nominale All’interno dello sportello di manutenzione Dimensioni (L x A x P) 295 mm x 325 mm x 420 mm Peso 6,9 kg Materiale Plastica Lunghezza cavo 0,8 m -1,2 m Capacità...
  • Seite 78 4219.460.2023.1...

Inhaltsverzeichnis