Inhaltsverzeichnis
Werbung
Verfügbare Sprachen
Verfügbare Sprachen
Werbung
Kapitel
Inhaltsverzeichnis
Fehlerbehebung

Verwandte Anleitungen für Zanussi ZOHEX3X1


Inhaltszusammenfassung für Zanussi ZOHEX3X1
- Seite 1 User Manual GETTING STARTED? EASY. ZOHEX3X1 EN User Manual Oven NL Gebruiksaanwijzing Oven FR Notice d'utilisation Four DE Benutzerinformation Backofen PT Manual de instruções Forno ES Manual de instrucciones Horno...
-
Seite 2: Inhaltsverzeichnis
VISIT OUR WEBSITE TO: Get usage advice, brochures, trouble shooter, service and repair information: www.zanussi.com/support Subject to change without notice. CONTENTS 1. SAFETY INFORMATION....................2 2. SAFETY INSTRUCTIONS....................4 3. INSTALLATION.......................6 4. PRODUCT DESCRIPTION..................... 8 5. CONTROL PANEL......................8 6. BEFORE FIRST USE......................9 7. -
Seite 3: General Safety
Do not let children play with the appliance. • Keep all packaging away from children and dispose of it • appropriately. WARNING: Keep children and pets away from the • appliance when it operates or when it cools down. Accessible parts become hot during use. If the appliance has a child safety device, it should be •... -
Seite 4: Safety Instructions
2. SAFETY INSTRUCTIONS 2.1 Installation Mounting screws 4x25 mm WARNING! Only a qualified person must 2.2 Electrical connection install this appliance. WARNING! • Remove all the packaging. Risk of fire and electric shock. • Do not install or use a damaged appliance. - Seite 5 • Do not put flammable products or items that are wet with flammable products in, Cable types applicable for installation or near or on the appliance. replacement for Europe: WARNING! H07 RN-F, H05 RN-F, H05 RRF, H05 VV-F, H05 Risk of damage to the appliance. V2V2-F (T90), H05 BB-F •...
-
Seite 6: Internal Lighting
• Be careful when you remove the door intended to be used in other applications from the appliance. The door is heavy! and are not suitable for household room • Clean regularly the appliance to prevent illumination. the deterioration of the surface material. •... - Seite 7 (*mm) min. 550 min. 560 3.2 Securing the oven to the cabinet ENGLISH...
-
Seite 8: Product Description
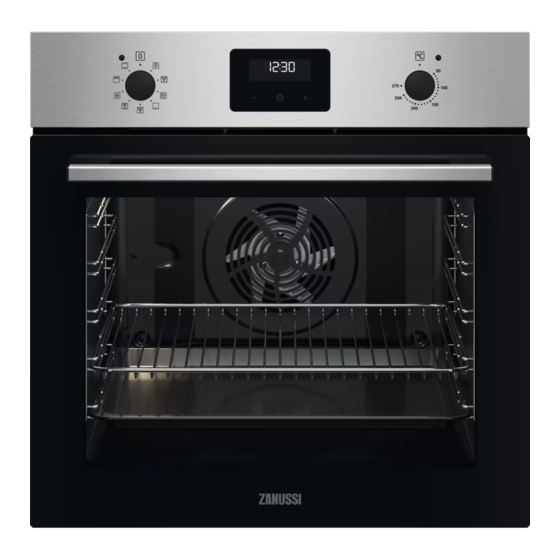
4. PRODUCT DESCRIPTION 4.1 General overview Control panel Knob for the heating functions Power lamp / symbol Display Control knob (for the temperature) Temperature indicator / symbol Heating element Lamp Cavity embossment - Aqua cleaning container Shelf support, removable Shelf positions 4.2 Accessories •... -
Seite 9: Before First Use
5.3 Display A. Clock functions B. Timer 6. BEFORE FIRST USE WARNING! Refer to Safety chapters. 6.1 Before first use The oven can emit an odour and smoke during preheating. Make sure that the room is ventilated. Step 1 Step 2 Step 3 Set the clock Clean the oven... -
Seite 10: Clock Functions
7.2 Heating functions Heating func‐ Application tion Heating func‐ Application tion To defrost food (vegetables and fruit). The defrosting time de‐ The oven is off. pends on the amount and size Defrost of the frozen food. Off position To grill thin pieces of food in large quantities and to toast To turn on the lamp. - Seite 11 Clock function Application To set a countdown. This function has no effect on the operation of the oven. You can set this function at any time, also when the oven is off. Minute Minder 8.2 How to set: Clock functions How to change: Time of Day - flashes when you connect the oven to the electrical supply, when there was a power cut or when the timer is not set.
-
Seite 12: Using The Accessories
9. USING THE ACCESSORIES devices. The high rim around the shelf WARNING! prevents cookware from slipping of the shelf. Refer to Safety chapters. 9.1 Inserting accessories A small indentation at the top increases safety. The indentations are also anti-tip Wire shelf: Push the shelf between the guide bars of the shelf support and make sure that the feet point down. -
Seite 13: Safety Thermostat
10.2 Safety thermostat safety thermostat which interrupts the power supply. The oven turns on again Incorrect operation of the oven or defective automatically when the temperature drops. components can cause dangerous overheating. To prevent this, the oven has a 11. HINTS AND TIPS If you use two baking trays at the same time, Refer to Safety chapters. -
Seite 14: Conventional Cooking
Conventional Cook‐ True Fan Cooking CAKES (min) (°C) (°C) Christmas cake, 90 - 120 Cake mould, Ø preheat the empty 20 cm oven Plum cake, pre‐ 50 - 60 Bread tin heat the empty oven Muffins 140 - 150 20 - 30 Baking tray Muffins, two levels 140 - 150... - Seite 15 Conventional Cooking True Fan Cooking BREAD AND PIZZA (min) (°C) (°C) Pizza 230 - 250 230 - 250 10 - 20 Enamelled tray Scones 10 - 20 Baking tray Preheat the empty oven. Use the cake mould. Conventional Cooking True Fan Cooking FLANS (min) (°C)
- Seite 16 Conventional Cooking True Fan Cooking MEAT (min) (°C) (°C) Pork shoulder, with rind 120 - 150 Pork shin, 2 pieces 100 - 120 Leg of lamb 110 - 130 Whole chicken 70 - 85 Whole turkey 210 - 240 Whole duck 120 - 150 Whole goose 150 - 200...
- Seite 17 GRILL (kg) (min) (min) 1st side 2nd side Chicken breast, 4 pieces 12 - 15 12 - 14 Burgers, 6 20 - 30 Fish fillet, 4 pieces 12 - 14 10 - 12 Toasted sandwiches, 4 - 6 5 - 7 Toast, 4 - 6 2 - 4 2 - 3...
- Seite 18 11.5 Defrost (kg) Defrosting time Further defrosting (min) time (min) Chicken 100 - 140 20 - 30 Place chicken on an up‐ turned saucer placed on a large plate. Turn halfway through. Meat 100 - 140 20 - 30 Turn halfway through. 90 - 120 Cream 2 x 0.2...
- Seite 19 Ramekins Pizza pan Baking dish Flan base tin Ceramic Dark, non-reflective Dark, non-reflective Dark, non-reflective 8 cm diameter, 5 28 cm diameter 26 cm diameter 28 cm diameter cm height 11.8 Moist Fan Baking For the best results follow suggestions listed in the table below.
- Seite 20 (°C) (min) Vegetables, poached, baking tray or dripping pan 35 - 45 0.4 kg Vegetarian omelette pizza pan on wire shelf 35 - 45 Mediterranean vege‐ baking tray or dripping pan 35 - 45 tables, 0.7 kg 11.9 Information for test institutes Tests according to IEC 60350-1.
-
Seite 21: Care And Cleaning
(°C) (min) Toast, 4 - 6 Grill Wire shelf max. 2 - 3 minutes first Preheat the oven for 3 pieces side; 2 - 3 minutes minutes. second side Beef burger, Grill Wire shelf max. 20 - 30 Put the wire shelf on 6 pieces, and dripping the fourth level and the... - Seite 22 Step 1 Turn off the oven and wait until it is cold. Step 2 Pull the front of the shelf support away from the side wall. Step 3 Pull the rear end of the shelf support away from the side wall and remove Step 4 Install the shelf supports in the oppo‐...
- Seite 23 Step 3 Close the oven door halfway to the first opening position. Then lift and pull forward and remove the door from its seat. Step 4 Put the door on a soft cloth on a stable sur‐ face. Step 5 Hold the door trim (B) on the top edge of the door at the two sides and push inwards to re‐...
-
Seite 24: Troubleshooting
We recommend that you write the data here: Model (MOD.) ......... Product number (PNC) ......... Serial number (S.N.) ......... 14. ENERGY EFFICIENCY 14.1 Product Information and Product Information Sheet* Supplier's name Zanussi Model identification ZOHEX3X1 949496258 ENGLISH... -
Seite 25: Energy Saving
Energy Efficiency Index 81.2 Energy efficiency class Energy consumption with a standard load, conventional mode 0.93 kWh/cycle Energy consumption with a standard load, fan-forced mode 0.69 kWh/cycle Number of cavities Heat source Electricity Volume 72 l Type of oven Built-In Oven Mass 27.6 kg * For European Union according to EU Regulations 65/2014 and 66/2014. -
Seite 26: Veiligheidsinformatie
GA NAAR ONZE WEBSITE VOOR: Advies over gebruik, brochures, het oplossen van problemen, service- en reparatie- informatie: www.zanussi.com/support Wijzigingen voorbehouden. INHOUDSOPGAVE 1. VEILIGHEIDSINFORMATIE..................26 2. VEILIGHEIDSVOORSCHRIFTEN.................28 3. MONTAGE ........................31 4. BESCHRIJVING VAN HET PRODUCT................ 32 5. BEDIENINGSPANEEL....................32 6. VOOR HET EERSTE GEBRUIK................... 33 7. -
Seite 27: Algemene Veiligheid
complexe beperkingen dienen altijd uit de buurt van het apparaat te worden gehouden, tenzij ze voortdurend onder toezicht staan. Laat kinderen niet spelen met het apparaat. • Houd alle verpakkingen uit de buurt van kinderen en • verwijder ze op gepaste wijze. WAARSCHUWING: Houd kinderen en huisdieren uit de •... -
Seite 28: Veiligheidsvoorschriften
Als het netsnoer beschadigd is, moet de fabrikant, een • erkende serviceverlener of een gekwalificeerd persoon deze vervangen teneinde gevaarlijke situaties te voorkomen. Om de inschuifrails te verwijderen trekt u eerst de voorkant • van de inschuifrail en dan de achterkant uit de zijwanden. Installeer de inschuifrails in de omgekeerde volgorde. - Seite 29 moet worden vervangen, dan moet dit De aardkabel (groene/gele kabel) moet 2 cm gebeuren door onze Klantenservice. langer zijn dan fase- en neutrale kabels • Laat de stroomkabel niet in aanraking (blauwe en bruine kabels). komen met de deur van het apparaat of de niche onder het apparaat, met name niet als deze werkt of als de deur heet is.
-
Seite 30: Afvalverwerking
– leg geen aluminiumfolie op de bodem • Maak het apparaat schoon met een van de ruimte in het apparaat. vochtige zachte doek. Gebruik alleen – plaats geen water direct in het hete neutrale schoonmaakmiddelen. Gebruik apparaat. geen schuurmiddelen, schuursponsjes, –... -
Seite 31: Montage
3. MONTAGE 3.1 Inbouwen WAARSCHUWING! Raadpleeg de hoofdstukken Veiligheid. (*mm) min. 550 min. 560 (*mm) min. 550 min. 560 NEDERLANDS... -
Seite 32: Beschrijving Van Het Product
3.2 Bevestiging van de oven aan de kast 4. BESCHRIJVING VAN HET PRODUCT 4.1 Algemeen overzicht Bedieningspaneel Knop voor verwarmingsfuncties Aan/uit-lampje/symbool Display Bedieningsknop (voor de temperatuur) Temperatuurindicator/symbool Verwarmingselement Lamp Ventilator Uitsparing van de ovenruimte - Bak voor reiniging met water Verwijderbare inschuifrail Rekstanden 4.2 Accessoires... -
Seite 33: Voor Het Eerste Gebruik
5.2 Sensorveld / Knoppen De tijd instellen. De klokfunctie instellen. De tijd instellen. 5.3 Display A. Klokfuncties B. Timer 6. VOOR HET EERSTE GEBRUIK WAARSCHUWING! Raadpleeg de hoofdstukken Veiligheid. 6.1 Voor het eerste gebruik De oven kan een vreemde geur en rook afgeven tijdens het voorverwarmen. Zorg ervoor dat de kamer wordt verlucht. -
Seite 34: Dagelijks Gebruik
7. DAGELIJKS GEBRUIK WAARSCHUWING! Verwarmings‐ Toepassing Raadpleeg de hoofdstukken functie Veiligheid. Voor het braden van grotere 7.1 Instellen: Verwarmingsfunctie stukken vlees of gevogelte met botten op één niveau. Voor gra‐ Turbo grill tineren en bruinen. Stap 1 Draai aan de knop voor de verwar‐ Voor het bakken van pizza. -
Seite 35: Klokfuncties
8. KLOKFUNCTIES 8.1 Klokfuncties Klokfunctie Toepassing Met deze functie kunt u de dagtijd instellen, wijzigen of controleren. Tijdstip van de dag Instellen hoe lang de oven in werking is. Duur Om een afteltijd in te stellen. Deze functie heeft geen invloed op de werk‐ ing van de oven. -
Seite 36: Gebruik Van De Accessoires
Instellen: Kookwekker Stap 3 Druk op een willekeurige toets om het signaal uit te zetten. Stap 4 Draai de knoppen naar de uitstand. Annuleren: Klokfuncties Stap 1 - druk herhaaldelijk totdat het klokfunctiesymbool begint te knipperen. Stap 2 Indrukken en vasthouden: De klokfunctie schakelt na enkele seconden uit. -
Seite 37: Extra Functies
Bakrooster, Bakplaat: Plaats de plaat tussen de geleiders van de in‐ schuifrails en het bakrooster op de geleiders erbo‐ ven. 10. EXTRA FUNCTIES 10.1 Koelventilator oververhitting veroorzaken. Om dit te voorkomen is de oven voorzien van een Als de oven in werking is, wordt de veiligheidsthermostaat die de stroomtoevoer koelventilator automatisch ingeschakeld om onderbreekt. -
Seite 38: Boven- /Onderwarmte Hetelucht
Bereidingstijden apparaat de beste instellingen (temperatuur, De bereidingsduur is afhankelijk van het bereidingsduur, etc.) voor uw kookgerei, soort voedsel, de samenstelling en het recepten en hoeveelheden. volume. Houd in eerste instantie het bereidingsproces in de gaten. Zoek bij het gebruik van dit 11.2 Bakken en roosteren Boven- /onderwarmte Hetelucht CA‐... -
Seite 39: Hetelucht
Boven- /onderwarmte Hetelucht CA‐ (min) (°C) (°C) Eclairs, twee ni‐ 2 en 4 35 - 45 Bakplaat veaus Taartjes 45 - 70 Cakevorm, Ø 20 cm Rijke vruchtencake 160 110 - 120 Cakevorm, Ø 24 cm Verwarm de lege oven voor. Boven- /onderwarmte Hetelucht BROOD EN... - Seite 40 Boven- /onderwarm‐ Hetelucht VLEES (min) (°C) (°C) Rundvlees 50 - 70 Varkensvlees 90 - 120 Kalfsvlees 90 - 120 Engelse rosbief, rood 50 - 60 Engelse rosbief, medium 60 - 70 Engelse biefstuk, bien cuit 70 - 75 Boven- /onderwarmte Hetelucht VLEES (min)
-
Seite 41: Turbo Grill
Grill met de maximale temperatuurinstelling. GRILLEN (kg) (min) (min) 1e kant 2e kant Ossenhaas, 4 stuks 12 - 15 12 - 14 Biefstuk, 4 stuks 10 - 12 6 - 8 Worstjes, 8 12 - 15 10 - 12 Varkenskoteletten, 4 stuks 12 - 16 12 - 14 Halve kip, 2... -
Seite 42: Dehydrateren - Hetelucht
GEVOGELTE GEVOGELTE (°C) (min) (°C) (min) Gevogelte, porties, 0,2 200 - 220 30 - 50 Kalkoen, 2,5 - 3,5 kg 160 - 180 120 - 150 - 0,25 kg elk Kalkoen, 4 - 6 kg 140 - 160 150 - 240 Halve kip, 0,4 - 0,5 kg 190 - 210 35 - 50... -
Seite 43: Warmelucht (Vochtig)
FRUIT FRUIT Pruimen 8 - 10 Schijfjes appel 6 - 8 Abrikozen 8 - 10 Peren 6 - 9 11.7 Warmelucht (vochtig) - aanbevolen accessoires Gebruik de donkere en niet-reflecterende bakjes en schalen. Ze nemen de warmte beter op dan licht en reflecterend servies. Ovenschaaltjes Pizza pan Ovenschotel... -
Seite 44: Aanwijzingen Voor Testinstituten
(°C) (min) Hele vis, 0,2 kg bakplaat of lekschaal 25 - 35 Visfilet, 0,3 kg pizzavorm op rooster 30 - 40 Gepocheerd vlees, bakplaat of lekschaal 35 - 45 0,25 kg Sjasliek, 0,5 kg bakplaat of lekschaal 40 - 50 Koekjes, 16 stuks bakplaat of lekschaal 30 - 45... -
Seite 45: Onderhoud En Reiniging
(°C) (min) Appeltaart, Boven- /onder‐ Bakrooster 70 - 90 2 blikken warmte Ø20 cm Appeltaart, Hetelucht Bakrooster 70 - 90 2 blikken Ø20 cm Biscuitge‐ Boven- /onder‐ Bakrooster 40 - 50 Verwarm de oven 10 bak, taart‐ warmte minuten voor. vorm Ø26 Biscuitge‐... - Seite 46 12.1 Opmerkingen over schoonmaken Maak de voorkant van de oven schoon met een zachte doek, warm water en een mild reini‐ gingsmiddel. Reinig en controleer de deurpakking rond het frame van de uitsparing. Gebruik een reinigingsoplossing om metalen oppervlakken te reinigen. Reinig vlekken met een mild reinigingsmiddel.
- Seite 47 Stap 3 Stel de temperatuur in op 90 °C. Stap 6 Wacht tot de oven afgekoeld is. Maak de holte droog met een zachte doek. Stap 4 Laat de oven 30 minuten werken. Stap 5 Schakel de oven uit. 12.4 Hoe te verwijderen en installeren: Deur De ovendeur beschikt over twee glasplaten.
-
Seite 48: Probleemoplossing
Stap 8 Reinig de glasplaten met een sopje. Droog de glasplaten voorzichtig af. Reinig de glas‐ platen niet in de vaatwasser. Stap 9 Installeer na het reinigen de glasplaat en de ovendeur. De bedrukte zone moet naar de binnenkant van de deur gericht zijn. -
Seite 49: Energiezuinigheid
Productnummer (PNC) ......... Serienummer (S.N.) ......... 14. ENERGIEZUINIGHEID 14.1 Productinformatie- en productinformatieblad* Naam leverancier Zanussi Modelidentificatie ZOHEX3X1 949496258 Energie-efficiëntie-index 81.2 Energie-efficiëntieklasse Energieverbruik bij een standaardbelasting, stand boven + onder‐ 0.93 kWh/cyclus warmte Energieverbruik bij een standaardbelasting, stand hetelucht 0.69 kWh/cyclus... -
Seite 50: Milieubescherming
EN 60350-1 - Elektrische huishoudelijke kookapparaten - Deel 1: Range-ovens, ovens, stoomovens en grills - Methoden voor prestatiemeting. 14.2 Energiebesparing Restwarmte Wanneer de kookduur langer is dan 30 minuten, verlaag dan de oventemperatuur tot Deze oven bevat functies die u minimaal 3-10 minuten voor het einde van helpen energie te besparen het koken. -
Seite 51: Information Sur La Sécurité
VISITEZ NOTRE SITE WEB POUR : Obtenir des conseils d’utilisation, des brochures, un dépanneur, des informations sur le service et les réparations : www.zanussi.com/support Sous réserve de modifications. TABLE DES MATIÈRES 1. INFORMATION SUR LA SÉCURITÉ................51 2. CONSIGNES DE SÉCURITÉ..................53 3. -
Seite 52: Consignes Générales De Sécurité
de 8 ans et les personnes ayant un handicap très important et complexe doivent être tenus à l'écart de l’appareil, à moins d'être surveillés en permanence. Ne laissez pas les enfants jouer avec l'appareil. • Ne laissez pas les emballages à la portée des enfants et •... -
Seite 53: Consignes De Sécurité
Pour retirer les supports de grille, tirez d'abord sur l'avant • de ceux-ci, puis sur l'arrière, pour les écarter des parois extérieures. Réinstallez les supports de grille en répétant cette procédure dans l'ordre inverse. 2. CONSIGNES DE SÉCURITÉ 2.1 Installation Largeur de l’arrière de l’ap‐... - Seite 54 porte de l'appareil ou de la niche d'encastrement sous l'appareil, particulièrement lorsqu'il est en marche ou que la porte est chaude. • La protection contre les chocs des parties 2.3 Utilisation sous tension et isolées doit être fixée de telle manière qu'elle ne puisse pas être AVERTISSEMENT! enlevée sans outils.
-
Seite 55: Éclairage Intérieur
– ne placez jamais de feuilles • Nettoyez régulièrement l'appareil afin de d'aluminium directement sur le fond maintenir le revêtement en bon état. de la cavité de l'appareil. • Nettoyez l'appareil avec un chiffon doux – ne versez jamais d'eau directement humide. -
Seite 56: Installation
3. INSTALLATION 3.1 Encastrement AVERTISSEMENT! Reportez-vous aux chapitres concernant la sécurité. (*mm) min. 550 min. 560 (*mm) min. 550 min. 560 FRANÇAIS... -
Seite 57: Fixation Du Four Au Meuble
3.2 Fixation du four au meuble 4. DESCRIPTION DE L'APPAREIL 4.1 Présentation générale Bandeau de commande Manette de sélection des modes de cuisson Voyant / symbole de mise sous tension Affichage Thermostat Indicateur / symbole de température Élément chauffant Éclairage Ventilateur Bac de la cavité... -
Seite 58: Touches Sensitives
5.2 Touches sensitives Pour régler l'heure. Pour régler une fonction de l'horloge. Pour régler l'heure. 5.3 Affichage A. Fonctions de l’horloge B. Minuteur 6. AVANT LA PREMIÈRE UTILISATION AVERTISSEMENT! Reportez-vous aux chapitres concernant la sécurité. 6.1 Avant la première utilisation Le four peut produire une odeur et de la fumée lors du préchauffage. -
Seite 59: Utilisation Quotidienne
7. UTILISATION QUOTIDIENNE AVERTISSEMENT! Mode de cuis‐ Application Reportez-vous aux chapitres concernant la sécurité. Pour rôtir de grosses pièces de 7.1 Comment régler : Mode de viande ou de volaille avec os sur un seul niveau. Également cuisson Turbo gril pour gratiner et faire dorer. -
Seite 60: Fonctions De L'horloge
8. FONCTIONS DE L'HORLOGE 8.1 Fonctions de l’horloge Fonction de l'horloge Utilisation Pour régler, changer ou vérifier l'heure. Heure Pour régler la durée de fonctionnement du four. Durée Pour régler la minuterie. Cette fonction est sans effet sur le fonctionnement du four. -
Seite 61: Utilisation Des Accessoires
Comment régler : Minuteur Étape 4 Tournez la manette sur la position Arrêt. Comment annuler : Fonctions de l’horloge Étape 1 - appuyez plusieurs fois jusqu’à ce que le symbole de la fonction horloge commence à cligno‐ ter. Étape 2 Maintenez la touche : La fonction horloge est désactivée au bout de quelques secondes. -
Seite 62: Fonctions Supplémentaires
Grille métallique, Plateau de cuisson: Poussez le plateau entre les rails du support de grille et glissez la grille métallique entre les rails se trouvant juste au-dessus. 10. FONCTIONS SUPPLÉMENTAIRES 10.1 Ventilateur de refroidissement surchauffe dangereuse. Pour éviter cela, le four dispose d'un thermostat de sécurité... - Seite 63 Temps de cuisson réglages (fonction, temps de cuisson, etc.) Le temps de cuisson varie selon le type pour vos ustensiles, vos recettes et les d'aliment, sa consistance et son volume. quantités lorsque vous utiliserez l'appareil. Au départ, surveillez la cuisson lorsque vous cuisinez.
- Seite 64 Chauffage Haut/ Bas Chaleur tournante GÂ‐ TEAUX (min) (°C) (°C) Petits pains, pré‐ 12 - 20 Plateau de chauffer le four à cuisson vide Éclairs 25 - 35 Plateau de cuisson Éclairs, deux ni‐ 2 et 4 35 - 45 Plateau de veaux cuisson...
- Seite 65 Chauffage Haut/ Bas Chaleur tournante PRÉPARATIONS À BASE D'ŒUFS (min) (°C) (°C) Quiches 50 - 60 Lasagne 180 - 190 180 - 190 25 - 40 Cannellonis 180 - 190 180 - 190 25 - 40 Utilisez le deuxième niveau de la grille. Utilisez la grille métallique.
-
Seite 66: Turbo Gril
Chauffage Haut/ Bas Chaleur tournante POISSON (min) (°C) (°C) Truite / Dorade, 3 - 4 poissons 40 - 55 Thon / Saumon, 4 - 6 filets 35 - 60 11.3 Gril Préchauffez le four à vide. Utilisez le quatrième niveau de la grille. Réglez le gril à... - Seite 67 PORC VOLAILLE (°C) (min) (°C) (min) Épaule / Cou / Noix de 160 - 180 90 - 120 Volaille, portions0,2 - 200 - 220 30 - 50 jambon, 1 - 1,5 kg 0,25 kg chacune Côtelettes / Côte levée, 170 - 180 60 - 90 Poulet, demi0,4 - 0,5 190 - 210...
- Seite 68 (kg) Durée de décon‐ Décongélation com‐ gélation (min) plémentaire (min) Truite 0,15 25 - 35 10 - 15 Fraises 30 - 40 10 - 20 Beurre 0,25 30 - 40 10 - 15 Gâteau 11.6 Déshydratation - Chaleur tournante LÉGUMES Utilisez des plaques recouvertes de papier (°C) sulfurisé.
- Seite 69 11.8 Chaleur tournante humide Pour de meilleurs résultats, suivez les suggestions indiquées dans le tableau ci- dessous. (°C) (min) Petits pains sucrés, Plateau de cuisson ou plat à 40 - 50 (12 pièces) rôtir Petits pains, (9 piè‐ Plateau de cuisson ou plat à 35 - 45 ces) rôtir...
- Seite 70 (°C) (min) Tartelettes, (8 pièces) Plateau de cuisson ou plat à 30 - 40 rôtir Légumes, pochés, Plateau de cuisson ou plat à 35 - 45 0.4 kg rôtir Omelette végétarien‐ plaque à pizza sur la grille mé‐ 35 - 45 tallique Légumes méditerra‐...
-
Seite 71: Entretien Et Nettoyage
(°C) (min) Génoise, Chaleur tour‐ Grille métal‐ 2 et 4 40 - 60 Préchauffez le four moule à gâ‐ nante lique pendant 10 minutes. teau de 26 cm Sablé Chaleur tour‐ Plateau de 140 - 20 - 40 nante cuisson Sablé... - Seite 72 Après chaque utilisation, lavez tous les accessoires et séchez-les. Utilisez un chiffon doux avec de l’eau tiède et un détergent doux. Ne lavez pas les accessoires au lave-vaisselle. Ne nettoyez pas les accessoires antiadhésifs avec un produit nettoyant abrasif ou des objets tranchants.
- Seite 73 Étape 1 Ouvrez complètement la porte et saisissez les 2 charnières de porte. Étape 2 Soulevez et faites tourner les leviers sur les 2 charnières. Étape 3 Fermez la porte du four à la première posi‐ tion d'ouverture (mi-parcours). Puis soulevez et tirez la porte vers l'avant et retirez-la de son logement.
-
Seite 74: Dépannage
La zone imprimée doit faire face à l'intérieur de la por‐ te. Après l'installation, vérifiez que la surface du pan‐ neau de verre où se trouve la zone imprimée est lisse au toucher (le relief doit être de l'autre côté). Lorsque le cadre de la porte est installé... -
Seite 75: Rendement Énergétique
......... 14. RENDEMENT ÉNERGÉTIQUE 14.1 Informations produit et Fiche d’informations produit* Nom du fournisseur Zanussi Identification du modèle ZOHEX3X1 949496258 Index d'efficacité énergétique 81.2 Classe d’efficacité énergétique Consommation d'énergie avec charge standard et mode tradition‐ 0.93 kWh/cycle Consommation d'énergie avec charge standard et mode air pulsé... -
Seite 76: En Matière De Protection De L'environnement
Cuisson avec ventilation Maintien des aliments au chaud Si possible, utilisez les fonctions de cuisson Sélectionnez la température la plus basse avec la ventilation pour économiser de possible pour utiliser la chaleur résiduelle et l'énergie. maintenir le repas au chaud. Chaleur résiduelle Chaleur tournante humide Si la cuisson doit durer plus de 30 minutes,... -
Seite 77: Sicherheitshinweise
BESUCHEN SIE UNSERE WEBSITE, UM: Anwendungshinweise, Prospekte, Informationen zu Fehlerbehebung, Service und Reparatur zu erhalten: www.zanussi.com/support Änderungen vorbehalten. INHALTSVERZEICHNIS 1. SICHERHEITSHINWEISE.................... 77 2. SICHERHEITSANWEISUNGEN................... 79 3. MONTAGE........................82 4. GERÄTEBESCHREIBUNG...................83 5. BEDIENFELD........................83 6. VOR DER ERSTEN INBETRIEBNAHME..............84 7. TÄGLICHER GEBRAUCH.................... 85 8. -
Seite 78: Allgemeine Sicherheit
verbundenen Gefahren verstanden haben. Kinder unter 8 Jahren und Personen mit schweren Behinderungen oder Mehrfachbehinderung müssen vom Gerät ferngehalten werden, wenn sie nicht ständig beaufsichtigt werden. Kinder dürfen nicht mit dem Gerät spielen. • Halten Sie sämtliches Verpackungsmaterial von Kindern •... -
Seite 79: Sicherheitsanweisungen
gleichermaßen qualifizierten Person ausgetauscht werden, um Gefahren durch elektrischen Strom zu vermeiden. Ziehen Sie die Einhängegitter erst vorne und dann hinten • von der Seitenwand weg und nehmen Sie sie heraus. Führen Sie zum Einsetzen der Einhängegitter die oben aufgeführten Schritte in umgekehrter Reihenfolge durch. 2. - Seite 80 Gerät nicht berührt oder in ihre Nähe gelangt, insbesondere wenn das Gerät eingeschaltet oder die Tür heiß ist. • Alle Teile, die gegen direktes Berühren schützen, sowie die isolierten Teile 2.3 Gebrauch müssen so befestigt werden, dass sie nicht ohne Werkzeug entfernt werden WARNUNG! können.
-
Seite 81: Innenbeleuchtung
– Füllen Sie kein Wasser in das heiße • Reinigen Sie das Geräts mit einem Gerät. weichen, feuchten Tuch. Verwenden Sie – Lassen Sie nach Abschluss des ausschließlich Neutralreiniger. Benutzen Garvorgangs kein feuchtes Geschirr Sie keine Scheuermittel, scheuernde oder feuchte Speisen im Gerät Reinigungsschwämmchen, Lösungsmittel stehen. -
Seite 82: Montage
3. MONTAGE 3.1 Montage WARNUNG! Siehe Kapitel Sicherheitshinweise. (*mm) min. 550 min. 560 (*mm) min. 550 min. 560 DEUTSCH... -
Seite 83: Befestigung Des Ofens Am Möbel
3.2 Befestigung des Ofens am Möbel 4. GERÄTEBESCHREIBUNG 4.1 Gesamtansicht Bedienfeld Einstellknopf für die Ofenfunktionen Betriebskontrolllampe/-symbol Display Einstellknopf (für die Temperatur) Temperaturanzeige/-symbol Heizelement Lampe Ventilator Garraumvertiefung - Behälter für die Aqua-Reinigungsfunktion Einhängegitter, herausnehmbar Einschubebenen 4.2 Zubehör • Backblech Für Kuchen und Plätzchen. •... -
Seite 84: Vor Der Ersten Inbetriebnahme
5.2 Sensorfelder/Tasten Einstellen der Zeit. Einstellen einer Uhrfunktion. Einstellen der Zeit. 5.3 Display A. Uhrfunktionen B. Timer 6. VOR DER ERSTEN INBETRIEBNAHME WARNUNG! Siehe Kapitel Sicherheitshinweise. 6.1 Vor der ersten Inbetriebnahme Der Backofen kann während des Vorheizens Geruch und Rauch verströmen. Stellen Sie sicher, dass der Raum belüftet ist. -
Seite 85: Täglicher Gebrauch
Schalten Sie den Ofen aus und warten Sie, bis er abgekühlt ist. Setzen Sie die Zubehörteile und die heraus‐ nehmbaren Einhängegitter in den Backofen. 7. TÄGLICHER GEBRAUCH WARNUNG! Ofenfunktion Anwendung Siehe Kapitel Sicherheitshinweise. Zum Backen von Kuchen mit knusprigen Böden und zum Ein‐ 7.1 Einstellung: Ofenfunktion kochen von Lebensmitteln. -
Seite 86: Uhrfunktionen
Allgemeine Empfehlungen zur Energieeinsparung finden Sie im Kapitel „Energieeffizienz“, Energie sparen. 8. UHRFUNKTIONEN 8.1 Uhrfunktionen Uhrfunktion Anwendung Zum Einstellen, Ändern oder Abfragen der Uhrzeit. Uhrzeit Einstellen der Einschaltdauer für den Backofen. Dauer Zum Einstellen eines Countdowns. Diese Funktion wirkt sich nicht auf den Betrieb des Backofens aus. -
Seite 87: Einstellung: Kurzzeit-Wecker
Einstellung: Kurzzeit-Wecker Schritt 2 - zum Einstellen der Zeit drücken. Die Funktion startet automatisch nach 5 Sekunden. Nach Ablauf der eingestellten Zeit ertönt der Signalton. Schritt 3 Drücken Sie eine beliebige Taste, um das Signal abzustellen. Schritt 4 Drehen Sie die Knöpfe in die Position Aus. Abbrechen: Uhrfunktionen Schritt 1 - wiederholt drücken, bis das Symbol der Uhrfunktion anfängt zu blinken. -
Seite 88: Zusatzfunktionen
Kombirost, Backblech: Schieben Sie das Backblech zwischen die Füh‐ rungsstäbe der Einhängegitter und dem Kombirost auf die Führungsstäbe darüber. 10. ZUSATZFUNKTIONEN 10.1 Kühlgebläse gefährlichen Überhitzung führen. Um dies zu verhindern, ist der Backofen mit einem Wenn der Backofen in Betrieb ist, wird das Sicherheitsthermostat ausgestattet, der die Kühlgebläse automatisch eingeschaltet, um Stromzufuhr unterbrechen kann. -
Seite 89: Backen Und Braten
Garzeiten (Garstufe, Gardauer, usw.) für Ihr Die Garzeiten hängen von der Art des Kochgeschirr, Ihre Rezepte und die von Garguts, seiner Konsistenz und der Menge Ihnen zubereiteten Garmengen am besten geeignet sind. Beobachten Sie den Garfortschritt. Finden Sie heraus, welche Geräteeinstellungen 11.2 Backen und Braten Ober-/Unterhitze Heißluft... - Seite 90 Ober-/Unterhitze Heißluft KU‐ CHEN (Min.) (°C) (°C) Eclairs, zwei Ebe‐ – – 2 und 4 35 – 45 Backblech Törtchen 45 – 70 Kuchenform, Ø 20 cm Üppiger Obstku‐ 110 – 120 Kuchenform, Ø chen 24 cm Heizen Sie den leeren Backofen vor. Ober-/Unterhitze Heißluft BROT UND...
- Seite 91 Ober-/Unterhitze Heißluft FLEISCH (Min.) (°C) (°C) Rind 50 – 70 Schweinefleisch 90 – 120 Kalb 90 – 120 Roastbeef, englisch, blutig 50 – 60 Roastbeef, englisch, rosa 60 – 70 Roastbeef, englisch, durch 70 – 75 Ober-/Unterhitze Heißluft FLEISCH (Min.) (°C) (°C) Schweineschulter, mit Schwarte...
-
Seite 92: Heißluftgrillen
GRILL (kg) (Min.) (Min.) Erste Seite Zweite Seite Filetsteaks, 4 Stück 12 - 15 12 - 14 Rindersteak, 4 Stück 10 - 12 6 - 8 Würstchen, 8 12 - 15 10 - 12 Schweinekoteletts, 4 Stück 12 - 16 12 - 14 Hähnchen, halbiert, 2 30 - 35... -
Seite 93: Dörren - Heißluft
GEFLÜGEL GEFLÜGEL (°C) (Min.) (°C) (Min.) Geflügelteile, je 0,2 - 200 - 220 30 - 50 Pute, 2,5 - 3,5 kg 160 - 180 120 - 150 0,25 kg Pute, 4 - 6 kg 140 - 160 150 - 240 Hähnchen, halbiert, je 190 - 210 35 - 50... -
Seite 94: Feuchte Umluft - Empfohlenes Zubehör
Stellen Sie die Temperatur auf 60 - 70 °C ein. OBST (Std.) OBST Aprikosen 8 - 10 (Std.) Apfelscheiben 6 - 8 Pflaumen 8 - 10 Birnen 6 - 9 11.7 Feuchte Umluft - Empfohlenes Zubehör Verwenden Sie die dunklen und nicht reflektierenden Formen und Behälter. Sie haben eine bessere Wärmeabsorption als helle Farbe und reflektierende Schüsseln. -
Seite 95: Informationen Für Prüfinstitute
(°C) (Min.) Fischfilet, 0,3 kg Pizzapfanne auf Kombirost 30 - 40 Fleisch, pochiert, 0,25 Backblech oder tiefes Blech 35 - 45 Schaschlik, 0,5 kg Backblech oder tiefes Blech 40 - 50 Plätzchen, 16 Stück Backblech oder tiefes Blech 30 - 45 Makronen, 20 Stück Backblech oder tiefes Blech 45 - 55... -
Seite 96: Reinigung Und Pflege
(°C) (Min.) Biskuit, Ku‐ Ober-/Unterhit‐ Kombirost 40 - 50 Backofen 10 Min. vor‐ chenform Ø heizen. 26 cm Biskuit, Ku‐ Heißluft Kombirost 40 - 50 Backofen 10 Min. vor‐ chenform Ø heizen. 26 cm Biskuit, Ku‐ Heißluft Kombirost 2 und 4 40 - 60 Backofen 10 Min. -
Seite 97: Entfernen: Einhängegitter
Reinigen Sie den Garraum nach jedem Gebrauch. Fettansammlungen oder andere Speise‐ reste könnten einen Brand verursachen. Es kann sich Feuchtigkeit im Ofen oder an den Glasscheiben der Tür niederschlagen. Um die Kondensation zu reduzieren, schalten Sie den Backofen immer 10 Minuten vor dem Ga‐ ren ein. -
Seite 98: Aus- Und Einbau Der: Tür
12.4 Aus- und Einbau der: Tür Die Backofentür hat zwei Glasscheiben. Die Backofentür und die innere Glasscheibe können zur Reinigung ausgebaut werden. Lesen Sie die gesamte Anleitung „Aus- und Einbauen der Tür“, bevor Sie die Glasscheiben entfernen. VORSICHT! Benutzen Sie den Backofen nicht ohne die Glasscheiben. Schritt 1 Öffnen Sie die Backofentür vollständig und halten Sie beide Scharniere fest. -
Seite 99: Austausch: Lampe
Schritt 8 Reinigen Sie die Glasscheiben mit Wasser und Spülmittel. Trocknen Sie die Glasschei‐ ben sorgfältig ab. Reinigen Sie die Glas‐ scheiben nicht im Geschirrspüler. Schritt 9 Setzen Sie nach der Reinigung die Glas‐ scheibe und die Backofentür ein Der bedruckte Bereich muss zur Innenseite der Tür zeigen. -
Seite 100: Servicedaten
Modell (MOD.) ......... Produktnummer (PNC) ......... Seriennummer (S.N.) ......... 14. ENERGIEEFFIZIENZ 14.1 Produktinformationen und Produktdatenblatt* Herstellername Zanussi Modellidentifikation ZOHEX3X1 949496258 Energieeffizienzindex 81.2 Energieeffizienzklasse Energieverbrauch bei Standardbeladung, Ober-/Unterhitze 0.93 kWh/Programm Energieverbrauch bei Standardbeladung, Umluft 0.69 kWh/Programm Anzahl der Garräume Wärmequelle Strom Fassungsvermögen... -
Seite 101: Energie Sparen
14.2 Energie sparen Restwärme Beträgt die Garzeit mehr als 30 Minuten, reduzieren Sie die Ofentemperatur 3 - 10 Der Backofen verfügt über Min. vor Ablauf des Garvorgangs. Durch die Funktionen, mit deren Hilfe Sie Restwärme des Backofens werden die beim täglichen Kochen Energie Speisen weiter gegart. -
Seite 102: Segurança De Crianças E Pessoas Vulneráveis
VISITE O NOSSO WEBSITE PARA: Resolver problemas e obter conselhos de utilização, catálogos e informações sobre assistência e reparações: www.zanussi.com/support Sujeito a alterações sem aviso prévio. ÍNDICE 1. INFORMAÇÕES DE SEGURANÇA................102 2. INSTRUÇÕES DE SEGURANÇA................104 3. INSTALAÇÃO......................107 4. DESCRIÇÃO DO PRODUTO..................108 5. -
Seite 103: Segurança Geral
complexas afastadas do aparelho, a menos que constantemente vigiadas. Não permita que crianças brinquem com o aparelho. • Mantenha todos os materiais de embalagem fora do • alcance das crianças e elimine-os de forma apropriada. AVISO: Mantenha as crianças e os animais domésticos •... -
Seite 104: Instruções De Segurança
Para remover os apoios para prateleiras, puxe primeiro a • parte da frente e depois a parte de trás do apoio para prateleiras para fora da parede lateral. Instale os apoios para prateleiras na sequência inversa. 2. INSTRUÇÕES DE SEGURANÇA 2.1 Instalação Profundidade do aparelho 569 mm... - Seite 105 2.3 Utilização • As protecções contra choques eléctricos das peças isoladas e não isoladas devem estar fixas de modo a não poderem ser AVISO! retiradas sem ferramentas. Risco de ferimentos, • Ligue a ficha à tomada elétrica apenas no queimaduras, choque elétrico ou final da instalação.
- Seite 106 • A eventual descoloração do esmalte ou neutros. Não utilize produtos abrasivos, do aço inoxidável não afeta o esfregões, solventes ou objetos desempenho do aparelho. metálicos. • Utilize um recipiente profundo quando • Se utilizar um spray para forno, siga as cozer bolos muito húmidos.
-
Seite 107: Instalação
3. INSTALAÇÃO 3.1 Encastre AVISO! Consulte os capítulos relativos à segurança. (*mm) min. 550 min. 560 (*mm) min. 550 min. 560 PORTUGUÊS... -
Seite 108: Descrição Do Produto
3.2 Fixação do forno no armário 4. DESCRIÇÃO DO PRODUTO 4.1 Visão geral Painel de controlo Botão para as funções de aquecimento do forno Lâmpada/símbolo de alimentação Visor Botão de controlo (para a temperatura) Símbolo / indicador de temperatura Elemento de aquecimento Lâmpada Ventilador Baixo relevo da cavidade - Recipiente da... -
Seite 109: Antes Da Primeira Utilização
5.2 Campos/Botões do sensor Para definir o tempo. Para selecionar uma função de relógio. Para definir o tempo. 5.3 Visor A. Funções de relógio B. Temporizador 6. ANTES DA PRIMEIRA UTILIZAÇÃO AVISO! Consulte os capítulos relativos à segurança. 6.1 Antes da primeira utilização O forno pode emitir algum odor e fumo durante o pré-aquecimento. -
Seite 110: Utilização Diária
7. UTILIZAÇÃO DIÁRIA AVISO! Tipo de aqueci‐ Aplicação Consulte os capítulos relativos à mento segurança. Para assar peças de carne 7.1 Como definir: Função de grandes ou aves com ossos nu‐ ma posição da prateleira. Para aquecimento Turbo Grill fazer gratinados e alourar. Para cozer pizza. -
Seite 111: Funções De Relógio
8. FUNÇÕES DE RELÓGIO 8.1 Funções de relógio Função de relógio Aplicação Para definir, alterar ou verificar a hora do dia. Hora do dia Para definir o tempo de funcionamento do forno. Duração Para definir uma contagem decrescente. Esta função não afeta o funcio‐ namento do forno. -
Seite 112: Utilizar Os Acessórios
Como definir: Conta-Minutos Passo 4 Rode os botões para a posição Off. Como cancelar: Funções de relógio Passo 1 - prima repetidamente até o símbolo da função do relógio começar a piscar. Passo 2 Prima continuamente: A função do relógio desliga-se após alguns segundos. 9. -
Seite 113: Funções Adicionais
Prateleira em grelha, Tabuleiro para assar: Introduza o tabuleiro entre as barras-guia dos apoios para prateleiras e a prateleira em grelha sobre as barras imediatamente acima. 10. FUNÇÕES ADICIONAIS 10.1 Ventoinha de arrefecimento sobreaquecimento perigoso. Para evitar isso, o forno possui um termóstato de segurança Quando o forno está... - Seite 114 No início, monitorize o desempenho quando seus recipientes e para as suas receitas e cozinhar. Quando utilizar este aparelho, quantidades. procure as melhores regulações (grau de cozedura, tempo de cozedura, etc.) para os 11.2 Fazer bolos e assar Cozedura Convencio‐ Aquecimento Ventilado BO‐...
- Seite 115 Cozedura Convencio‐ Aquecimento Ventilado BO‐ (min) (°C) (°C) Éclairs 25 - 35 Tabuleiro para assar Éclairs, dois níveis - 2 e 4 35 - 45 Tabuleiro para assar Tartes 45 - 70 Forma de bolo, Ø 20 cm Bolo de fruta rico 110 - 120 Forma de bolo, Ø...
- Seite 116 Cozedura Convencional Aquecimento Ventila‐ FLANS (min) (°C) (°C) Quiches 50 - 60 Lasanha 180 - 190 180 - 190 25 - 40 Canelones 180 - 190 180 - 190 25 - 40 Utilize a segunda posição da prateleira. Utilize a prateleira em grelha. Cozedura Convenci‐...
- Seite 117 Cozedura Convencio‐ Aquecimento Ventila‐ CARNE (min) (°C) (°C) Faisão inteiro 90 - 120 Utilize a segunda posição da prateleira. Cozedura Convencio‐ Aquecimento Ven‐ tilado PEIXE (min) (°C) (°C) Truta / Dourada, 3 - 4 peixes 40 - 55 Atum / Salmão, 4 - 6 filetes 35 - 60 11.3 Grelhador Pré-aqueça o forno vazio.
- Seite 118 Para calcular o tempo do assado, multiplique o tempo dado na tabela abaixo pelos centímetros de espessura do filete. CORDEIRO (°C) (min) Perna de borrego / 150 - 170 100 - 120 CARNE DE Borrego assado, 1 - VACA (°C) (min) 1,5 kg Carne assada ou lom‐...
- Seite 119 (kg) Tempo de des‐ Tempo extra de des‐ congelação congelação (min.) (min.) Carne 100 - 140 20 - 30 Vire a meio do tempo. 90 - 120 Natas 2 x 0,2 80 - 100 10 - 15 Também é possível bater as natas quando ainda es‐...
- Seite 120 Formas individu‐ Forma com base para Forma para pizza Assadeira flan Vitrocerâmica Escuro, não refletor Escuro, não refletor Escuro, não refletor 8 cm de diâmetro, 28 cm de diâmetro 26 cm de diâmetro 28 cm de diâmetro 5 cm de altura 11.8 Ventilado com Resistência Para obter os melhores resultados, siga as sugestões indicadas na tabela abaixo.
- Seite 121 (°C) (min.) Biscoitos, 16 unida‐ tabuleiro para assar ou tabu‐ 30 - 45 leiro para recolha de gorduras Biscoitos de amên‐ tabuleiro para assar ou tabu‐ 45 - 55 doa, 20 unidades leiro para recolha de gorduras Queques, 12 unida‐ tabuleiro para assar ou tabu‐...
-
Seite 122: Manutenção E Limpeza
(°C) (min) Pão-de-ló, Cozedura Con‐ Prateleira 40 - 50 Pré-aqueça o forno du‐ forma de vencional em grelha rante 10 minutos. bolo de Ø26 Pão-de-ló, Aquecimento Prateleira 40 - 50 Pré-aqueça o forno du‐ forma de Ventilado em grelha rante 10 minutos. bolo de Ø26 Pão-de-ló, Aquecimento... - Seite 123 12.1 Notas sobre a limpeza Limpe a parte da frente do forno com um pano macio com água morna e um detergente su‐ ave. Limpe e verifique a junta da porta em torno da moldura da cavidade. Utilize uma solução de limpeza para limpar as superfícies metálicas. Limpe manchas com um detergente suave.
- Seite 124 Passo 3 Regule a temperatura para 90 °C. Passo 6 Aguarde até que o forno esteja frio. Se‐ que a cavidade com um pano macio. Passo 4 Deixe o forno funcionar durante 30 min. Passo 5 Desligue o forno. 12.4 Como remover e instalar: Porta A porta do forno tem dois painéis de vidro.
-
Seite 125: Resolução De Problemas
Passo 8 Limpe os painéis de vidro com água e sabão Seque cuidadosamente os painéis de vidro. Não lave os acessórios na máquina de lavar loiça. Passo 9 Após a limpeza, instale o painel de vidro e a porta do forno. A zona com a impressão em relevo tem de ficar volta‐... -
Seite 126: Eficiência Energética
14. EFICIÊNCIA ENERGÉTICA 14.1 Informação de produto e folha de informação de produto* Nome do fornecedor Zanussi Identificação do modelo ZOHEX3X1 949496258 Índice de eficiência energética 81.2 Classe de eficiência energética Consumo de energia com uma carga normal, modo convencional 0.93 kWh/ciclo... -
Seite 127: Poupança De Energia
14.2 Poupança de energia Calor residual Quando a duração da cozedura for superior a 30 min, reduza a temperatura do forno O forno possui funções que para 3 a 10 min no mínimo antes do fim da ajudam a poupar energia nos cozedura. -
Seite 128: Información Sobre Seguridad
VISITE NUESTRO SITIO WEB PARA: Obtener consejos, folletos, soluciones a problemas e información de servicio y reparación: www.zanussi.com/support Salvo modificaciones. CONTENIDO 1. INFORMACIÓN SOBRE SEGURIDAD...............128 2. INSTRUCCIONES DE SEGURIDAD................130 3. INSTALACIÓN......................133 4. DESCRIPCIÓN DEL PRODUCTO................134 5. PANEL DE MANDOS....................134 6. -
Seite 129: Seguridad General
personas con minusvalías importantes y complejas, salvo que estén bajo supervisión continua. No deje que los niños jueguen con el aparato. • Mantenga todo el material de embalaje fuera del alcance de • los niños y deséchelo de forma adecuada. ADVERTENCIA: Mantenga a los niños y mascotas alejados •... -
Seite 130: Instrucciones De Seguridad
Para quitar los carriles laterales, tire primero del frontal del • carril y luego separe el extremo trasero de las paredes. Coloque los carriles laterales en el orden inverso. 2. INSTRUCCIONES DE SEGURIDAD 2.1 Instalación Fondo con la puerta abier‐ 1022 mm ADVERTENCIA! Sólo un técnico cualificado... - Seite 131 2.3 Uso • Conecte el enchufe a la toma de corriente únicamente cuando haya terminado la instalación. Asegúrese de tener acceso al ADVERTENCIA! enchufe del suministro de red una vez Riesgo de lesiones, quemaduras finalizada la instalación. y descargas eléctricas o •...
- Seite 132 • La pérdida de color del esmalte o el acero estropajos duros, disolventes ni objetos inoxidable no afecta al rendimiento del metálicos. aparato. • Si utiliza aerosoles de limpieza para • Utilice una bandeja honda para pasteles hornos, siga las instrucciones de húmedos.
-
Seite 133: Instalación
3. INSTALACIÓN 3.1 Empotrado ADVERTENCIA! Consulte los capítulos sobre seguridad. (*mm) min. 550 min. 560 (*mm) min. 550 min. 560 ESPAÑOL... -
Seite 134: Descripción Del Producto
3.2 Fijación del horno al mueble 4. DESCRIPCIÓN DEL PRODUCTO 4.1 Descripción general Panel de control Mando de las funciones de cocción Piloto/símbolo de alimentación Pantalla Mando de control (para la temperatura) Indicador/símbolo de temperatura Elemento calentador Bombilla Ventilador Relieve de la cavidad - Contenedor de limpieza con agua Carril de apoyo, extraíble Niveles para las rejillas... -
Seite 135: Antes Del Primer Uso
5.2 Sensores / botones Para ajustar la hora. Para ajustar una función de reloj. Para ajustar la hora. 5.3 Pantalla A. Funciones del reloj B. Temporizador 6. ANTES DEL PRIMER USO ADVERTENCIA! Consulte los capítulos sobre seguridad. 6.1 Antes del primer uso El horno puede emitir olores y humos durante el precalentamiento. -
Seite 136: Uso Diario
7. USO DIARIO ADVERTENCIA! Función de Aplicación Consulte los capítulos sobre cocción seguridad. Para asar piezas de carne gran‐ 7.1 Cómo configurar: Función de des o aves con hueso en una posición de bandeja. Para hacer cocción Grill Turbo gratenes y dorar. Para hornear pizza. -
Seite 137: Funciones Del Reloj
8. FUNCIONES DEL RELOJ 8.1 Funciones del reloj función de reloj Aplicación Ajustar, modificar o comprobar la hora. Hora Programar la duración del funcionamiento del horno. Duración Para configurar una cuenta atrás. Esta función no influye en el funciona‐ miento del horno. Puede ajustar esta función cualquier momento, incluso Avisador si el horno está... -
Seite 138: Uso De Los Accesorios
Cómo configurar: Avisador Paso 4 Gire los mandos a la posición de apagado. Instrucciones para cancelar: Funciones del reloj Paso 1 - pulse repetidamente hasta que el símbolo de la función de reloj empiece a parpadear. Paso 2 Mantenga pulsada: La función de reloj se apaga después de unos segundos. -
Seite 139: Funciones Adicionales
Parrilla, Bandeja: Posicione la bandeja entre las guías del carril de apoyo y la parrilla en las guías de encima. 10. FUNCIONES ADICIONALES 10.1 Ventilador de enfriamiento sobrecalentamientos peligrosos. Para evitarlo, el horno dispone de un termostato Cuando el horno funciona, el ventilador de de seguridad que interrumpe la alimentación. -
Seite 140: Horneado Y Asado
Tiempos de cocción (de calor, tiempo de cocción, etc.) para sus Los tiempos de cocción dependen del tipo de recipientes, recetas y cantidades cuando alimento, de su consistencia y del volumen. utilice este horno. Inicialmente, supervise el rendimiento cuando cocine. Busque los ajustes óptimos 11.2 Horneado y asado Cocción convencio‐... - Seite 141 Cocción convencio‐ Aire caliente RE‐ POSTERÍA (min) (°C) (°C) Bollos rellenos de 25 - 35 Bandeja crema Bollos rellenos de 2 y 4 35 - 45 Bandeja crema, dos niveles Tartaletas 45 - 70 Molde de pas‐ tel, Ø 20 cm Pastel de fruta 110 - 120 Molde de pas‐...
- Seite 142 Cocción convencional Aire caliente FLANES (min) (°C) (°C) Canelones 180 - 190 180 - 190 25 - 40 Use el segundo nivel. Utilice la parrilla. Cocción convencio‐ Aire caliente CARNE (min) (°C) (°C) Carne de res 50 - 70 Cerdo 90 - 120 Ternera 90 - 120...
- Seite 143 Cocción convencional Aire caliente PESCADO (min) (°C) (°C) Trucha / Pargo, 3 - 4 pescados 40 - 55 Atún / Salmón, 4 - 6 filetes 35 - 60 11.3 Grill Precaliente el horno vacío. Use el cuarto nivel. Grill con la temperatura ajustada al máximo. GRILL (kg) (min)
- Seite 144 CERDO AVES (°C) (min) (°C) (min) Paletilla / Cuello / Ja‐ 160 - 180 90 - 120 Aves troceadas, 0,2 - 200 - 220 30 - 50 món, 1 - 1,5 kg 0,25 kg cada Chuletas / Costillas, 1 - 170 - 180 60 - 90 Pollo, medio, 0,4 - 0,5...
- Seite 145 (kg) Tiempo de des‐ Tiempo de descon‐ congelación gelación posterior (min) (minutos) Trucha 0.15 25 - 35 10 - 15 Fresas 30 - 40 10 - 20 Mantequilla 0.25 30 - 40 10 - 15 Pasteles 11.6 Desecar alimentos - Aire caliente VERDURAS Cubra las bandejas con papel vegetal o de...
- Seite 146 11.8 Horneado húmedo + ventil. Para obtener el mejor resultado, siga las recomendaciones de la tabla siguiente. (°C) (min) Rollitos dulces, 12 bandeja o bandeja honda 40 - 50 piezas Rollitos, 9 piezas bandeja o bandeja honda 35 - 45 Pizza congelada, parrilla 45 - 55...
- Seite 147 11.9 Información para los institutos de pruebas Pruebas conforme a IEC 60350-1. (°C) (min) Pastelillos, Cocción con‐ Bandeja de 20 - 30 20 unidades vencional cocción por bandeja Pastelillos, Aire caliente Bandeja de 150 - 20 - 35 20 unidades cocción por bandeja Pastelillos,...
-
Seite 148: Mantenimiento Y Limpieza
(°C) (min) Hamburgue‐ Grill Parrilla y máx. 20 - 30 Coloque la parrilla en sa de vacu‐ grasera el cuarto nivel y la gra‐ no, 6 trozos, sera en el tercer nivel 0,6 kg del horno. Dele la vuel‐ ta a la mitad del tiem‐ Precaliente el horno 3 minutos. - Seite 149 Paso 1 Apague el horno y espere a que esté frío. Paso 2 Tire de la parte delantera del carril de apoyo para separarlo de la pared late‐ ral. Paso 3 Tire del extremo trasero del carril de apoyo para despegarlo de la pared la‐ teral y sáquelo.
- Seite 150 Paso 3 Cierre la puerta del horno a medio camino hasta la primera posición de apertura. A con‐ tinuación levante la puerta y tire hacia ade‐ lante para desencajarla. Paso 4 Coloque la puerta sobre una superficie esta‐ ble y protegida por un paño suave. Paso 5 Sujete por ambos lados el acabado de la puerta (B), situado en el borde superior de...
-
Seite 151: Solución De Problemas
Antes de reemplazar la bombilla: Paso 1 Paso 2 Paso 3 Apague el horno. Espere hasta que Desconecte el horno de la red. Coloque un paño en el fondo de la el horno esté frío. cavidad. Bombilla trasera Paso 1 Gire la tapa de cristal para extraerla. -
Seite 152: Eficacia Energética
14. EFICACIA ENERGÉTICA 14.1 Información del producto y Hoja de información del producto* Nombre del proveedor Zanussi Identificación del modelo ZOHEX3X1 949496258 Índice de eficiencia energética 81.2 Clase de eficiencia energética Consumo de energía con carga estándar, modo convencional 0.93 kWh/ciclo Consumo de energía con carga estándar, modo con ventilador... -
Seite 153: Aspectos Medioambientales
15. ASPECTOS MEDIOAMBIENTALES deseche los aparatos marcados con el Recicle los materiales con el símbolo símbolo junto con los residuos Coloque el material de embalaje en los domésticos. Lleve el producto a su centro de contenedores adecuados para su reciclaje. reciclaje local o póngase en contacto con su Ayude a proteger el medio ambiente y la oficina municipal. - Seite 156 WWW.ZANUSSI.COM/SHOP...