Pelgrim GK635 Anleitung
Gaskochmulde
Inhaltsverzeichnis
Verfügbare Sprachen
Verfügbare Sprachen
Quicklinks
GK635
GK635W
GK677
Das Gerätetypenschild befi ndet sich an der Unterseite des Gerätes.
The appliance identifi cation card is located on the bottom of the appliance.
GK678
GK695
GKV635
Kleben Sie hier das Gerätetypenschild ein.
Stick the appliance identifi cation card here.
Halten Sie die vollständige Typennummer bereit,
wenn Sie mit der Kundendienstabteilung Kontakt aufnehmen.
When contacting the service department,
have the complete type number to hand.
Adressen und Telefonnummern der Kundendienstorganisation fi nden Sie auf der Garantiekarte.
Anleitung
You will fi nd the addresses and phone numbers of the service organisation on the guarantee card.
Manual
Inhaltsverzeichnis

Verwandte Anleitungen für Pelgrim GK635


Inhaltszusammenfassung für Pelgrim GK635
- Seite 1 GK635 GK635W GK677 Das Gerätetypenschild befi ndet sich an der Unterseite des Gerätes. The appliance identifi cation card is located on the bottom of the appliance. GK678 GK695 GKV635 Kleben Sie hier das Gerätetypenschild ein. Stick the appliance identifi cation card here.
- Seite 2 Anleitung 3 - 27 Manual 3 - 27 Benutzte Piktogramme - Pictograms used Wissenswertes - Important information Tipp - Tip...
- Seite 3 Inhalt Ihre Gaskochmulde 1.1 Einleitung 1.2 Beschreibung Sicherheitsvorschriften Bedienung 3.1 Zünden und einstellen 3.2 Zündsicherung 3.3 Zusätzliche Eigenschaften der elektronischen Zündsicherung Bequem kochen Die optimale Benutzung der Kochmulde 8 - 9 Pfl ege 5.1 Allgemeines 5.2 Reinigung 11 - 12 Störungen 6.1 Fehlermeldungen bei elektrischen Geräten 6.2 Störungstabelle...
-
Seite 4: Ihre Gaskochmulde
1 Ihre Gaskochmulde 1.1 Einleitung Diese Gaskochmulde wurde für die echten Hobbyköche entworfen. Die unterschied- lichen Brennerleistungen sorgen dafür, dass Sie jedes Gericht zubereiten können. Durch die in den Bedienungsknöpfen integrierte Funkenzündung zünden und bedienen Sie die Knöpfe mit einer Hand. Bei den Typen GK677 und GK695 bleiben durch die großzügige Platzierung der Wokbrenner während des Wokbetriebs mindestens zwei Brenner für die Zubereitung anderer Gerichte frei. -
Seite 5: Beschreibung
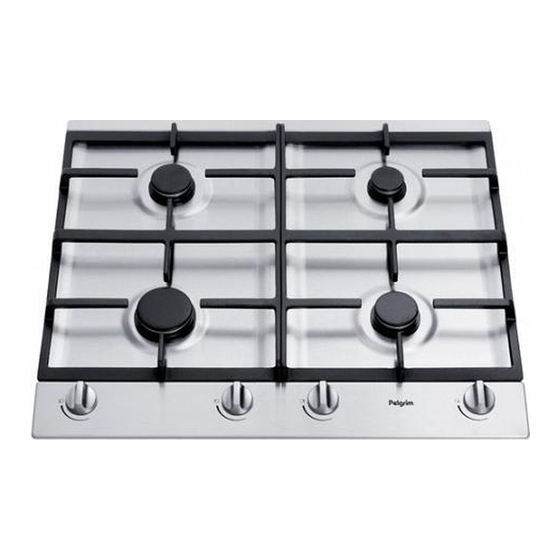
1 Ihre Gaskochmulde 1.2 Beschreibung GKV635 Garbrenner Normalbrenner Starkbrenner Wokbrenner Rippenplatte Kochmulde GK635W GK635/GK635E GK677/GK677E/GK678 (schwarz) GK695/GK695E... -
Seite 6: Bedienung
3 Bedienung Bitte lesen Sie die gesonderten Sicherheitsvorschriften bevor Sie das Gerät in Betrieb nehmen! 3.1 Zünden und einstellen Jeder Brenner ist stufenlos zwischen Groß- und Kleinstellung einstellbar. 1. 0-Stellung 2. Brennerbezeichnung 3. Kleinstellung 4. Großstellung 3.2 Zündsicherung Ihr Gaskochfeld verfügt über eine Zündsicherung. Diese sorgt dafür, dass die Gaszufuhr unterbrochen wird, wenn die Flamme während des Kochvorgangs erlischt. -
Seite 7: Zusätzliche Eigenschaften Der Elektronischen Zündsicherung
3 Bedienung 3.3 Zusätzliche Eigenschaften der elektronischen Zündsiche- rung Wenn Ihr Kochfeld über eine elektronische Zündsicherung verfügt, können Sie die folgenden Funktionen verwenden: Wiedereinschaltautomatik Wenn die Flamme während des Kochvorgangs erlischt, versucht das Gerät automatisch, sie wieder zu entzünden. Wenn danach innerhalb von 10 Sekunden keine Flamme erkannt werden kann, wird die Gaszufuhr des Brenners geschlossen. -
Seite 8: Bequem Kochen
4 Bequem kochen Optimale Benutzung der Kochmulde Sorgen Sie immer dafür, dass die Flammen unter dem Topf bleiben. Wenn die Flammen um den Topf züngeln, geht viel Energie verloren. Zudem können die Griffe zu heiß werden. Benutzen Sie keine Töpfe mit kleinerem Bodendurchmesser als 12 cm. - Seite 9 4 Bequem kochen Benutzung des Wok-Zusatzrostes Der Zusatzrost wird für den Wokbrenner mitgeliefert oder ist als Zubehör erhältlich. Er sorgt für zusätzliche Stabilität bei einem Wok mit runder Boden. Der Wok-Zusatzrost fällt mit speziellen Aussparungen über den Standard-Wok-Pfannenträger.
-
Seite 10: Allgemeines
5 Pfl ege 5.1 Allgemeines Ihr Gerät ist aus hochwertigen Materialien hergestellt und lässt sich einfach reinigen. • Regelmäßige Reinigung und Pfl ege sofort nach Benutzung des Gerätes verhindert, dass übergekochte Essensreste lange einwirken können und hartnäckige, schwer zu entfernende Flecken verursachen. Sie können am besten ein mildes Reinigungsmittel verwenden. -
Seite 11: Reinigung
5 Pfl ege 5.2 Reinigung 5.2.1 Hartnäckige Flecken auf Email (Topfroste, Brennerdeckel und Auffangschalen) • Hartnäckige Flecken mit fl üssigem Scheuerpulver entfernen. Verwenden Sie keine Scheuermittel, Scheuerkissen, spitze Gegenstände oder ätzende Reinigungsmittel. 5.2.2 Hartnäckige Flecken auf Edelstahl (Auffangschalen) • Vor allem überkekochter Rotkohl, Rote Bete, Ketchup, Apfelmus, Rhabarber und andere stark zuckerhaltige Lebensmittel sowie saure Flüssigkeiten können eine Verfärbung der Oberfl... -
Seite 12: Reinigung Entfernbaren Brennerteilen
5 Pfl ege 5.2.5 Reinigung entfernbaren Brennerteilen • Die entfernbaren Brennerteile (einschließlich Wok) können am besten mit einem milden Spülmittel und einem weichen Tuch gereinigt werden. Bei hartnäckigen Flecken können Sie die Teile in Wasser mit Spülmittel weichen lassen. • Brennerteile dürfen nicht im Geschirrspüler gereinigt werden. -
Seite 13: Fehlermeldungen Bei Elektrischen Geräten
6 Störungen 6.1 Fehlermeldungen bei elektrischen Geräten MELDUNG URSACHE ABHILFE Zwei kurze akustische Beim Wiederanzünden ist Überprüfen Sie die Signale nacheinander, ein Fehler aufgetreten. Gaszufuhr zu Ihrem acht Sekunden lang, jede Kochfeld und die korrekte Minute. Position der Brennerköpfe. Drehen Sie alle Knöpfe in die 0-Stellung und versuchen Sie erneut, die Flamme anzuzünden. - Seite 14 6 Störungen 6.2 Störungstabelle Wenn das Gerät nicht ordnungsgemäß funktioniert, bedeutet das nicht unbedingt, dass es defekt ist. Versuchen Sie eventuell, das Problem selbst zu lösen mit Hilfe der nachfolgenden Tabelle, oder suchen Sie nach weiteren Informationen auf der Website ‘www.pelgrimservice.nl’.
- Seite 15 Fall ist, wenden Sie sich an Ihren Installateur. Knebel nicht tief genug Halten Sie den Knebel eingedrückt (nur für GK635 zwischen Groß- und - GK677 - GK695 - GKV635). Kleinstellung tief genug eingedrückt. Bei der ersten Inbetriebnahme kann dies im Zusammenhang mit der Gaszufuhr länger dauern.
- Seite 16 7 Installationsanweisung 7.1 Allgemeines Dieses Gerät darf nur von einem anerkannten Installateur angeschlossen werden! Achtung! Gasart und Land, wofür sich das Gerät eignet, sind auf dem Typenschild angegeben. Dies ist ein Klasse-3 Gerät. Gasanschluß • Der Gasanschluß muß den nationalen und lokalen Vorschriften entsprechen. •...
- Seite 17 Sicherung der Hausinstallation vollständig herausgedreht ist, oder • der Stecker aus der Steckdose gezogen wurde. Defekte Teile dürfen nur durch Pelgrim-Originalteile ersetzt werden. Nur für diese Teile kann Pelgrim garantieren, dass Sie die Sicherheitsanforderungen erfüllen. Wenn das Anschlusskabel beschädigt ist, darf es nur vom Hersteller, dessen Serviceorganisation oder gleichermaßen qualifi...
- Seite 18 7 Installationsanweisung 7.2 Einbauen Kochmulde vorbereiten Montieren Sie den mitgelieferten Krümmer auf den Gasanschluss des Gerätes. 1/2” ISO 228 (gerade) 1/2” ISO 10226-1 (konisch) Abdichtring Nur für Frankreich: 1/2” ISO 228 (gerade) 1/2” ISO 228 (gerade) Abdichtring Ausschnitt in die Arbeitsplatte sägen •...
- Seite 19 7 Installationsanweisung Befestigungspunkte Montagebügel Für die Befestigungspunkte der Montagebügel vgl. 1* in den Abbildungen mit den Einbaumaßen ab Seite 78. Schraubenöffnung für Dünne Arbeitsplatten Dicke Arbeitsplatten Montagebügel Abdichtband Entfernen Sie die Schutzfolie des Abdichtbands (A) und kleben Sie das Band auf den Rand der Arbeitsplatte.
- Seite 20 7 Installationsanweisung Einbaumaße GK635.. - GKV635 voorzijde Vorderseite minimaler Abstand der Rückseite des Geräts zur hinteren Wand: 10 mm minimale afstand achterzijde toestel tot achterwand: 10 mm Vorderseite voorzijde G1/2’’...
- Seite 21 7 Installationsanweisung Einbaumaße GK635W voorzijde Vorderseite minimaler Abstand der Rückseite des Geräts zur hinteren Wand: 10 mm minimale afstand achterzijde toestel tot achterwand: 10 mm voorzijde Vorderseite G1/2’’...
- Seite 22 7 Installationsanweisung Einbaumaße GK677 voorzijde Vorderseite minimaler Abstand der Rückseite des Geräts zur hinteren Wand: 10 mm minimale afstand achterzijde toestel tot achterwand: 10 mm Vorderseite voorzijde G1/2’’...
- Seite 23 7 Installationsanweisung Einbaumaße GK678 voorzijde Vorderseite minimaler Abstand der Rückseite des Geräts zur hinteren Wand: 10 mm minimale afstand achterzijde toestel tot achterwand: 10 mm voorzijde Vorderseite G1/2’’...
- Seite 24 7 Installationsanweisung Einbaumaße GK695 voorzijde Vorderseite minimaler Abstand der Rückseite des Geräts minimale afstand achterzijde toestel tot achterwand: 10 mm zur hinteren Wand: 10 mm Vorderseite voorzijde G1/2’’...
- Seite 25 Benötigter Freiraum Eine Gaskochmulde entwickelt Wärme. Sorgen Sie für ausreichenden Freiraum zu nicht- hitzebeständigen Materialien. Achten Sie auch auf Werkstoffe, die sich verfärben können (wie Edelstahl). min. 600 mm (GK635/GKV635) min. 750 mm (GK677/GK678) min. 900 mm (GK695) min. 100 mm min.
- Seite 26 7 Installationsanweisung Gastechnische Daten G25/25 G20/20 G25/20 G30/29 G31/29 G31/36 G30/50 G31/50 G31/67 mbar mbar mbar mbar mbar mbar mbar mbar mbar Brenner- (kW) (kW) (kW) (kW / g/h) (kW / g/h) (kW / g/h) (kW / g/h) (kW / g/h) (kW / g/h) 1.00 1.00...
-
Seite 27: Entsorgung Gerät Und Verpackung
8 Anlage 8.1 Entsorgung Gerät und Verpackung Bei der Herstellung dieses Gerätes wurden dauerhafte Werkstoffe verwendet. Dieses Gerät muss am Ende seines Lebenszyklus in verantwortungsvoller Weise entsorgt werden. Sie erhalten hierzu Informationen bei den zuständigen Behörden. Die Verpackung des Gerätes ist wiederverwendbar. Verwendet können sein: •... - Seite 54 uw kookplaat...