Werbung
Quicklinks
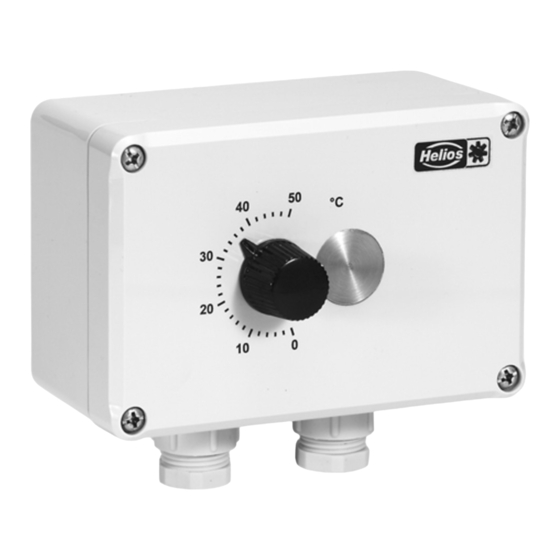
Vierstufen-Thermostat TME 4
Four Step Electronic Thermostat Switch TME 4
Thermostat à quatre étages TME 4
MONTAGE
Die Montage erfolgt aufputz auf einer ebenen Fläche.
• Frontdeckel abschrauben.
• Gehäuseunterteil anschrauben.
• PG-Verschraubung öffnen; elektrisches Anschluß-
kabel einführen, abisolieren und gemäß Schalt-
schema auf der Klemmleiste verdrahten.
• PG-Verschraubung festziehen und auf Dichtheit
überprüfen.
• Frontdeckel aufschrauben und auf Dichtheit prüfen.
• Funktionsprüfung vornehmen.
TECHNISCHE DATEN
Betriebsspannung
230 V, 50/60 Hz ±10%
Maße B x H x T
Max. Dauerstrom
Regelbereich
Schaltgenauigkeit
Schaltabstand
Schutzart
max. Umgebungstemp.
Leistungsaufnahme
Schutzklasse
ZUBEHÖR, SCHALT- UND STEUERELEMENTE
Der Gebrauch von Zubehörteilen, die nicht von Helios
empfohlen oder angeboten werden, ist nicht statt-
haft. Eventuell auftretende Schäden unterliegen nicht
der Gewährleistung.
GARANTIEANSPRÜCHE – HAFTUNGSAUS-
SCHLUSS
Wenn die vorausgehenden Ausführungen nicht be-
achtet werden, entfällt unsere Gewährleistung und
Behandlung auf Kulanz. Gleiches gilt für abgeleitete
Haftungsansprüche an den Hersteller.
VORSCHRIFTEN – RICHTLINIEN
Bei ordnungsgemäßer Installation und bestimmungs-
gemäßem Betrieb entspricht das Gerät den zum Zeit-
punkt seiner Herstellung gültigen Vorschriften und
Richtlinien CE.
Schaltschema
Wiring Diagram
Schéma de branchement
80V
St.1
100V
St.2
130V
St.3
170V
St.4
230V
St.5
F
F
E D C B
µ
µ
µ
max
Schaltfolge / switch
succession
succession de mettre en circuit
Service und Information
D
HELIOS Ventilatoren GmbH & Co · Lupfenstraße 8 · 78056 VS-Schwenningen
CH HELIOS Ventilatoren AG · Steinackerstraße 36 · 8902 Urdorf / Zürich
A
HELIOS Ventilatoren GmbH · Postfach 854 · Siemensstraße 15 · 6023 Innsbruck
INSTALLATION
The unit should be mounted on a smooth surface.
• Remove the front cover.
• Screw the back box to the wall.
• Unscrew the PG compression gland and insert the
cable. Strip back the cable and wire to the terminal
connector according to the wiring diagram.
• Assemble the compression gland (PG 11) and
check for tightness.
• Replace the front cover and tighten the screws.
• Check that the unit functions correctly.
TECHNICAL DATA
Supply voltage
120 x 80 x 75 mm
Dimensions
6 A (AC 3)
Max. load
0 – 50 °C
Temperature range
+/- 0,8 K bei 20 °C
Deviation
1 K
Switching steps
IP 54
Protection
0 bis +60 °C
Max. ambient temp.
ca. 2 W
Consumption
II
Protection
ACCESSORIES, SWITCHES AND
CONTROLLERS
The use of accessories not offered or recommended
by Helios is not permitted and would result in any
warranty claims becoming invalid.
WARRANTY – EXCLUSION OF
LIABILITY
If the preceding instructions are not observed or the
unit is not used in the manner for which it was designed
all warranty claims become invalid.
CERTIFICATES
Correctly installed the product complies with relevant
European standards and regulations as at the time of
its manufacture.
fig. 1
➀
TME 4 Switching steps
Switching sequence for temperature rises
Switching sequence for temperature
drops
N
PE
M
1~
A
A
N
L
Betriebsspg.
Supply voltage
µ
Tension fonctionn.
min
/
TME 4
230 V, 50/60 Hz ± 10%
120 x 80 x 75 mm
6 A (AC 3)
0° to +50°C
± 0.8 K at 20°C
0° to +60°C
approx. 2 W
Class II
Fig. 1
SS-702
Stufe
Step
Etage
N
L1
T
soll
set
F
HELIOS Ventilateurs · Z.I. La fosse à la Barbière · Rue Louis Saillant Bât. D1 · 93605 Aulnay sous Bois
GB HELIOS Ventilation Systems Ltd. · 5 Crown Gate · Wyncolls Road · Severalls Industrial Park ·
Colchester · Essex · CO4 4HT
MONTAGE
Montage apparent sur une surface plane.
• Dévisser le couvercle avant.
• Visser la partie inférieure du châssis.
• Ouvrir le presse-étoupe; introduire les câbles de
branchement, dénuder et raccorder à la boîte à
bornes selon le schéma de branchement.
• Serrer à bloc le presse-étoupe et contrôler
l'étanchéité.
• Revisser le couvercle avant (contrôler l'étanchéité).
• Procéder au test de fonctionnement.
CARCTERISTIQUES TECHNIQUES
Tension de fonctionnement
Dimensions l x H x P
Charge maxi.
Plage de température
Précision graduation
1 K
Ecart de commutation
IP 54
Protection
Température maxi. ambiante
Puissance absorbée
Classe de protection
ACCESSOIRES, APPAREILS DE
TEMPORISATION ET DE RÉGULATION
L'utilisation d'accessoires qui ne sont pas directe-
ment offerts ou conseillés par Helios n'est pas auto-
risée. Les dommages éventuels entraînent la sup-
pression de notre garantie.
DEMANDE DE GARANTIE – RÉSERVES DU
CONSTRUCTEUR
En cas de non-respect des indications précédentes,
toute demande de remplacement ou de réparation à
titre gratuit sera déclinée. Il en sera de même pour
toute implication de responsabilité du fabricant.
RÉGLEMENTATIONS – NORMES
Si la notice d'installation et d'utilisation est observée,
nos produits correspondent aux normes et régle-
mentations internationales.
fig. 1
➀
1 TME 4 Etages de commutation
Succession de commutations quand la
température augmente
Succession de commutations quand la
température baisse
TME 4 Schaltstufe
Schaltfolge Temperaturanstieg
Schaltfolge Temperaturabfall
T
T
T
soll+1
soll+2
soll+3
set+1
set+2
set+3
230 V, 50/60 Hz ±10%
120 x 80 x 75 mm
6 A (AC 3)
0 – 50 °C
+/- 0,8 K à 20 °C
1 K
IP 54
0 – +60 °C
env. 2 W
II
T
Temp.
soll+4
set+4
Werbung

Inhaltszusammenfassung für Helios TME 4
- Seite 1 HELIOS Ventilatoren GmbH & Co · Lupfenstraße 8 · 78056 VS-Schwenningen HELIOS Ventilateurs · Z.I. La fosse à la Barbière · Rue Louis Saillant Bât. D1 · 93605 Aulnay sous Bois CH HELIOS Ventilatoren AG · Steinackerstraße 36 · 8902 Urdorf / Zürich GB HELIOS Ventilation Systems Ltd.
- Seite 2 OPERATION/USE FONCTIONNEMENT Der TME 4 ist an einer zur Erfassung der Raumtem- The TME 4 must be installed in a location suitable for Le thermostat doit être placé dans un endroit appro- peratur geeigneten Stelle zu montieren. Verzerrende measuring the room temperature correctly; i.e. in a prié...


