Isotta PP14 Montageanleitung
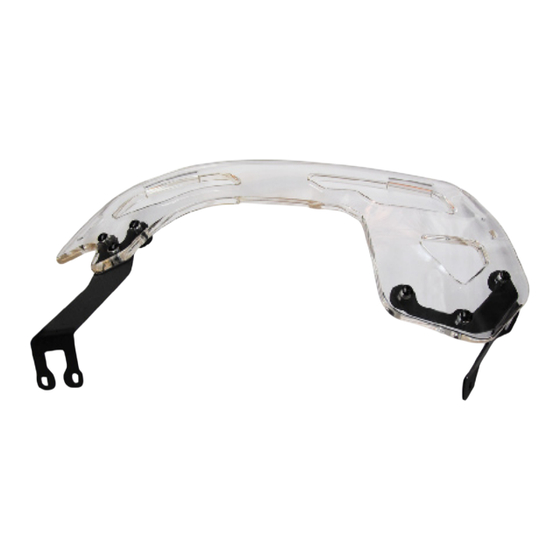
Gepäckträger für koffer
Via Masetti, 12/b
Zola Pedrosa
(BOLOGNA)
Tel. +39-051/750062 +39-051/751371
Fax 051/752393
www.isotta-srl.com
e-mail: isotta-srl@isotta-srl.com
Grazie per aver acquistato il nostro prodotto!
1.
MONTAGGIO STAFFE DI FISSAGGIO: Fissate le viti
M5x25 (senza gommino) nei fori filettati (figura 2 A)
dall'intero verso l'esterno della piega. Stringete bene
le viti. E' possibile per un fissaggio più saldo utilizzare
un frenafiletto. Fissate le viti M5x12 con gommino e
rondella d15 f5 sp1.5 nei fori (figura 3B). Stringete le viti
fin quando il gommino di deforma legermente, anche
qui è possibile per un fissagio migliore usare un po' di
frenafiletti.
2.
Fissate le staffe precedentemente montate al portapac-
co (vedi figure 4+5+6) utilizzando i dadi ciechi torniti in
dotazione. Fissate il tutto senza stringere le viti.
3.
Dopo aver aperto la borsa per accedere ai dadi di
fissaggio interni, allentate le viti originali (figura 8-A )
senza rimuoverle.
4.
Fissate il portapacco preassemblato (con le viti non
strette completamente) alla borsa della moto come
indicato in figura 11.
5.
Utilizzate le viti M5x15 nei fori A e B (figure 10+12),
inserite la rondella in teflon di colore bianco tra la staffa
in ferro e la plastica della borsa. Posizionate corretta-
mente il portapacco premendolo in appoggio sulla bor-
sa e stringete tutte le viti delle staffe e del portapacco.
6.
Nei punti C (figura 11) sono montati i gommini, per evi-
tare che tocchino le parti verniciate delle borse utilizza-
te gli adesivi rotondi trasparenti di protezione.
7.
A montaggio ultimato potete utilizzare il portapacco per
caricare un bagaglio aggiuntivo fino ad un peso di max
5.5 Kg per portapacco.
Copyright by ISOTTA ®
Vi informiamo che tutti i nostri prodotti vengono lavorati secondo tecnologie CNC
e LASER, permettendo la massima precisione nella realizzazione del prodotto.
Eventuali differenze riscontrate durante il montaggio del prodotto sono probabilmente
da imputarsi a intolleranze relative al veicolo. In questo caso non si garantisce un
montaggio perfetto.
Istruzioni di montaggio | Montageanleitung | Fitting instructions
Portapacchi laterali PP14 | Gepäckträger für Koffer PP14| Luggage carrier PP14
Vielen Dank für den Erwerb unseres Produktes!
1.
Montage Halter: Montieren Sie die M5x25 Schrau-
ben (ohne Gummi) von Innen nach Außen wie in
Bild 2 A abgebildet. Ziehen Sie die Schrauben fest.
Für einen besseren Halt kann Schraubensiche-
rungsmittel benutzt werden.
2.
Montieren Sie die M5x12 Schrauben mit Unterleg-
scheibe D15 f5 an die Halter (Bild 3B). Ziehen Sie
die Schrauben so weit fest bis sich das Gummi ein
wenig deformiert. Auch hier kann Schraubensiche-
rungsmittel benutzt werden.
3.
Montieren Sie nun die Halter mit den gelieferten
Spezialmuttern an den Gepäckträger (Bild 4 + 5
+ 6). Ziehen Sie hierbei die Schrauben noch nicht
fest.
4.
Öffnen Sie nun den Koffer um an die inneren Be-
festigungsmuttern zu gelangen. Lösen Sie die
Schrauben am Koffer (Bild 8 A) ohne diese zu ent-
fernen.
5.
Montieren Sie nun den Gepäckträger mit den M5x15
Schrauben und weißer Teflon Unterlegscheibe zwi-
schen Halter und Koffer (Bild 10+12).
6.
Bringen Sie die runden transparenten Schutzfolien
an den in Bild 11 beschriebenen Punkten an. So
wird vermieden dass der Lack der Koffer Schaden
nehmen kann.
7.
Jeder Gepäckträger kann mit max 5.5 kg belastet
werden.
Copyright by ISOTTA ®
Diese Anleitung ist nach besten Wissen und Gewissen verfasst worden. Ein
juristischer Anspruch auf Richtigkeit besteht nicht. Für fahrzeugspezifische
Toleranzen kann unsererseits keine Gewährleitung übernommen werden. Wenn
Sie Schwierigkeiten mit dem Anbau dieses Artikels haben, wenden Sie sich bitte
an die Werkstatt Ihres Vertrauens. Bei fehlerhaft montierten Teilen übernehmen
wir keine Haftung für dadurch resultierende Schäden an Sachgegenständen
oder Personen!
Thank you for purchasing our products!
1.
Bracket assembly: fit the M5x25 screws
(without rubbers) from the inside to the outside
as shown in figure 2A. Tighten the screws. For
a more secure fit you can use thread lock flu-
id.
2.
Mount the M5x12 screws with washers D15 f5
to the bracket (figure 3B). Tighten the screws
until the rubbers will be slightly deformed. For
better fit you can use thread lock fluid.
3.
Install the brackets with the delivered special
nuts to the luggage carrier as shown in figures
4 + 5 + 6. Do not tighten the screws yet.
4.
Open the panniers in order to get to the in-
ner nuts. Loosen the screws from the pan-
nier as shown in figure 8A. Do not remove the
screws.
5.
Install the luggage carrier to the pannier using
the m5x15 screws and teflon washer between
bracket and pannier (figure 10+12).
6.
Attach the round clear protective foil at the
points shown in figure 11. This will prevent
scratches on the paintwork of the pannier.
7.
Every pannier can be loaded with a maximum
of 5.5 kg.
Copyright by ISOTTA ®
These manuals are written on our current state of knowledge. Legal right on the
accuracy of the provided information is excluded. Please note that we can't war-
ranty vehicle specific tolerances. If you have any doubt ragarding the installation
of this part, please contact your local workshop.
In case of incorrectly fitted parts we do not accept liability for material damage
and persons.

Verwandte Anleitungen für Isotta PP14


Inhaltszusammenfassung für Isotta PP14
- Seite 1 Istruzioni di montaggio | Montageanleitung | Fitting instructions Zola Pedrosa (BOLOGNA) Tel. +39-051/750062 +39-051/751371 Fax 051/752393 Portapacchi laterali PP14 | Gepäckträger für Koffer PP14| Luggage carrier PP14 www.isotta-srl.com e-mail: isotta-srl@isotta-srl.com Vielen Dank für den Erwerb unseres Produktes! Grazie per aver acquistato il nostro prodotto!
- Seite 2 Copyright by ISOTTA ® Copyright by ISOTTA ® Copyright by ISOTTA ® Vi informiamo che tutti i nostri prodotti vengono lavorati secondo tecnologie CNC Diese Anleitung ist nach besten Wissen und Gewissen verfasst worden. Ein These manuals are written on our current state of knowledge. Legal right on the e LASER, permettendo la massima precisione nella realizzazione del prodotto.
- Seite 3 Copyright by ISOTTA ® Copyright by ISOTTA ® Copyright by ISOTTA ® Vi informiamo che tutti i nostri prodotti vengono lavorati secondo tecnologie CNC Diese Anleitung ist nach besten Wissen und Gewissen verfasst worden. Ein These manuals are written on our current state of knowledge. Legal right on the e LASER, permettendo la massima precisione nella realizzazione del prodotto.
- Seite 4 Copyright by ISOTTA ® Copyright by ISOTTA ® Copyright by ISOTTA ® Vi informiamo che tutti i nostri prodotti vengono lavorati secondo tecnologie CNC Diese Anleitung ist nach besten Wissen und Gewissen verfasst worden. Ein These manuals are written on our current state of knowledge. Legal right on the e LASER, permettendo la massima precisione nella realizzazione del prodotto.