Inhaltsverzeichnis
Werbung
Quicklinks
INSTRUCTION MANUAL
Keep this manual in a safe place for future reference
FREE FLOAT TYPE STEAM TRAPS
JH-X SERIES
EINBAU- UND BETRIEBSANLEITUNG
Gebrauchsanleitung leicht zugänglich aufbewahren
FREISCHWIMMER KONDENSATABLEITER
JH-X SERIE
MANUEL D UTILISATION
Conserver ce manuel dans un endroit facile d'accès
PURGEURS DE VAPEUR À FLOTTEUR FERMÉ LIBRE
GAMME JH-X
JH-X
JH3-X
JH5RL-X
JH7RL-X
JH7.2R-X
JH7.5R-X
JH8R-X
Copyright (C) 2019 by TLV CO., LTD. All rights reserved.
Werbung
Inhaltsverzeichnis

Verwandte Anleitungen für TLV JH-X Serie


Inhaltszusammenfassung für TLV JH-X Serie
- Seite 1 FREISCHWIMMER KONDENSATABLEITER JH-X SERIE MANUEL D UTILISATION Conserver ce manuel dans un endroit facile d'accès PURGEURS DE VAPEUR À FLOTTEUR FERMÉ LIBRE GAMME JH-X JH-X JH3-X JH5RL-X JH7RL-X JH7.2R-X JH7.5R-X JH8R-X Copyright (C) 2019 by TLV CO., LTD. All rights reserved.
- Seite 2 1 MPa = 10.197 kg/cm , 1 bar = 0.1 MPa For products with special specifications or with options not included in this manual, contact TLV for instructions. The contents of this manual are subject to change without notice.
-
Seite 3: Safety Considerations
• The three types of cautionary items above are very important for safety; be sure to observe all of them, as they relate to installation, use, maintenance, and repair. Furthermore, TLV accepts no responsibility for any accidents or damage occurring as a result of failure to observe these precautions. -
Seite 4: Sicherheitshinweise
• Diese drei Warnzeichen sind wichtig für Ihre Sicherheit. Sie müssen unbedingt beachtet werden, um den sicheren Gebrauch des Produktes zu gewährleisten und Einbau, Wartung und Reparatur ohne Unfälle oder Schäden durchführen zu können. TLV haftet nicht für Unfälle oder Schäden, die durch Nichtbeachtung dieser Sicherheitshinweise entstehen. -
Seite 5: Règles De Sécurité
1. Règles de sécurité DANGER AVERTISSEMENT ATTENTION NE JAMAIS exposer le flotteur à la chaleur directement. AVERTISSEMENT Installer le produit correctement et NE PAS l’utiliser en dehors de la pression et de la température maximales de fonctionnement, ni en dehors des autres plages spécifiées. NE PAS utiliser ce produit avec une pression différentielle supérieure au maximum indiqué. -
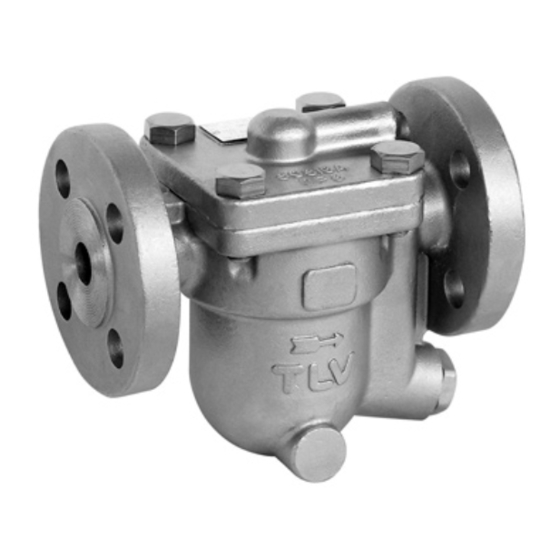
Seite 6: Configuration Aufbau Configuration
2. Configuration Aufbau Configuration JH3-X JH5RL-X !4 !5 !3 !2 !8 !1 !0 w !7 !0 !9 !6 !5 !4 !2 JH7RL-X JH7.2R-X !7 !9 w !7 @3 !2 JH7.5R-X JH8R-X w !9 #2 #1 y i u... - Seite 7 Description Description Description Body Connector Screen Holder Cover Connector Gasket Snap Ring Cover Gasket X-element Snap Ring Float X-element Guide Screen Holder Retainer Orifice Air Vent Valve Seat X-element Case Orifice Gasket Spring Clip X-element Screen Orifice Plug or Outlet Cover Flange or Socket Eye Bolt Plug or Outlet Cover Gasket...
- Seite 8 3. Specifications Technische Daten Données techniques Refer to the product nameplate for detailed specifications. Die technischen Daten stehen auf dem Typenschild. Les données techniques sont inscrites sur la plaquette nominative. A Model Modèle B Nominal Diameter Größe/DN Dimension/DN C Maximum Allowable Pressure* Maximal zulässiger Druck* Pression maximale admissible* D Maximum Allowable Temperature* TMA...
-
Seite 9: Proper Installation
4. Proper Installation • Installation, inspection, maintenance, repairs, disassembly, adjustment CAUTION and valve opening/closing should be carried out only by trained maintenance personnel. • Use the eyebolts for removing the cover only; DO NOT use the eyebolts for hoisting the product. •... -
Seite 10: Inspection And Maintenance
Check to make sure that the pipes connected to the trap have been installed properly. 1. Is the pipe diameter suitable? 2. Has the trap been installed within the allowable inclination and with the arrow on the body pointing in the direction of flow? 3. - Seite 11 Disassembly/Reassembly (to reassemble, follow procedures in reverse) Part & No. JH3X JH5RL-X JH7RL-X JH7.2R-X JH7.5R-X JH8R-X Disassembly Reassembly Cover Bolt 10 Use a wrench to Coat threads with anti-seize remove and tighten to the proper torque Cover Nut 11 Cover 2 Lift up and off (use all Align the cover with the four eyebolts for...
- Seite 12 If drawings or other special documentation were supplied for the product, any torque given there takes precedence over values shown here. 7. Maintenance Parts and Repair Parts Maintenance parts and repair parts are available from TLV only in kits, as shown below. JH3-X JH5RL-X JH7RL-X JH7.2R-X...
-
Seite 13: Operational Check
(When conducting a visual inspection, flash steam is sometimes mistaken for steam leakage. For this reason, the use of a steam trap diagnostic instrument such as TLV TrapMan is highly recommended.) Flash Steam... -
Seite 14: Troubleshooting
9. Troubleshooting If the expected performance is unachievable after installation of the steam trap, read chapters 4 and 5 again and check the following points for appropriate corrective measures. Remedy Cause Problem Float is damaged or filled with condensate Replace the float No condensate is discharged Orifice, screen or piping are clogged with rust or... -
Seite 15: Rohrleitungsführung
4. Einbauhinweise • Einbau und Ausbau, Inspektion, Wartungs- und Reparaturarbeiten, VORSICHT Öffnen/Schließen von Armaturen, Einstellung von Komponenten dürfen nur von geschultem Wartungspersonal vorgenommen werden. • Die Ringschrauben nur zum Abheben des Gehäusedeckels benutzen, NICHT zum Heben des gesamten Produkts. • In sicherer Enfernung von Auslassöffnungen aufhalten und andere Personen warnen, sich fern zu halten. -
Seite 16: Inspektion Und Wartung
Stellen Sie sicher, dass die Rohrleitungsarbeiten richtig ausgeführt wurden und dass der Kondensatableiter wie beschrieben eingebaut wurde: 1. Ist die Nennweite groß genug? 2. Wurde der Kondensatableiter horizontal, bzw. Innerhalb der Schräglagentoleranz und mit dem Pfeil in Durchflussrichtung eingebaut? 3. Ist genügend Platz für Wartungsarbeiten vorhanden? 4.