Herunterladen Inhalt Inhalt Diese Seite drucken
Axkid Rekid Bedienungsanleitung

Axkid Rekid Bedienungsanleitung

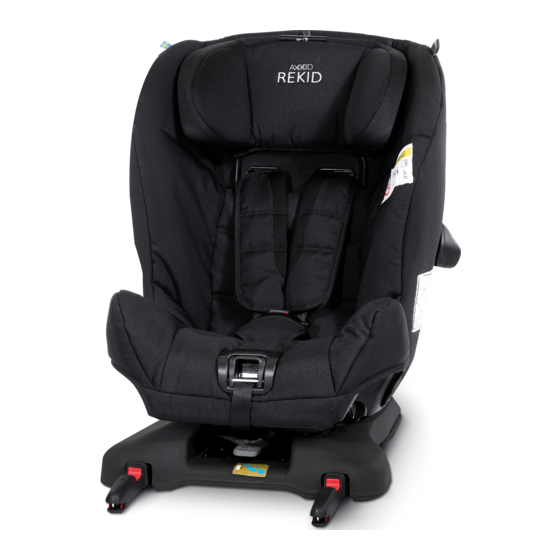
Rear-facing 9-18 kg with isofix rear-facing 9-25 kg with vehicle seat belt and tethers
Vorschau ausblenden Andere Handbücher für Rekid:

Werbung

Verfügbare Sprachen

Verfügbare Sprachen

Important Information
Read this instruction manual before installing the Rekid child restraint in your
vehicle. For more information and fitting videos visit www.axkid.com.
Thank you for choosing an Axkid child seat. Our team has over 30 years combined
experience within child safety, and we have done our utmost to make the Rekid child seat
as safe as possible. The Rekid child restraint is approved according to ECE R44/04, the
latest European standards for child safety. To maximise your child's safety it is important
that you keep the following in mind;
Read this instruction manual carefully before installing the Rekid child restraint.
If in doubt, contact your retailer who can demonstrate a correct installation. An
incorrect installation could endanger your child.
Do not use a child restraint in a seating position where an active airbag is fitted. If
you still wish to install the Rekid in this location the airbag must be disconnected
at an authorised service centre. Some vehicles may be equipped with a switch
which allows you to manually switch the airbag off. It is important to always check
if the vehicle's indicator light shows that the airbag is turned off.
Extensive research has shown that the risk of serious injury or worse is five
times greater for a young child when in a forward facing restraint compared to
a rearward-facing restraint. In Rekid your child can travel rearward-facing up to
25kg.
Always use the support leg when installing the Rekid seat. The support leg is
a very important safety feature designed to maximise your child's safety in an
accident.
Should you have an accident, no matter how small, your child restraint should be
replaced. It may have damage that is undetectable and could seriously jeopardize
your child's safety. For this reason Axkid do not recommend purchasing second
hand child restraints.
Never leave your child unattended in the car.
Ensure any luggage or loose objects are secured in your vehicle as they may cause
injuries to passengers in the event of a collision.
Store this instruction manual in the designated pocket (P) on the car seat.
V4
Downloaded from
www.Manualslib.com
Rear-facing 9-18 kg with ISOFIX
Rear-facing 9-25 kg with vehicle seat belt and tethers
Instruction Manual
manuals search engine
Rekid
3

Werbung

Inhaltsverzeichnis
loading

Inhaltszusammenfassung für Axkid Rekid

  • Seite 1 Thank you for choosing an Axkid child seat. Our team has over 30 years combined experience within child safety, and we have done our utmost to make the Rekid child seat as safe as possible. The Rekid child restraint is approved according to ECE R44/04, the latest European standards for child safety.
  • Seite 2 Contents The Rekid child restraint is suitable for use from approximately six months of age, or from when your child can sit up unsupported, up until the age of six. This child restraint can be installed in two different ways depending on your child’s age and size.
  • Seite 3 The child restraint cannot be used with a 2-point lap belt (ii). IMPORTANT: If you wish to install your Rekid in a location where an airbag is fitted, then the airbag must be disconnected at an authorized service centre. Some vehicles may be equipped with a switch which allows you to manually switch the airbag off.
  • Seite 4 To begin push and hold the adjuster for ISOfix (I). Now you should be able to unfold the ISOfix arms (H). The easiest way to lift the Rekid into the vehicle is with its back first. Place the child restraint in the vehicle with the back of the restraint facing the front of the vehicle.
  • Seite 5 This needs to be repeated on both sides to create two anchor points. When installing Rekid in the front passenger seat the lower anchor straps must be attached to the front gliding tracks so the anchor points will be located along the front edge of the passenger seat.
  • Seite 6: Placing Your Child In The Seat

    If you have installed Rekid in the back seat you can now move the front seat to a comfortable position. Note: The back of the child restraint may, but does not need to be in contact with the back of the front seat.
  • Seite 7 Rear-facing 9-25kg with seat belt & tethers Positioning the child restraint The easiest way to lift the Rekid into the vehicle is with its back first. Place the child restraint in the vehicle with the back of the restraint facing the front of the vehicle.
  • Seite 8 This needs to be repeated on both sides to create two anchor points. When installing Rekid in the front passenger seat the lower anchor straps must be attached to the front gliding tracks so the anchor points will be located along the front edge of the passenger seat.
  • Seite 9 If you have installed Rekid in the back seat you can now move the front seat to a comfortable position. Note: The back of the child restraint may, but does not need to be in contact with the back of the front seat.
  • Seite 10: Care And Maintenance

    If the seat cover needs replacing ensure only original products from Axon Kids are used. If other products are used the Rekid’s safety system may be compromised and could lead to severe injury or death in case of an accident.
  • Seite 11 De nombreuses études ont montré que le risque de blessures graves ou pire ,est cinq fois plus élevé pour un jeune enfant quand il fait face à la route comparé à lorsqu’il se trouve dos à la route. Dans le Rekid votre enfant peut voyager dos à la route jusqu’à 25kg, Toujours utiliser la jambe de support quand vous installez le siège Rekid.
  • Seite 12 Conservez ce manuel d’utilisation dans la poche prévu à cet effet (P) Sommaire Le siège-auto Rekid est utilisable à partir d’environ 6 mois ou à partir du moment où l’enfant peut se tenir assis tout seul, jusqu’à 6 ans, Ce siège-auto peut être installé de deux manières différentes suivant lâge et la taille de l’enfant.
  • Seite 13 Le siège auto ne peut pas être utilisé avec une ceinture ventrale (ii) IMPORTANT: Si vous souhaitez installer le Rekid dans un véhicule muni d’airbags, les airbags doivent être déconnectés dans un centre agréé. Certains véhicules peuvent être équipés d’un bouton qui vous permet manuellement de désactiver les airbags.
  • Seite 14 La façon la plus simple d’installer le Rekid dans le véhicule est, de faire rentrer le dos du siège en premier. Note: Quand vous installez le Rekid sur le siège avant il est possible , mais pas obligatoire que le dos du siège soit en contact avec le tableau de bord.
  • Seite 15 Cette opération doit être effectuée des deux côtés du siège pour créer deux points d’ancrage. Lorsque vous installer le Rekid sur le siège avant, les sangles d’ancrage du bas doivent être attachées à l’avant des rails du siège avant.
  • Seite 16: Installer L'enfant Dans Le Siège-Auto

    Si vous avez installé Rekid sur le siège arrière du véhicule vous pouvez maintenant déplacer le siège avant jusqu’à une position confortable. Le dos du siège-auto peut être en contact avec le dos du siège avant, mais pas nécessairement .
  • Seite 17 Installer le siège-auto La façon la plus simple d’installer le Rekid dans le véhicule est, de faire rentrer le dos du siège en premier, Les talons du siège-auto (O) doivent être sur le rebord du siège du véhicule.
  • Seite 18 Cette opération doit être effectuée des deux côtés du siège pour créer deux points d’ancrage. Lorsque vous installez le Rekid sur le siège avant, les sangles d’ancrage du bas doivent être attachées à l’avant des rails du siège avant.
  • Seite 19 Si vous avez installé Rekid sur le siège arrière du véhicule vous pouvez maintenant déplacer le siège avant jusqu’à une position confortable. Note: Le dos du siège-auto peut être en contact avec le dos du siège avant, mais pas nécessairement .
  • Seite 20: Entretien Et Maintenance

    Garantie Le Rekid est garantie 12 mois à partir de la date d’achat. Assurez-vous de garder la facture et si besoin, rapporter là ou vous avez acheté le produit si jamais vous avez un problème couvert par la garantie. La garantie ne couvre pas: * l’usure normale...
  • Seite 21 25 kg. de peso. Use siempre la pata de apoyo al instalar y usar la silla Rekid. La pata de apoyo es un elemento de seguridad muy importante, diseñada para maximizar la seguridad de su hijo en caso de accidente.
  • Seite 22 ÍNDICE La silla de seguridad infantil Rekid puede usarse a partir de los seis meses de edad del niño, o desde que el niño puede sentarse solo sin apoyo, hasta la edad de seis años aproximadamente. Esta silla de seguridad puede ser instalada de dos maneras diferentes, dependiendo de la edad y la altura del niño.
  • Seite 23 ISOFIX o cinturón de seguridad de tres puntos (i), y el airbag debe estar siempre desactivado. No usar Rekid con un cinturón de seguridad de dos puntos (ii). IMPORTANTE: Si desea instalar Rekid en un asiento con airbag, el airbag debe ser desconectado por un servicio técnico autorizado. Algunos vehículos están equipados con un interruptor que permite desconectar el airbag manualmente.
  • Seite 24 Para comenzar, presione y mantenga presionada la palanca de ajuste para ISOFIX (I). Ahora podrá desplegar los brazos para ISOFIX (H). La manera más fácil de instalar la silla Rekid en el vehículo es metiendo primero el respaldo. Coloque la silla Rekid en el asiento del vehículo de forma que el respaldo de Rekid mire hacia la parte delantera del vehículo.
  • Seite 25 Rekid, para crear los puntos de anclaje. Si instala Rekid en el asiento trasero del vehículo, inserte el broche de la correa de sujeción bien en la parte trasera de los rieles de los asientos delanteros, bien en el recodo entre el respaldo y el asiento delantero.
  • Seite 26 Si ha instalado Rekid en el asiento trasero del vehículo, ahora puede mover el asiento delantero del piloto o del copiloto hasta una posición cómoda. Nota: Es posible, pero no necesario, que al instalar Rekid en el asiento trasero del vehículo, el respaldo de Rekid toque el respaldo del asiento delantero.
  • Seite 27 (D) y empújelo de un lado a otro por debajo de la tela, en el hueco entre la funda de tela y el chasis de la silla Rekid, hasta que salga por la otra ranura para el cinturón de seguridad en el otro lado.
  • Seite 28 Rekid, para crear los puntos de anclaje. Si instala Rekid en el asiento trasero del vehículo, inserte el broche de la correa de sujeción bien en la parte trasera de los rieles de los asientos delanteros, bien en el recodo entre el respaldo y el asiento delantero.
  • Seite 29 Si ha instalado Rekid en el asiento trasero del vehículo, ahora puede mover el asiento delantero del piloto o del copiloto hasta una posición cómoda. Nota: Es posible, pero no necesario, que al instalar Rekid en el asiento trasero del vehículo, el respaldo de Rekid toque el respaldo del asiento delantero.
  • Seite 30 CUIDADO Y MANTENIMIENTO La funda de la silla de seguridad Rekid puede quitarse y lavarse a máquina a 30º C usando el programa de lavado para prendas delicadas. No use secadora, ya que esto puede dañar el tejido y hacer que el relleno se separe de la tela.
  • Seite 31 Sie sie für später auf. Für mehr Informationen und Anwendungsvideos besuchen Sie www.axkid.com oder www.vital-innovations.de. Vielen Dank, dass Sie sich zum Kauf von Axkid Kindersitz entschieden haben. Unser Team hat eine über 30-jährige Erfahrung in Bezug der Sicherheit von Kindern und wir haben unser Möglichstes getan, den Apollo Kindersitz so sicher wie möglich zu machen.
  • Seite 32 Axonkids diese Einbauart. Rückwärtsgerichtet 9-25 kg mit Fahrzeuggurt und Spanngurt 39-41 Falls Ihr Fahrzeug nicht mit ISOFIX-Halterungen ausgestattet ist, können Sie Ihren Rekid mit Hilfe des Drei-Punkt-Gurtes und den mitgelieferten Befestigungsgurten einbauen. Für Kinder zwischen 9-25 kg geeignet.
  • Seite 33: Erlaubte Und Unerlaubte Positionen Des Kindersitzes

    Erlaubte und unerlaubte Positionen des Kindersitzes Das Kinderrückhaltesystem kann an jedem vorwärtsgerichtetem Beifahrersitz benutzt werden, der ISOFIX-Anschlüsse oder einen Dreipunktgurt (i) hat. Vorausgesetzt der Airbag ist ausgeschaltet. Das Rückhaltesystem kann nicht mit einem 2-Punkt Beckengurt benutzt werden (ii). WICHTIG: Verwenden Sie den Kindersitz nicht auf Sitzplätzen mit aktiven Airbags oder schalten Sie den Airbag entsprechend aus.
  • Seite 34: Anbringen Der Isofix Halterungen

    Drücken und halten Sie zunächst den Riegel (I) unterhalb der Basis. Die Isofix Arme (H) sollten nun ausklappbar sein. Der Rekid kann einfach mit der Rückseite zuerst in das Fahrzeug gehoben werden. Platzieren Sie den Kindersitz so, dass die Rückseite nach vorn gerichtet ist.
  • Seite 35: Anbringen Der Spanngurte

    Sie diese fest. Dies sollte an beiden Seiten vorgenommen werden, damit zwei Verankerungspunkte vorhanden sind. Beim Einbau des Rekid am Vordersitz müssen die Haltegurte an der vorderen Gleitschiene befestigt werden. Ziehen Sie die Spanngurte (N) aus dem Gurtgehäuse auf eine geeignete Länge heraus.
  • Seite 36: Befestigen Des Kindes Im Kindersitz

    Wenn Sie den Rekid auf dem Rücksitz eingebaut haben, können Sie Ihren Vordersitz in eine komfortable Position einstellen. Hinweis: Die Rückseite des Kindersitzes kann den Vordersitz berühren. Befestigen des Kindes im Kindersitz Drücken Sie den Auslöseknopf für den Gurt (E) und ziehen Sie die Schultergurte vorwärts (nicht die Schulterpolster), um den Gurt vollständig zu lösen.
  • Seite 37: Einbau Des Sitzes

    Gurte etwas nach unten in den Fahrzeugsitz neigt. Befestigen des Sicherheitsgurtes Öffnen Sie die Gurtsperre (L) an beiden Seiten des Rekid. Ziehen Sie den Sicherheitsgurt vollständig heraus bis der Beckengurt etwa 70-80 cm lang ist. Ziehen Sie den Gurt durch den Schlitz (D) unterhalb des Sitzpolsters bis der Gurt auf der anderen Seite wieder herauskommt.
  • Seite 38 Sie diese fest. Dies sollte an beiden Seiten vorgenommen werden, damit zwei Verankerungspunkte vorhanden sind. Beim Einbau des Rekid am Vordersitz müssen die Haltegurte an der vorderen Gleitschiene befestigt werden. Ziehen Sie die Spanngurte (N) aus dem Gurtgehäuse auf eine geeignete Länge heraus.
  • Seite 39 Wenn Sie den Rekid auf dem Rücksitz eingebaut haben, können Sie Ihren Vordersitz in eine komfortable Position einstellen. Hinweis: Die Rückseite des Kindersitzes kann den Vordersitz berühren. Befestigen des Kindes im Kindersitz Drücken Sie den Auslöseknopf für den Gurt (E) und ziehen Sie die Schultergurte vorwärts (nicht die Schulterpolster), um den Gurt vollständig zu lösen.
  • Seite 40: Pflege Und Wartung

    Stoffbezuges finden Sie unter www.axkid.com oder unter www.vital- innovations.de Jedes Plastikteil des Rekid kann mit einem milden Waschmittel und Wasser gereinigt werden. Verwenden Sie keine aggressiven Reiniger, die Lösungsmittel etc. enthalten. Dies kann zu Schäden führen und die Sicherheit des Kinderrückhaltesystems beeinträchtigen.

Inhaltsverzeichnis